Remove storage containers used by Bitnami applications
Microsoft Azure supports launching virtual machines following two approaches: using the new Microsoft Azure Resource Manager or using the “classic” approach. Even though the new Microsoft Azure management console has views for showing all the “classic” resources, it does not show all of them. Therefore, there may be some virtual disk images that are still attached to your storage container but not visible in the Microsoft Azure management console, and these images will block deletion of the storage container.
You can resolve this issue either by using the older version of the Microsoft Azure console, or by using the Microsoft Azure Storage Explorer.
Removing disk images using the Microsoft Azure console
To resolve this issue, follow the steps below:
-
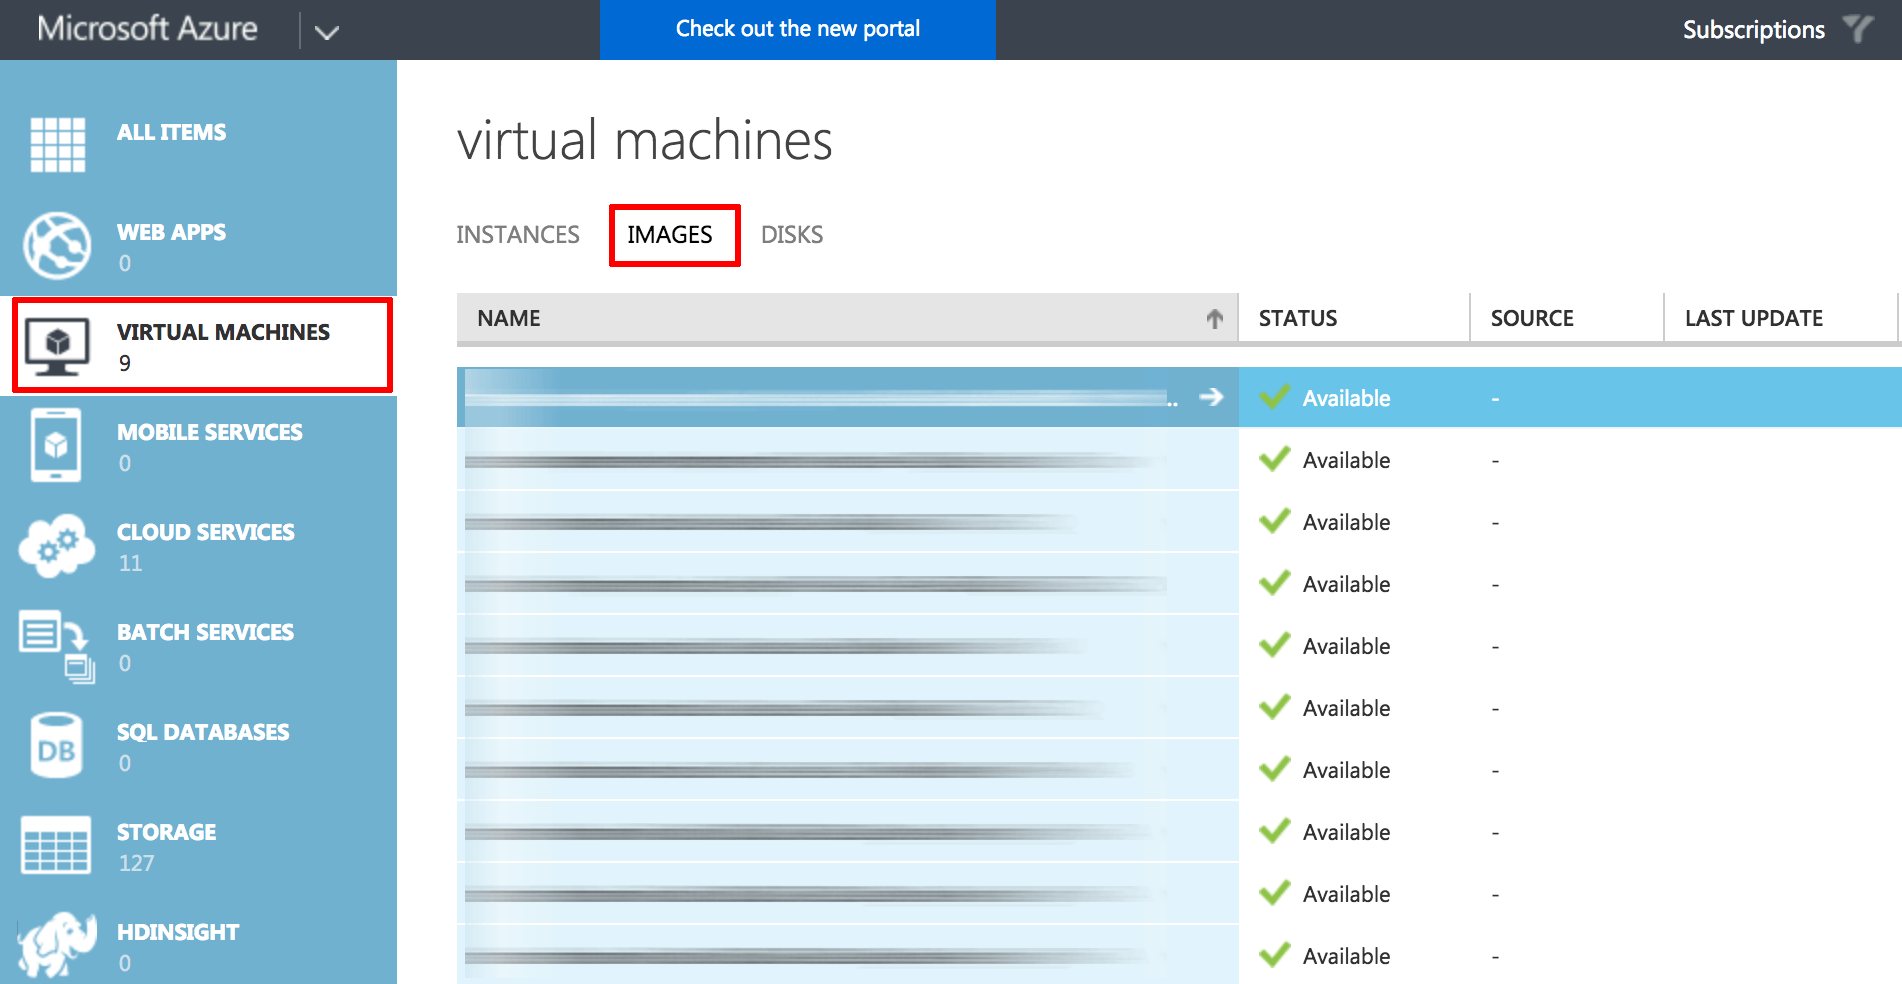
Log in to the older version of the Microsoft Azure console using the same account credentials you use for the new Microsoft Azure console.
-
Select the “Virtual Machines” menu item.
-
Select the “Images” tab.
-
Delete any leftover disk images corresponding to the Bitnami application you removed.
Once the leftover disk images are removed, you should also be able to remove the storage container using the Microsoft Azure management console.
Removing disk images using the Microsoft Azure Storage Explorer
-
Download and install the Microsoft Azure Storage Explorer for your operating system.
-
Log in to the Microsoft Azure Storage Explorer using the same account credentials you use for the Azure Portal.
-
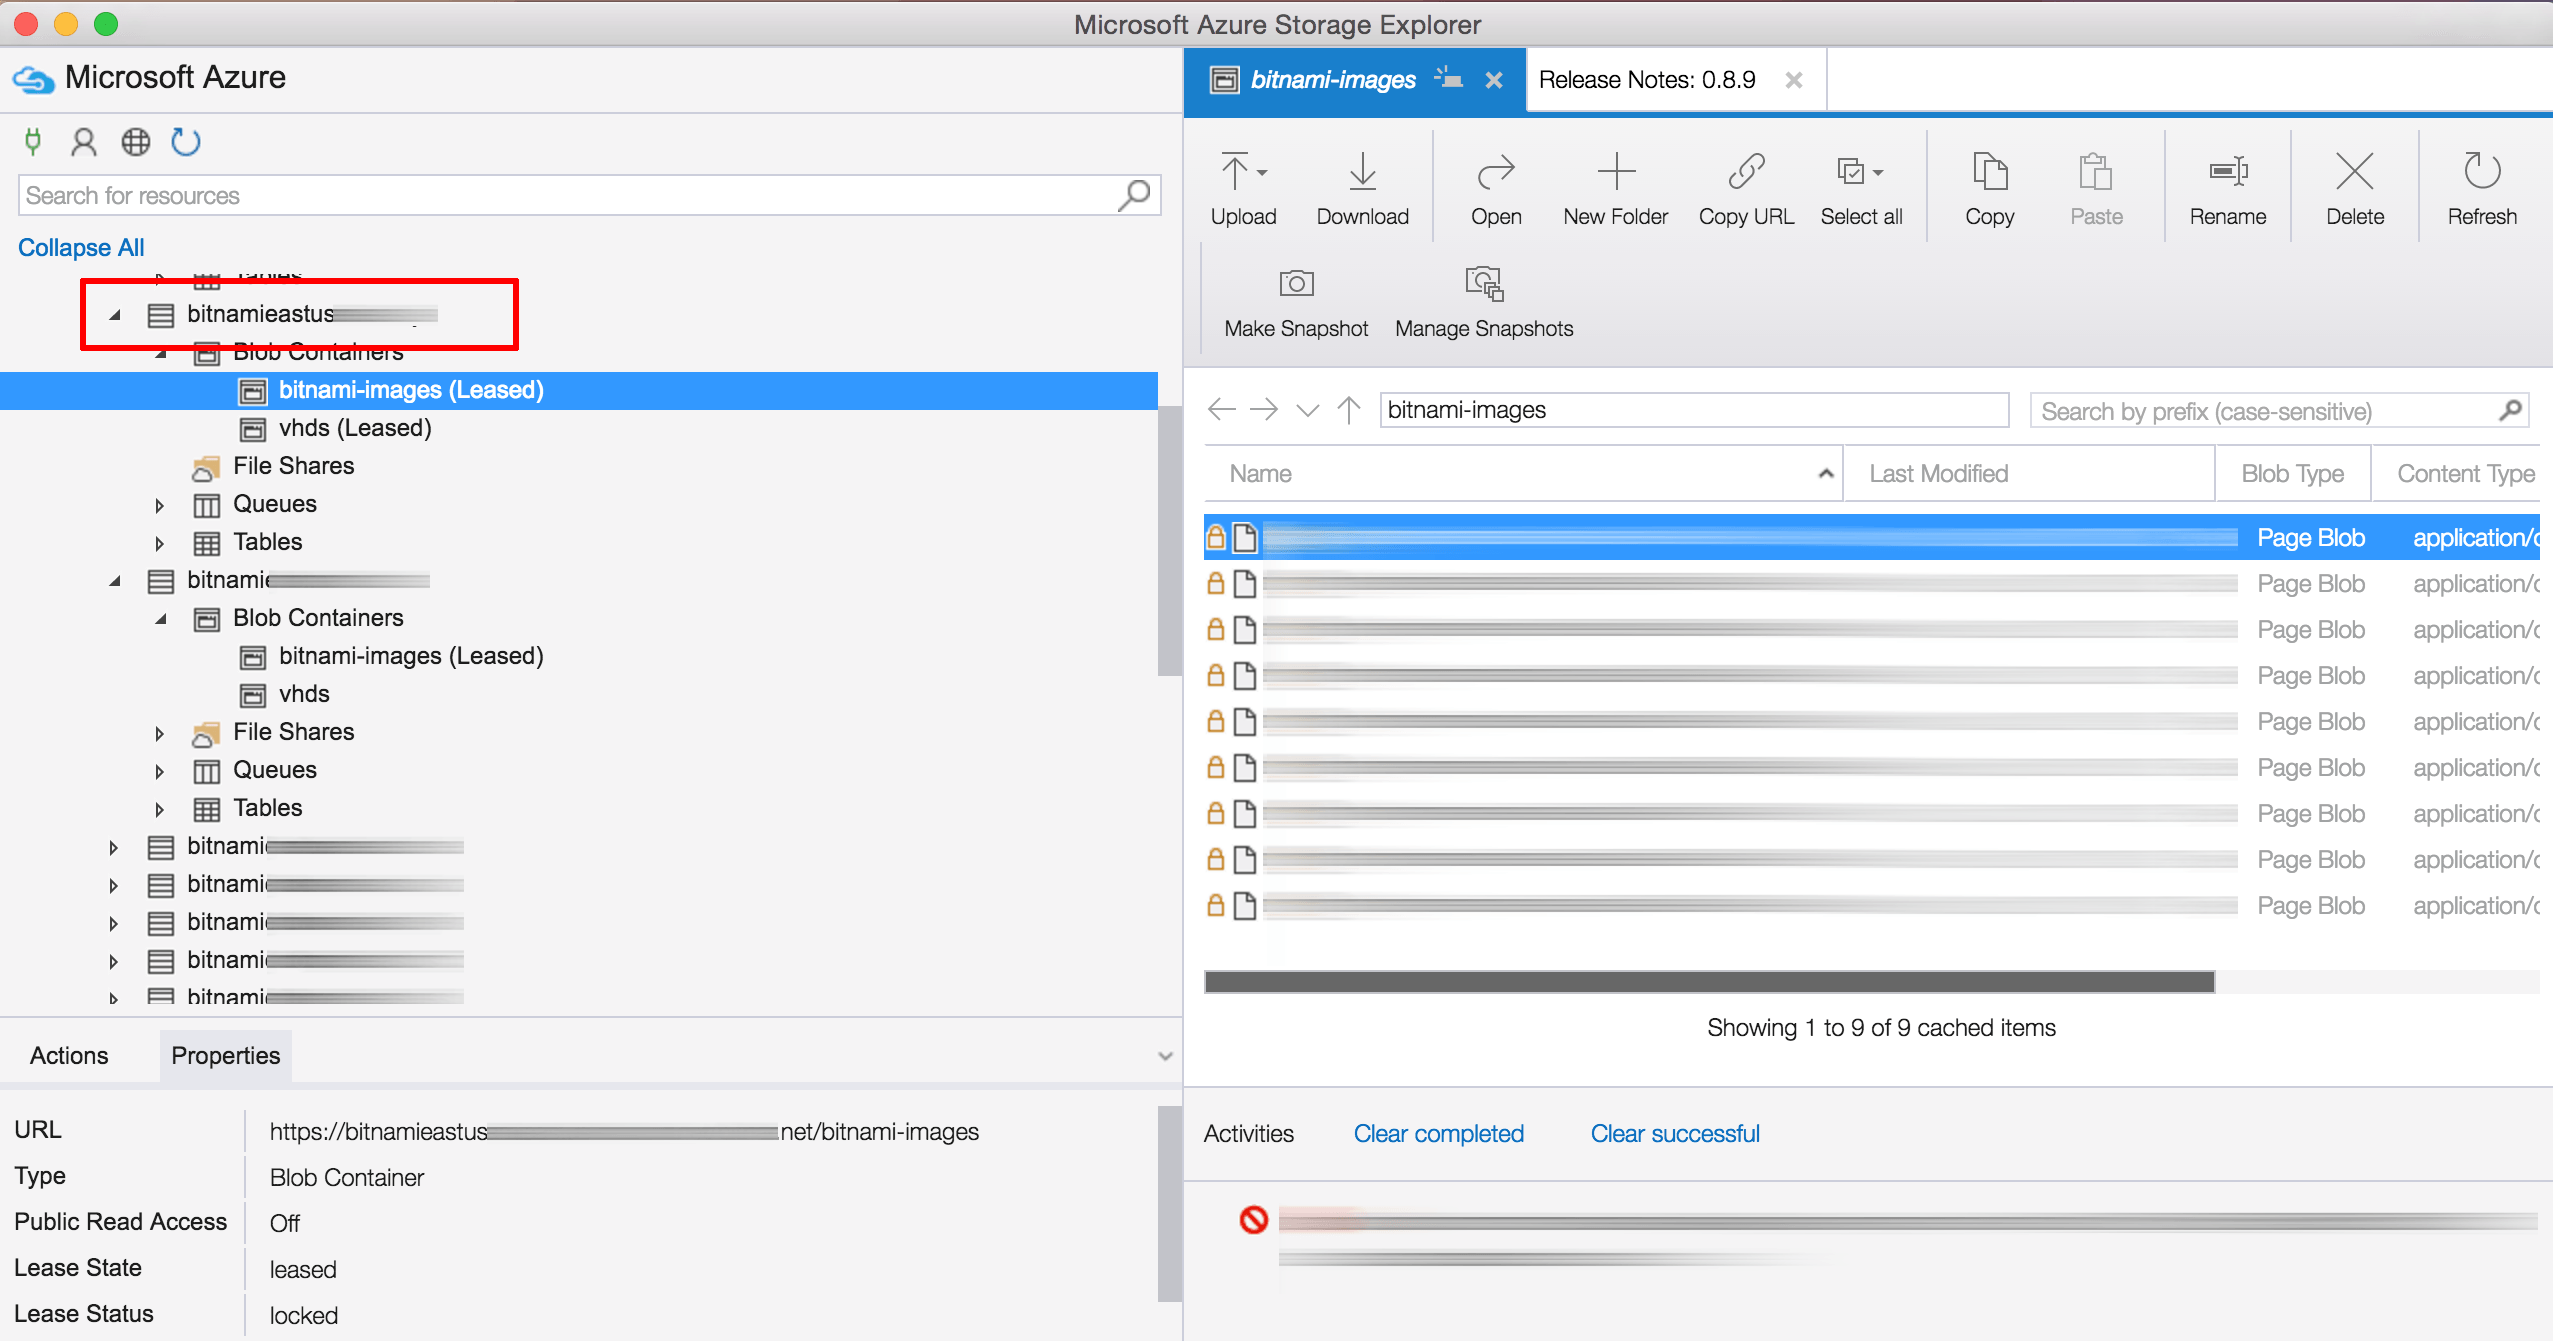
Navigate to the bucket created for your images. Typically, this bucket will be named using a bitnami prefix, as shown below:
TIP: In case you cannot find the correct bucket, log in to the Microsoft Azure management console and look in the “Disks” section of your virtual machine configuration. This includes a “Location” field which holds the bucket name.
-
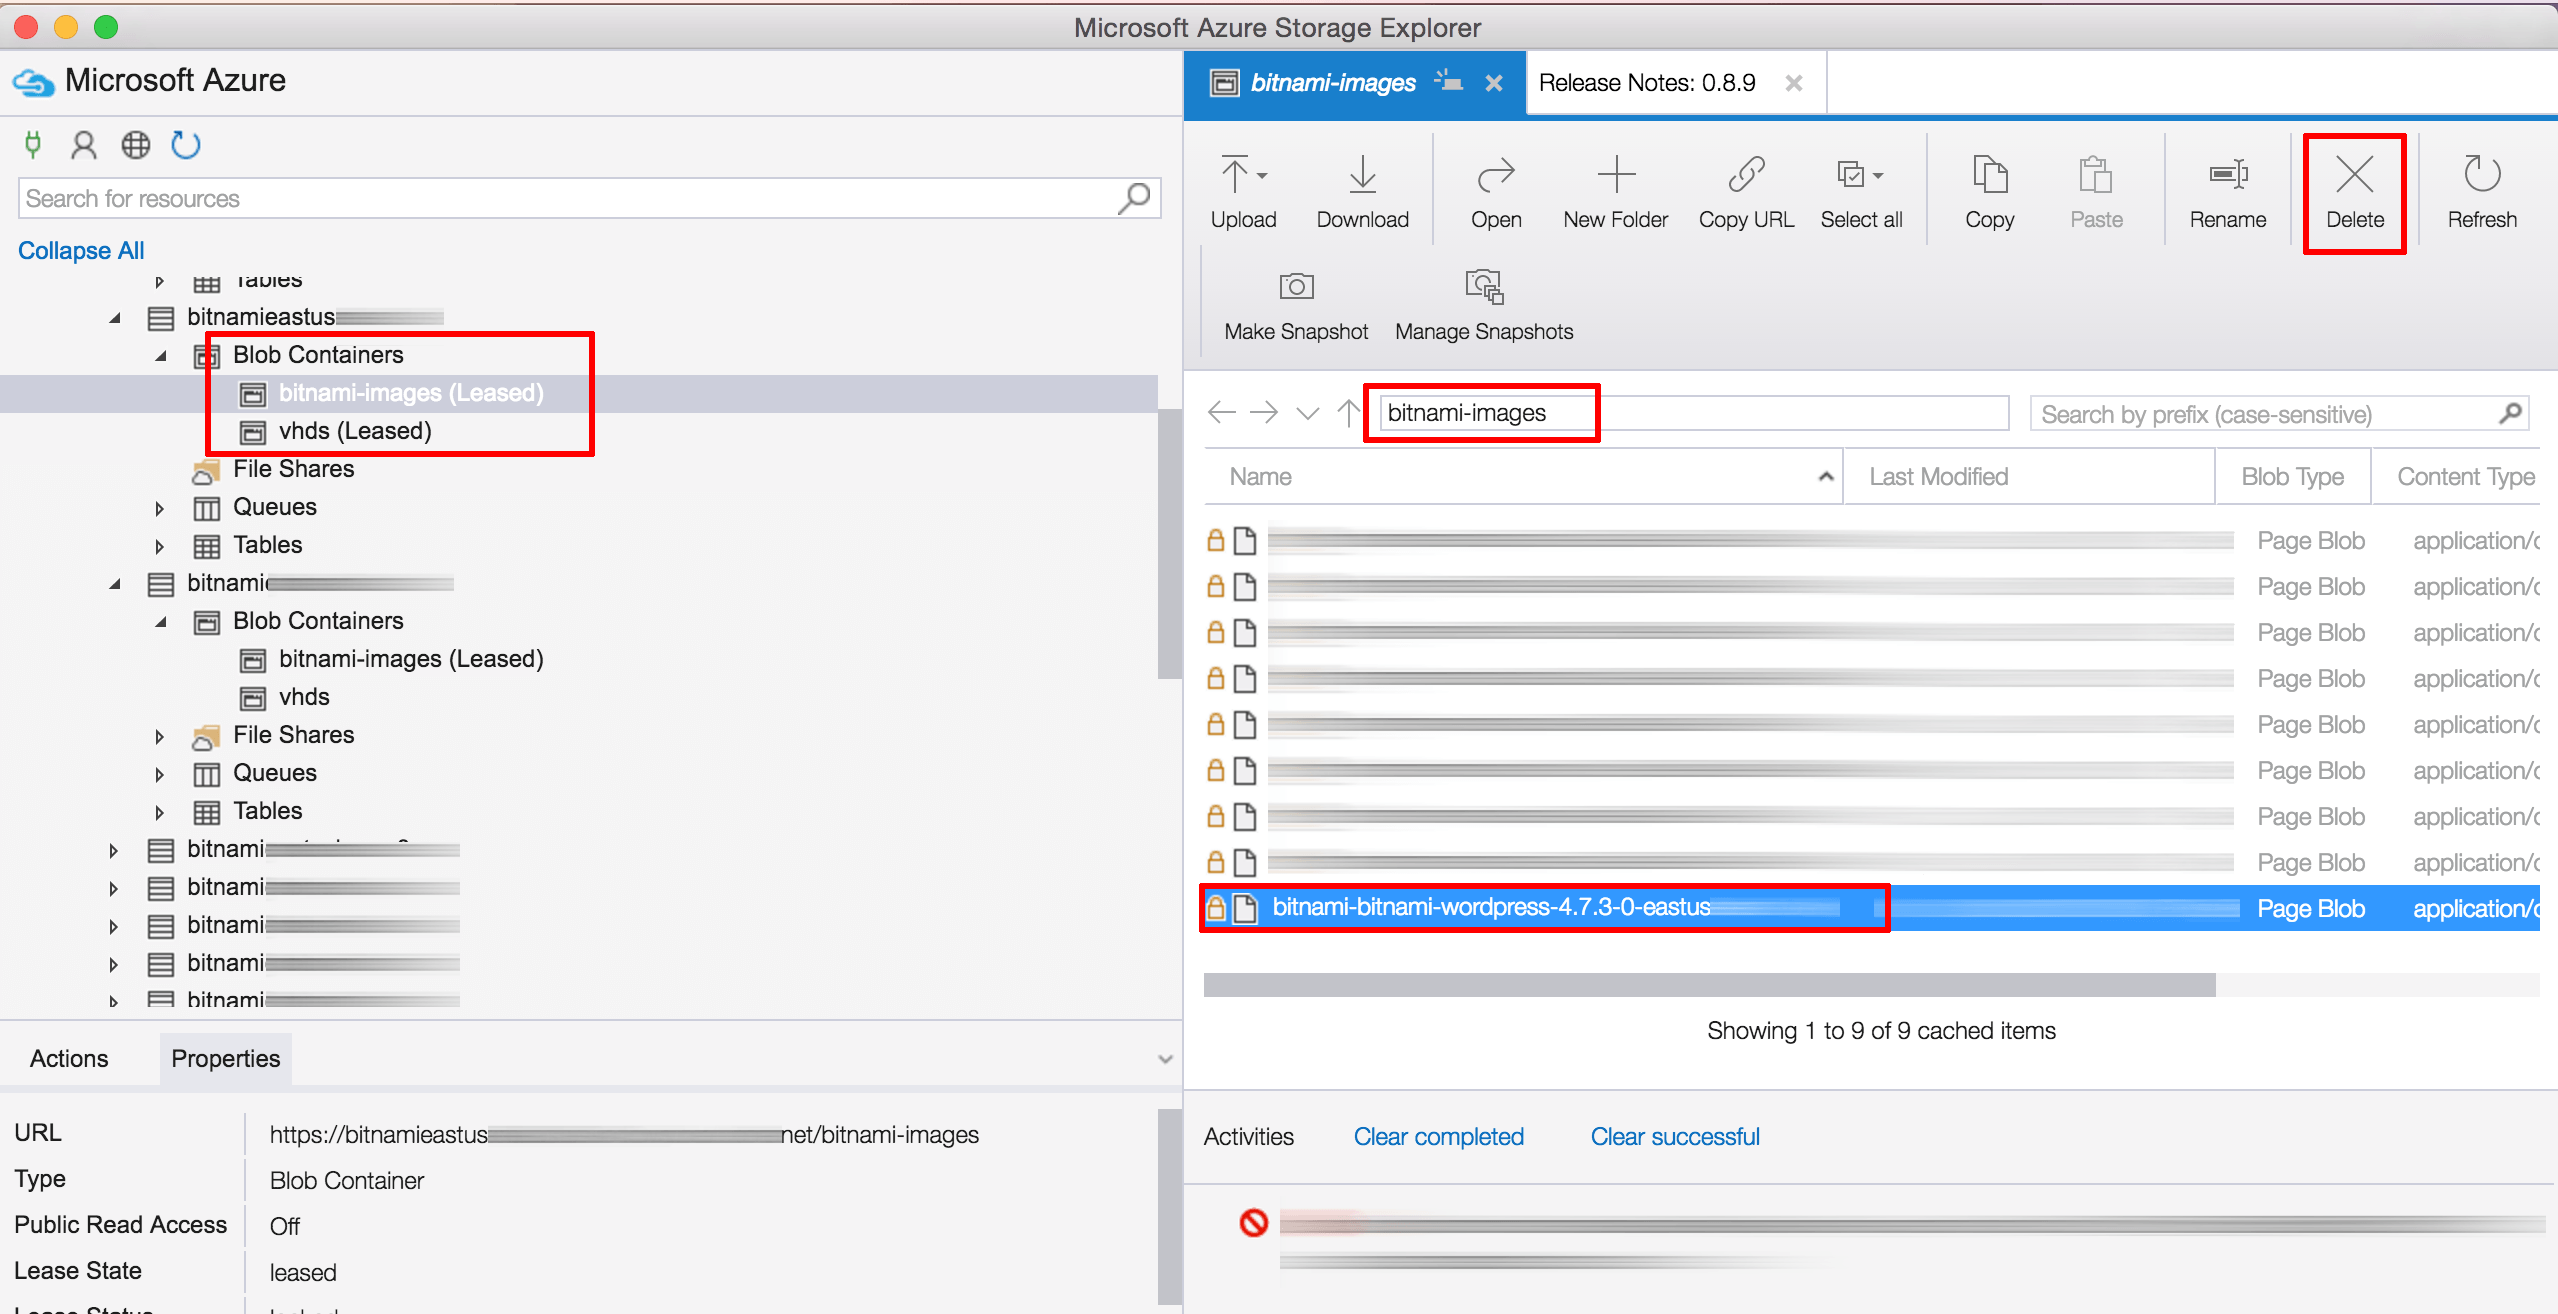
Within the bucket, navigate to the “Blob Containers -> bitnami-images (Leased)” node and delete the Bitnami disk image corresponding to the Bitnami application you removed. Repeat this step for the “Blob Containers -> vhds (Leased)” node.
Once the leftover images are removed, you should also be able to remove the storage container using the Microsoft Azure management console.


