Open or close server ports
NOTE: The steps below use the newer version of the Azure management console.
Open server ports for remote access
IMPORTANT: Making this application’s network ports public is a significant security risk. You are strongly advised to only allow access to those ports from trusted networks. If, for development purposes, you need to access from outside of a trusted network, please do not allow access to those ports via a public IP address. Instead, use a secure channel such as a VPN or an SSH tunnel. Follow these instructions to remotely connect safely and reliably.
By default, cloud servers launched through the Azure management console have their ports closed to secure them against external attacks. This is done for all ports apart from ports 22 (SSH), 80 (HTTP) and 443 (HTTPS). If you need to access your server remotely using a different port, you must first open the necessary port(s) using the Azure management console.
Follow these steps:
-
Log in to the Azure management console.
-
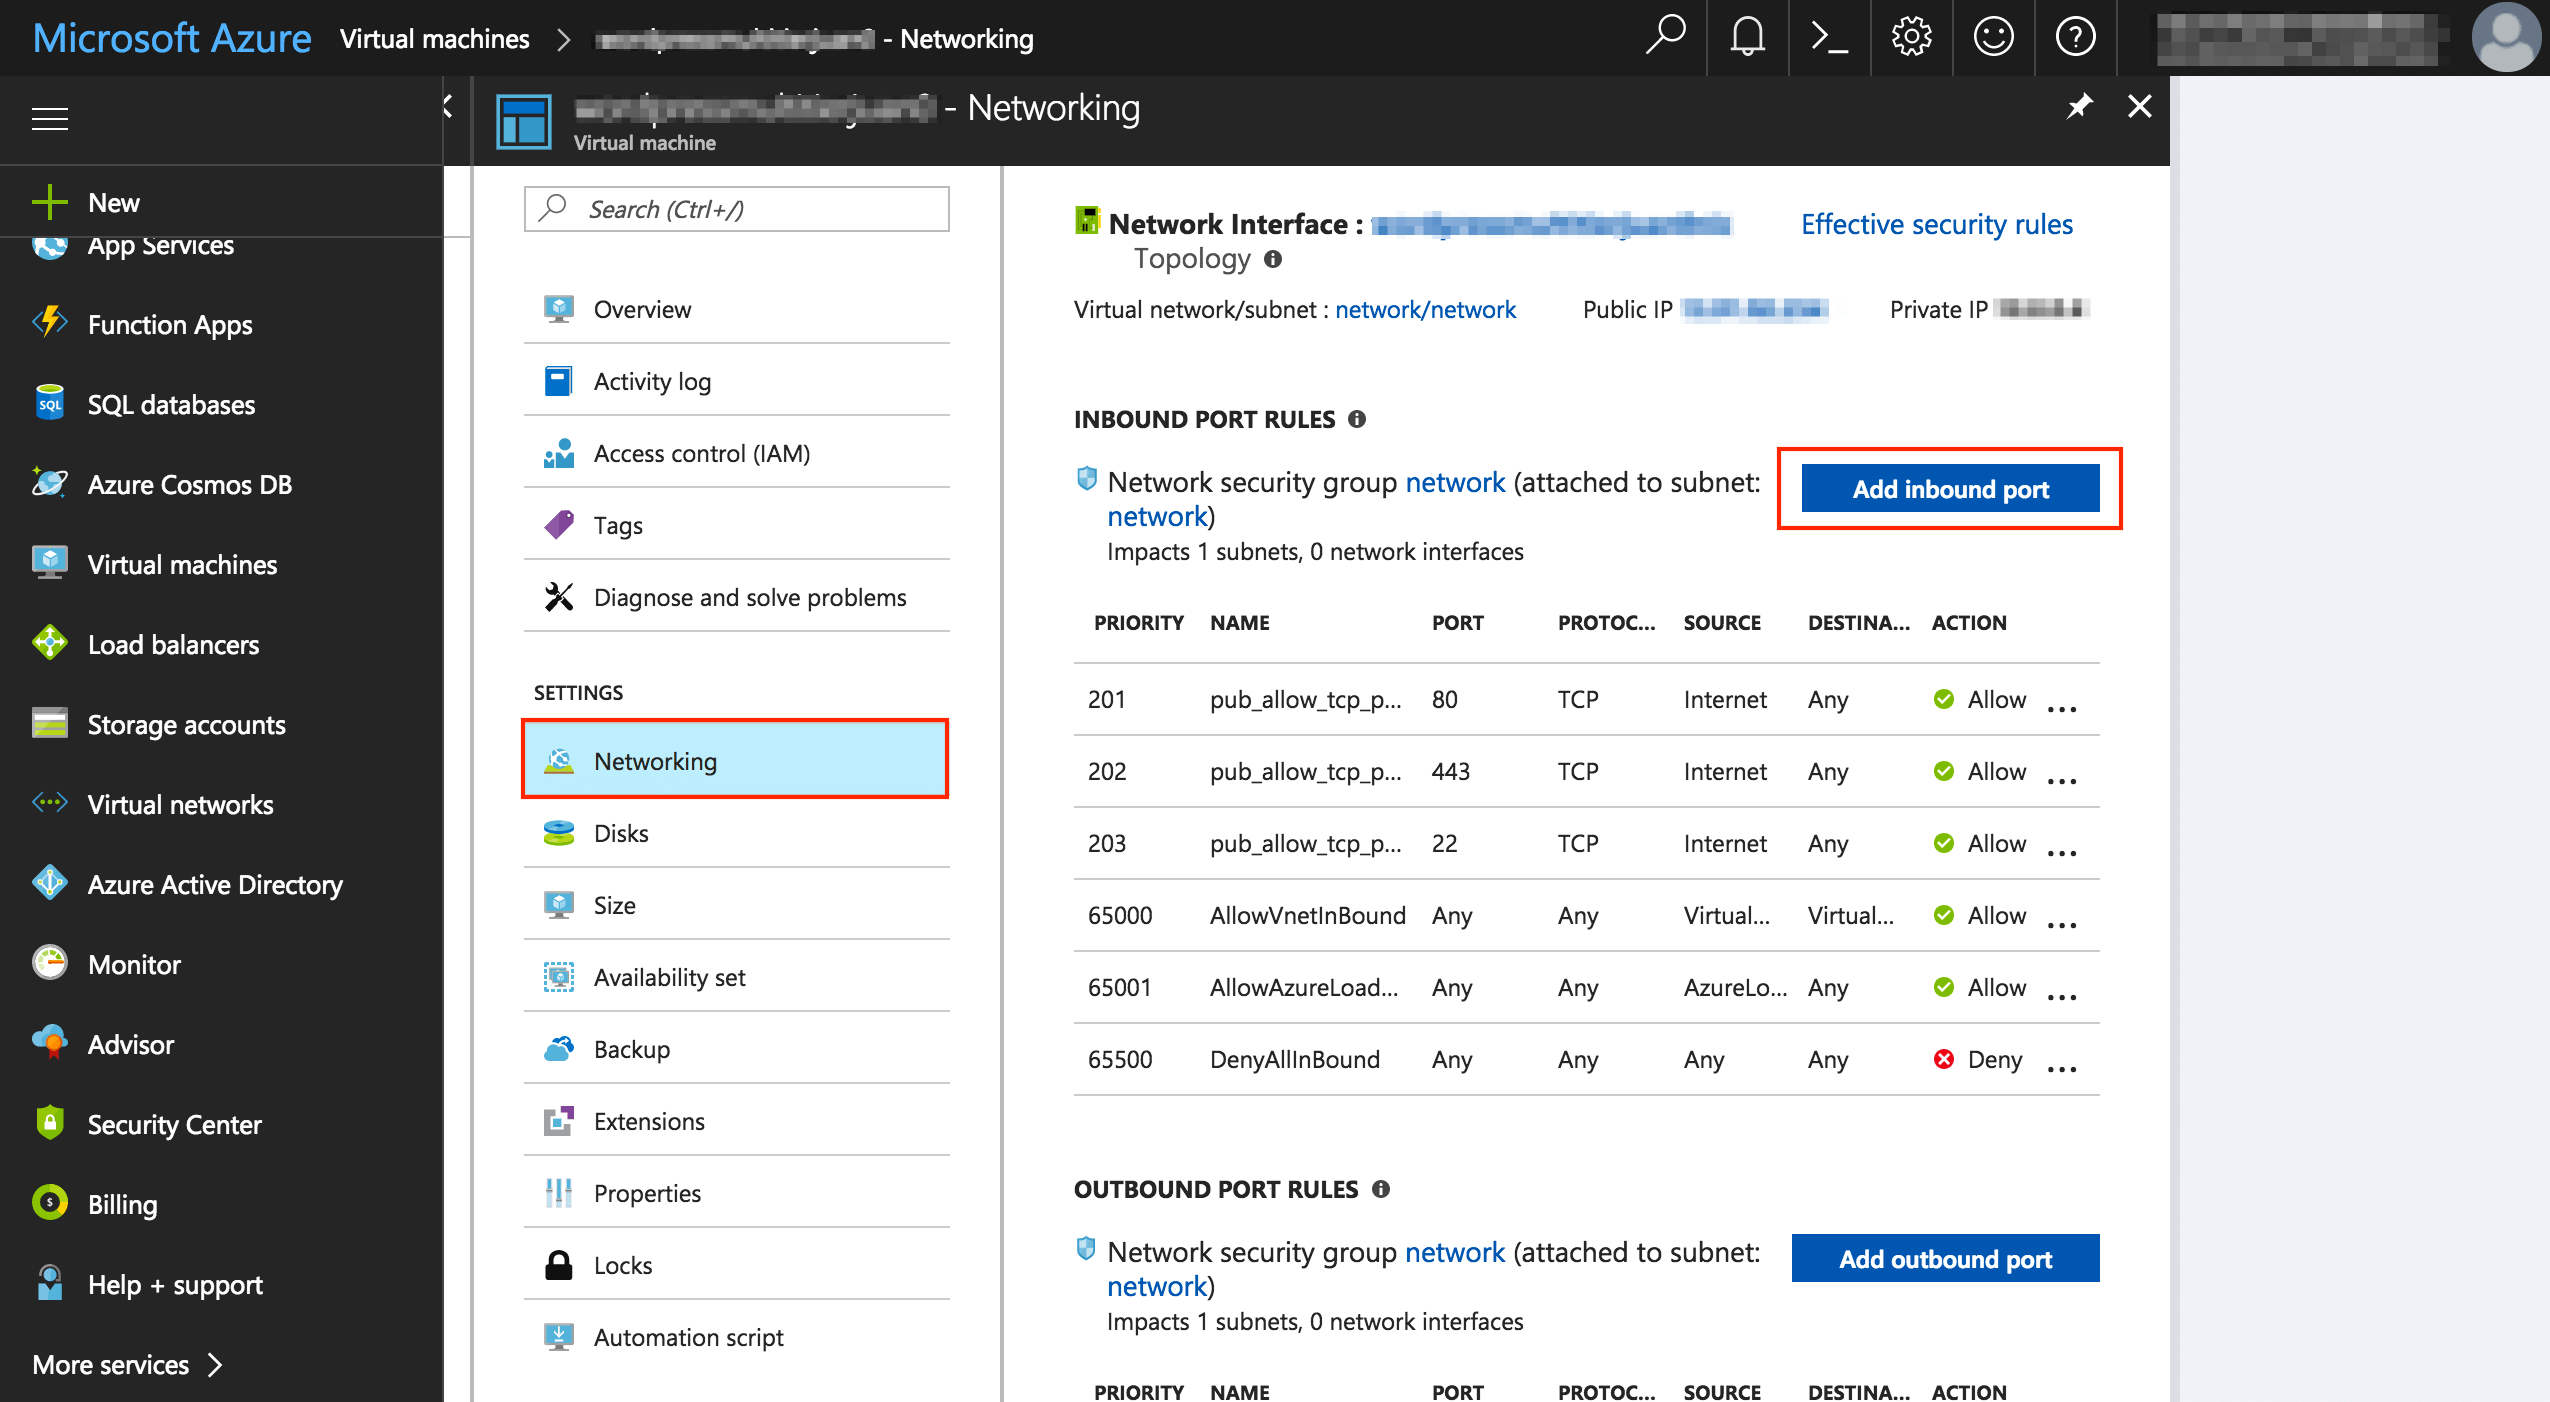
Click the “Virtual machines” icon in the toolbar and select your server from the resulting list.
-
Click the “Settings -> Networking” link for the server in the menu.
-
Select the network interface (there will typically only be one).
-
In the “Inbound port rules” section, click the “Add inbound port” link.
-
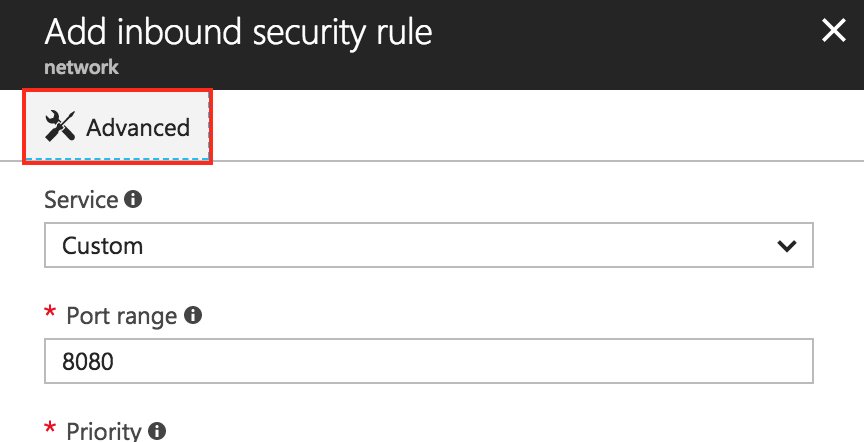
On the “Add inbound port” page, click “Advanced” to show more firewall options.
-
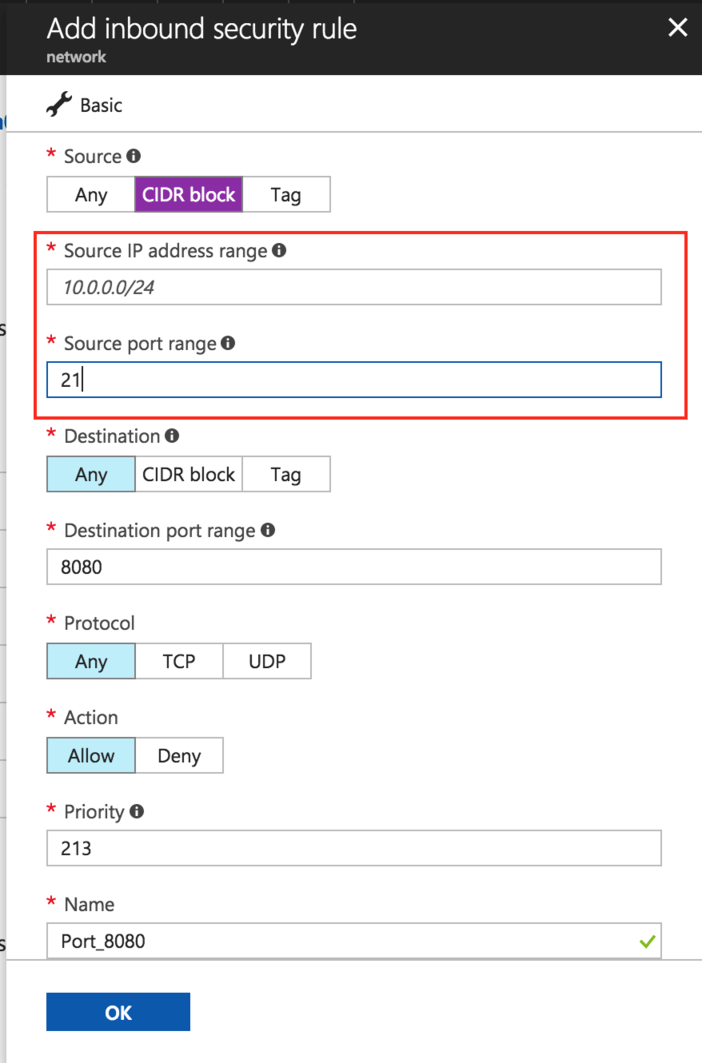
In the “Source” section, click “CIDR block” and enter the following information:
-
Source IP address range: specify an IP range to allow inbound connections only from known and trusted IP addresses.
IMPORTANT: Entering “All” allows access by anyone on the Internet. This is strongly discouraged and may result in unknown parties gaining access to your application and data.
-
Source port range: specify the port number/range. As an example, review the image below which demonstrates opening port 21 for FTP access.
-
Click “OK” to save the changes. Your new firewall rule will come into effect immediately.
-
Close server ports and deny remote access
There are two options for closing the server ports: selecting the action “Deny” when adding a firewall rule (recommended for development environments) or deleting an existing one.
-
Option 1: Deny remote access to a specific port
Follow these steps:
-
Log in to the Azure management console.
-
Click the “Virtual machines” icon in the toolbar and select your server from the resulting list.
-
Click the “Settings -> Networking” link for the server in the menu.
-
Select the network interface (there will typically only be one).
-
In the “Inbound port rules” section, click the “Add inbound port” link.
-
On the “Add inbound port” page, click “Advanced” to show more firewall options.
-
In the “Source port range” field specify the port number/range on which you wish to deny the remote access to your server. As an example, review the image below which demonstrates closing a port.
-
In the “Action” section, select “Deny”.

-
Click “OK” to save the changes. Your new firewall rule will come into effect immediately.
-
-
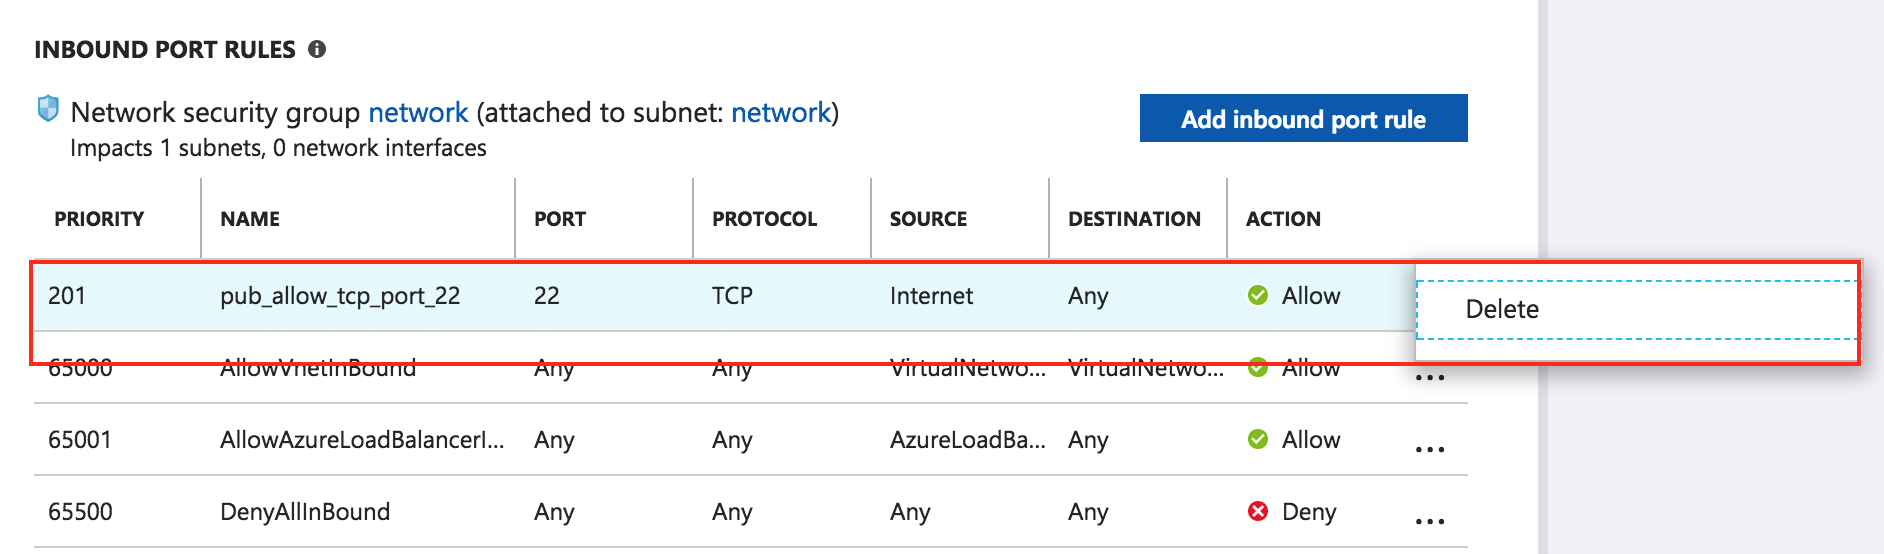
Option 2: Delete an existing inbound security rule
To close definitely a port for inbound traffic, delete it from the “Inbound security rules” section. To do so, find the security rule(s) you wish to close and click the “Delete” button next to each. The changes will come into effect immediately.