Run GitLab in the Cloud
Introduction
One of the first things that you should do before starting a software project is set up a version control system (VCS) for your code. A version control system allows you to track changes for your code, concurrently maintain different versions (eg. production and development) and simplifies the task of merging and integrating contributions from multiple developers. One of the most popular VCSs is Git, a distributed version control and source code management system. Though Git itself is mainly a collection of command line tools, many people manage Git repositories using third party tools and services, such as GitHub, Gitorious or GitLab.
GitLab is a Ruby on Rails web application that helps you manage who has permissions to contribute to which repository. It also includes a wiki, enables code reviews and many other features. GitLab CI is a complementary web application that provides Continuous Integration (CI) closely integrated with Git to run tasks after a new change or run tests in different branches in the repository.
This guide describes how to create your own Git repository and integrate it with a Continuous Integration (CI) server in the cloud using the Bitnami GitLab CE Stack.
NOTE: The steps below assume that you already have the Bitnami GitLab CE Stack running on a cloud server and that you have the credentials for the GitLab administration panel.
Step 1: Create a Git repository using GitLab
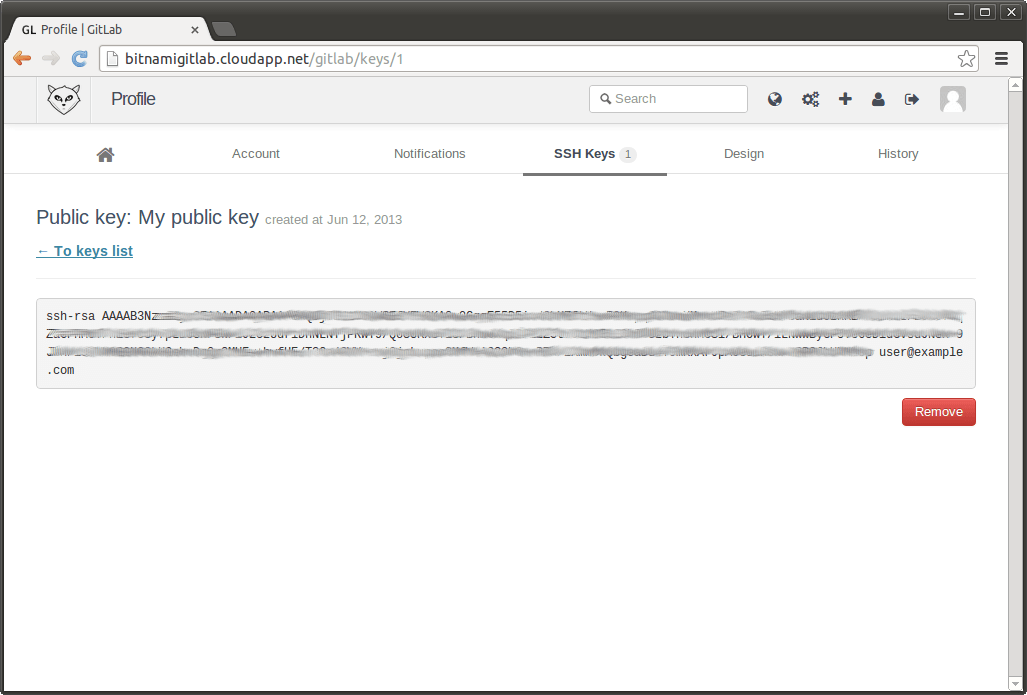
The first step is to log in to the GitLab administration panel and upload your public SSH key in the “User’s Profile” section. This key will be necessary to push code into the repository and it will also be needed when granting new users privileges to modify the code.
Next, ensure that you have a Git client installed in your development environment. There are different ways to install Git, but one of the easiest is to use the Bitnami LAMP Stack. These provide a complete PHP, MySQL and Apache development environment for Linux and also include a Git client by default.
Once you’ve confirmed you have a Git client installed, upload project files to the GitLab repository as shown in the image below. Remember to copy your private SSH key to the correct directory before doing so (usually C:\Users\USERNAME.ssh\id_rsa on Windows, /home/USERNAME/.ssh/id_rsa on Linux and /Users/USERNAME/.ssh/id_rsa on Mac OS X).
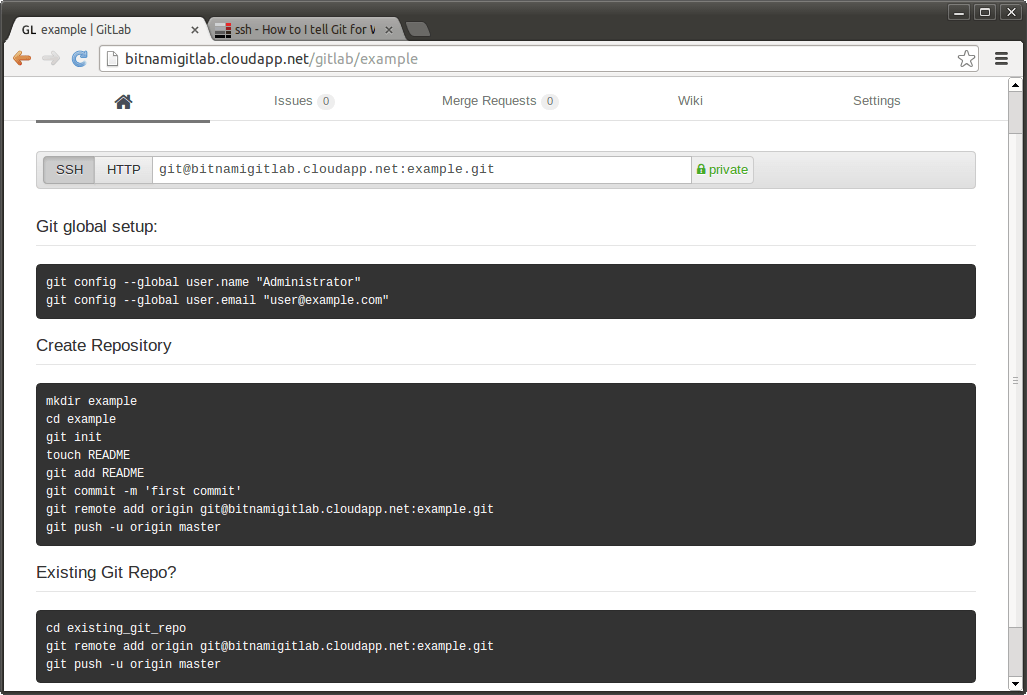
If all goes well, you should be able to see the README.txt file in the repository and in the GitLab application.
Step 2: Configure and manage GitLab
The Bitnami GitLab CE Stack can be customized in a variety of ways.
Use a custom domain name
Once the GitLab application is running, you can use a custom domain to access it. The only requirement is that the domain name should point to the server’s IP address.
Refer to the documentation on using a custom domain name.
Configure outgoing email settings
Configure the Bitnami GitLab application to send notifications via email.
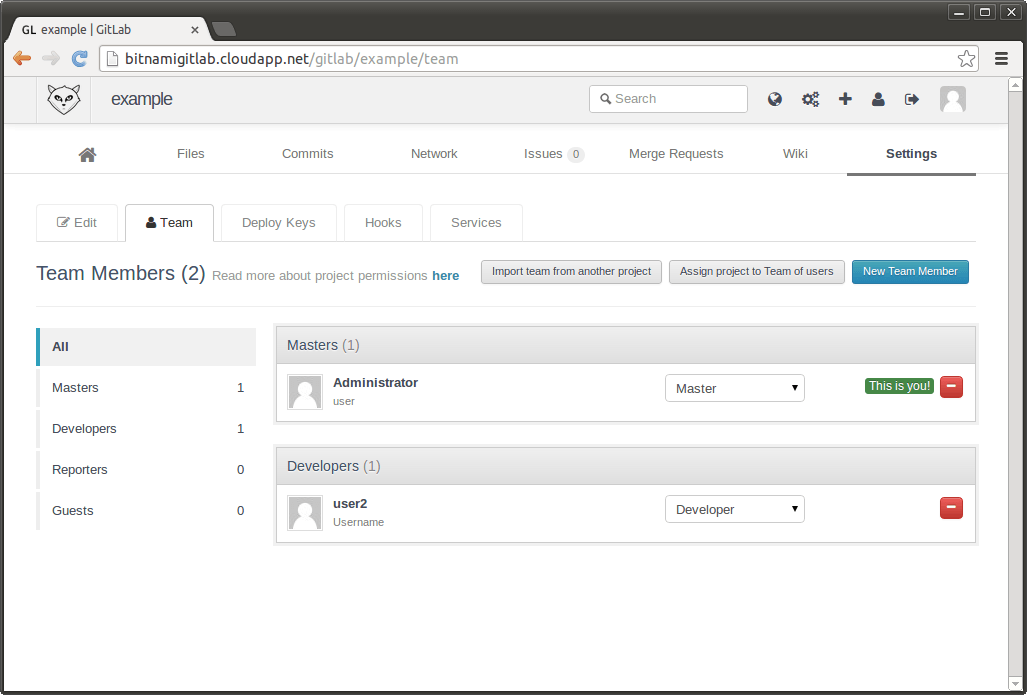
Set project roles
Managing projects from the GitLab application is extremely easy. From the administration panel, add new users or to create teams and groups with different permissions within a project.
GitLab projects can also be set up as public. With this setting, all users have read access to that project and can clone the project with a command like the one below:
$ git clone http://SERVER-IP/gitlab/example.git
Control the servers
GitLab uses the following servers:
- A MySQL database
- An Apache server configured with a Passenger module for Ruby on Rails applications
- A Redis server for storing job messages
- A GitLab Sidekiq server for processing the jobs in the background
Check the status of the servers with the command below:
$ sudo /opt/bitnami/ctlscript.sh status
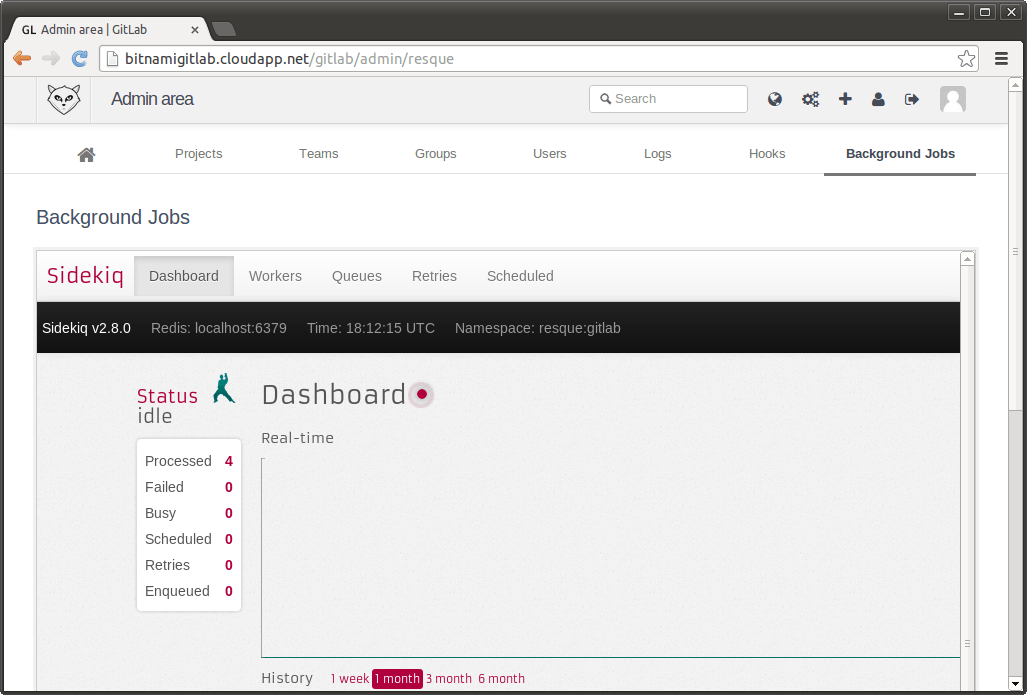
Debug server errors
To troubleshoot server problems, refer to each server’s log files, as described in these instructions. Sidekiq also ships a control panel where it is possible to check the logs and the status of the jobs.
Step 3: Integrate GitLab with GitLab CI
A Continuous Integration process typically performs different tasks: running tests, measuring performance, building releases and other tasks. You can integrate GitLab and GitLab CI to run these tasks automatically.