Install and configure Auth0
NOTE: The steps below assume that you have an Auth0 account. If not, register for a free Auth0 account.
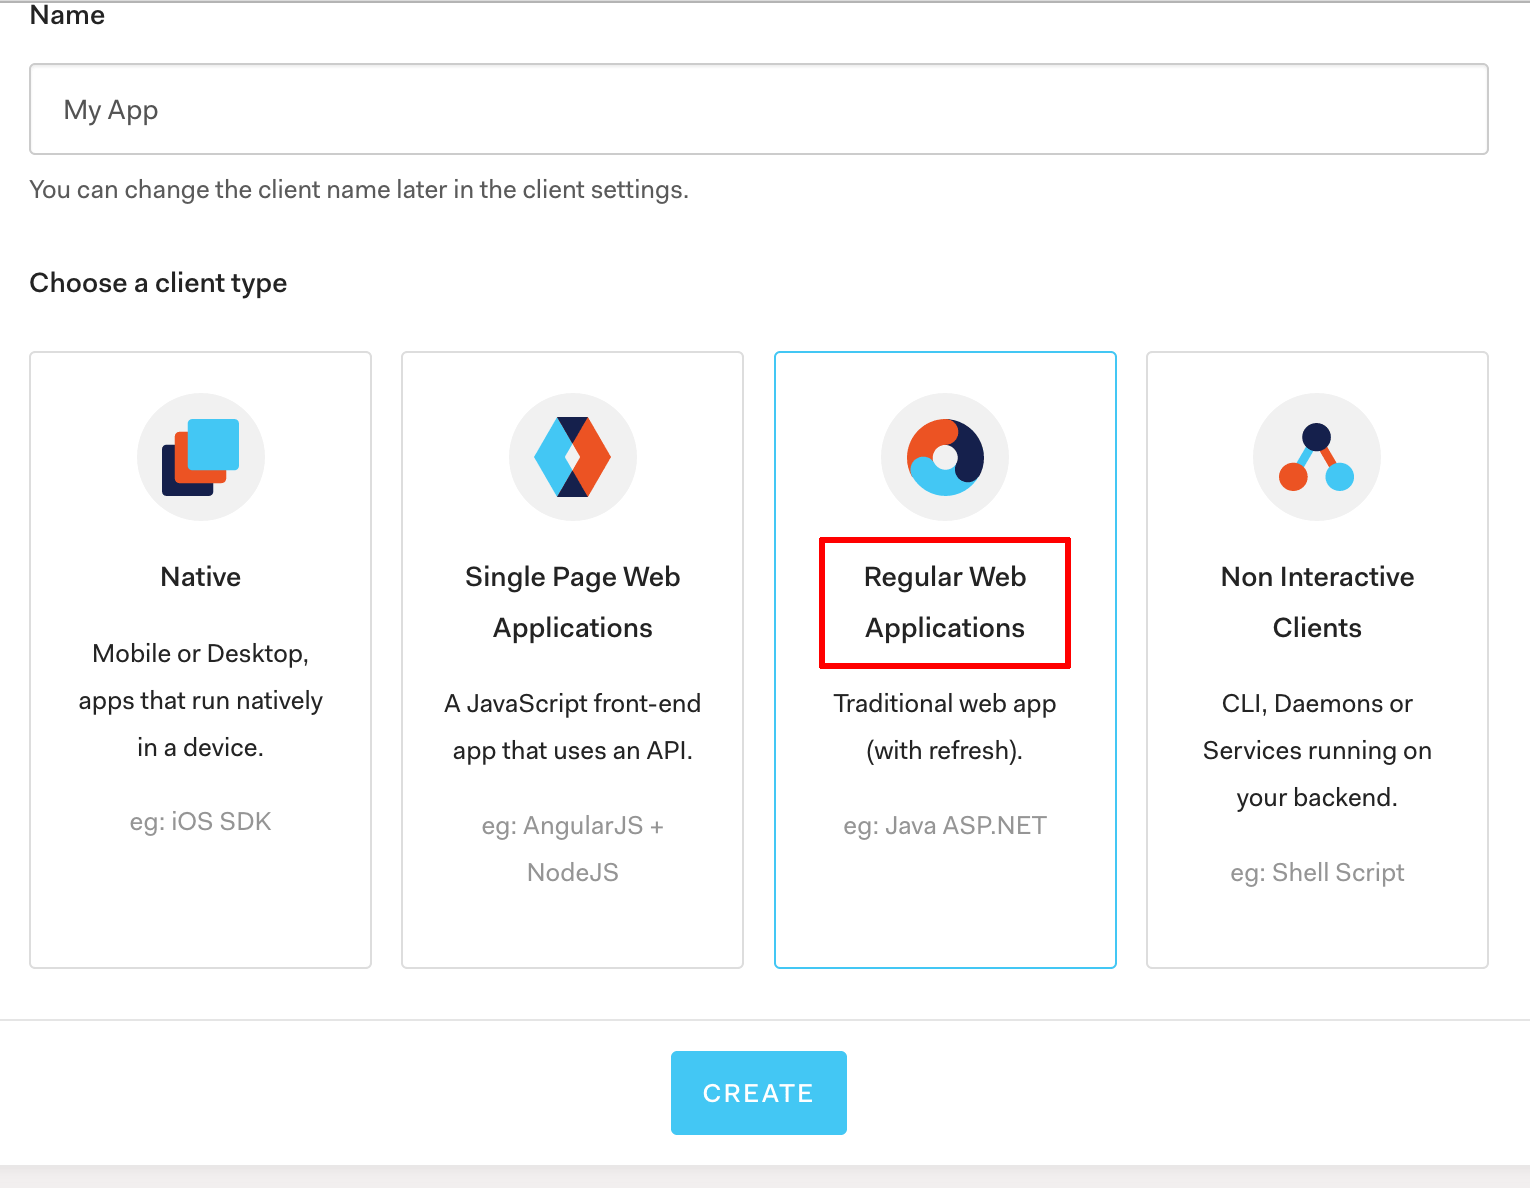
First, create a new Auth0 application as follows:
-
Log in to the Auth0 website and navigate to the “Clients” menu. Click the “Create client” button and choose “Regular Web Application” as the client type.
-
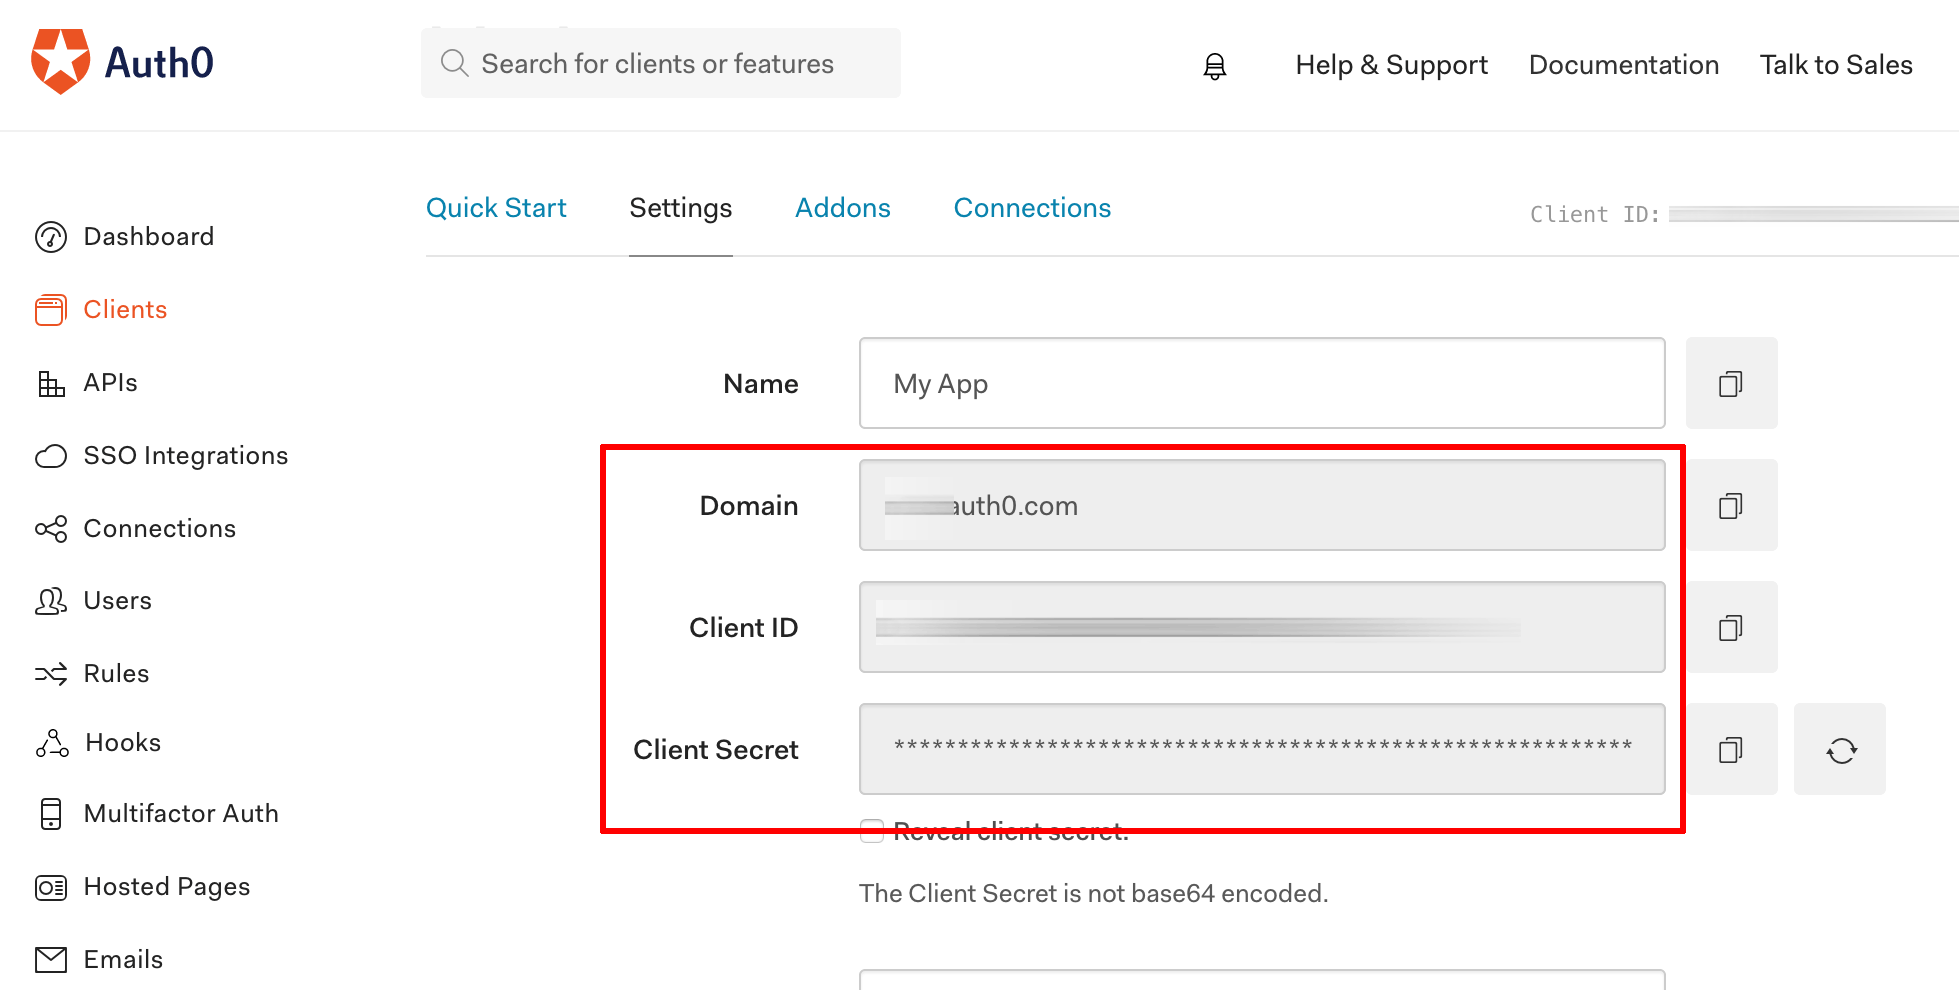
Browse to the “Settings” tab for the application in the Auth0 dashboard and note the domain, client ID and client secret.
-
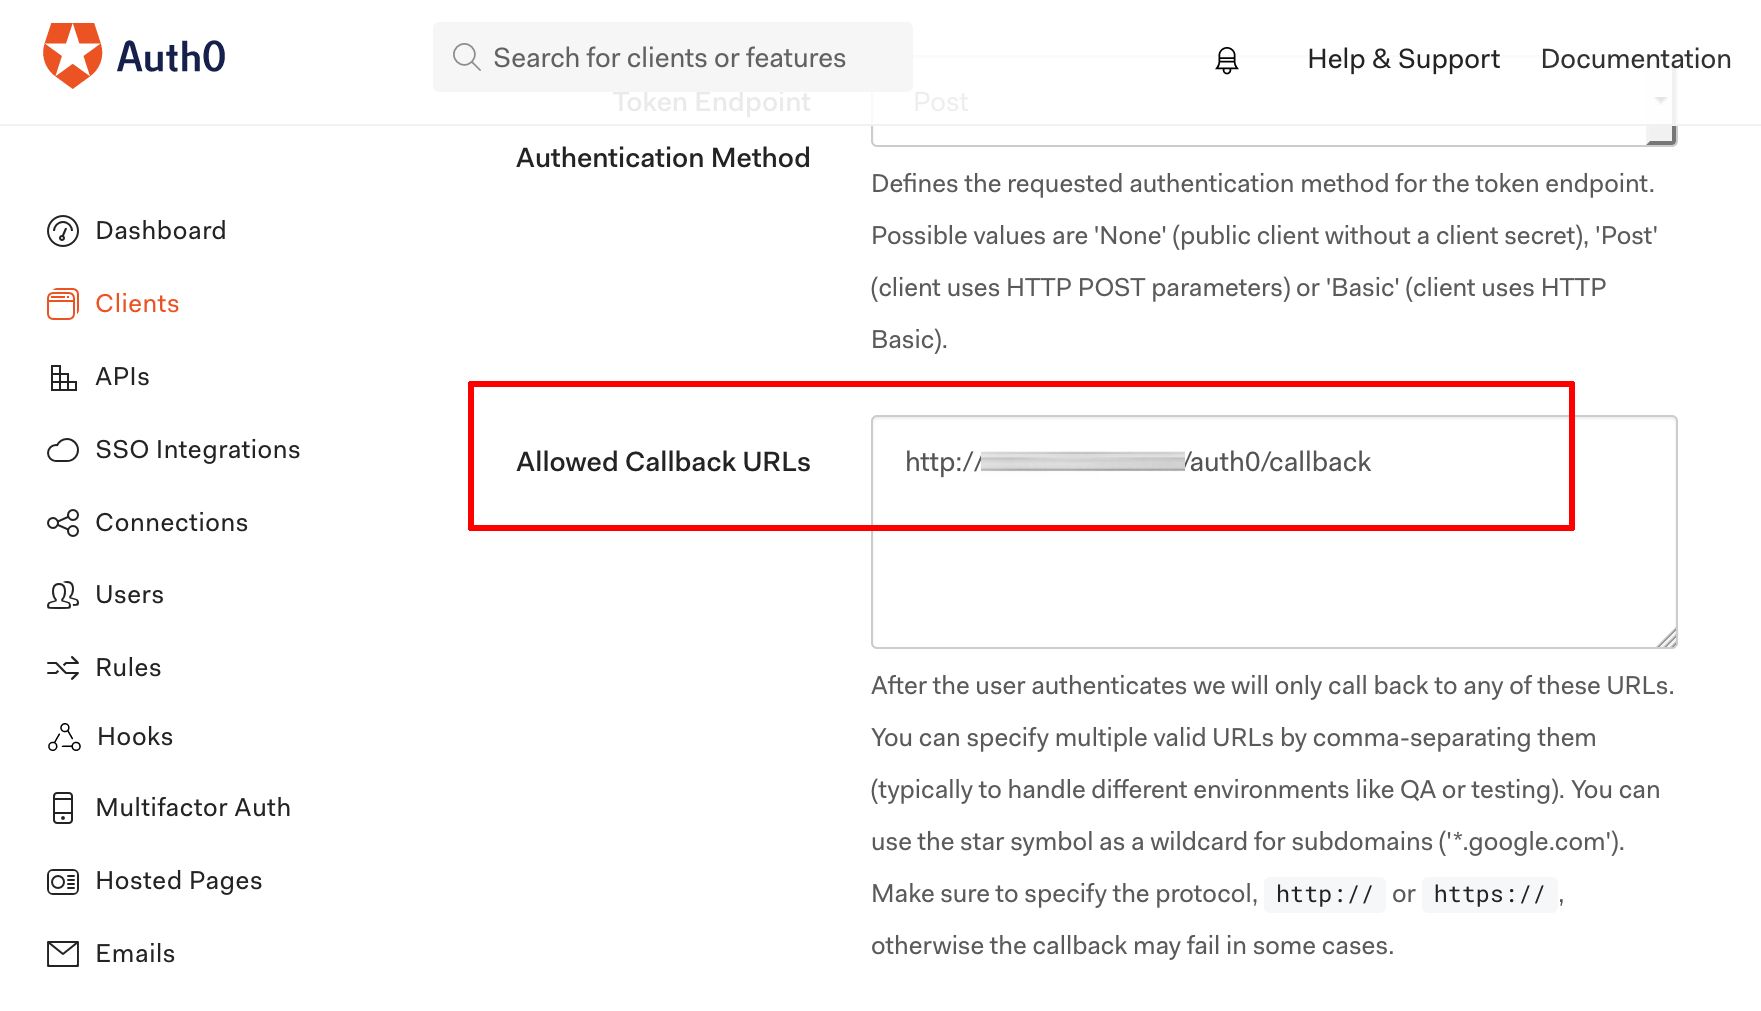
In the same “Settings” tab, update the “Allowed Callback URLs” field and set it to the value http://DRUPAL_SITE_ADDRESS/auth0/callback. Replace the DRUPAL_SITE_ADDRESS placeholder with the actual IP address of your Drupal host. Save the changes.
Next, install and configure the Auth0 module in your Drupal host as follows:
-
Log in to the server console, change to the application directory:
$ cd /opt/bitnami/drupal/ -
Update Composer:
$ sudo composer self-update -
Install the Auth0 module and its dependencies with Composer:
$ composer require auth0/auth0_drupal:^2.0.0 -
Log in to the Drupal administration panel as an administrator.
-
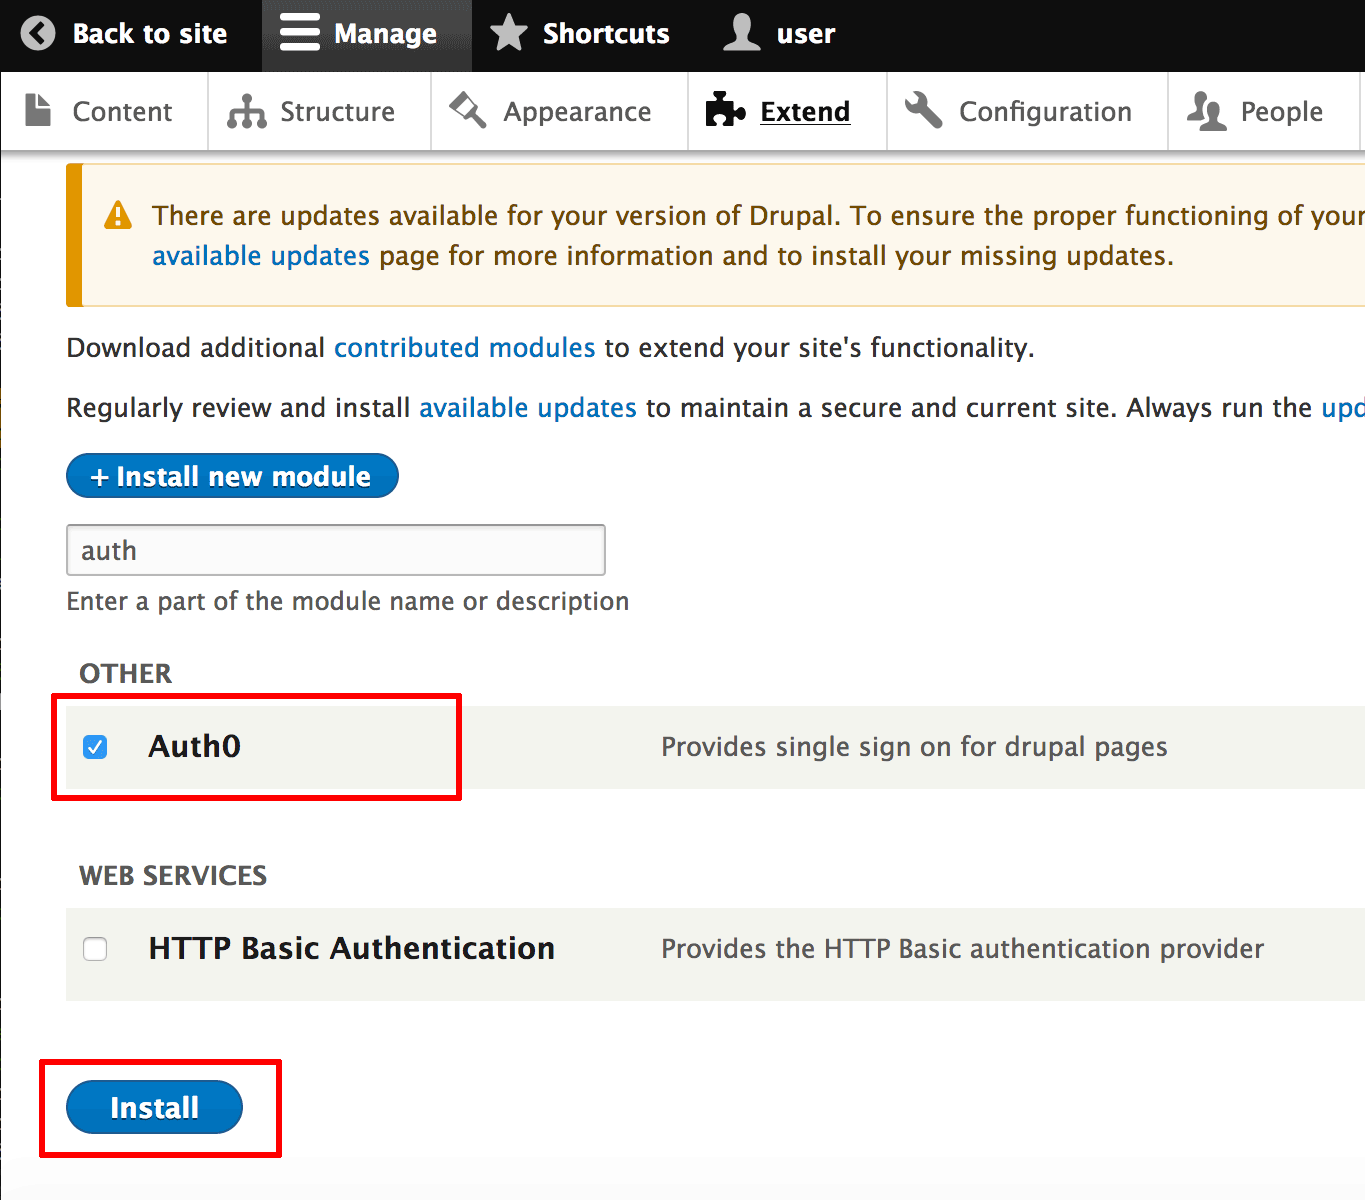
From the “Extend” menu, select the Auth0 plugin, which should appear in the list of available plugins. Install the plugin by clicking the “Install” button.
-
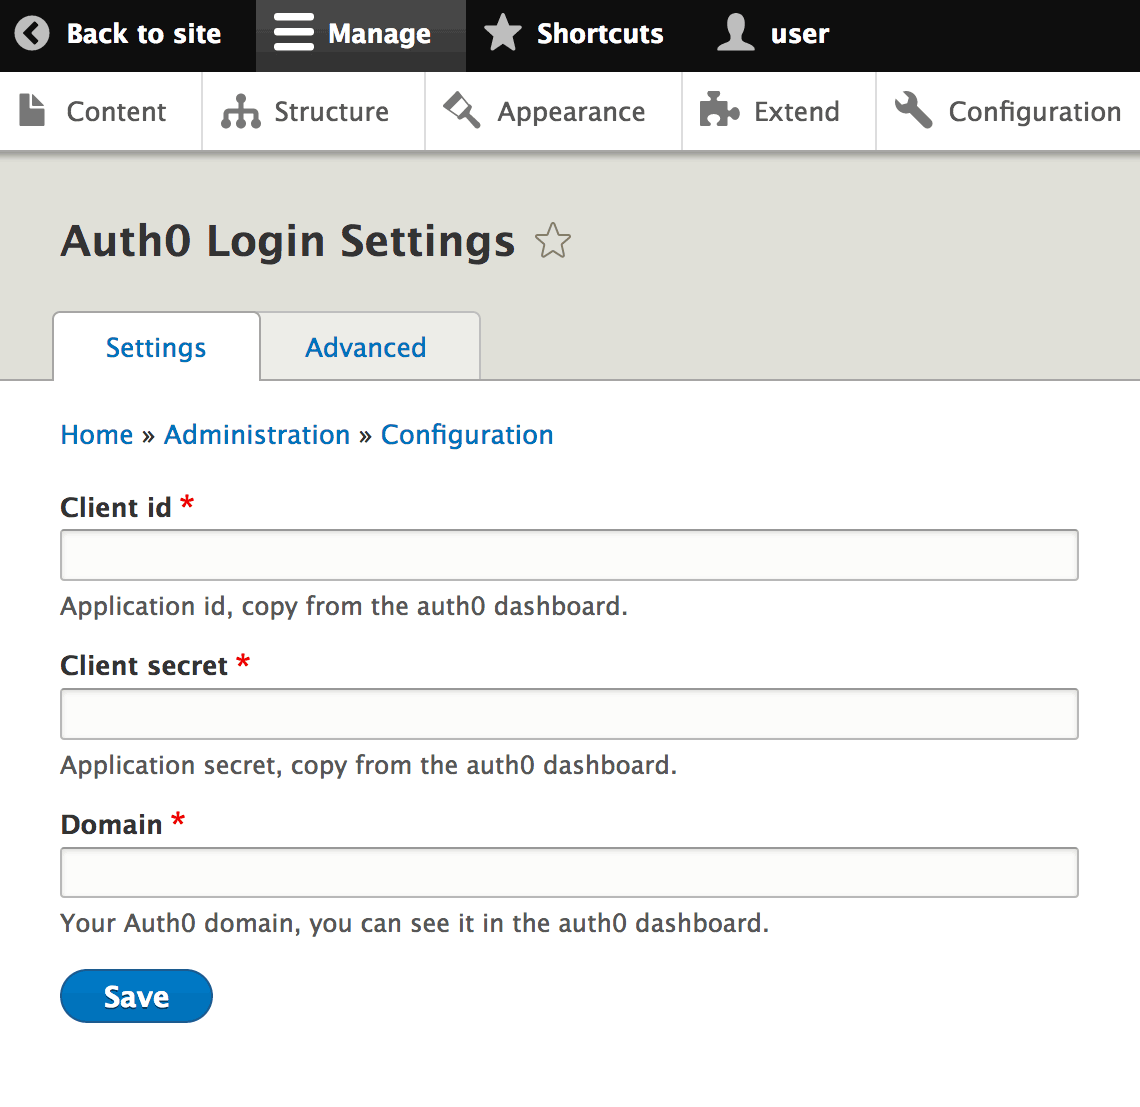
From the “Configuration -> System” menu, select the Auth0 plugin and configure it with the domain, client ID and client secret obtained from the Auth0 website. Click “Save” to save the changes.
-
Log out of the Drupal administration panel.
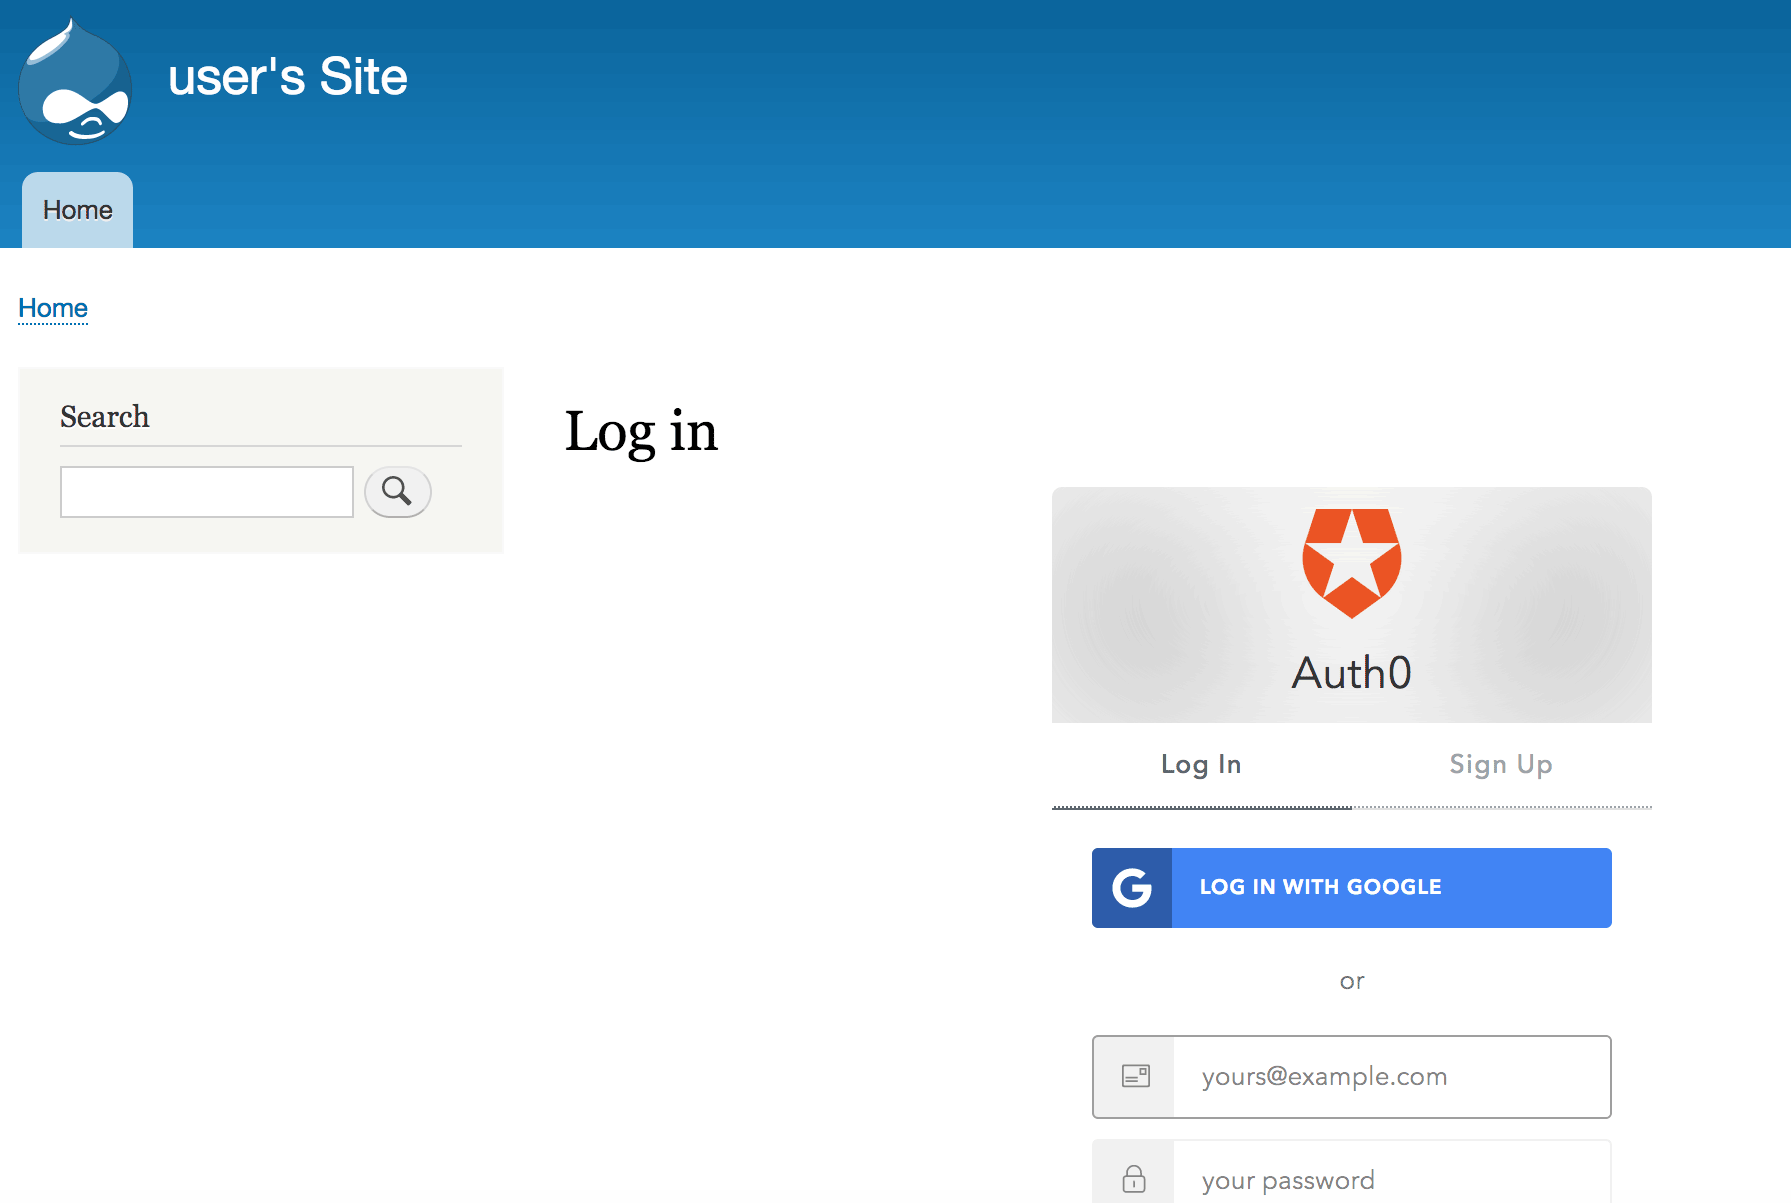
You should now be able to log in to Drupal using Auth0 user credentials. The Drupal login page should also change to reflect Auth0 as a login option.