Configure WordPress Multisite
Common usage scenarios
-
SCENARIO 1: You want multiple websites/blogs at subdomains of your primary domain eg. your primary domain is our-planets.com and you have separate websites/blogs at mercury.our-planets.com, mars.our-planets.com and earth.our-planets.com.
-
SCENARIO 2: You want multiple websites/blogs at different domains eg. a website at our-planets.com and another at space-is-awesome.com.
-
SCENARIO 3: You want a combination of the two previous scenarios eg. a primary domain at our-planets.com with separate blogs for Earth and Mars at earth.our-planets.com and mars.our-planets.com, another blog at space-is-awesome.com, and yet another blog at photos.space-is-awesome.com.
The following sections will guide you through configuring WordPress Multisite to handle these different scenarios.
Configure the domain for the WordPress Multisite main blog
NOTE: This is a mandatory step regardless of how you plan to use WordPress Multisite.
This section assumes that:
- You have a working WordPress Multisite installation.
- Your server has a static IP address.
- You are able to log in to your server console using a tool like PuTTY (Windows) or SSH (Linux and Mac OS X).
- You own at least one custom domain name for which you can configure DNS settings.
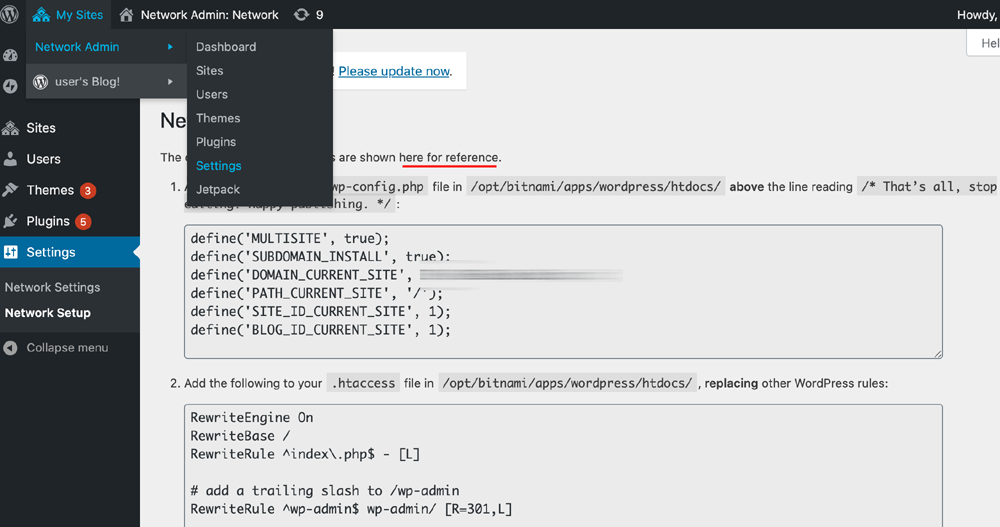
NOTE: The WordPress Multisite dashboard (under “My Sites -> Network Admin -> Settings -> Network Setup”) lists a set of changes to be made in your wp-config.php file, as shown below. These configuration changes are already included in the Bitnami WordPress Multisite stack. Therefore, the instructions listed in the “Network Setup” page should be disregarded.
The first step is to define the primary domain for your WordPress Multisite instance. To do this, follow the steps below:
-
Log in to your server console.
-
Execute the following command to update the domain name. In this example, let’s assume the primary domain is our-planets.com.
$ sudo /opt/bitnami/configure_app_domain --domain our-planets.com -
Update your domain’s DNS settings, specifically adding an A record that points your domain to the static IP address of your cloud server. If you’re in a hurry, or just testing things out, you can instead modify your local hosts file to map your domain to your server’s IP address. For more information on both these options, refer to the section on testing your installation.
Following these changes, entering your custom domain name into the browser address bar should take you to the WordPress Multisite default blog, as shown below:

You should also be able to log in to the WordPress dashboard by visiting http://SERVER-IP/wp-login.php.
Troubleshooting
If you have problems with redirection when you log in to the WordPress dashboard, check that the domain was successfully updated in these database tables:
- wp_options table: siteurl and home options
- wp_blogs table: domain option
An easy way to check these database tables is with phpMyAdmin. If you prefer using SQL, use these equivalent commands in the MySQL command-line tool. The third SQL command below assumes that your main blog has ID 1 in the database table; if this is not the case for your deployment, modify the command to reflect the correct blog ID.
USE bitnami_wordpress;
SELECT option_name,option_value FROM wp_options WHERE option_name='siteurl' OR option_name='home';
SELECT domain FROM wp_blogs WHERE blog_id = '1';
Additionally, confirm that the DOMAIN_CURRENT_SITE variable in the WordPress /opt/bitnami/wordpress/wp-config.php configuration file reflects the correct domain name.
Then, clear your browser cache and try to log in again to the application. Remember that if you are using an IP address instead of a domain name, you will have problems with some browsers; it is advisable to use the custom domain name only.
You can now choose from the following sections based on your requirements.
NOTE: If you wish to use subdirectories for your blogs/websites instead of subdomains, you must also configure WordPress Multisite to use subdirectories instead of subdomains.
Add several WordPress Multisite blogs with subdomains
This section assumes that:
- You have a working WordPress Multisite installation.
- Your server has a static IP address.
- You are able to log in to your server console using a tool like PuTTY (Windows) or SSH (Linux and Mac OS X).
- You own at least one custom domain name for which you can configure DNS settings.
- You have defined your primary domain and blog as described in the previous section and you are able to log in to the WordPress Multisite dashboard.
WordPress Multisite is designed for subdomains, so it’s easy to add a separate blog for each subdomain of your primary domain (Scenario 1). In this example, let’s assume we’re adding two blogs: earth.our-planet.com and mars.our-planet.com.
Follow these steps to associate a new blog with a subdomain:
-
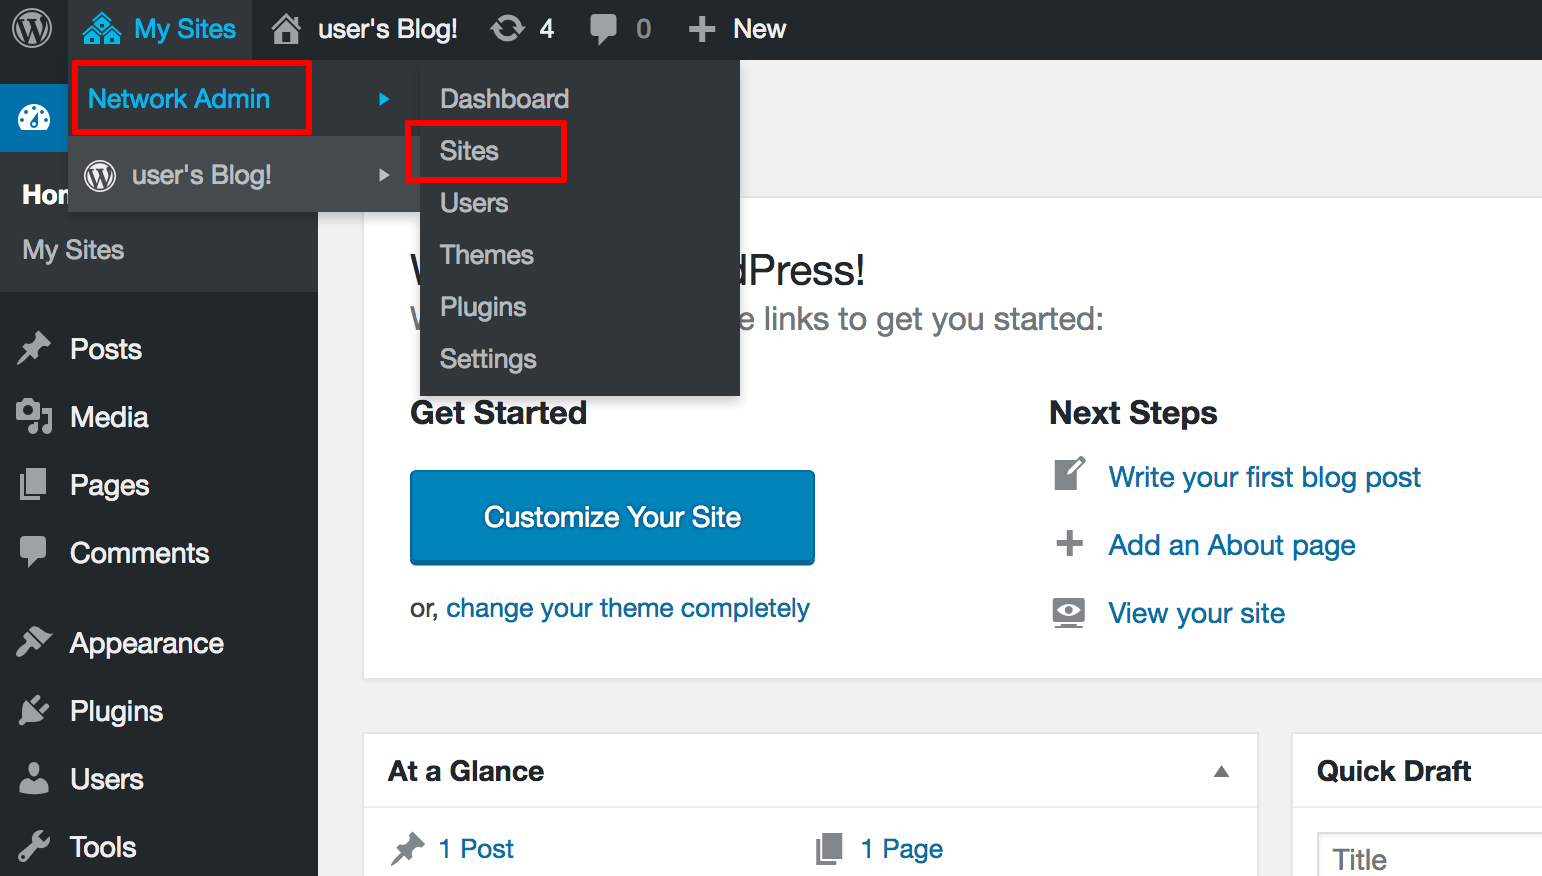
In the WordPress Multisite dashboard, select the “My Sites -> Network Admin -> Sites” option.
-
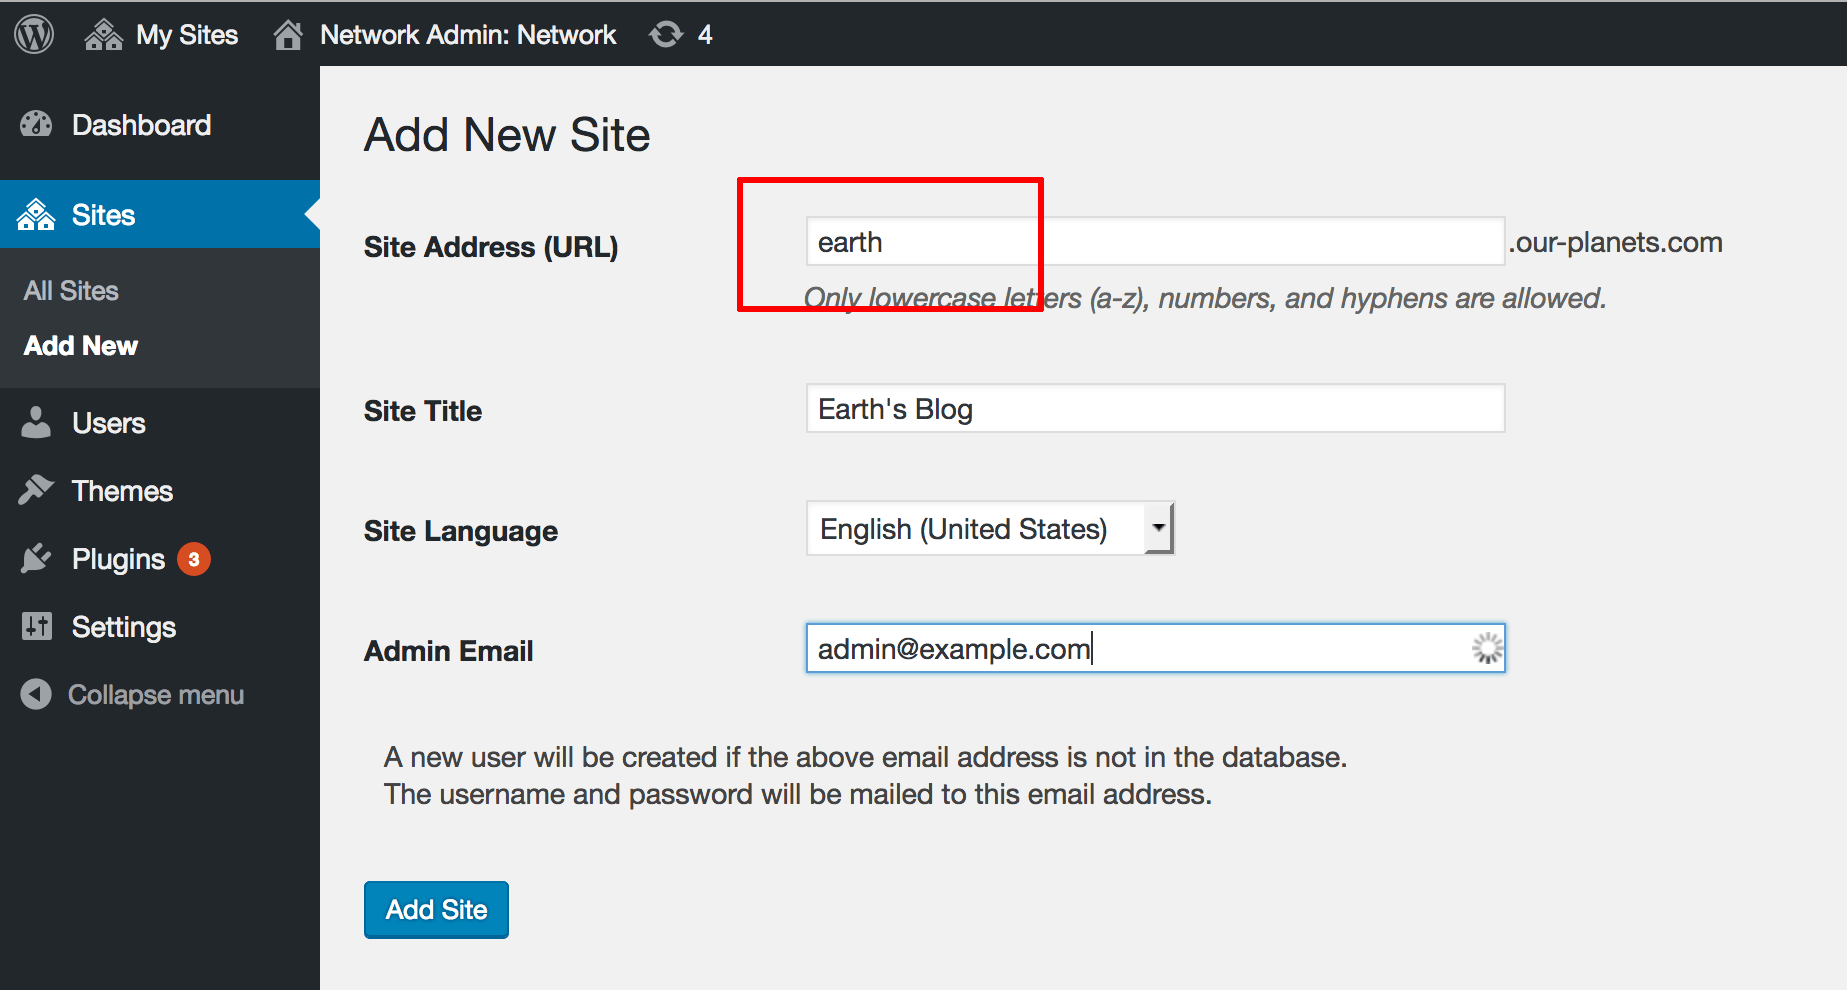
Select “Add New” to add a new blog.
-
Enter the subdomain name (the primary domain will already be filled in), together with a site title and administrator email address.
-
Click “Add Site” to create the new blog or website.
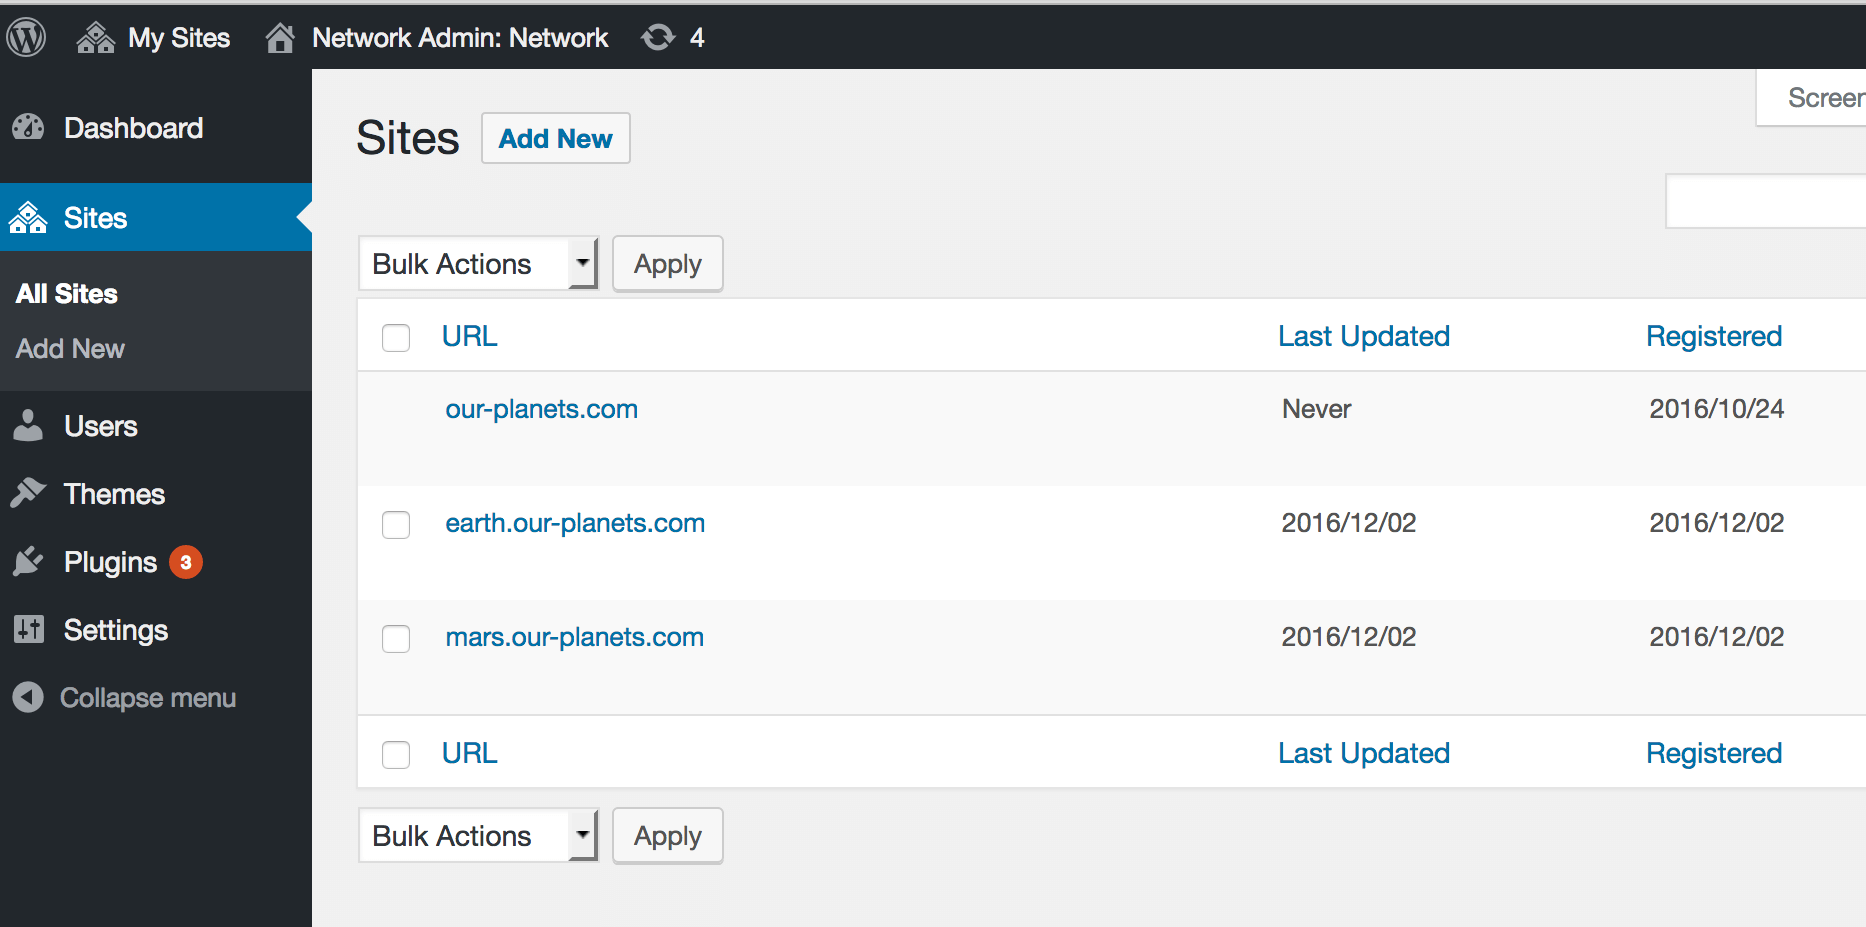
Repeat the above steps for all the subdomains and blogs you wish to create. Once you’re done, you can see a list by selecting the “My Sites -> Network Admin -> Sites” option.
At this point, you also need to update your domain’s DNS settings, specifically adding A records for your subdomains that point to the static IP address of your cloud server. If you’re in a hurry, or just testing things out, you can instead modify your local hosts file to map each subdomains to your server’s IP address. For more information on both these options, refer to the section on testing your installation.
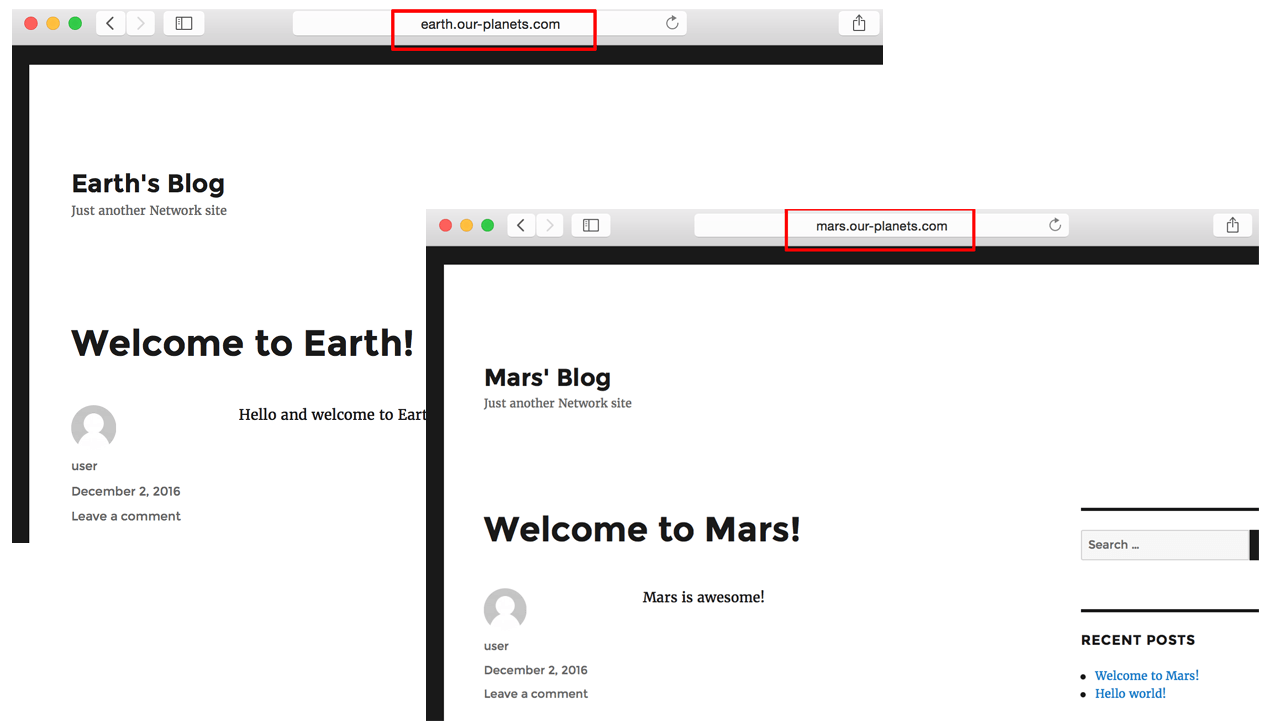
Following these changes, entering the subdomain name into the browser address bar should take you to the blog for that subdomain, as shown below:
Add several WordPress Multisite blogs with different domains
This section assumes that:
- You have a working WordPress Multisite installation
- Your server has a static IP address
- You are able to log in to your server console using a tool like PuTTY (Windows) or SSH (Linux and Mac OS X)
- You own at least one custom domain name for which you can configure DNS settings
- You have defined your primary domain and blog as described in the previous section and you are able to log in to the WordPress Multisite dashboard.
The WordPress domain mapping functionality allows users of a WordPress Multisite installation to map their blogs or websites to other domains or subdomains (Scenarios 2 and 3). This domain mapping functionality is natively available in WordPress Multisite since version 4.5. If you’re using an older version, you will need the WordPress MU Domain Mapping plugin.
WordPress Multisite version 4.5 and later
In this example, let’s assume we’re adding a blog for the domain space-is-awesome.com. Create and associate a new blog for the domain as follows:
-
In the WordPress Multisite dashboard, select the “My Sites -> Network Admin -> Sites” option.
-
Select “Add New” to add a new blog.
-
Enter the new domain name (ignore the primary domain which will appear as a suffix), together with a site title and administrator email address.

-
Click “Add Site” to create the new blog.
-
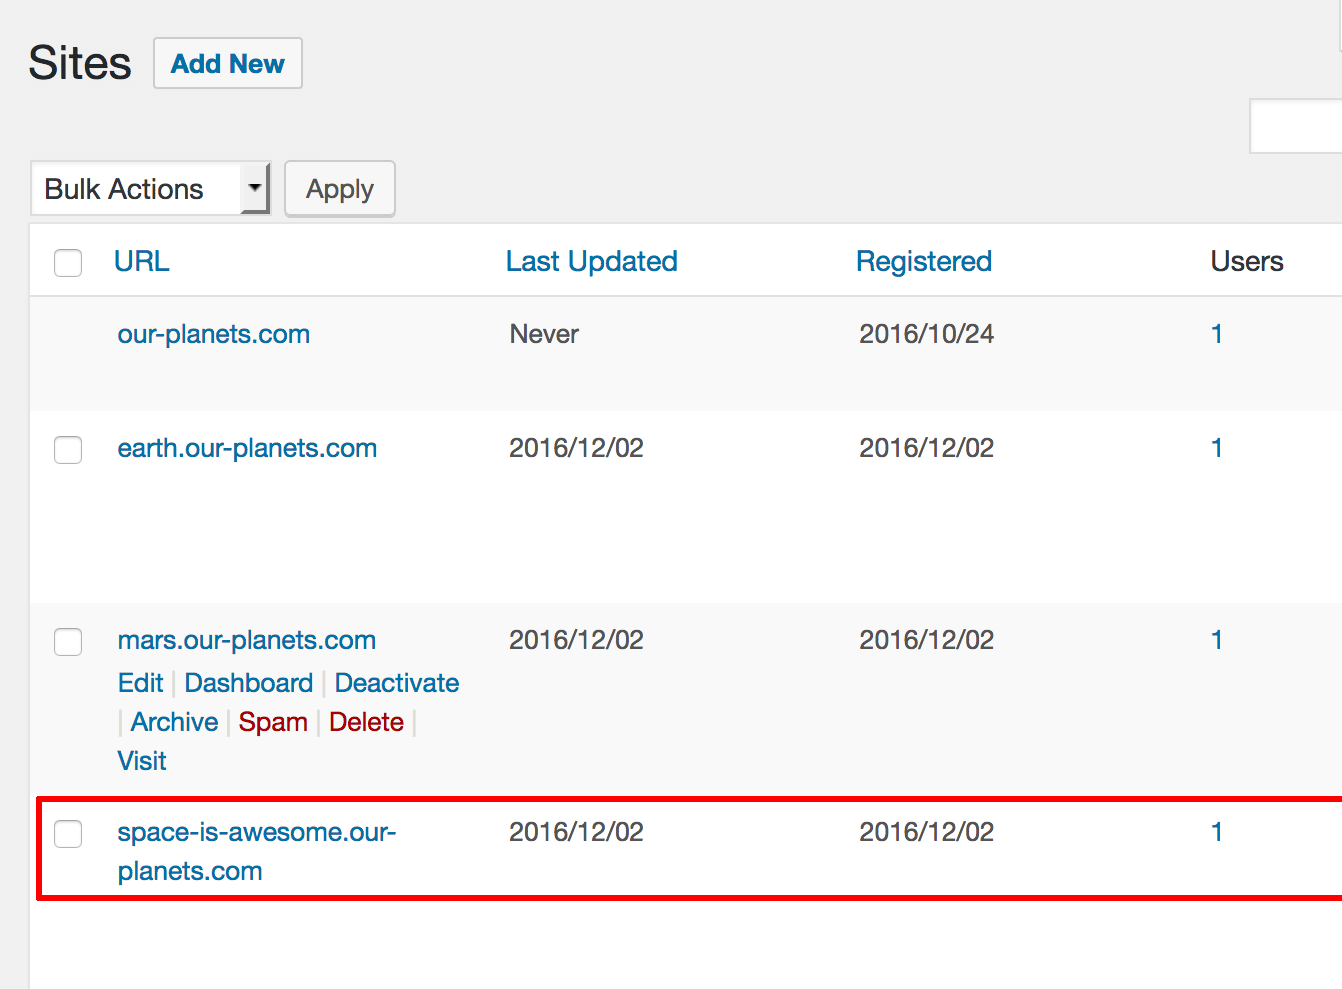
Select the “My Sites -> Network Admin -> Sites” option and you should see the new blog in the list.
Repeat these steps for each domain or subdomain you wish to associate with a separate blog. Once you’re done, select the “My Sites -> Network Admin -> Sites” option and verify the domain mapping for each blog.
At this point, you also need to update each domain or subdomain’s DNS settings, specifically adding A records that point them to the static IP address of your cloud server. If you’re in a hurry, or just testing things out, you can instead modify your local hosts file to map each domain or subdomain to your server’s IP address. For more information on both these options, refer to the section on testing your installation.
Following these changes, entering the domain name into the browser address bar should take you to the associated blog, as shown below:

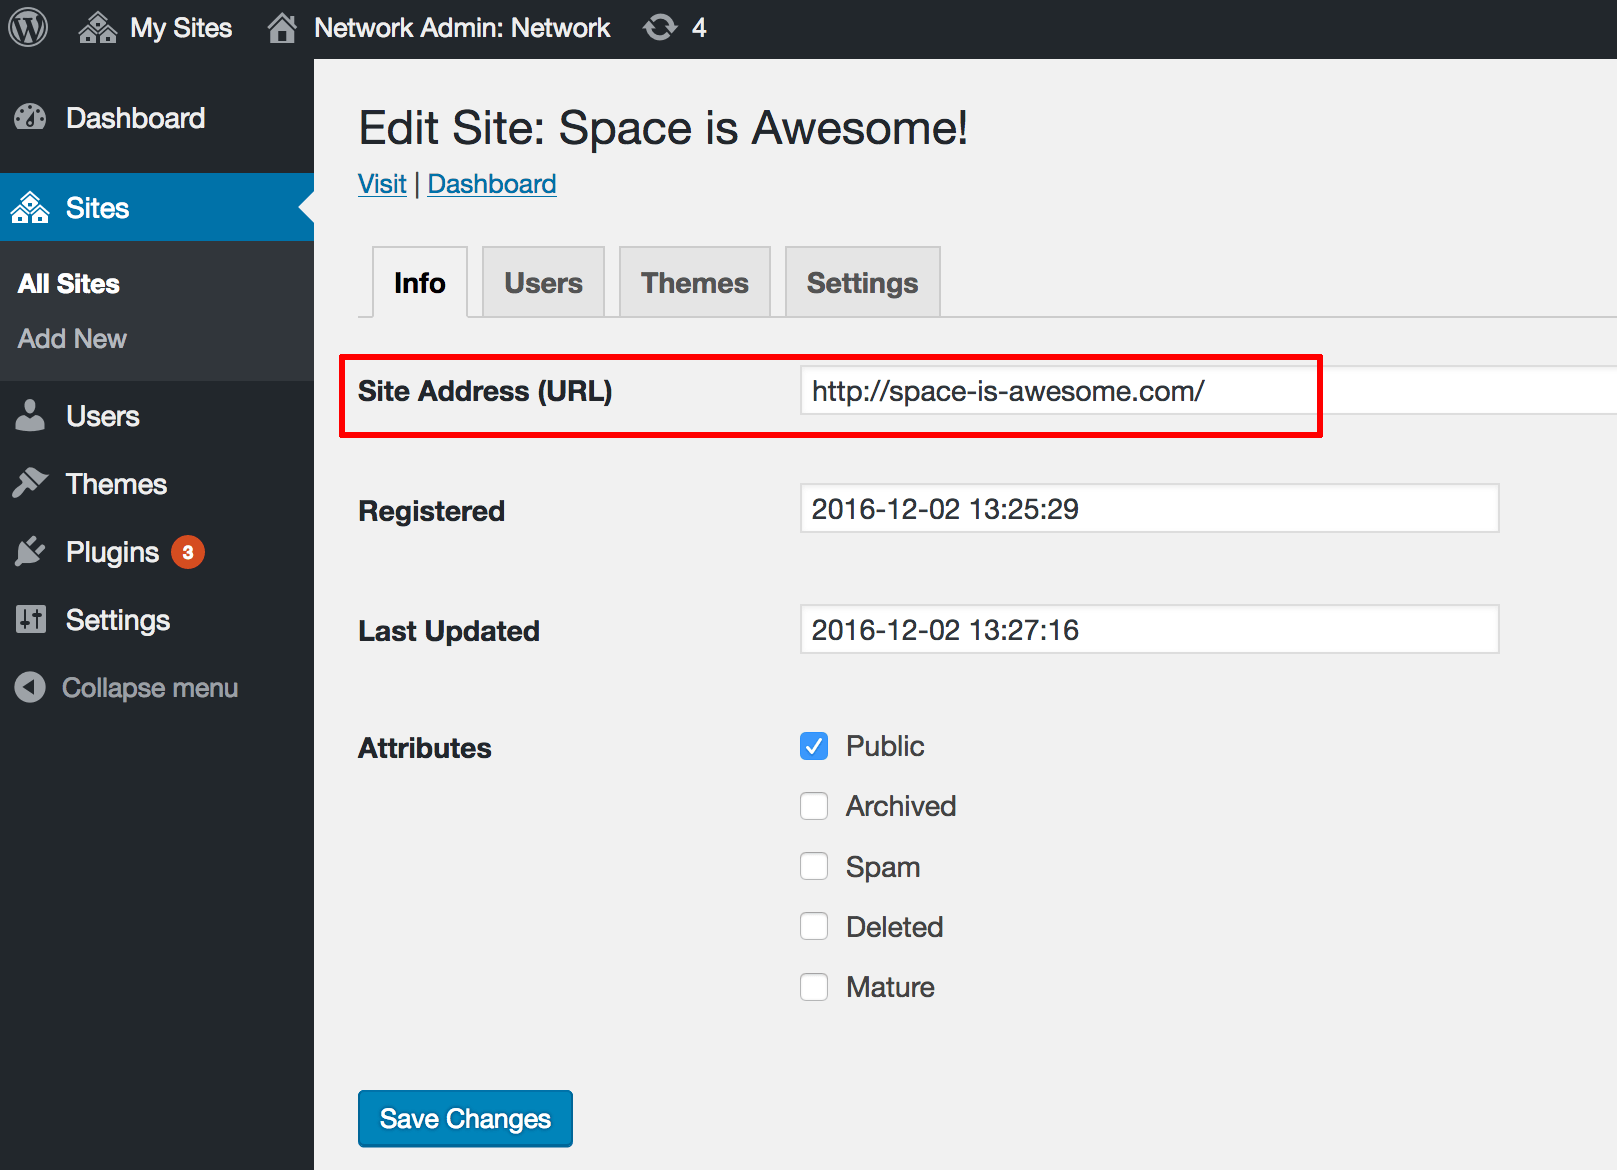
You might find that although you’re now able to access the new blog using the domain or subdomain name, you’re not able to access the blog’s dashboard. Typically, this is because WordPress still considers the new site to be a subdomain of the primary domain and tries to access it using a invalid URL (following the above example, space-is-awesome.our-planets.com). To resolve this, you can either update the DNS records for your primary domain and add an A record for this subdomain, or you can edit the entry for the site in the “My Sites -> Network Admin -> Sites” list and modify the domain URL, as shown below:
Older WordPress Multisite versions
If you are using a version of WordPress Multisite older than v4.5 with the WordPress MU Domain Mapping plugin, you must first configure the WordPress domain mapping functionality as follows.
-
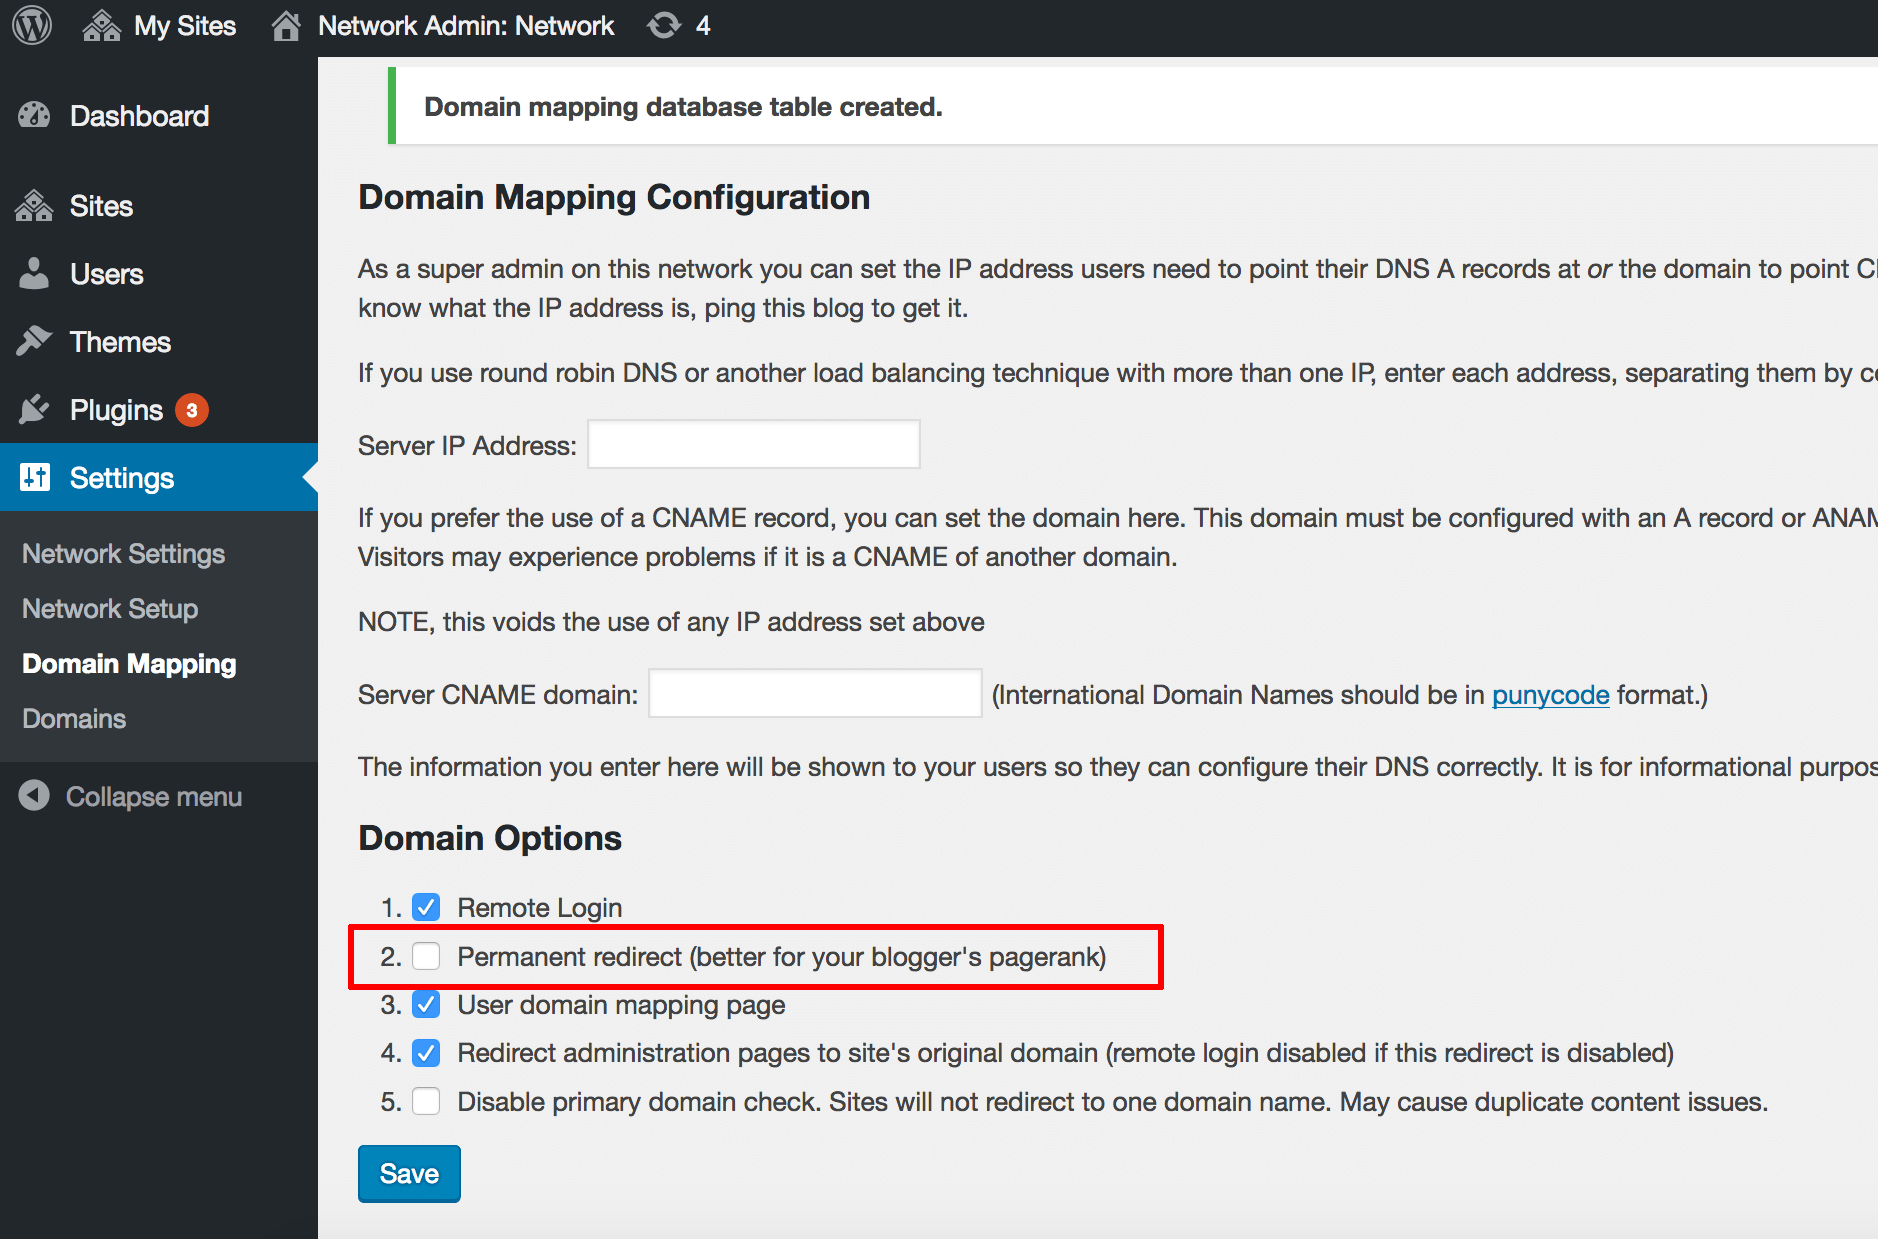
In the WordPress Multisite dashboard, select the “Settings -> Domain Mapping” option.
-
Enable the “Permanent redirect” option. This makes your blogs redirect to their mapped domains.
In this example, let’s assume we’re adding a blog for the domain space-is-awesome.com. Create and associate a new blog for the domain as follows:
-
In the WordPress Multisite dashboard, select the “My Sites -> Network Admin -> Sites” option.
-
Select “Add New” to add a new blog.
-
Enter the new domain name (ignore the primary domain which will appear as a suffix), together with a site title and administrator email address.
-
Click “Add Site” to create the new blog.
-
Select the “My Sites -> Network Admin -> Sites” option and you should see the new blog in the list.
-
Hover over the new blog’s name in the list, you will see that the URL for the blog includes a numeric site ID. Make a note of the site ID, as you will need it in the next step.
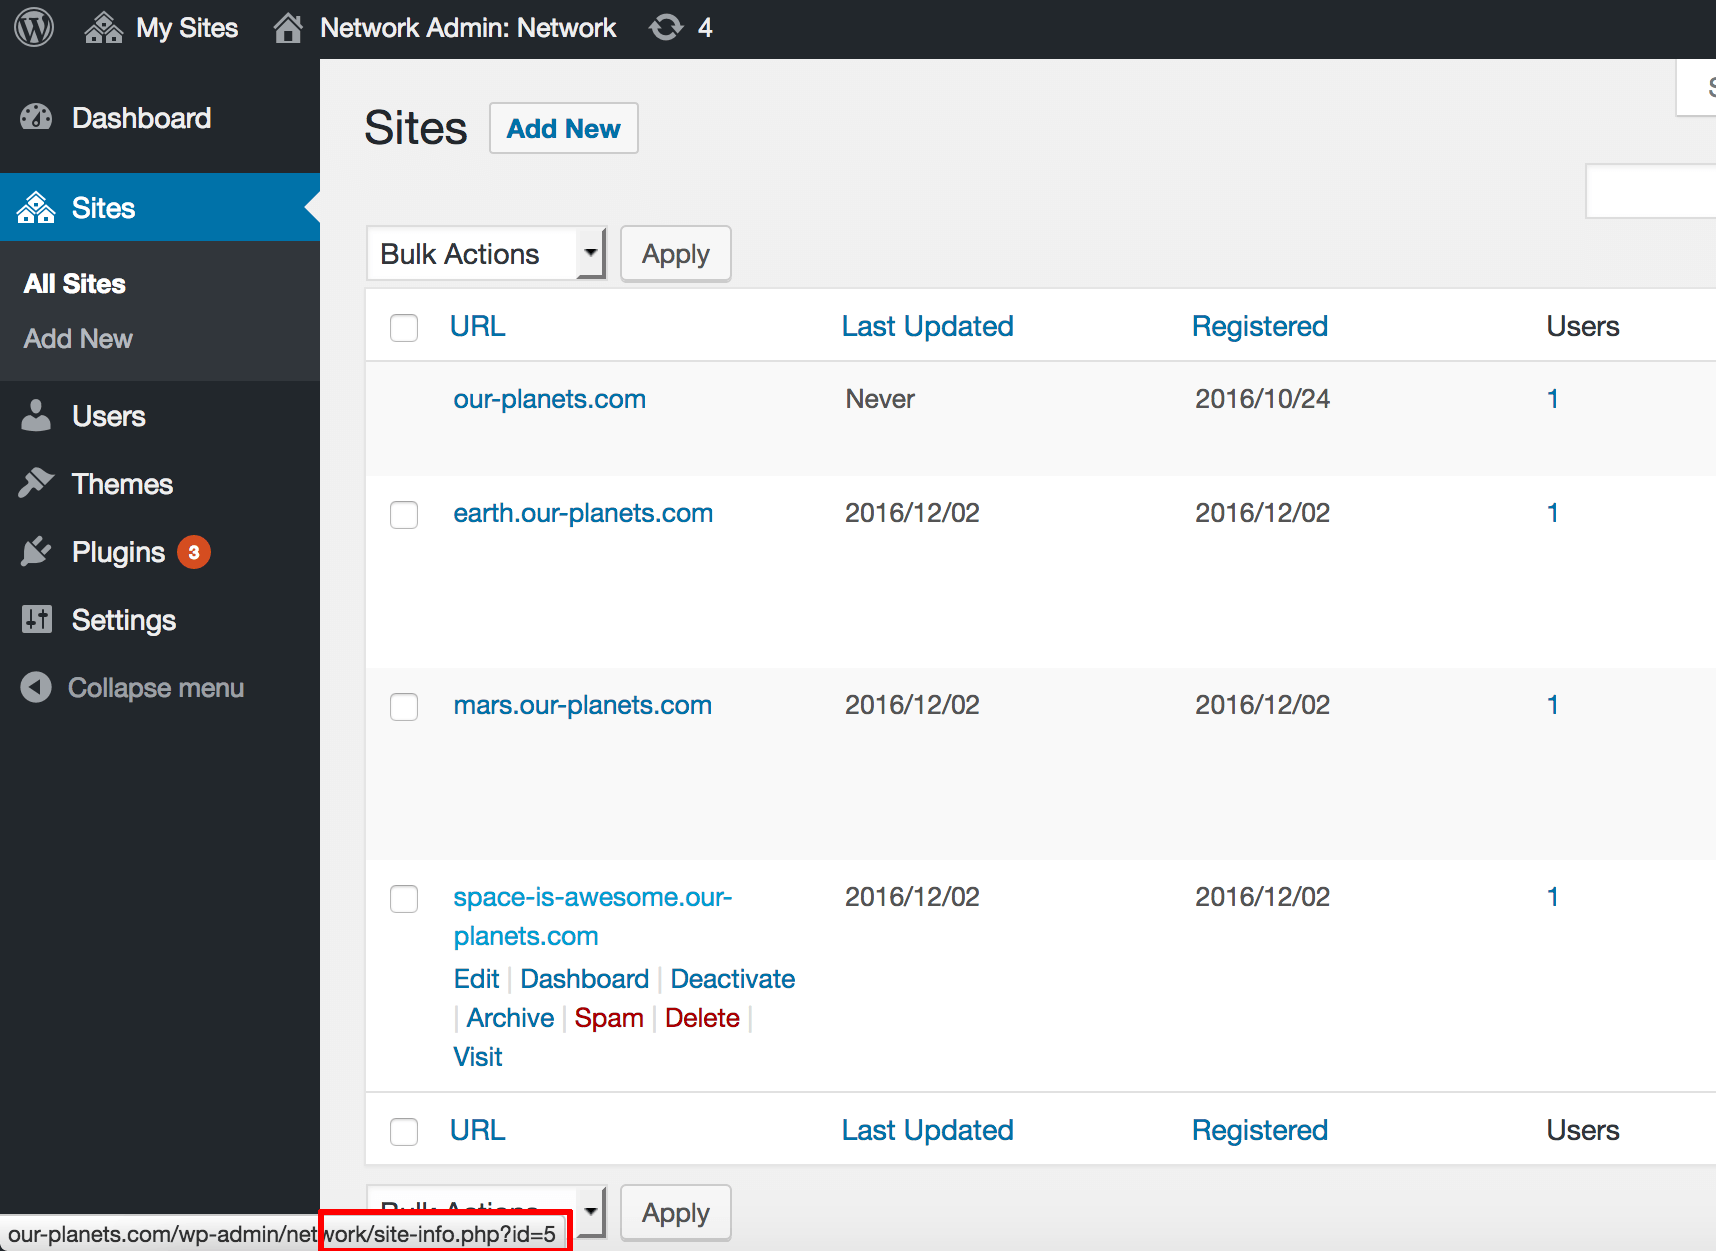
NOTE: You can also obtain the numeric site ID from the wp_blogs table in the database. An easy way to check this database table is with phpMyAdmin.
-
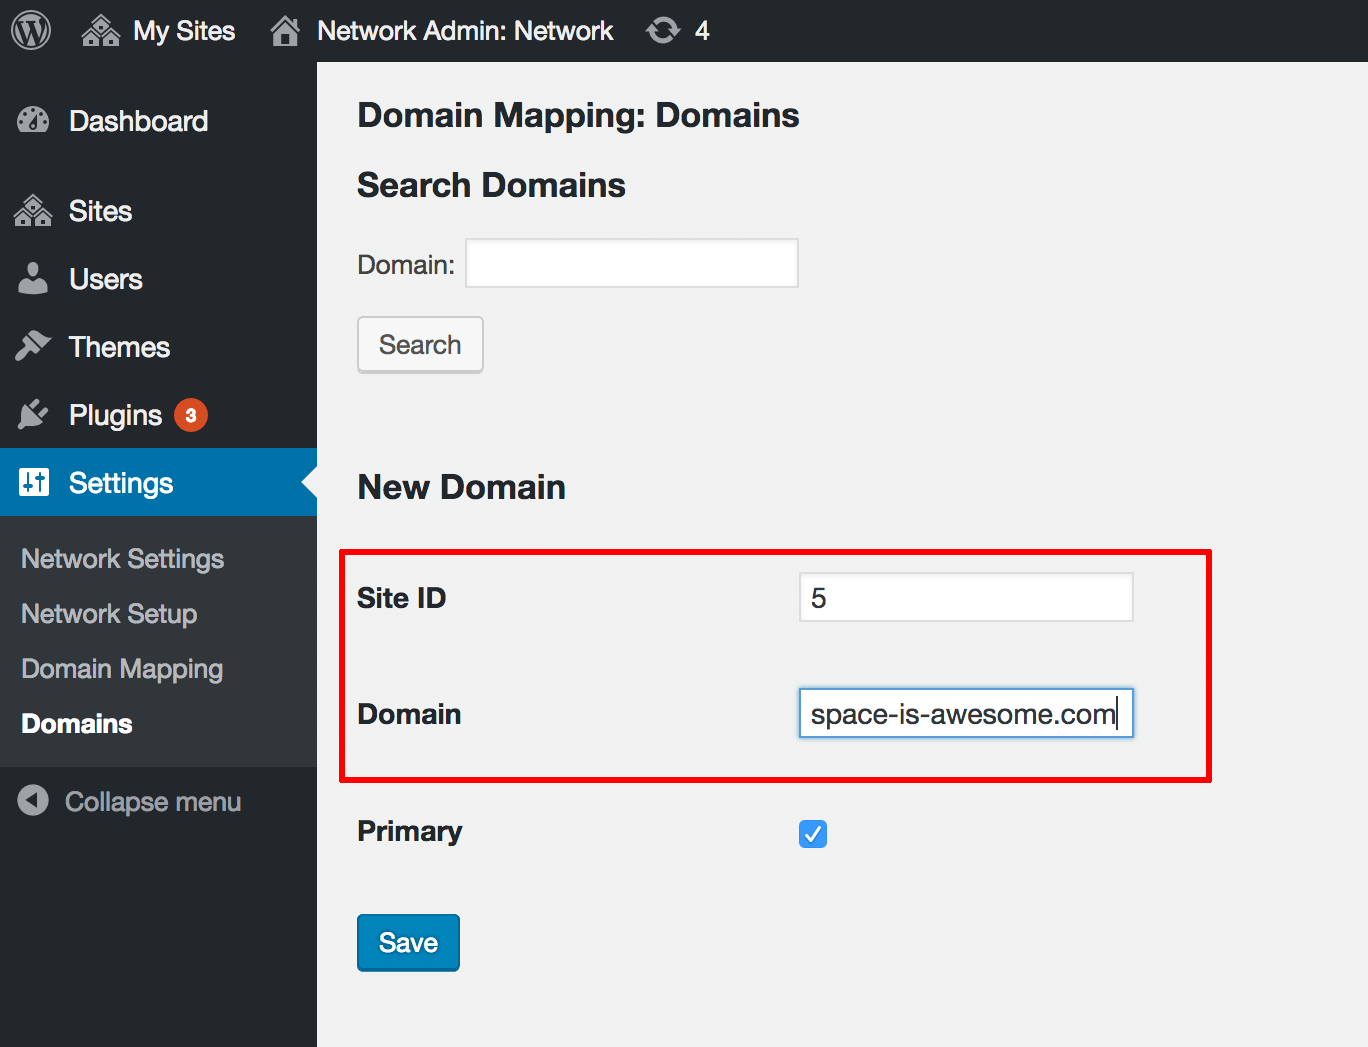
In the WordPress Multisite dashboard, select the “Settings -> Domains” option.
-
Associate the new blog with the domain by entering the new blog’s site ID together with the domain name in the fields provided.
-
Save the association by clicking “Save”.
Repeat these steps for each domain or subdomain you wish to associate with a separate blog. Once you’re done, select the “My Sites -> Network Admin -> Sites” option and verify the domain mapping for each blog.
At this point, you also need to update each domain or subdomain’s DNS settings, specifically adding A records that point them to the static IP address of your cloud server. If you’re in a hurry, or just testing things out, you can instead modify your local hosts file to map each domain or subdomain to your server’s IP address. For more information on both these options, refer to the section on testing your installation.
Following these changes, entering the domain name into the browser address bar should take you to the associated blog, as shown below:
You might find that although you’re now able to access the new blog using the domain or subdomain name, you’re not able to access the blog’s dashboard. Typically, this is because WordPress still considers the new site to be a subdomain of the primary domain and tries to access it using a invalid URL (following the above example, space-is-awesome.our-planets.com). To resolve this, you can either update the DNS records for your primary domain and add an A record for this subdomain, or you can edit the entry for the site in the “My Sites -> Network Admin -> Sites” list and modify the domain URL, as shown below:
Test WordPress Multisite
Testing with DNS
As a general rule, every domain or subdomain that you use in WordPress Multisite should have a DNS entry pointing to your server. This requires a change to each domain’s DNS settings, specifically the addition of an A record that points the domain to the static IP address of your server.
This change can only be accomplished through your domain name provider; it cannot be made through Bitnami’s hosting dashboard or through local commands on your server. You will therefore need to log in to your domain name provider’s management console and make the necessary changes. Step-by-step instructions for some popular providers are listed below:
Remember that once you make the necessary changes, it can take up to 48 hours for the change to propagate across other DNS servers. You can verify the new DNS record by using the Global DNS Propagation Checker and entering your domain name into the search field.
Testing with the hosts File
Given that DNS propagation takes some time, you can use a shortcut to test that your WordPress Multisite installation is working correctly. The shortcut involves manually adding entries for your domain(s) and subdomain(s) in your local system’s hosts file, which is always checked before a query is sent to a DNS server.
To do this, open the hosts file in a text editor and add a line like the one below to it.
54.224.97.204 our-planets.com
Remember to update the IP address on the left to reflect the IP address of your server, and the domain name on the right to reflect the domain or subdomain you wish to test. If you have multiple domains to test, add a separate line for each domain.
Once done, save the file. This takes care of mapping the our-planets.com domain name to the IP address 54.224.97.204.
If you now open your browser and type in the URL to your domain, such as http://our-planets.com, it should redirect to your server.
Troubleshooting
When using WordPress Multisite with multiple domains, you might encounter login errors related to your cookie settings. To correct these errors, follow the steps below:
-
Log in to the server console.
-
Edit the WordPress /opt/bitnami/wordpress/wp-config.php configuration file and add the lines below to it, immediately after the BLOG_ID_CURRENT_SITE definition:
# start: fixes for cookies issues with multiple domains define( 'COOKIE_DOMAIN', '' ); define( 'ADMIN_COOKIE_PATH', '/' ); define( 'COOKIEPATH', '/' ); define( 'SITECOOKIEPATH', '/' ); # end: fixes for cookies issues with multiple domains -
Save the changes to the file.