See a Subversion repository from Redmine
Redmine lets users check repository changes and link to cases. Simply configure the “Repository URL” in the project’s “Settings -> Repositories” tab.
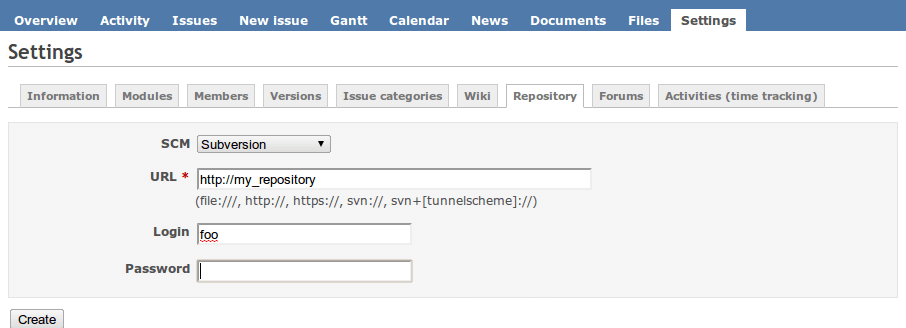
SCM: Subversion
URL: http://your_repository
Login: repository_login
Password: repository_password
Configure Redmine for advanced integration with Subversion
Before starting this guide, take into account that this is not necessary to see the repository changes in the Redmine application. If you only want to see the repository changes and link to the issues, it is only necessary to configure the project repository: “Project -> Settings -> Repository -> URL and Control Version System”.
This Redmine configuration is for automatic repository creation and rights management. Since v1.1.3-1, Redmine Stack ships all required modules for this configuration. This guide has been updated to work with Redmine 2.1.4.
Follow these steps:
-
Install the ActiveResource gem:
$ sudo /opt/bitnami/ruby/bin/gem install activeresource -
Make sure that the mod_dav module is enabled in your Apache configuration file (httpd.conf). This module should be loaded before the modules mentioned in the next step.
LoadModule dav_module modules/mod_dav.so -
Add the following lines in the Apache configuration file:
LoadModule dav_svn_module modules/mod_dav_svn.so LoadModule perl_module modules/mod_perl.so -
You will also need to add the following lines to the /opt/bitnami/apache/bin/envvars file.
NOTE: The paths may change depending on the stack version.
LD_LIBRARY_PATH="/usr/lib/perl/lib/5.16.3/x86_64-linux-thread-multi/CORE/:$LD_LIBRARY_PATH" export LD_LIBRARY_PATH -
Copy the Redmine.pm file into the Perl modules folder:
$ cp /opt/bitnami/redmine/extra/svn/Redmine.pm /usr/lib/perl/lib/site_perl/5.16.3/x86_64-linux-thread-multi/Apache2/ -
Create a directory for the repository, for instance:
$ sudo mkdir -p /opt/bitnami/repository/svn $ sudo chmod -R 0755 /opt/bitnami/repository $ sudo chown -R root:daemon /opt/bitnami/repository -
Add the lines below to the /opt/bitnami/apache/conf/vhosts/redmine-vhost.conf and /opt/bitnami/apache/conf/vhosts/redmine-https-vhost.conf Apache configuration files for Redmine:
PerlLoadModule Apache2::Redmine <Location /svn> DAV svn SVNParentPath "/opt/bitnami/repository/svn" Order deny,allow Deny from all Satisfy any PerlAccessHandler Apache::Authn::Redmine::access_handler PerlAuthenHandler Apache::Authn::Redmine::authen_handler AuthType Basic AuthName "Redmine SVN Repository" #read-only access <Limit GET PROPFIND OPTIONS REPORT> Require valid-user Allow from all # Allow from another-ip Satisfy any </Limit> # write access <LimitExcept GET PROPFIND OPTIONS REPORT> Require valid-user </LimitExcept> ## for mysql RedmineDSN "DBI:mysql:database=bitnami_redmine;host=localhost;mysql_socket=/opt/bitnami/mysql/tmp/mysql.sock" RedmineDbUser "bitnami" RedmineDbPass "bitnami_database_password" #You can find this value at config/database.yml </Location> -
Restart the server:
$ sudo /opt/bitnami/ctlscript.sh restart apache -
Log in to the Redmine application as administrator and navigate to “Settings -> Repositories -> Enable WS for repository management”.
-
Click “Generate a key” and save the key.
-
Add the following line in the crontab. You can edit the crontab using the command crontab -e:
NOTE: Replace the SERVER-IP, YOUR_APACHE_PORT and YOUR_API_KEY placeholders with the actual domain of your Redmine server, the port used by Apache and the Redmine API key, respectively.
*/2 * * * * /opt/bitnami/ruby/bin/ruby /opt/bitnami/redmine/extra/svn/reposman.rb --redmine http://SERVER-IP:YOUR_APACHE_PORT --svn-dir /opt/bitnami/repository/svn --owner root --group daemon --command="/opt/bitnami/subversion/bin/svnadmin create --pre-1.6-compatible --fs-type fsfs" --url http://SERVER-IP:YOUR_APACHE_PORT/svn --key="YOUR_API_KEY" --verbose >> /var/log/reposman.logIf you have configured Redmine for access over SSL, you can specify --redmine https://SERVER-IP in the previous crontab line.
Check that everything works properly creating a project from the Redmine application and checking the /var/log/reposman.log file.
Thanks to Jedbifa who posted a complete guide in the Bitnami forums.