Get Started with Bitnami WordPress on AWS Marketplace (for Beginners)
Introduction
WordPress is one of the most popular blogging platforms in the world, in use on over 60 million websites (according to Wikipedia). It’s not hard to understand why: WordPress is incredibly easy to use, comes with thousands of extensions and themes, and is completely free and open source.
If you’re looking to create a personal or small business website or blog, the Bitnami WordPress Stack is the quickest and easiest way to get started with WordPress. It comes with a pre-configured, secure and up-to-date installation of WordPress that you can immediately deploy and begin working with.
This guide will hold your hand as you start your journey with the Bitnami WordPress Stack. It will guide you through some important first steps, such as finding your WordPress credentials, changing the default interface language, creating your first post, and backing up your WordPress data.
Assumptions and prerequisites
The guide assumes that:
-
You have deployed Bitnami WordPress using the AWS Marketplace. In case you don’t know how to do this, our handy guide to getting started with Bitnami applications in the AWS Marketplace will walk you through the process.
-
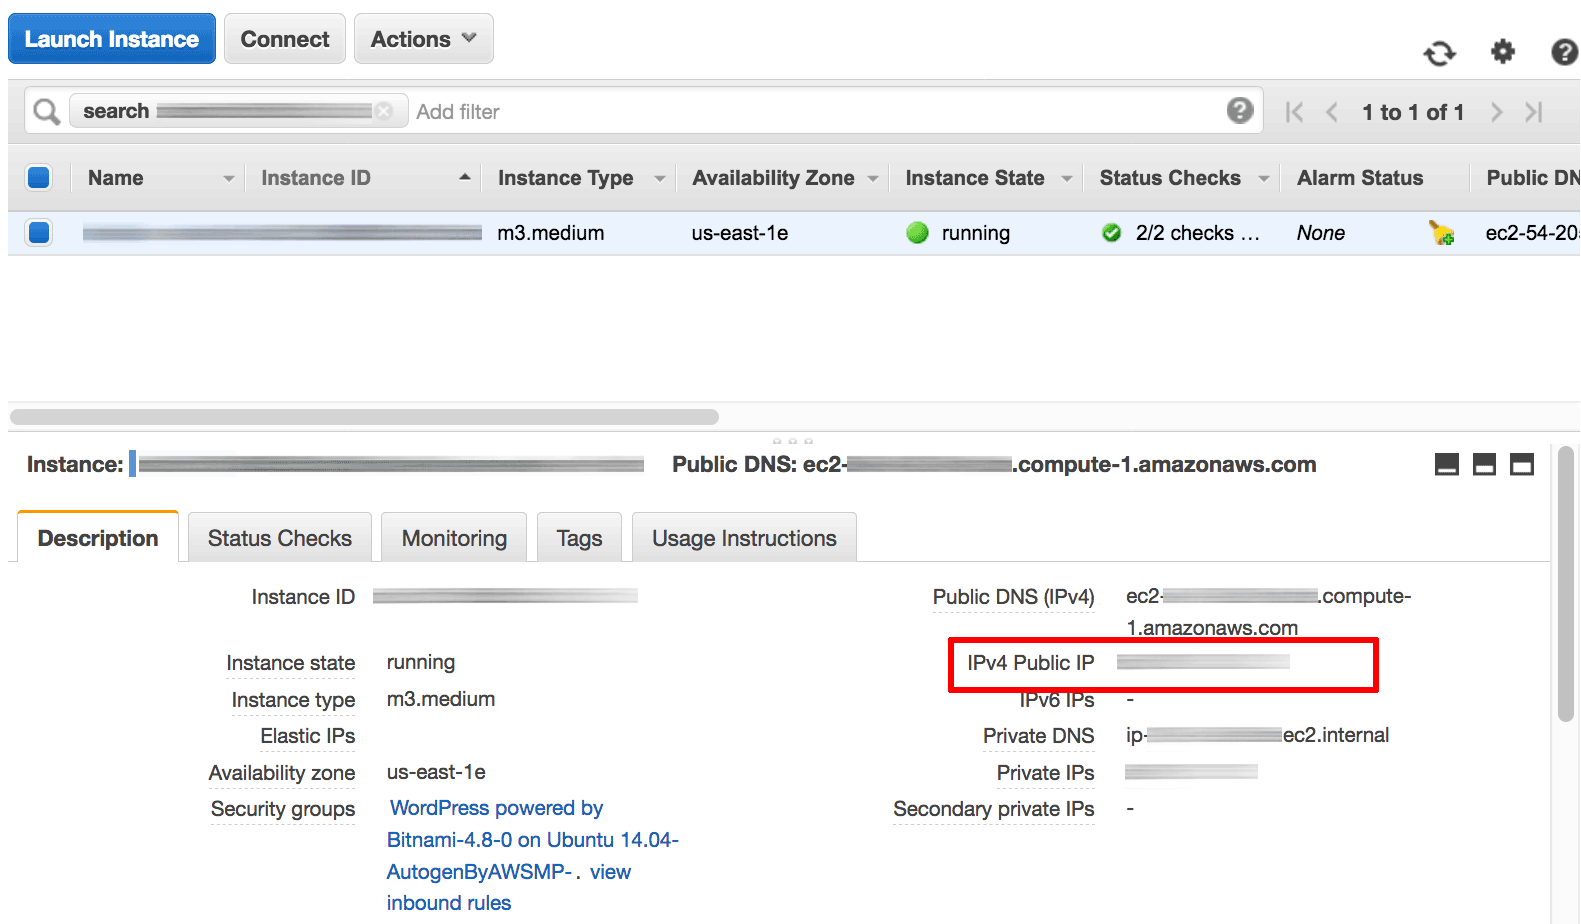
You have obtained the public IP address of your WordPress server from the AWS EC2 Console. In case you haven’t, use the image below as a reference to locate your server’s public IP address.
Get WordPress credentials
Most of your interaction with WordPress will take place through the WordPress Dashboard. To log in to the Dashboard, you will need a username and a password. By default, the Bitnami WordPress Stack is configured with these credentials:
Username: user
Password: Randomly-generated
To get the password, follow these steps:
-
Log in to the AWS EC2 Console.
-
In the left navigation bar, select the “Instances -> Instances” menu item.
-
Select your instance.
-
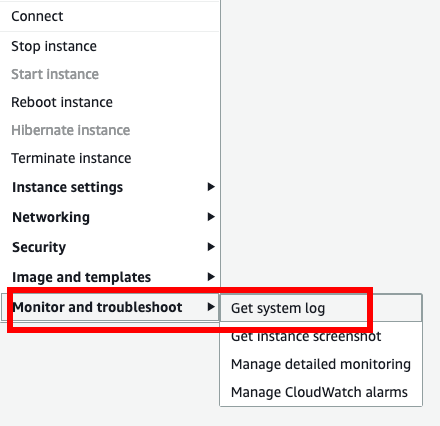
From the “Actions” drop-down menu, select the “Get System Log” menu item.
-
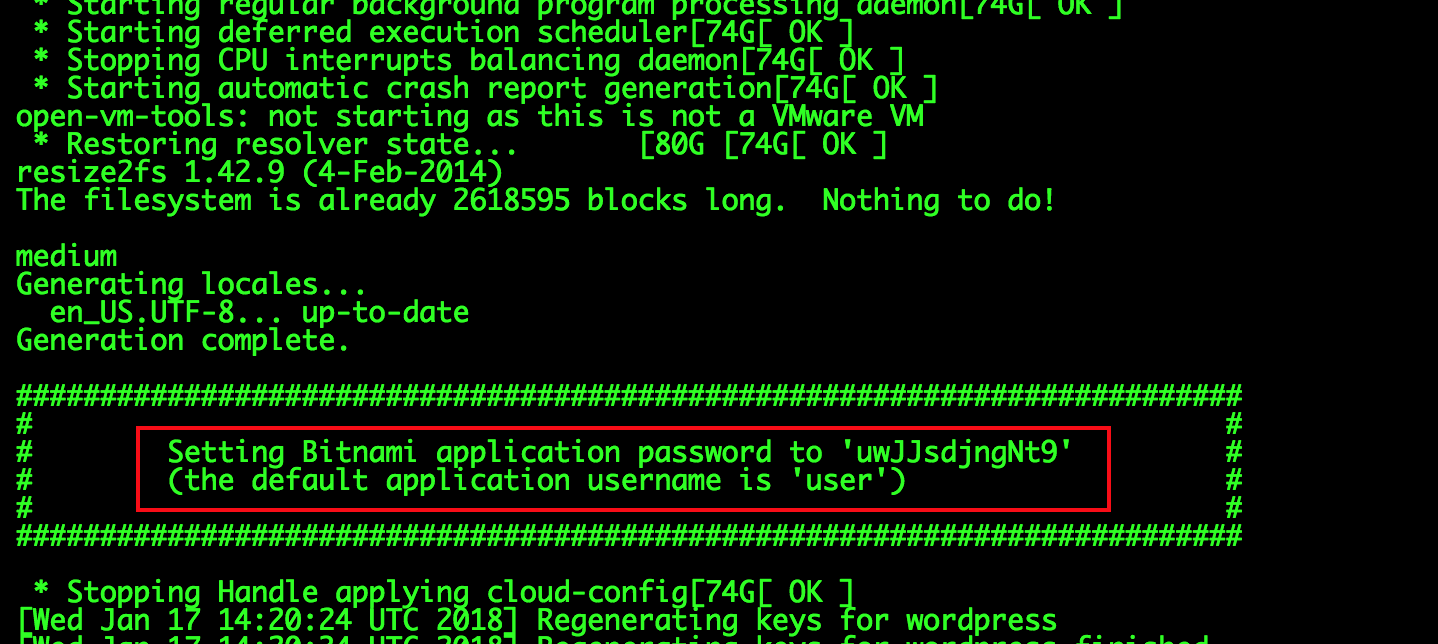
Review the system log until you find a message with the application username and password.
This password is only shown the first time you start the image. Please save it in a safe place.
TIP: You can also obtain the username and password at any time by checking the bitnami_credentials file as it is described in the FAQ.
Log in to the WordPress Dashboard
To log in to the WordPress Dashboard, follow these steps:
- Browse to the URL http://SERVER-IP/wp-admin, where SERVER-IP is the public IP address of your server.
- Enter the username and password from the previous section.
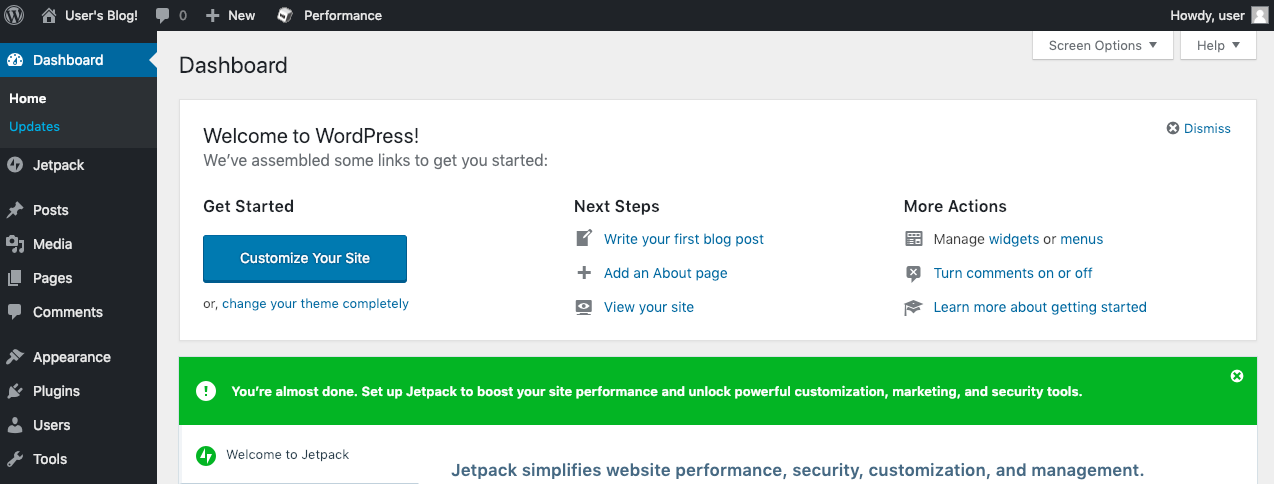
You should now arrive at the WordPress Dashboard, which allows you to manage posts, pages and comments; customize your blog with themes and plugins; import and export content; manage navigation menus; add or delete new user accounts; and much more.
Change the WordPress user interface language
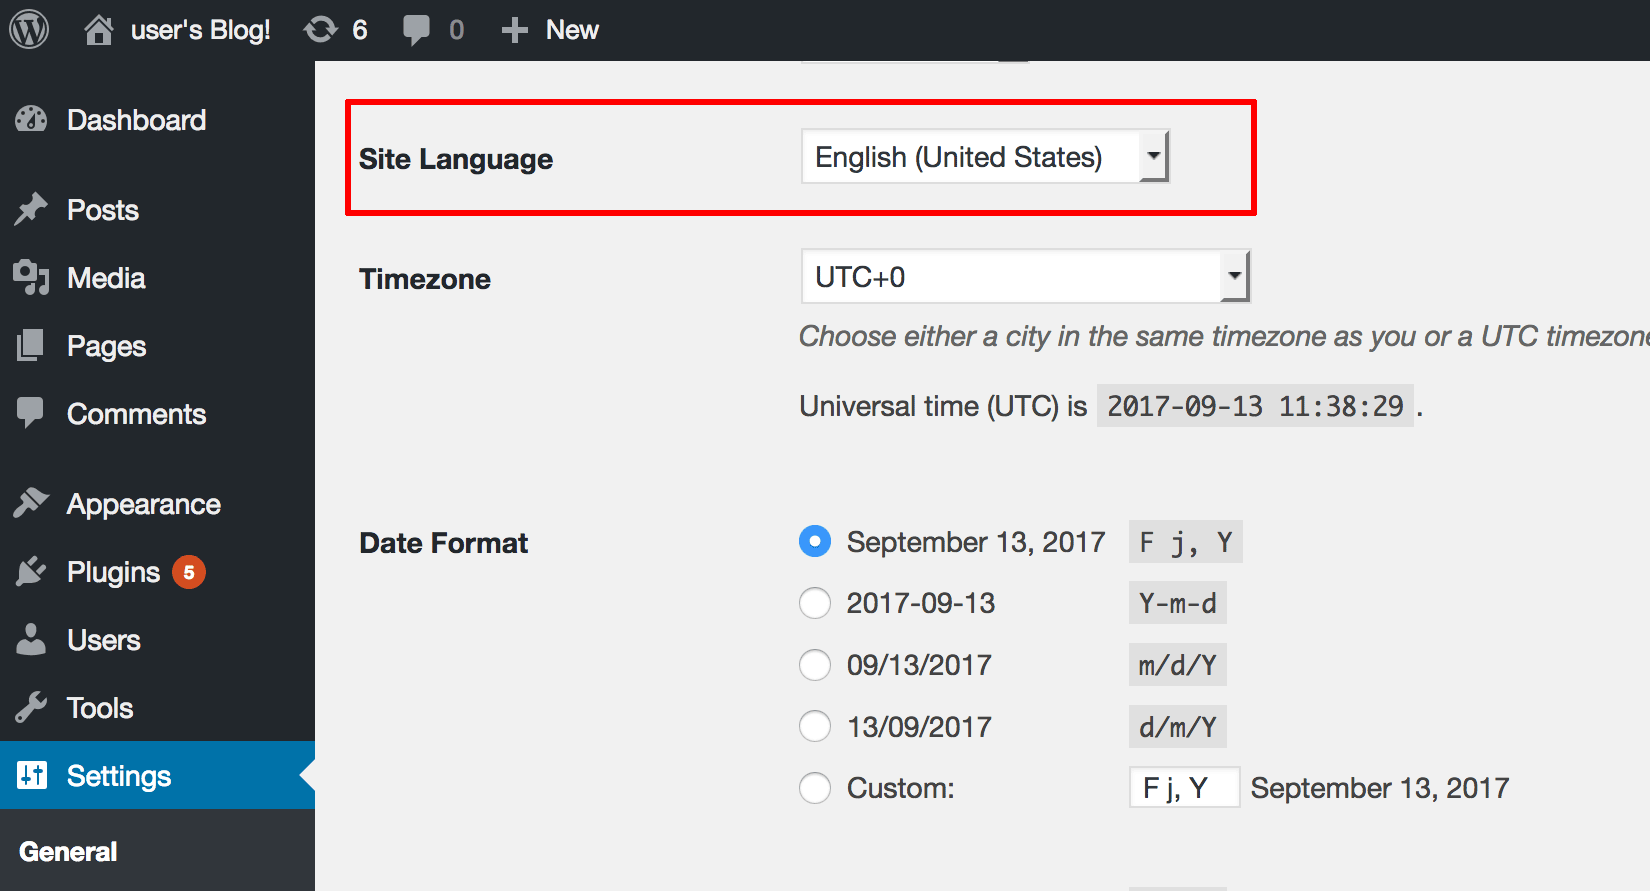
By default, the Dashboard user interface appears in English. However, you can switch it to use a different language easily following these steps:
-
Click the “Settings -> General” menu item located in the left navigation bar.
-
Scroll down to the “Site Language” field and select a different language.
-
Click “Save Changes” to save your changes and update the interface language.
Change the WordPress administrator password
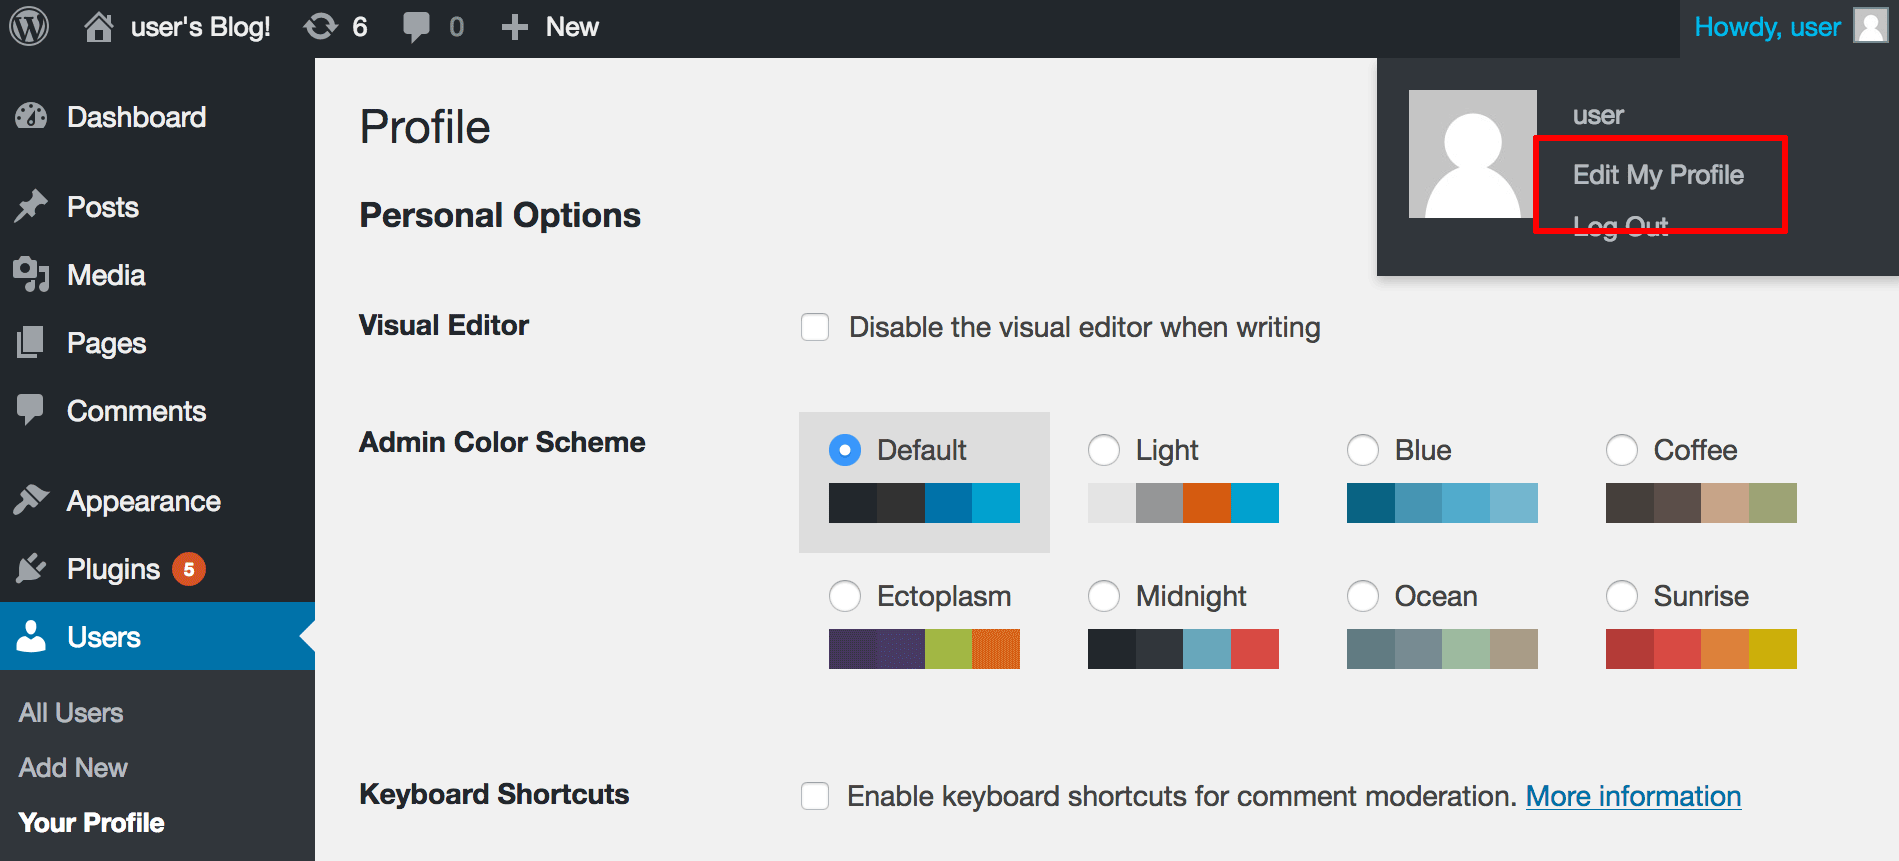
It is strongly recommended that you change the randomly-generated password for the WordPress Dashboard. To change the password, follow these steps while logged in to the Dashboard as the WordPress administrator:
-
Select the username icon in the top right corner and click the “Edit My Profile” link in the dialog.
-
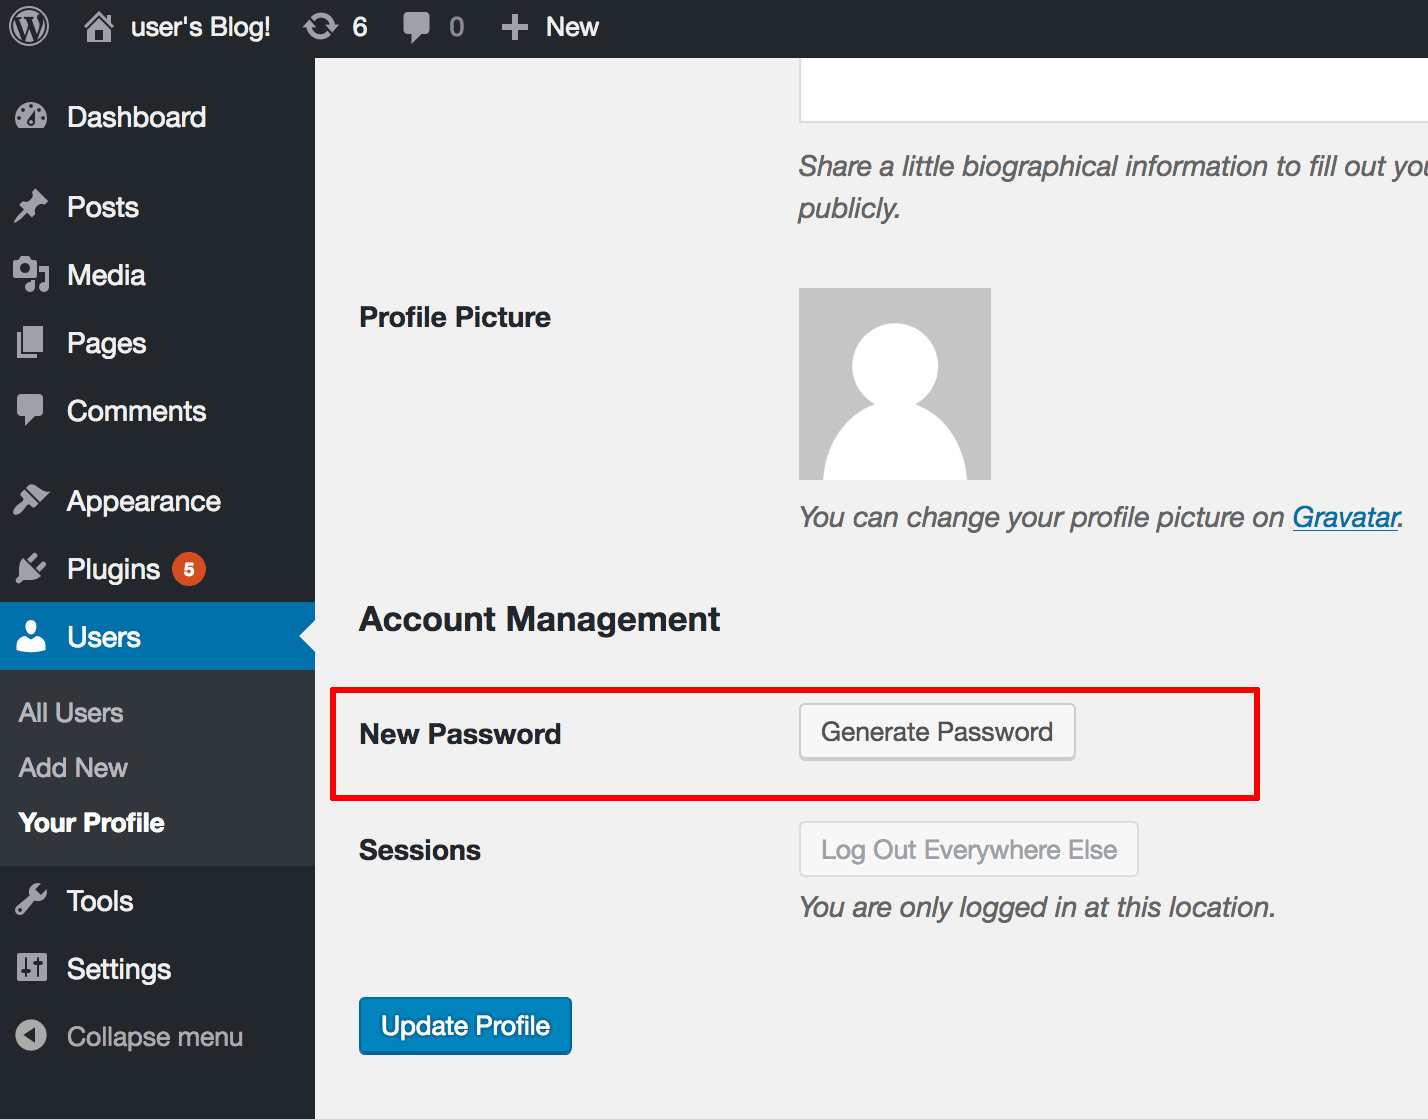
On the resulting profile page, find the “Account Management” section and click “Generate Password”.
-
Edit the generated password as needed and click the “Update Profile” button to save the new password.
Delete the sample post and page
By default, WordPress is installed with a sample post and a sample page. Before you can start making it your own, you should delete this sample content, as follows:
-
Log in to the WordPress Dashboard using the administrator account (if you’re not already logged in).
-
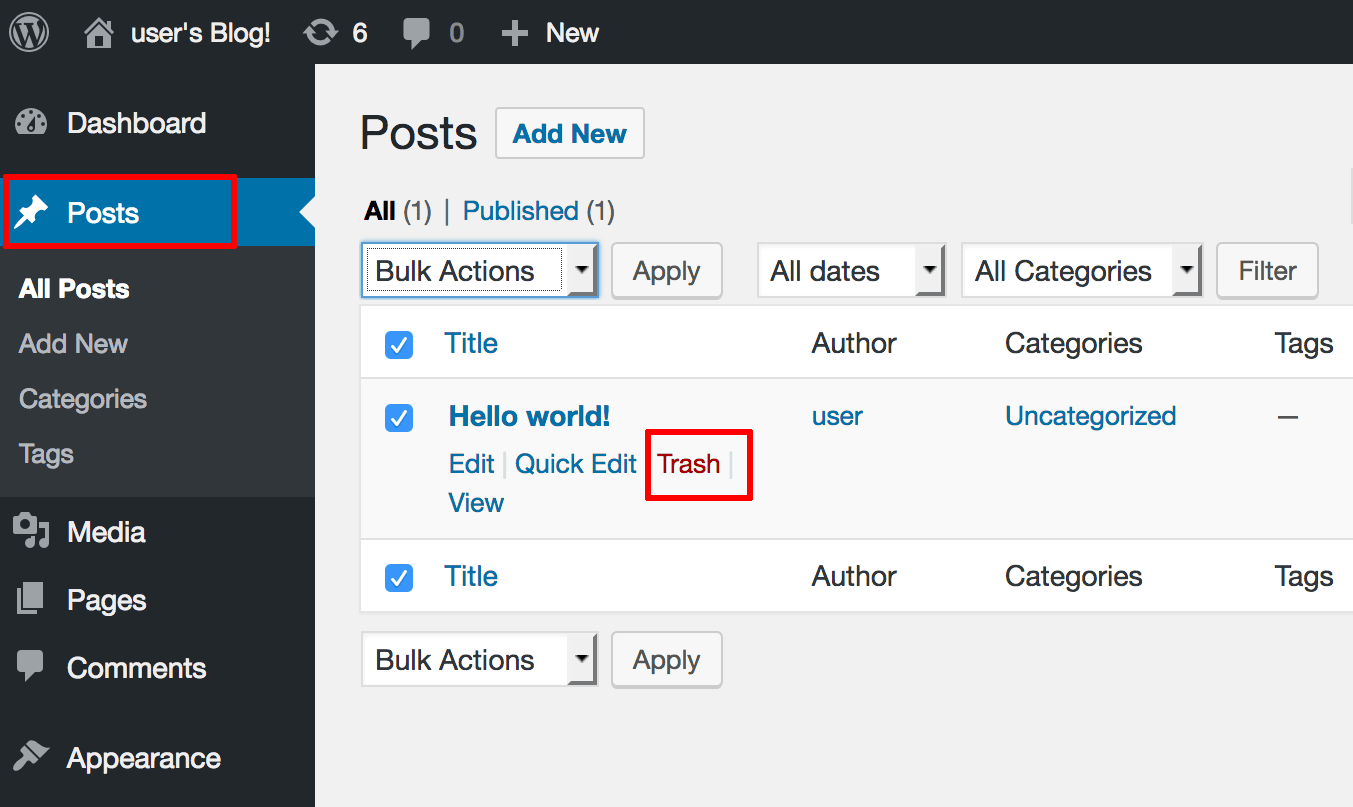
Navigate to the “Posts” section.
-
Select the sample post and click the “Trash” link in the sub-menu that appears under it.
-
Navigate to the “Pages” section and do the same for the sample page.
You should now have a clean slate and can begin creating your own posts and pages.
Create a new post
Add a new post using the following steps:
-
Log in to the WordPress Dashboard using the administrator account (if you’re not already logged in).
-
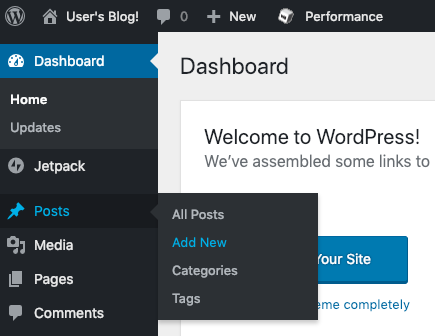
Select the “Posts -> Add New” menu option to create a new post.
-
Enter a title and content for the post. You can use the formatting tools at the top of the content area to format your post and add hyperlinks or images.
-
Optionally, choose the format and category for your post.
-
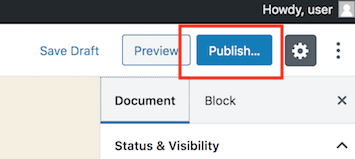
Publish it immediately using the “Publish” button.
Visit your blog’s front page and you should see your new post.
Enable automatic email notifications from WordPress
To enable automatic emails from WordPress (for example, when a comment is posted), you will need to install or enable the WP Mail SMTP plugin. Here’s how:
-
Log in to the WordPress Dashboard using the administrator account (if you’re not already logged in).
-
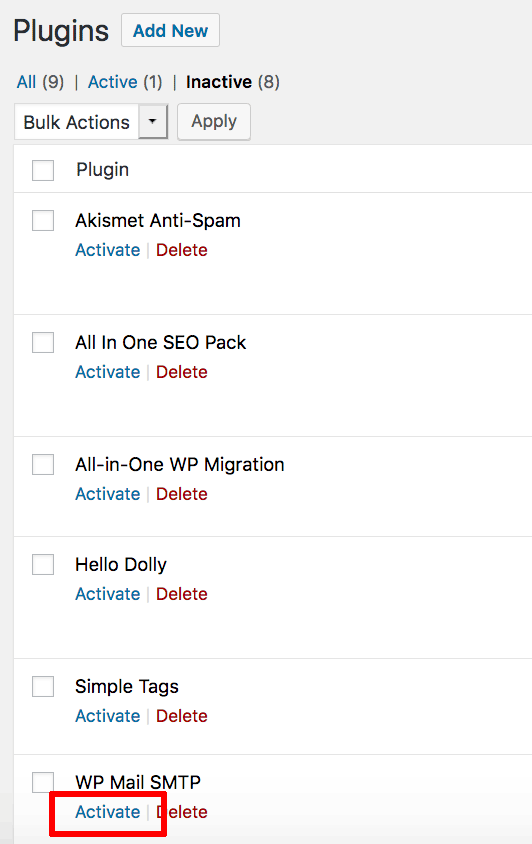
Navigate to the “Plugins” section and click the “Activate” option for the “WP-Mail-SMTP” plugin.
-
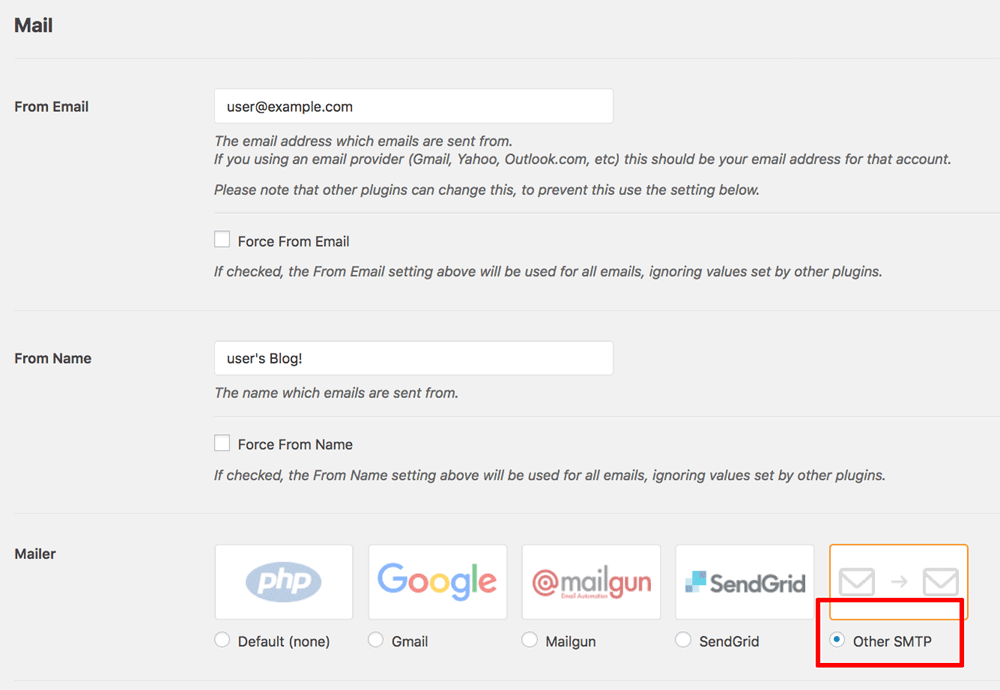
Navigate to the “Settings -> Email” panel and use the “SMTP Options” section to configure the SMTP settings of your email provider. Here is an example of configuring WordPress to use a Gmail account.
  SMTP Host: smtp.gmail.com
  SMTP Port: 587
  Encryption: Use TLS encryption.
  Authentication: Yes. Use SMTP authentication.
If you want to send email via a non-Gmail account, remember to replace these values with the correct data for your mail provider.
-
Validate your configuration by entering your email address in the “Send a Test Email” section and generating a test email message from WordPress.
Enable Amazon Polly
NOTE: The Amazon Polly WordPress plugin requires an Amazon Web Services (AWS) account. If you don’t have an AWS account, you can register for one on the AWS website.
Amazon Polly is a text-to-speech service from Amazon Web Services. It supports multiple languages and voices, and its audio stream can be played back directly in an application or stored in a standard file format.
Amazon Polly can be used in WordPress via the included Amazon Polly plugin. To configure it, follow these steps:
-
Log in to the AWS Console.
-
In the AWS services menu, scroll down until you see the “Security, Identity & Compliance” section. Select the IAM service.
-
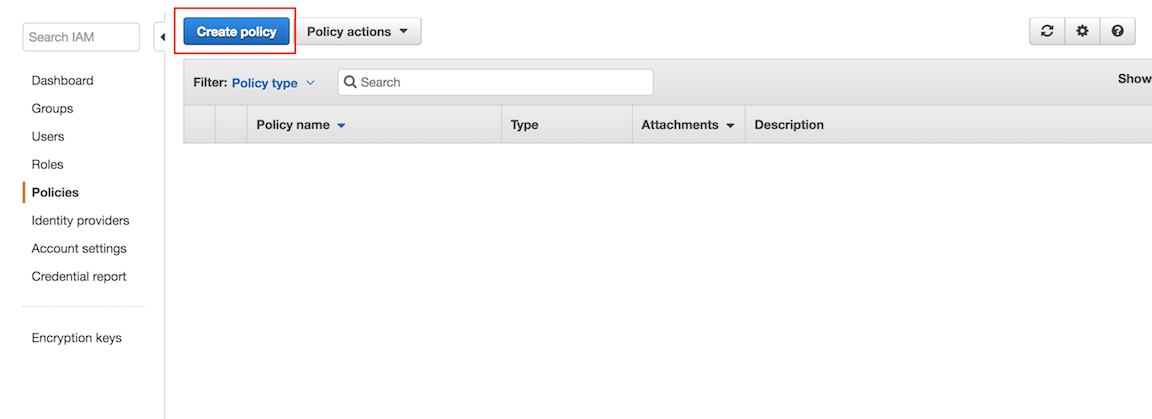
Select the “Policies” menu item and click the “Create Policy” button.
-
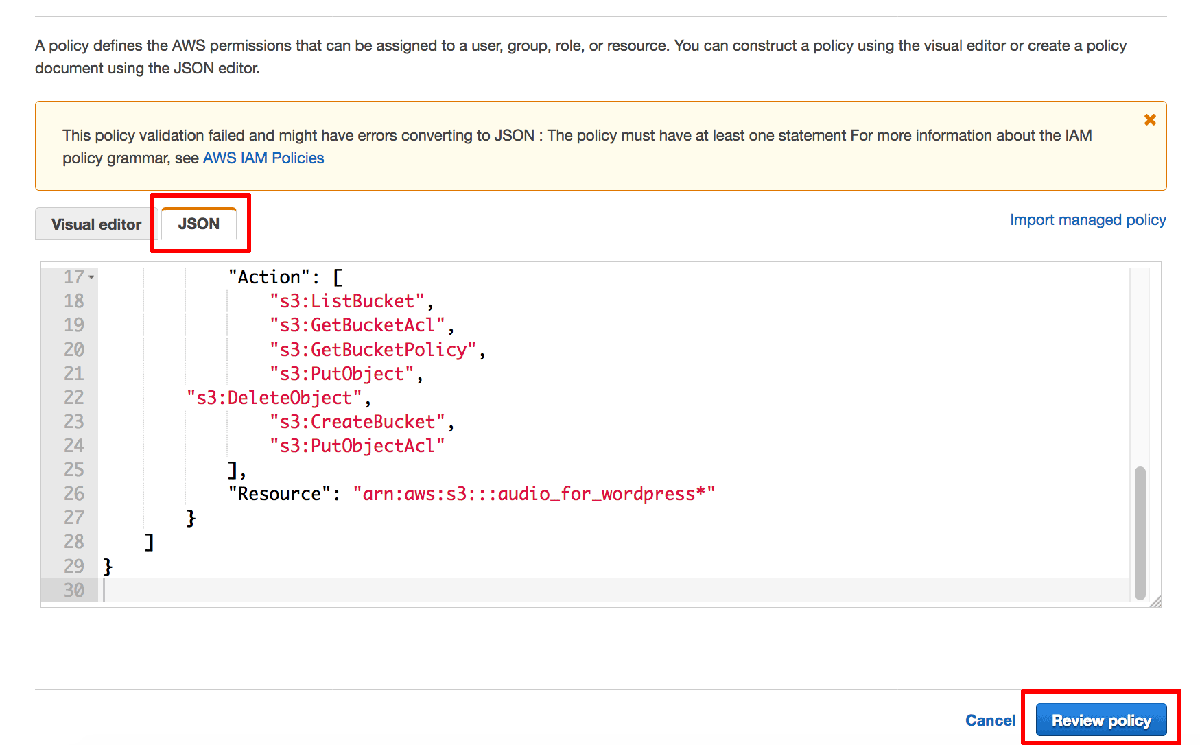
On the next page, select the JSON tab and enter the following content:
  {
      "Version": "2012-10-17",
      "Statement": [
          {
              "Sid": "Permissions1",
              "Effect": "Allow",
              "Action": [
                  "polly:SynthesizeSpeech",
                  "s3:HeadBucket",
                  "polly:DescribeVoices"
              ],
              "Resource": "*"
          },
          {
              "Sid": "Permissions2",
              "Effect": "Allow",
              "Action": [
                  "s3:ListBucket",
                  "s3:GetBucketAcl",
                  "s3:GetBucketPolicy",
                  "s3:PutObject",
      "s3:DeleteObject",
                  "s3:CreateBucket",
                  "s3:PutObjectAcl"
              ],
              "Resource": "arn:aws:s3:::audio_for_wordpress*"
          }
      ]
  }
Click “Review Policy” to proceed.
-
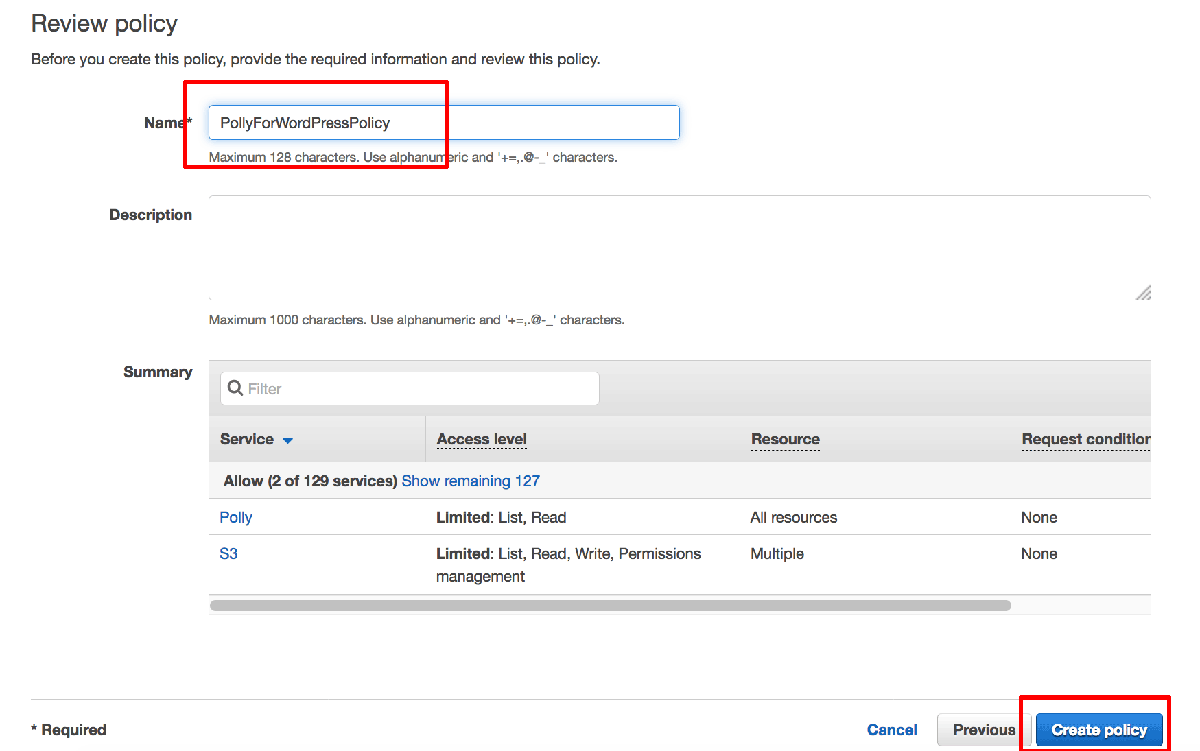
Set the policy name to “PollyForWordPressPolicy” and click “Create Policy” to save the new policy.
-
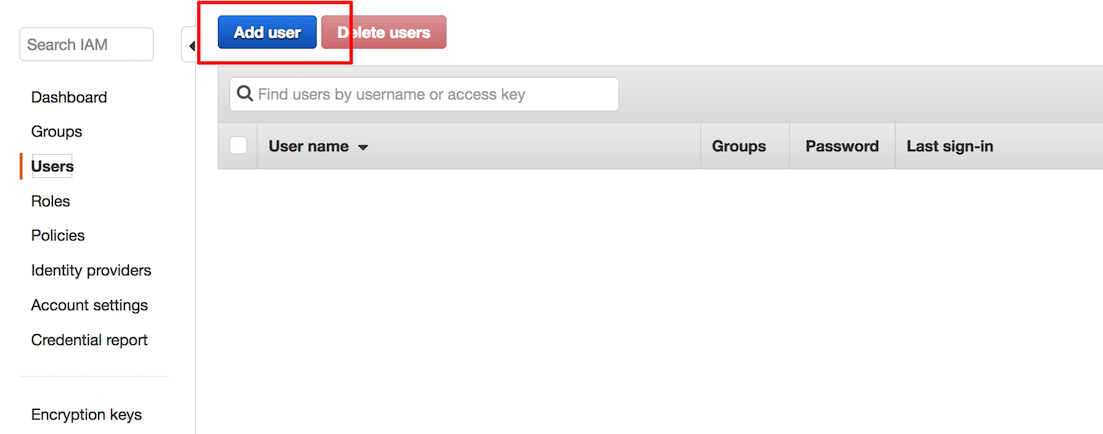
Select the “Users” section in the left navigation bar and click the “Add user” button.
-
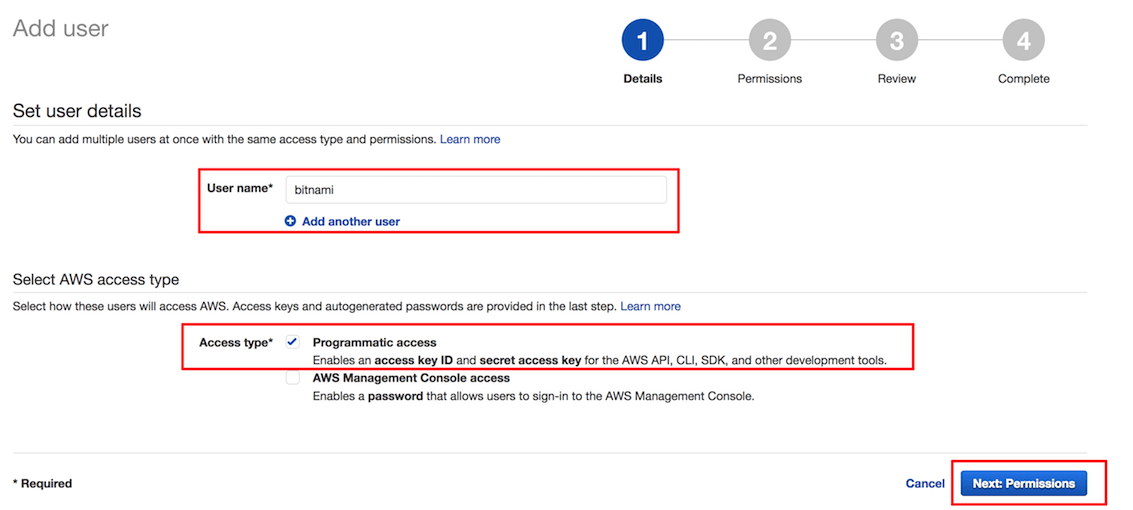
On the “Details” page, enter a user name for use with the plugin. Ensure that the “Programmatic access” checkbox in the “Select AWS access type” section is selected. Click the “Next: Permissions” button to proceed.
-
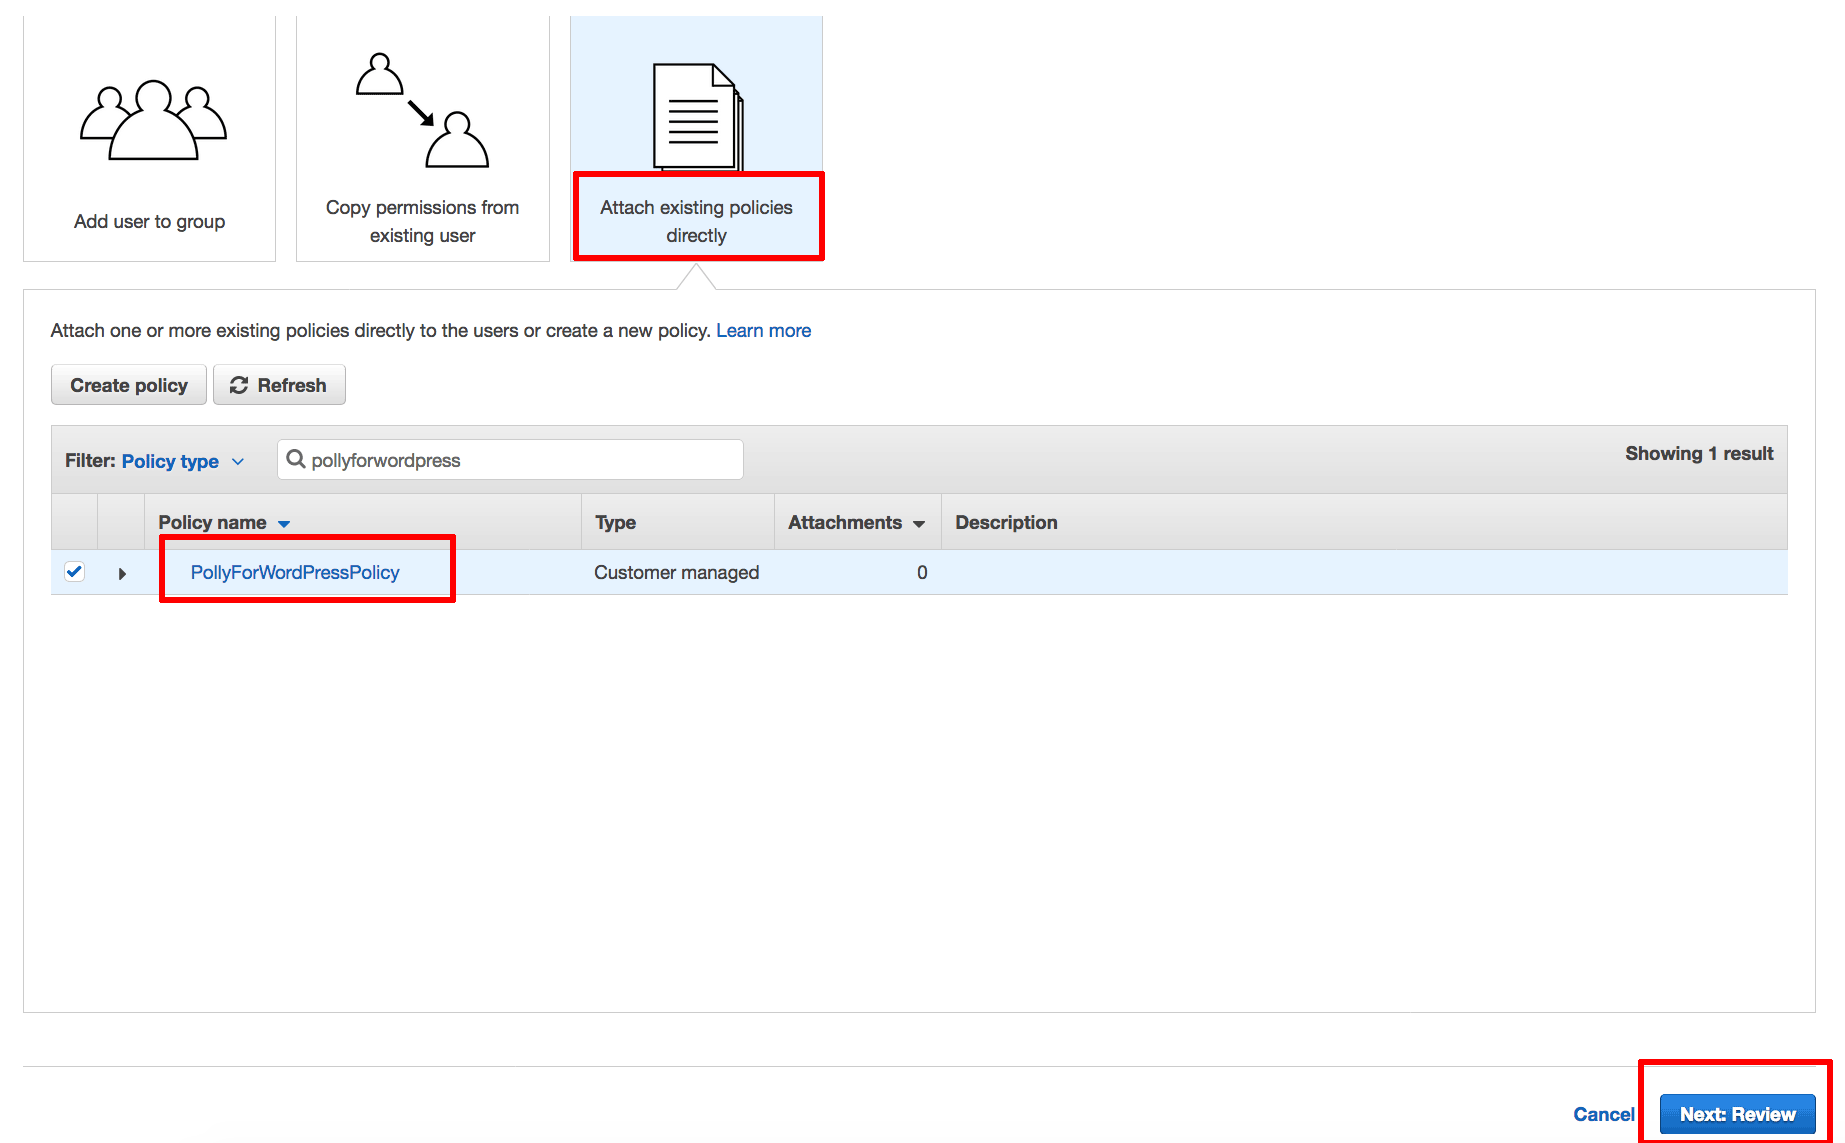
On the “Permissions” page, select the option to “Attach existing policies directly”. From the list of policies, find the new “PollyForWordPressPolicy” policy. Select it and click the “Next: Review” button.
-
On the “Review” page, review the selected options and click the “Create user” button.
-
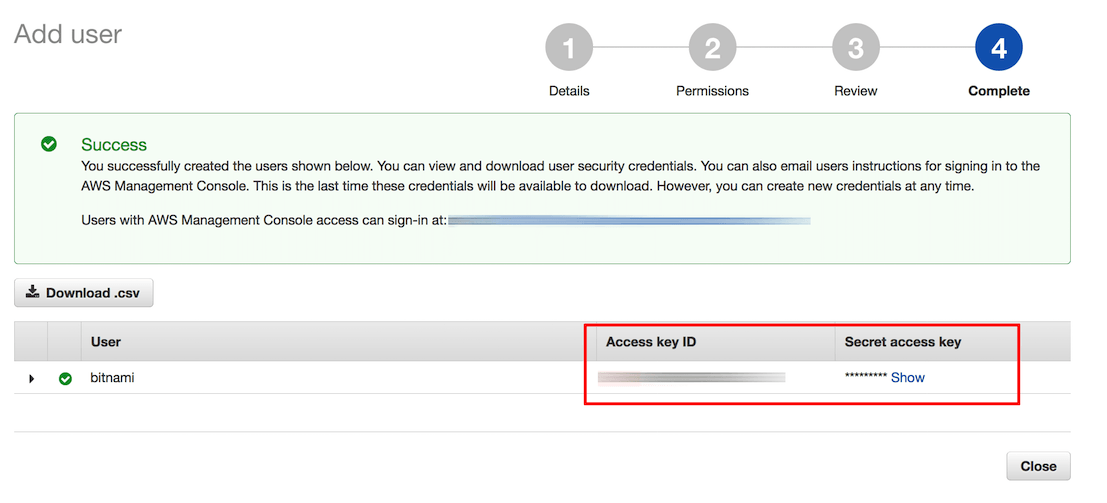
A new user and corresponding key pair, consisting of an “Access Key ID” and “Secret Access Key”, will be generated and displayed. The “Secret Access Key” value will not be displayed again, so it is important to accurately note down the “Access Key ID” and “Secret Access Key” values displayed on the screen at this point.
-
Log out of the AWS Console.
-
Log in to your WordPress dashboard.
-
Select the “Plugins -> Installed Plugins” menu item.
-
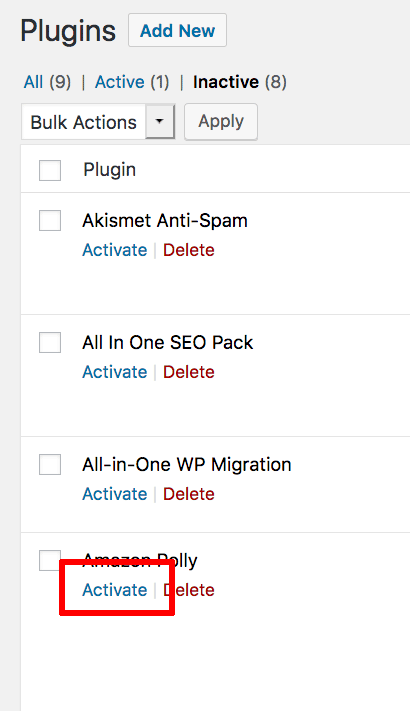
Find the “Amazon Polly” plugin and click the “Activate” link to activate it.
-
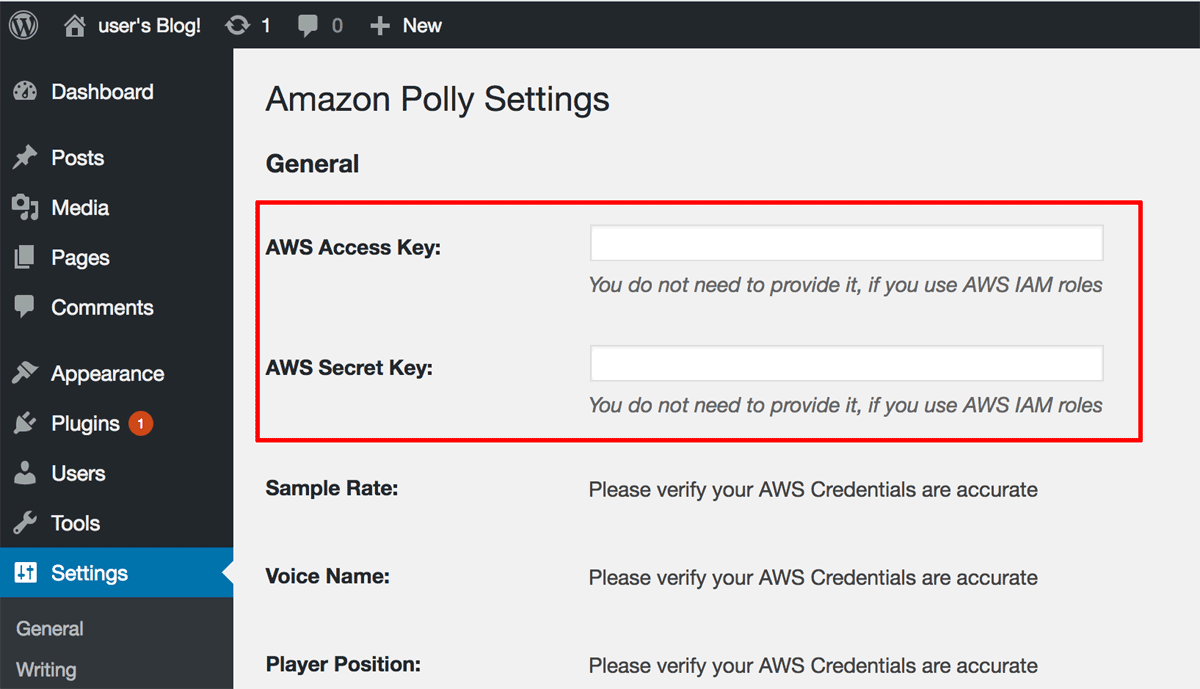
Select the “Settings -> Amazon Polly” menu item.
-
Enter the AWS Access Key and Secret Key obtained earlier and click “Save Changes”.
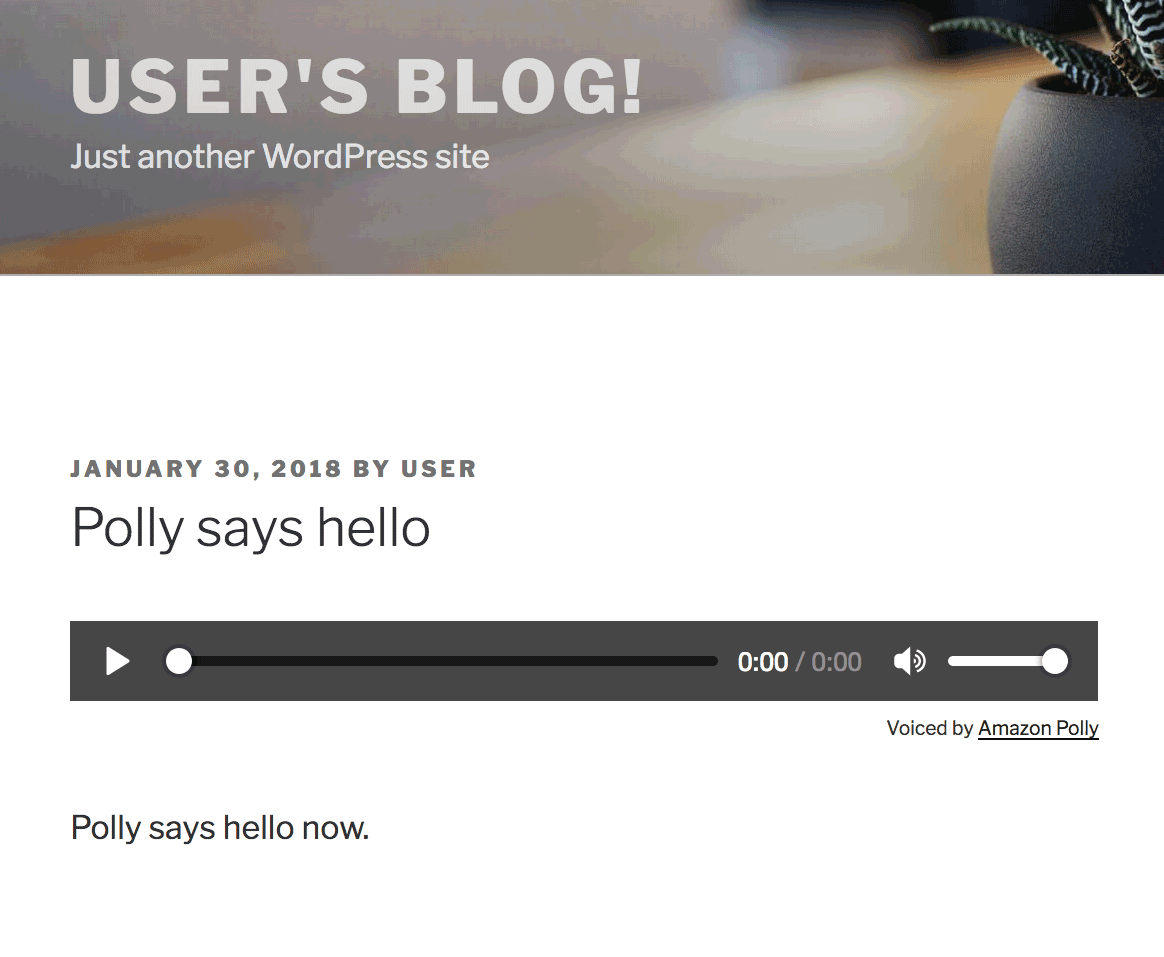
You can verify that the plugin is working by creating and publishing a new post. The published version of the post should automatically display an Amazon Polly audio bar with playback controls. Clicking the “Play” button should result in Amazon Polly reading out the content of the post.
Back up WordPress
Follow these steps to obtain a complete backup of your WordPress blog or website:
-
Log in to the WordPress Dashboard using the administrator account (if you’re not already logged in).
-
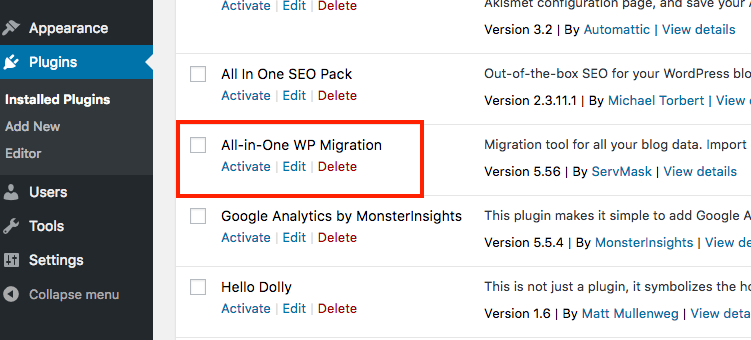
Select the “Plugins -> Installed Plugins” option.
-
Find the plugin named “All-in-One WP Migration” and select “Activate” to activate it.
-
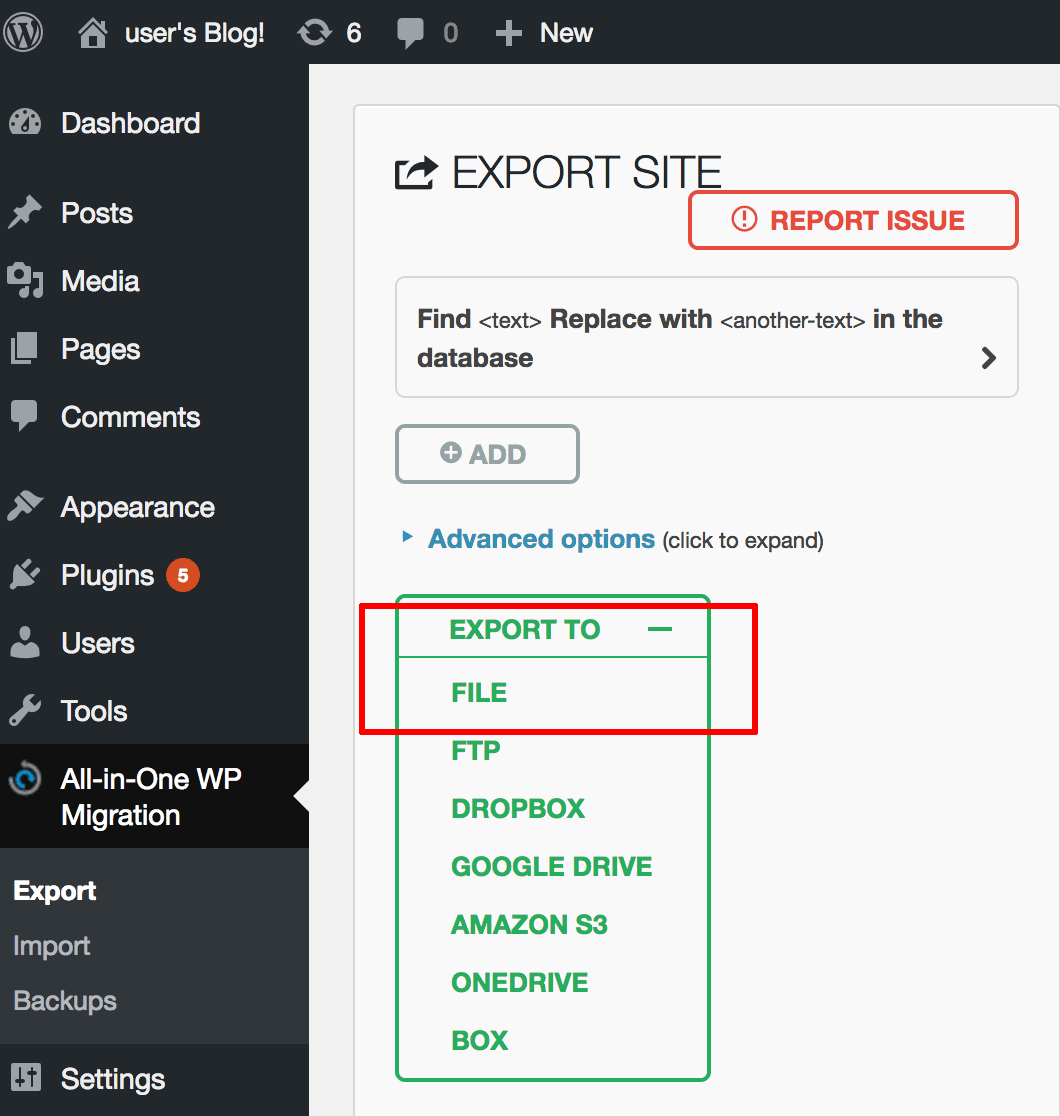
Select the “All-in-One WP Migration -> Export” option.
-
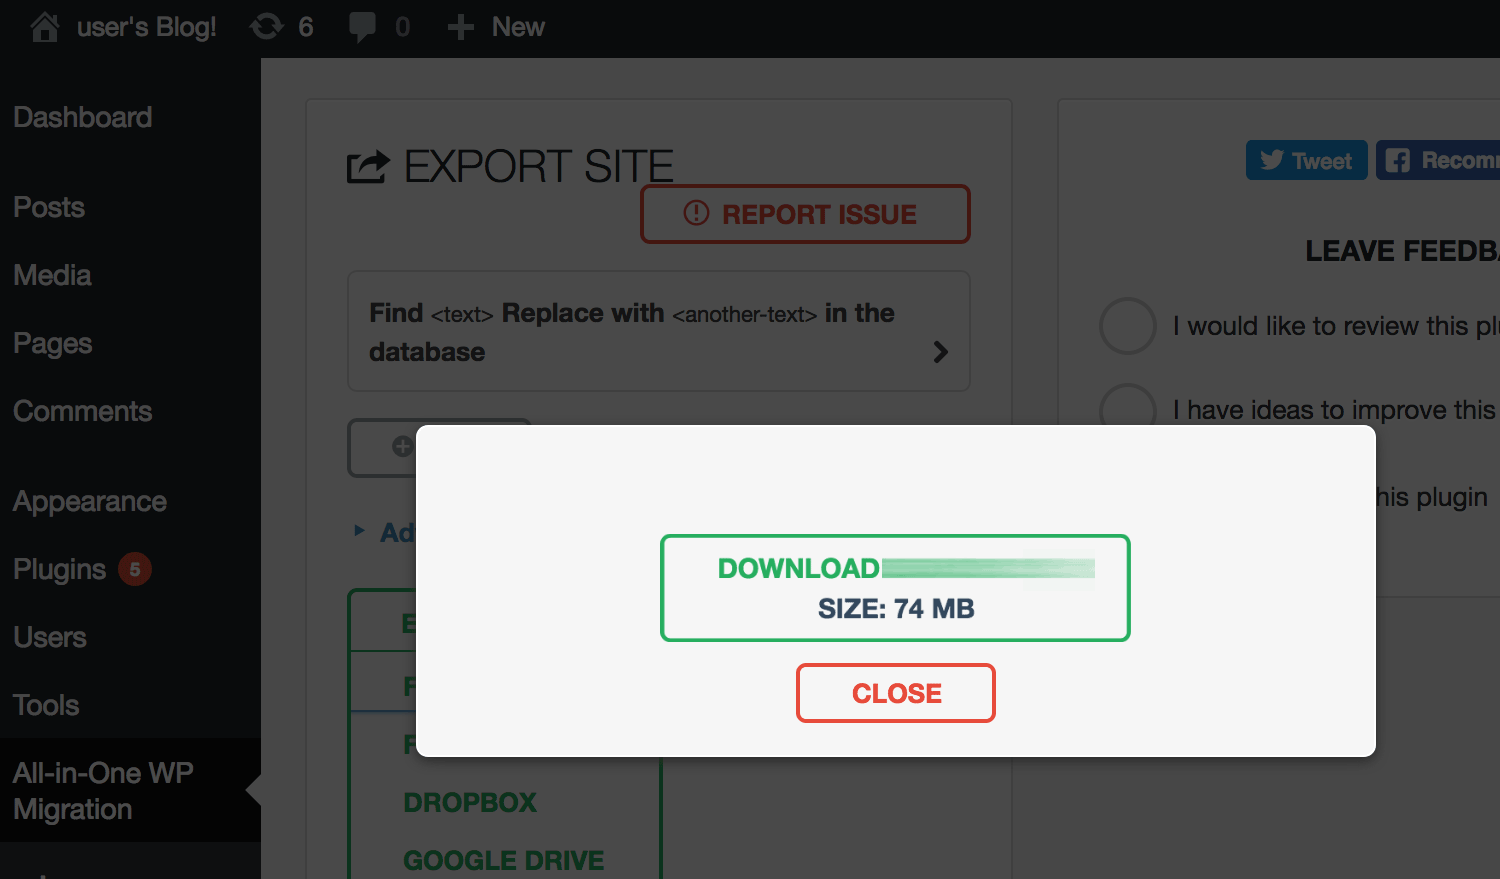
On the resulting page, click the “Export” button and select the “File” option to export the entire content of your WordPress blog, including plugins and themes.
You will now be prompted to download a ZIP file containing a complete backup of your WordPress blog or website. Save this file to a safe place on your local system.
Update WordPress to the latest available version
You can keep your WordPress installation up-to-date with the WordPress automatic update feature. To do this:
-
Log in to the WordPress Dashboard using the administrator account (if you’re not already logged in).
-
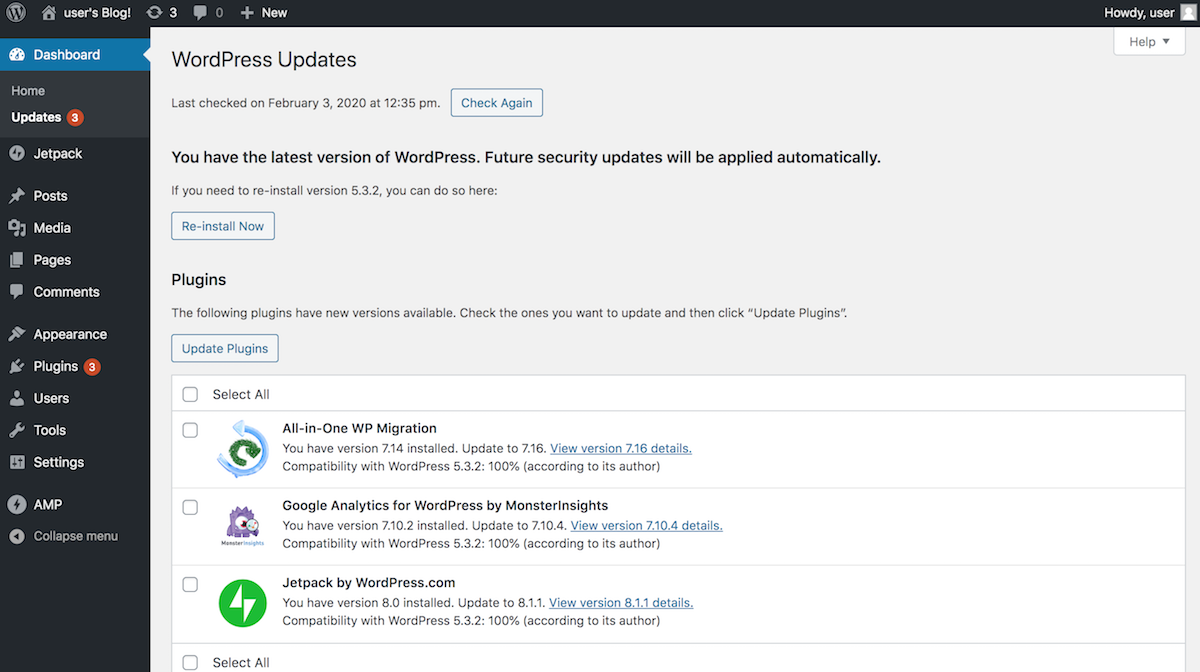
Select the “Dashboard -> Updates” menu item.
-
Review the resulting page to see if WordPress needs an update. If an update is available, you can install it by clicking the “Update Now” button.
Useful links
If you’ve worked your way through all the above steps, you should have a good understanding of how to perform common tasks with the Bitnami WordPress Stack. You can get to the next step by checking our Bitnami WordPress guide for intermediate users guide.
To learn more about the topics in this guide, visit the following links:
- Get started with Bitnami WordPress on AWS Marketplace (for intermediate users)
- Bitnami WordPress documentation
- WordPress manual
- Bitnami FAQ for AWS Cloud
- Migrate data from one WordPress instance to another
- Combine multiple independent WordPress websites/blogs into a single WordPress Multisite instance
- Separate a single WordPress Multisite instance into multiple independent WordPress websites/blogs

