Plan a Disaster Recovery (DR) using AWS regions
Introduction
Having a Disaster Recovery (DR) plan is a must to keep your personal or company site safe. Implementing High Availability (HA) is a good practice to ensure an alternative option in case of any failure of services, but it is not enough. HA works by placing redundant hosts running in different availability zones but in the same region.
In the event that your access to a particular region fails, a severe degradation in performance is experienced, or any other business critical issue is encountered, a DR plan allows you to recover your data from a different region regardless of the distance between the instances that are hosting your services and data.
Having a periodic DR plan based on daily or weekly backups in different regions is a best practice that you should implement now to ensure that both your IT infrastructure and sensitive data are safe under any circumstance.
This guide walks you through the process of creating an AMI from a running instance, deploying it in a different region, and associating its IP address to the new instance. It uses the Bitnami WordPress image and Asia Pacific region as examples, but these concepts are generally applicable to most applications and any publicly available region.
Assumptions and prerequisites
- You have a Bitnami application running on AWS, deployed using the AWS Marketplace, or the AWS Console.
- You have the necessary credentials to log in to the Bitnami application instance.
- You own a domain name.
Step 1: Create an AMI from your running instance and copy it into a different region
The first step is to create an image using your running instance and copy it to a different region. Once it is available in the region of your choice, you can launch it in an instance as demonstrated in step 2. In our WordPress example, we use a unique theme to demonstrate that the copied AMI preserves the same configuration as the original.
IMPORTANT: Remember to perform this step every time you apply a major change to your site. That way, the duplicate site, will be kept up to speed and relevant in case of a disaster.
To create an AMI and copy it into a different region:
-
Log in to the AWS Management Console.
-
If required, use the region selector in the top right corner to switch to the region where your instance was launched.
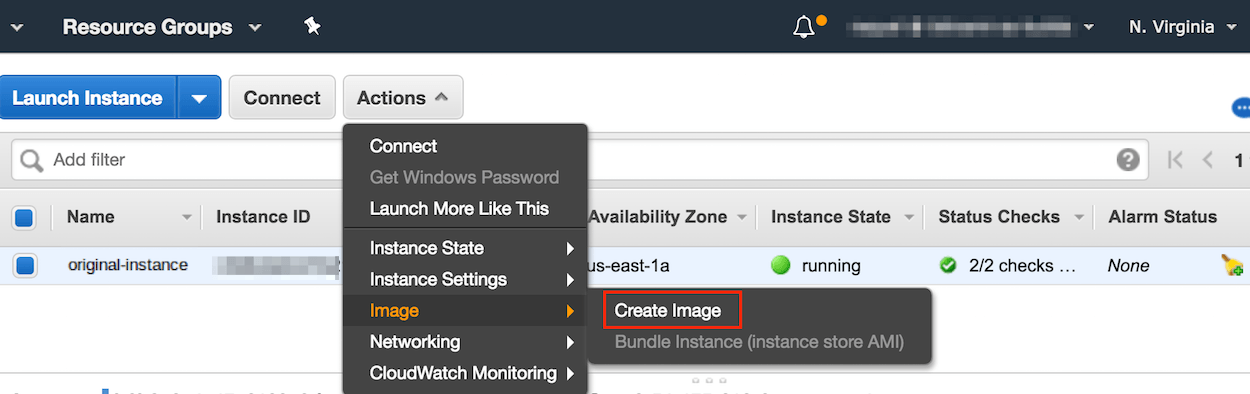
-
Select your instance and then select the “Create Image” option in the “Actions” menu.
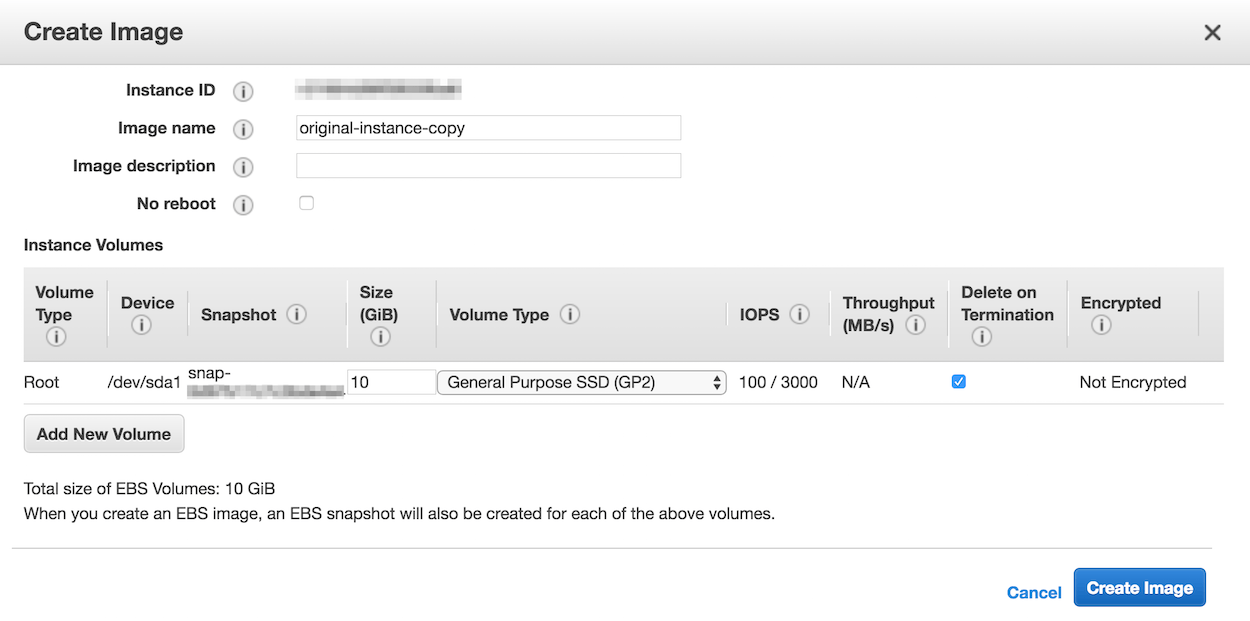
-
Specify the name for the new image and then click the “Create Image” button.
-
From the “AMIs” menu in the navigation panel, select the new image and select the “Copy AMI” option in the “Actions” menu.
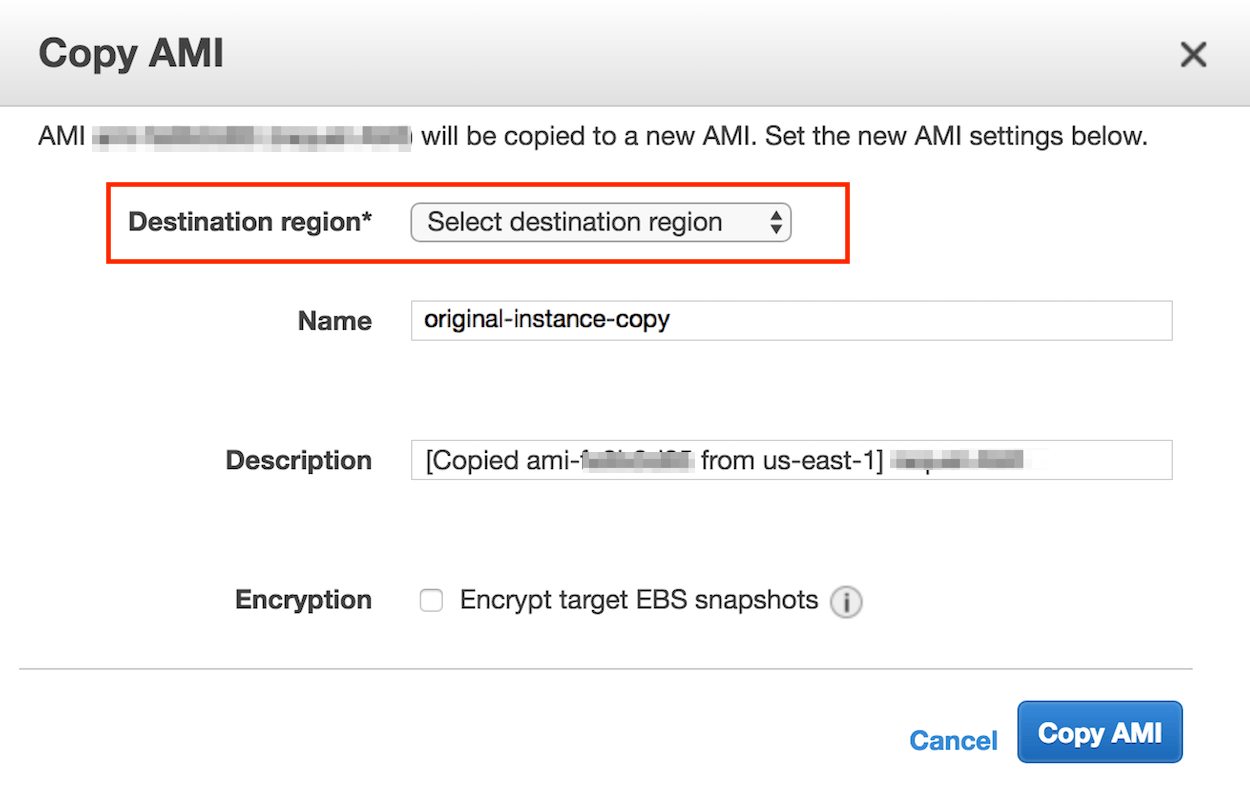
-
Specify the new region in the resulting dialog window and click the “Copy AMI” button.
You will now be able to launch a new instance with the image in the new region. Follow the steps below:
-
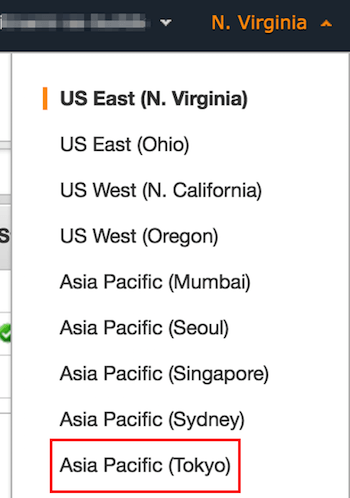
In the top menu of the EC2 dashboard, select the region where you have copied the AMI. You will see the list of the available AMIs for that region.
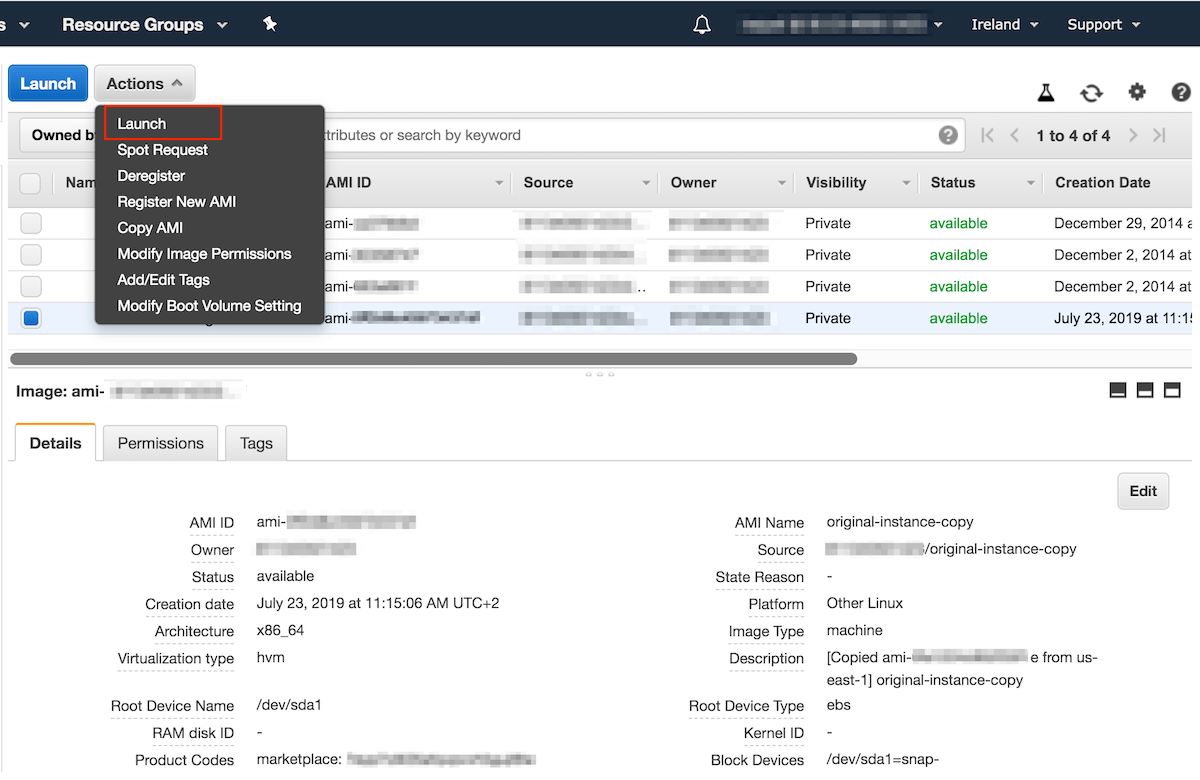
-
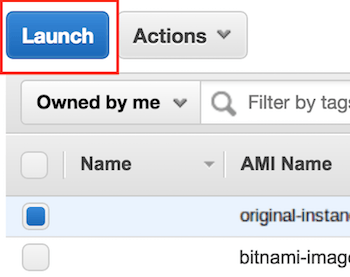
Select the image you have copied from the list and click “Actions -> Launch”:
-
Choose the instance type and click “Review and Launch” for finishing the process.
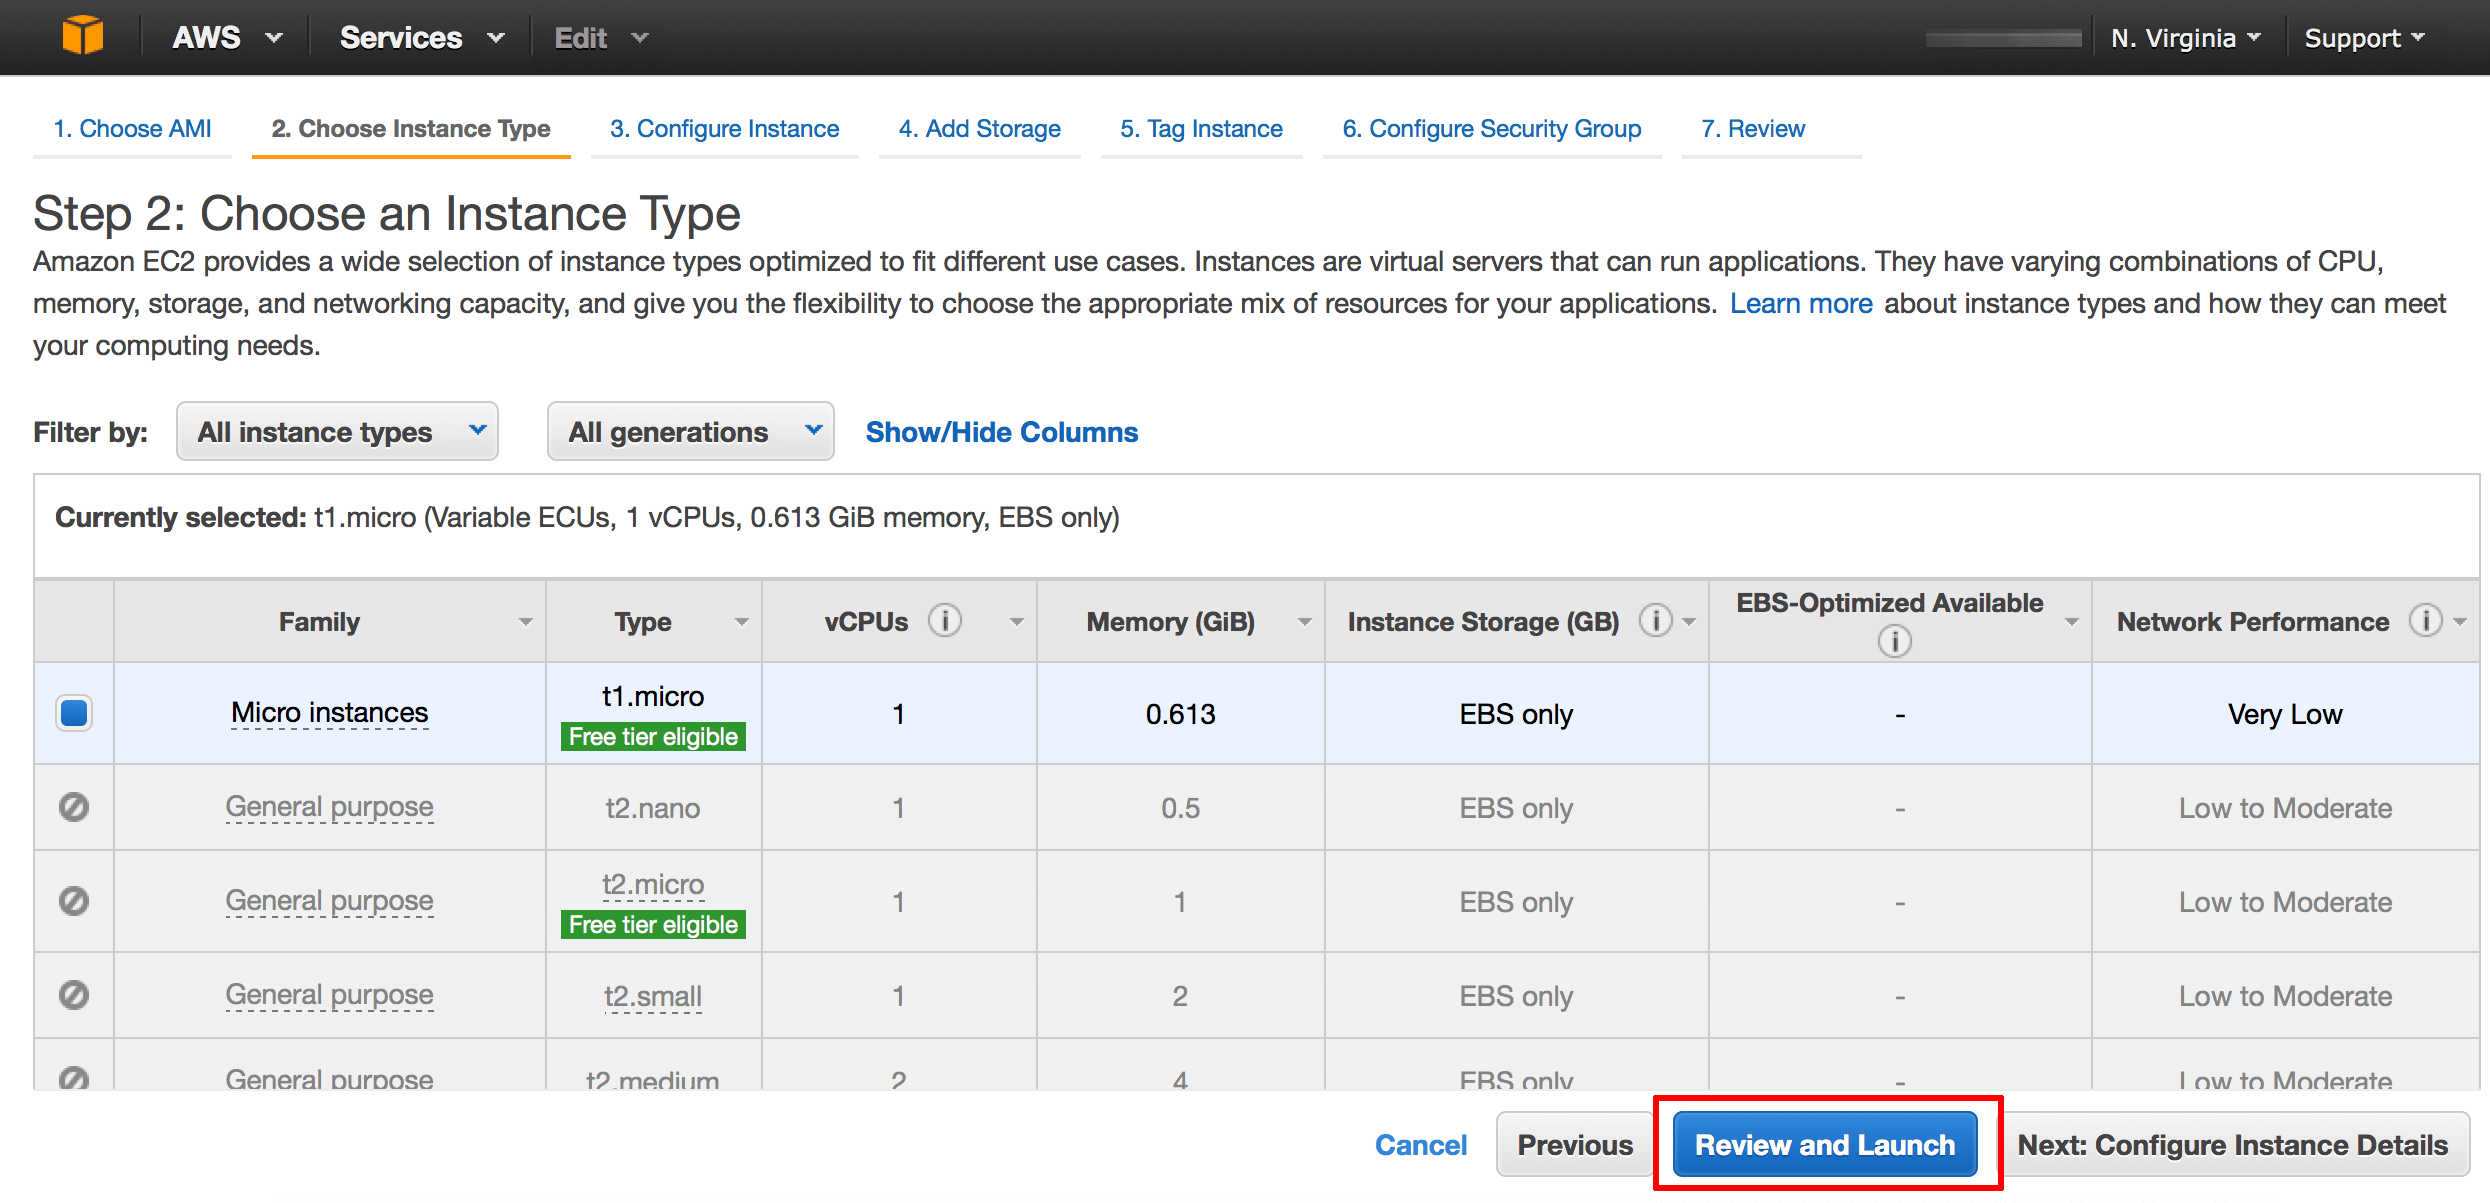
Step 2: Launch an instance in a different region using the copied AMI
Once you have created the AMI and copied it into a different region from the original instance, you can launch a new instance using it. To do so:
-
In the top menu of the AWS Console, select the region where you have copied the image. In this example, we are using Asia Pacific (Tokyo).
-
Navigate to “Images -> AMIs” and search for the recently copied AMI. Select it and click either “Launch” or “Actions -> Launch”.
-
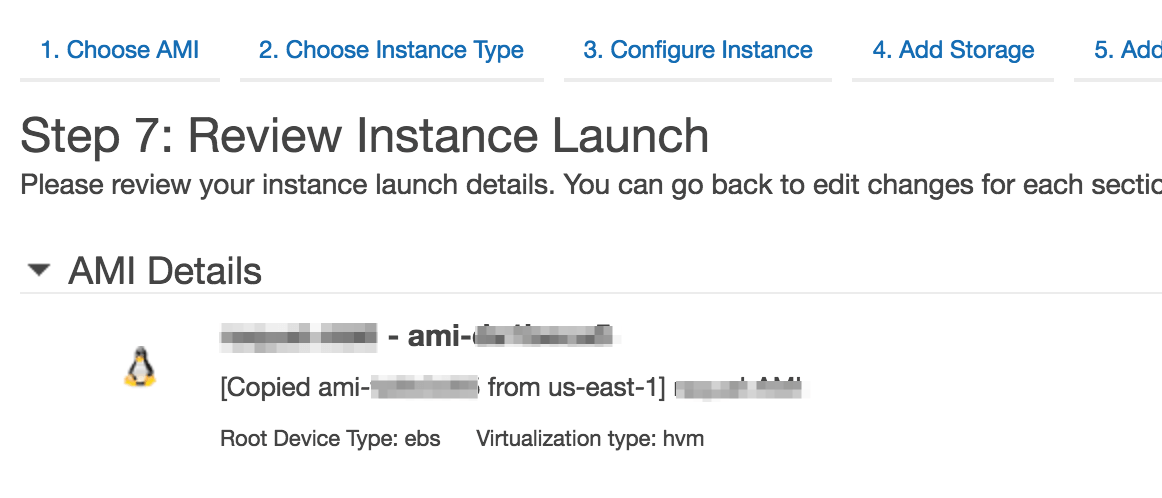
Select the Instance Type and click “Review and Launch”. In the resulting screen, review the instance launch information. Check that the “AMI Details” section AMI shows the image you have copied from your instance. Click “Launch” to proceed.
NOTE: In case you want to change the instance network configuration, click “Next: Configure Instance Details” to create a new VPC and enter the new values in the “Network” and “Subnet” fields.
-
Navigate to the “Instances -> Instances” section and select the new instance to see its description. Note the Public DNS or public IP address to later access the application:

-
To check that the new instance contains and preserves all the information and configuration of the original instance, enter the Public DNS or public IP address in a web browser. You should see a WordPress application with the same look as the original one:
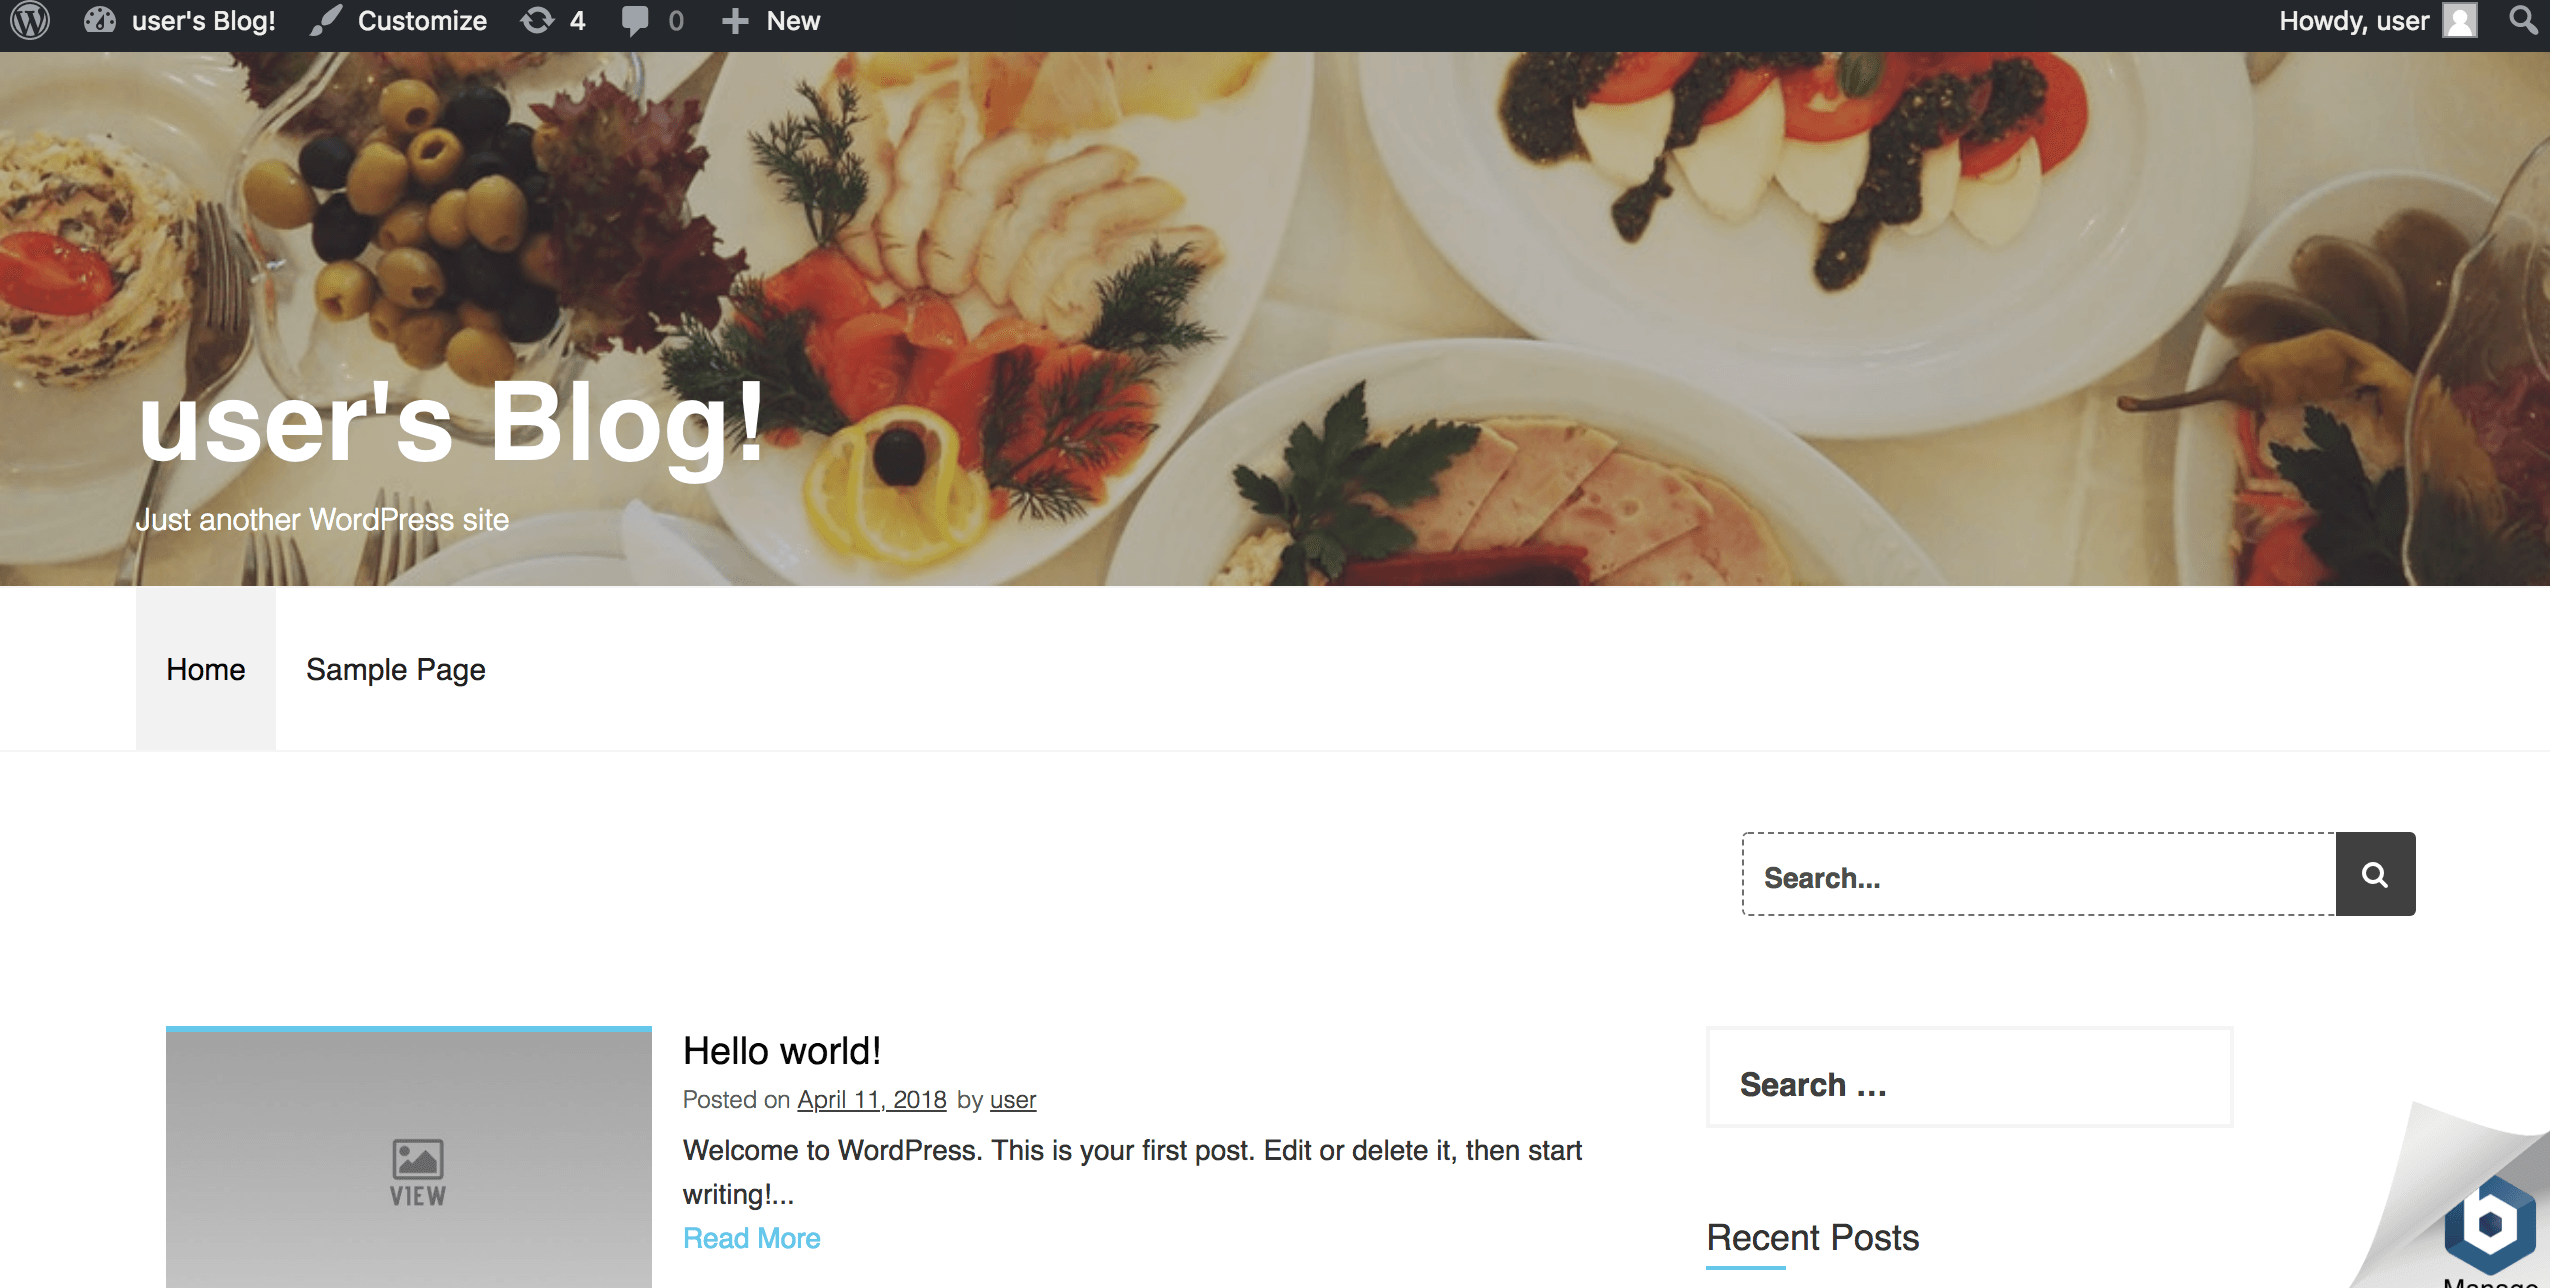
IMPORTANT: At this point, you must log in using the credentials for the original imported WordPress instance. Access the administration panel by browsing to http://SERVER-IP/wp-admin/.
Step 3: Create an IP address in the new region and associate it to the new instance
Since AWS doesn’t allow sharing of resources accross regions, the last step is to create a new IP address in the new region and associate it to the new instance. That way, you will be able to configure a custom domain once you have configured a static IP address (also known as an “elastic IP”) for the new instance. Follow these instructions:
-
Select the instance in the dashboard.
-
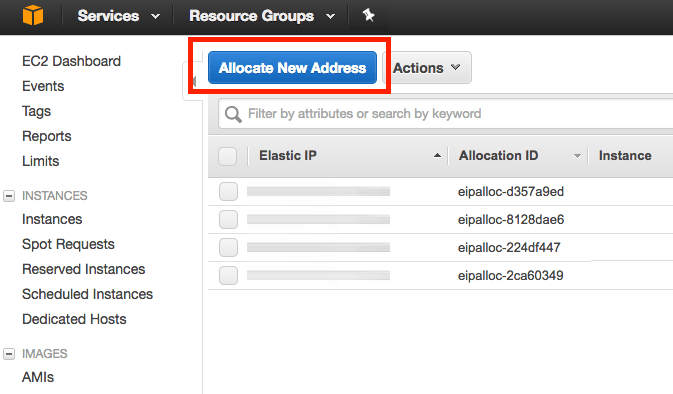
In the left navigation bar, select the “Network & Security -> Elastic IPs” menu item.
-
Click the “Allocate New Address” button.
-
Click “Allocate” in the next screen.
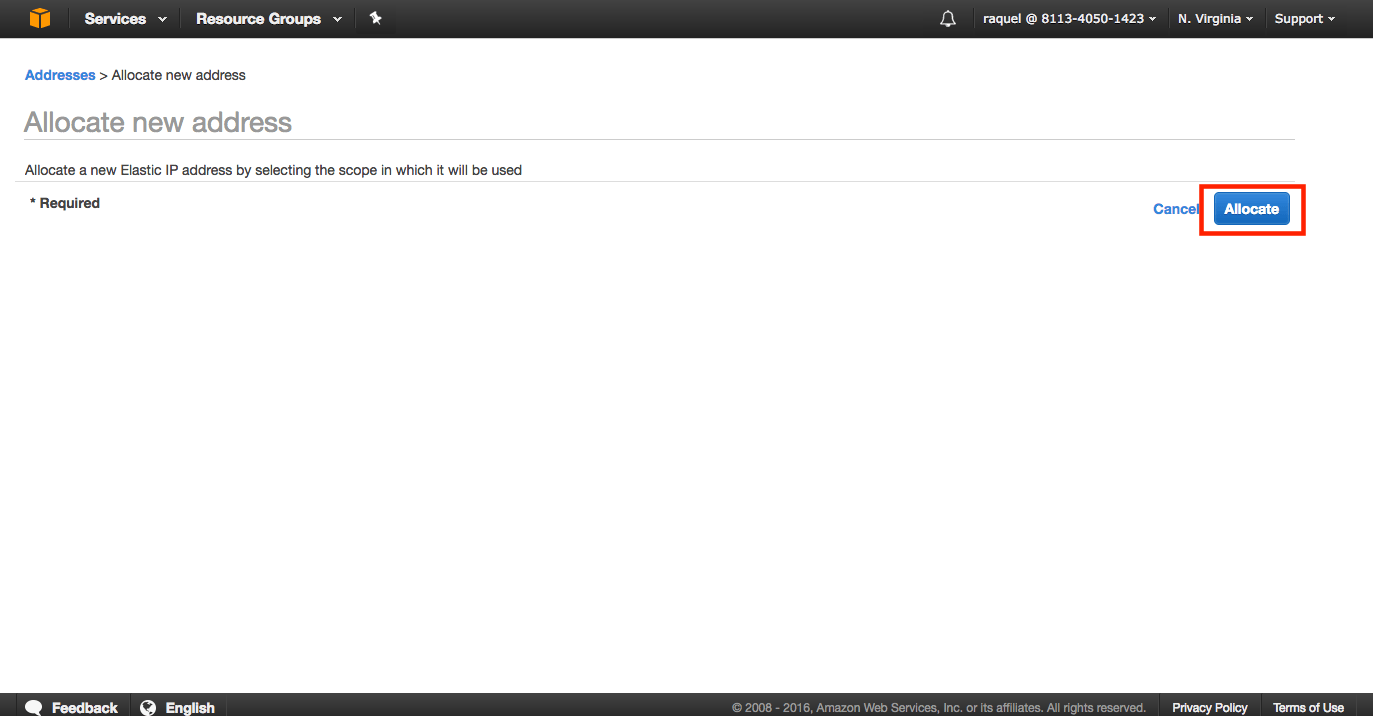
A new static IP address will be generated and will appear in the list of available IP addresses.

Next:
-
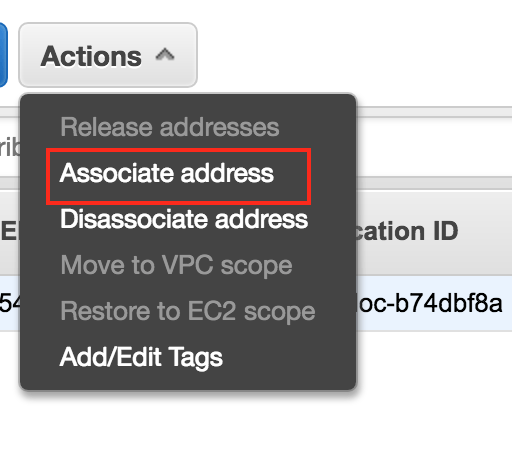
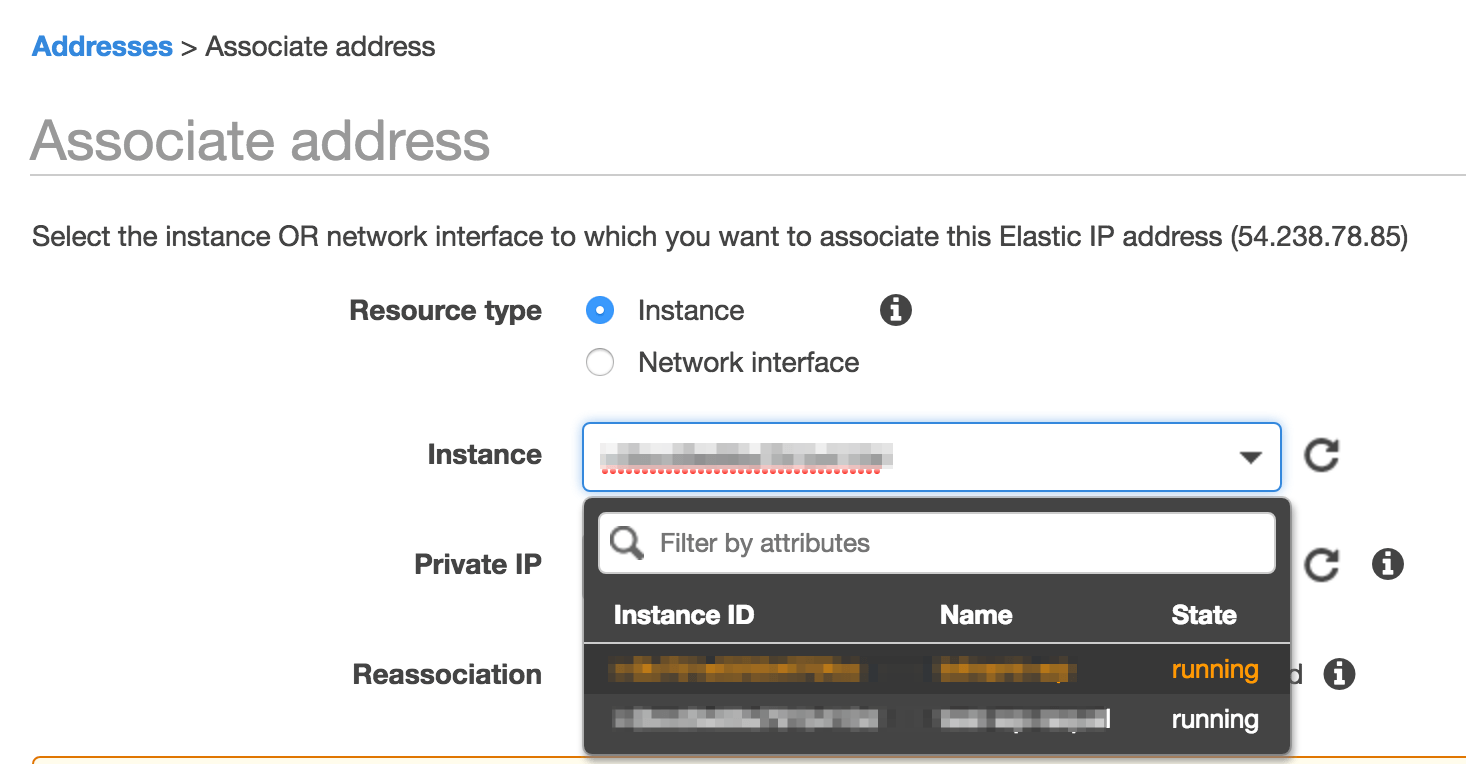
From the “Actions” drop-down menu, select the “Associate Address” menu item.
-
In the resulting dialog box, enter the instance ID of your server and click the “Associate” button.
The elastic IP address will now be assigned to your server and will persist across shutdown/reboot operations. Once you have configured the static IP address for your new instance, you can configure the domain in your DNS provider. Follow the instructions given in the “Configure the domain in your DNS provider” section in the FAQ.
NOTE: Remember that once you make the necessary changes, it can take up to 48 hours for the change to propagate across other DNS servers. You can verify the new DNS record by using the Global DNS Propagation Checker and entering your domain name into the search field.
Useful links
To learn more about the topics discussed in this guide, consider visiting the following links: