Add Elastic Block Storage (EBS) Volumes for Bitnami Applications on AWS
Introduction
If your Bitnami application host on Amazon Web Services (AWS) is running out of storage space, there’s an easy fix: increase available storage by adding a new Amazon Elastic Block Store (EBS) volume to it. EBS volumes are persistent block storage volumes that are available in either SSD or HDD format and come with a 99.99% availability guarantee for maximum data security and reliability.
This guide walks you through the process of adding more storage to a Bitnami application instance running on AWS by creating and attaching an EBS volume to it.
Assumptions and prerequisites
This guide assumes that:
- You have a Bitnami application running on AWS, deployed using the AWS Marketplace, the AWS Console or Amazon Lightsail.
- You have the necessary credentials to log in to the Bitnami application instance.
The procedure to add an EBS volume to your Bitnami application host will differ depending on whether your Bitnami application was deployed through Amazon Lightsail or not. Refer to the appropriate section below.
Bitnami applications deployed through Amazon Lightsail
Step 1: Identify your Bitnami application instance in the Amazon Lightsail dashboard
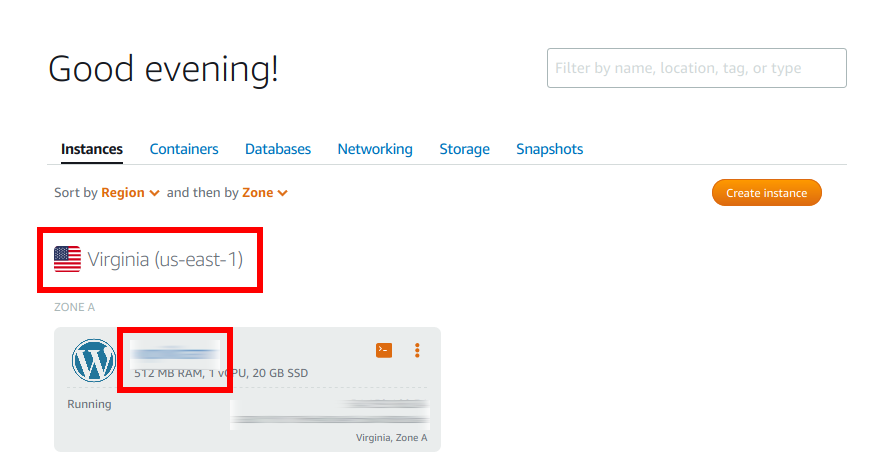
The first step is to identify your Bitnami application instance and note down its name and availability zone. To do this:
-
Log in to the Amazon Lightsail dashboard.
-
Select the “Instances” tab.
-
Note the instance name and availability zone. You will need these details in subsequent steps.
Step 2: Create and attach a storage volume
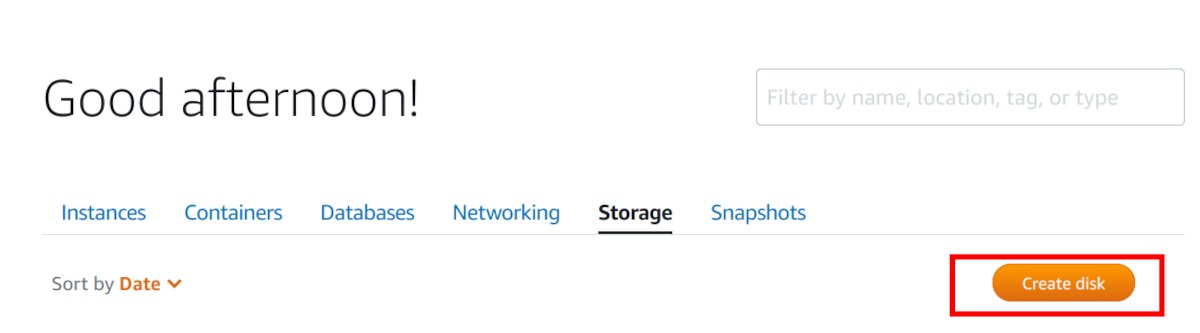
The next step is to create a new storage volume and attach it to the Bitnami application instance. Here’s how:
-
Log in to the Amazon Lightsail dashboard (if you’re not already logged in).
-
Select the “Storage” tab.
-
Click the “Create disk” button.
-
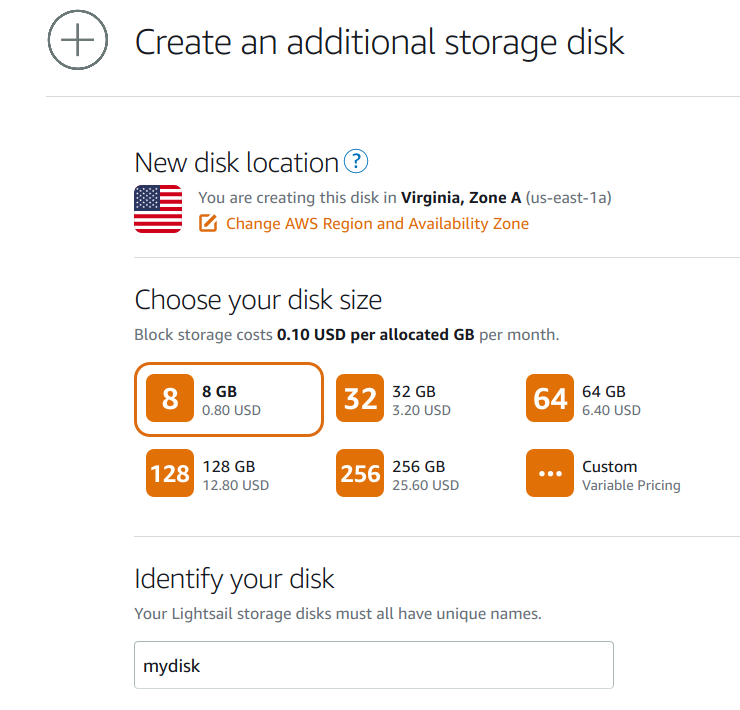
On the “Create an additional storage disk” page, select the region and size for the new disk and give it a unique name. It is important to select the same region as your instance identified in Step 1. Click the “Create disk” button to proceed.
-
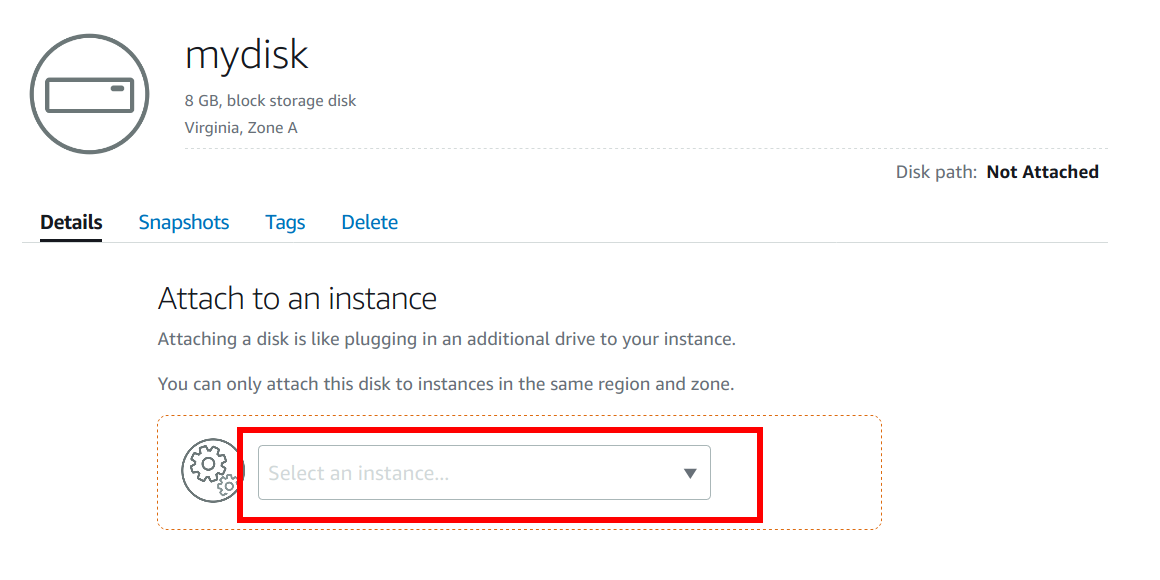
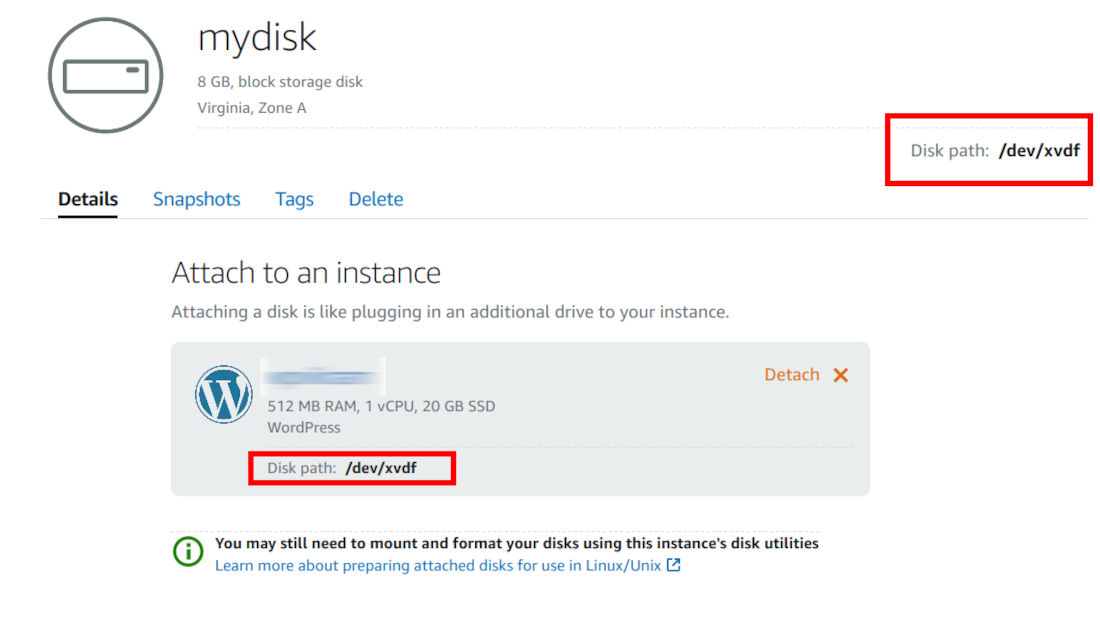
On the “Attach to an instance” page, select your Bitnami application instance from the list of available instances.
-
Click the “Attach” button to attach the new storage volume to the instance. Note the disk path displayed at the end of the process.
Step 3: Format and mount the storage volume
The next step is to let the Bitnami application instance know about the new volume. This involves formatting the instance with a file system and mounting it so that it can be used. Perform the following steps:
-
At the console, run the lsblk command and confirm that the storage volume has been mapped by checking the device name from Step 2 against the command output.
$ sudo lsblk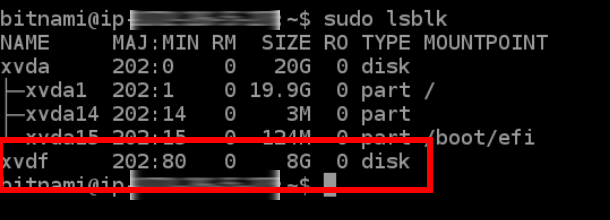
-
Format the new device with mkfs, remembering to use the device name from Step 2:
$ sudo mkfs.ext4 /dev/xvdX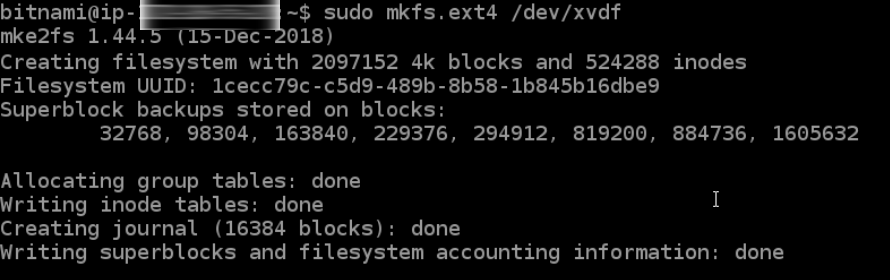
-
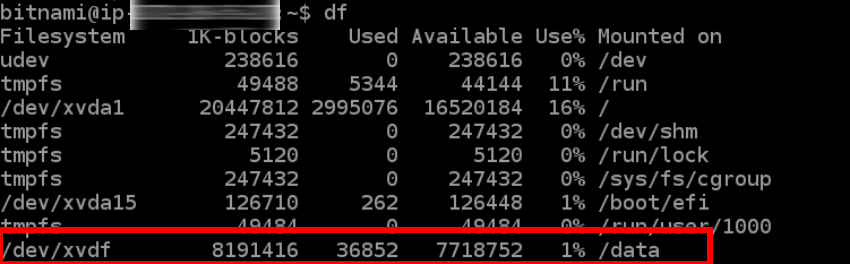
Create a directory and mount the volume with mount. As before, use the correct device name from Step 2 in the commands below.
  $ sudo mkdir /data
  $ sudo mount -t ext4 /dev/xvdX /data
Once mounted, check that the storage volume is available with df.
-
Edit the /etc/fstab file and add an entry to it for the new volume, as shown below. Modify the device name to reflect the device name from Step 2.
/dev/xvdX /data ext4 defaults,nofailThis ensures that the volume will be automatically remounted if you reboot the instance.
Your new storage volume is now mounted and available for use. To add more volumes, repeat Steps 2 and 3.
Bitnami applications deployed through the AWS Marketplace or the AWS Console
Step 1: Identify your Bitnami application instance in the AWS EC2 Console
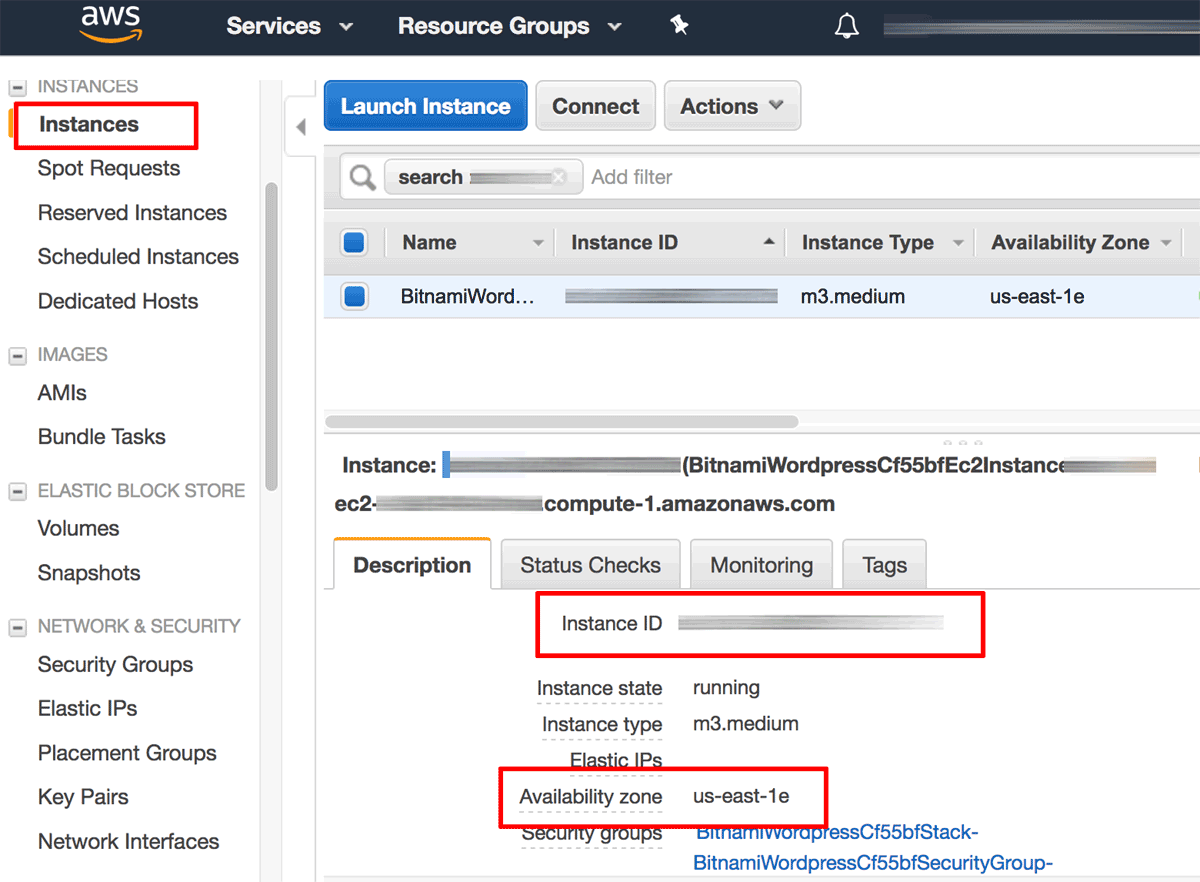
The first step is to identify your Bitnami application instance and note down the instance ID and availability zone. To do this:
-
Log in to the AWS EC2 console.
-
From the “Services” menu, select the “EC2” service.
-
From the EC2 Dashboard, select the “Instances -> Instances” menu item.
-
Search for and select your Bitnami application instance from the list of available instances.
-
From the instance details pane, note the instance ID and availability zone. You will need these details in subsequent steps.
Step 2: Create and attach an EBS volume
The next step is to create a new EBS volume and attach it to the Bitnami application instance. Here’s how:
-
Log in to the AWS EC2 console (if you’re not already logged in).
-
From the “Services” menu, select the “EC2” service.
-
From the EC2 Dashboard, select the “Elastic Block Store -> Volumes” menu item.
-
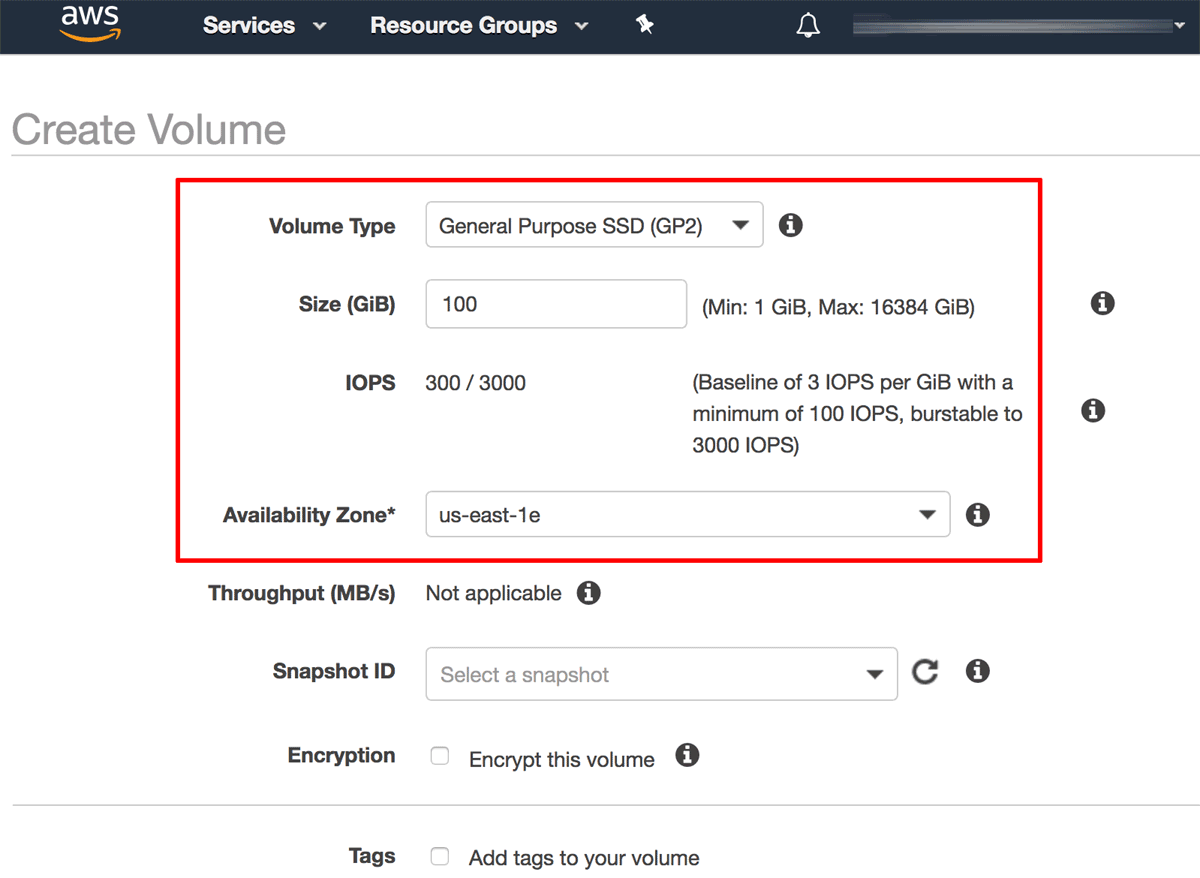
Click the “Create Volume” button.
-
On the “Create Volume” page:
-
Select the volume type (SSD, HDD or magnetic) and specify the storage size.
-
Select the same availability zone as the instance.
-
Specify whether the volume should be encrypted.
-
Click the “Create Volume” button to proceed.
-
-
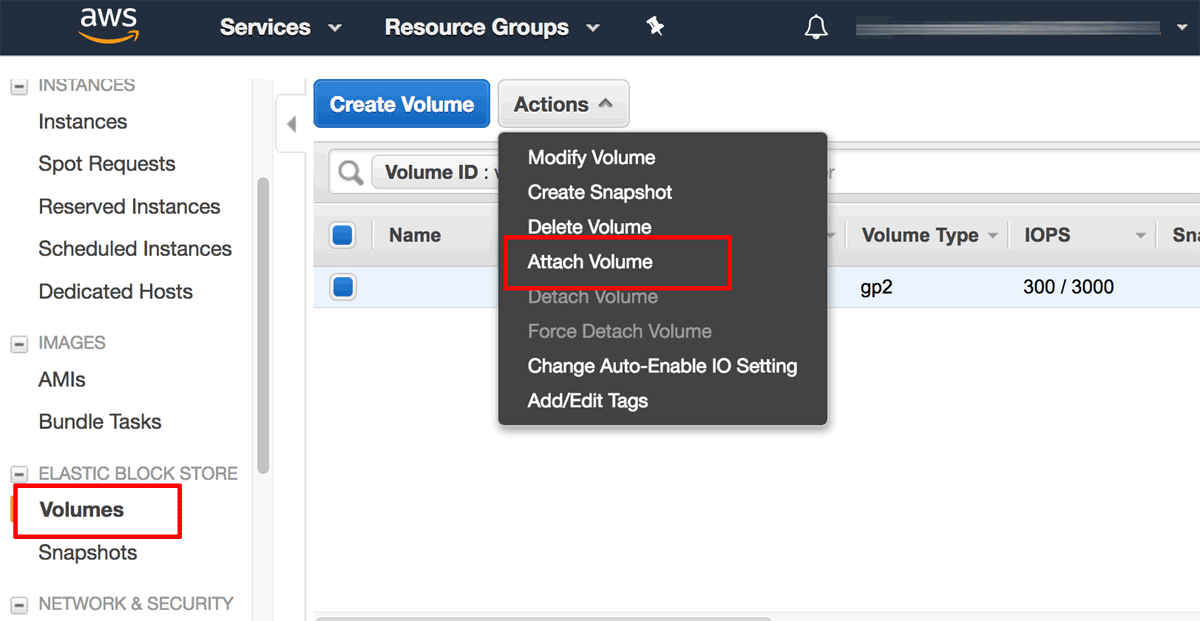
Once the volume has been created, note the volume ID. Navigate back to the “Elastic Block Store -> Volumes” page.
-
Search for and select the newly-created volume from the list of available volumes.
-
From the “Actions” menu, select the “Attach Volume” menu item.
-
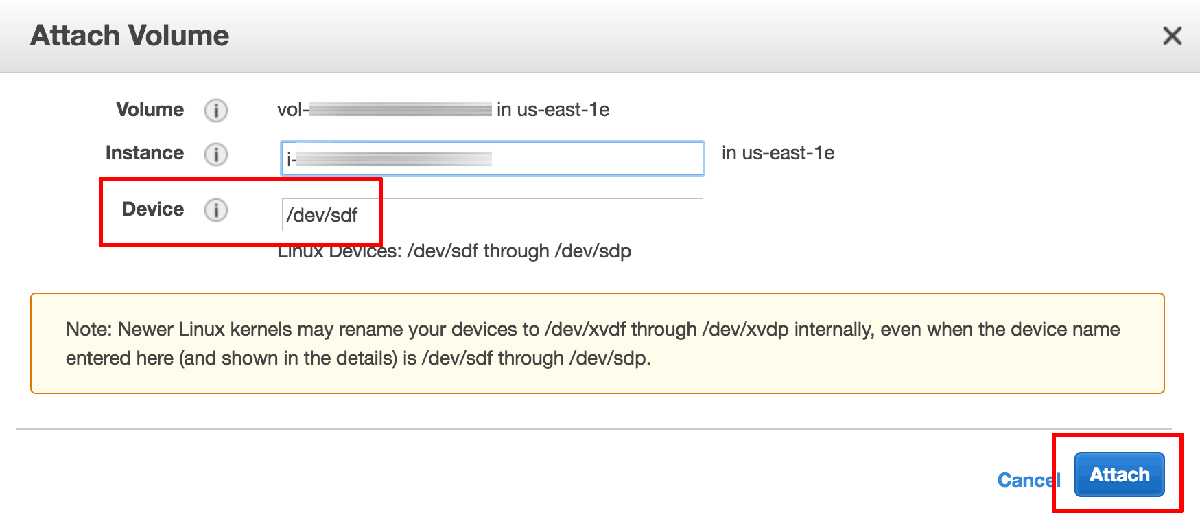
In the resulting dialog, enter the instance ID (obtained in Step 1) for your Bitnami application instance. Note the automatically-generated device name and click the “Attach” button to connect the EBS volume with the instance.
Step 3: Format and mount the EBS volume
You’re almost done! The final step is to let the Bitnami application instance know about the new volume. This involves formatting the instance with a file system and mounting it so that it can be used. Perform the following steps:
-
At the console, run the lsblk command and confirm that the EBS volume has been mapped by checking the device name from Step 2 against the command output.
$ sudo lsblkNOTE: Devices originally created as /dev/sdX in the AWS EC2 console may be mapped with the name /dev/xvdX in the lsblk command output.
-
Format the new device with mkfs, remembering to use the name shown in the lsblk output:
$ sudo mkfs.ext4 /dev/xvdX -
Create a directory and mount the volume with mount. As before, use the correct device name from Step 2 in the commands below.
  $ sudo mkdir /data
  $ sudo mount -t ext4 /dev/xvdX /data
Once mounted, check that the storage volume is available with df.
-
Edit the /etc/fstab file and add an entry to it for the new volume, as shown below. Modify the device name to reflect the device name from Step 2.
/dev/xvdX /data ext4 defaults,nofailThis ensures that the volume will be automatically remounted if you reboot the instance.
Your new storage volume is now mounted and available for use. To add more volumes, repeat Steps 2 and 3.
Useful links
To learn more about the topics discussed in this guide, consider visiting the following links: