Open or close server ports
Open server ports for remote access
IMPORTANT: Making this application’s network ports public is a significant security risk. You are strongly advised to only allow access to those ports from trusted networks. If, for development purposes, you need to access from outside of a trusted network, please do not allow access to those ports via a public IP address. Instead, use a secure channel such as a VPN or an SSH tunnel. Follow these instructions to remotely connect safely and reliably.
By default, AWS cloud servers have some or all of their ports closed to secure them against external attacks. In some cases, ports needed for specific applications to operate properly are also left open by default.
If you need to access your server remotely using a different port, you must first open the necessary port(s) using the AWS Console. If the server was launched using Amazon Lightsail, ports should be opened through the Amazon Lightsail dashboard instead.
Using the AWS Console
To open other ports for remote access, follow these steps:
-
If required, use the region selector in the top right corner to switch to the region where your instance was launched.
-
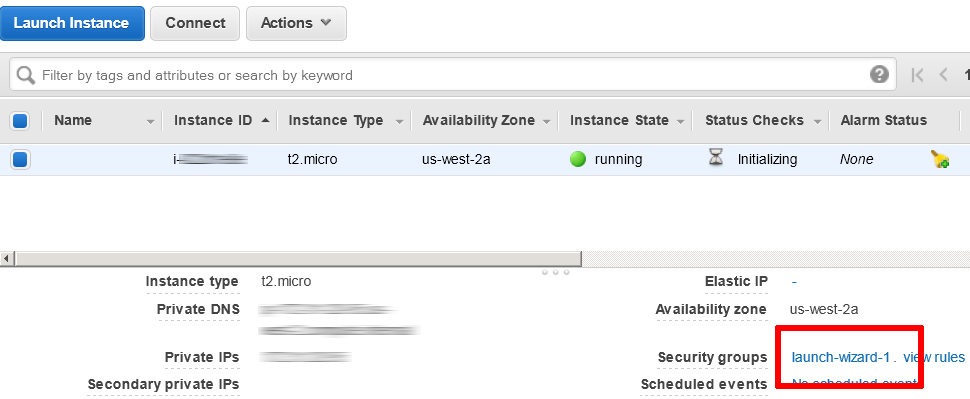
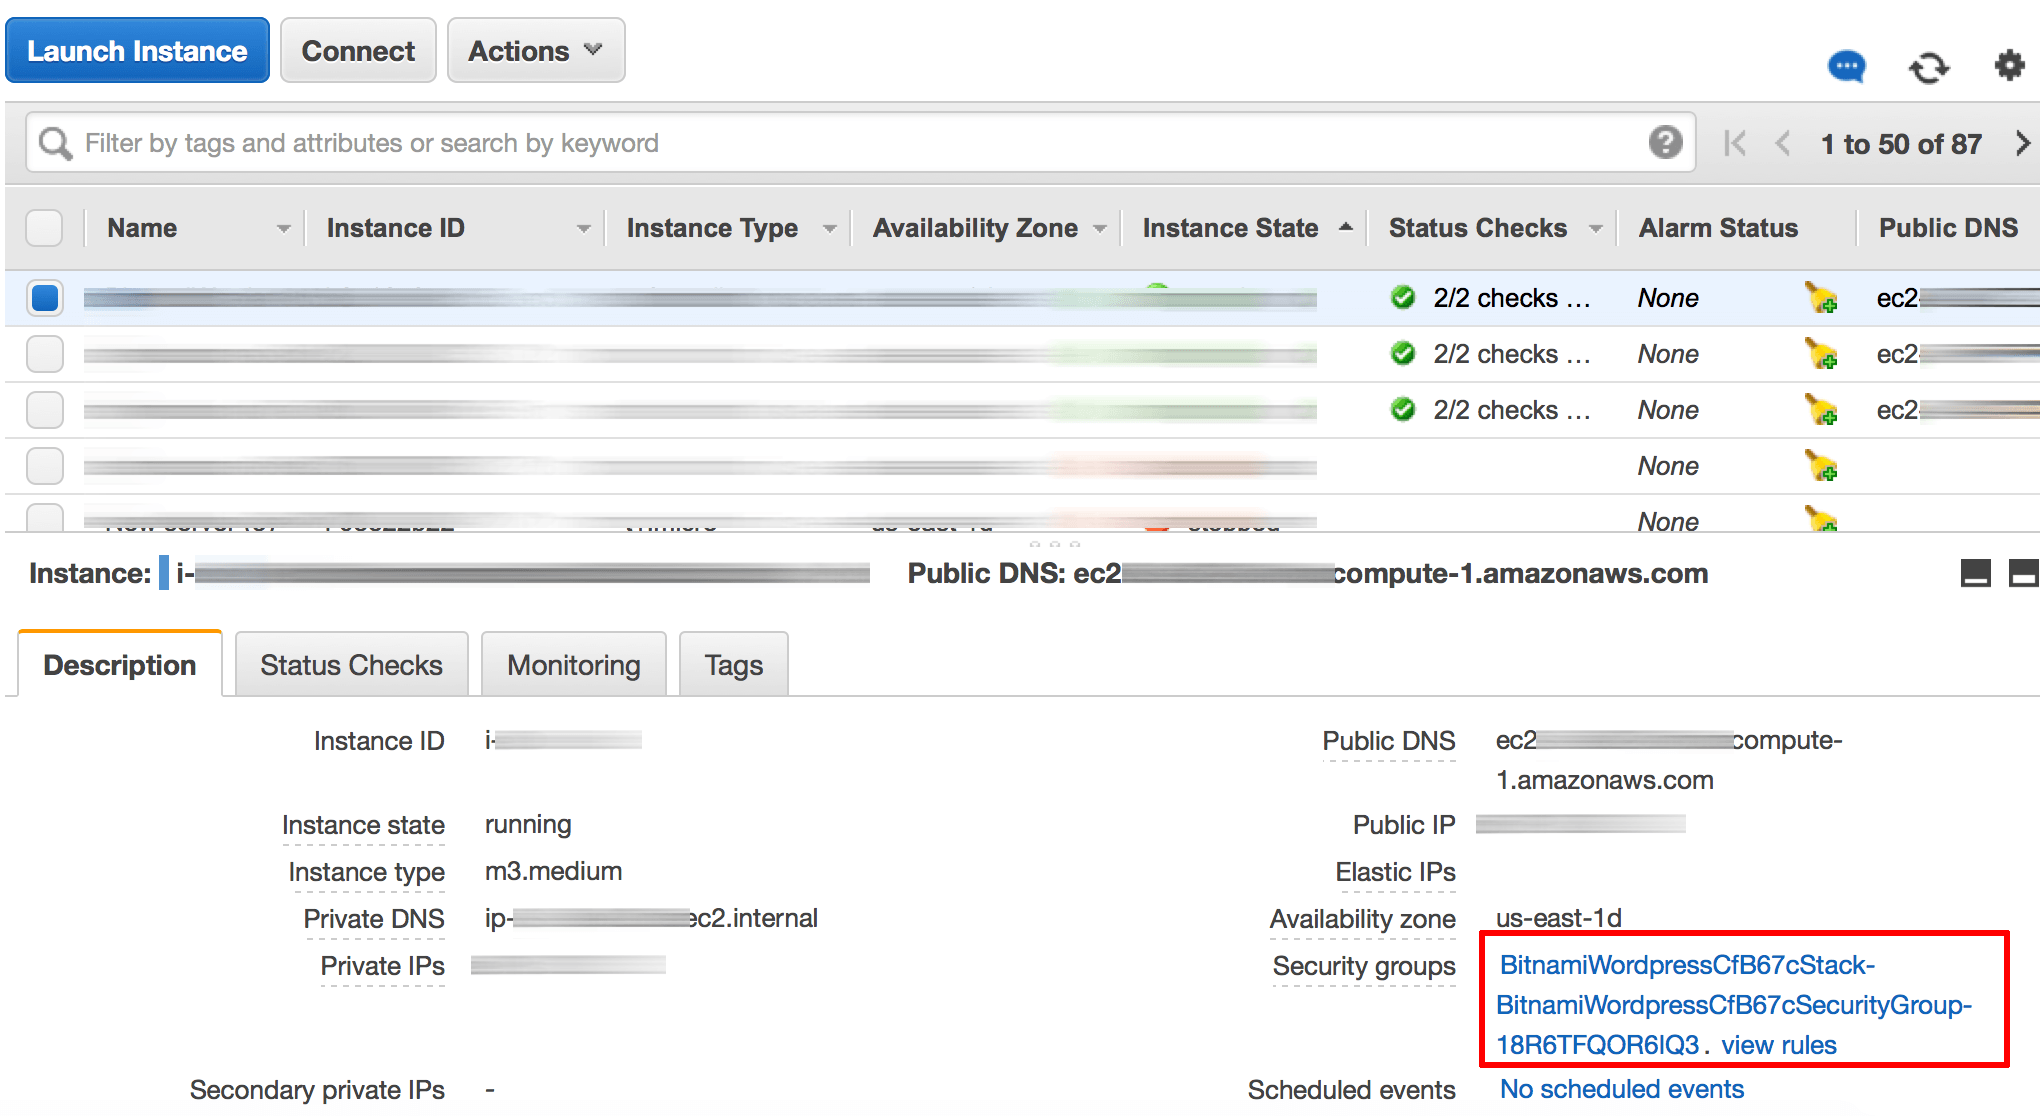
Select the instance in the dashboard.
-
In the lower panel, click the name of the security group used by the instance.
-
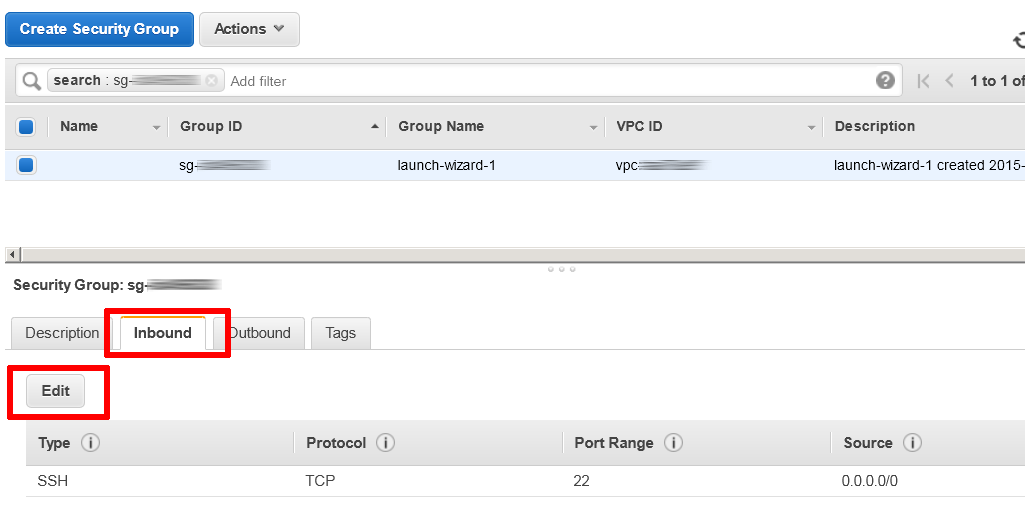
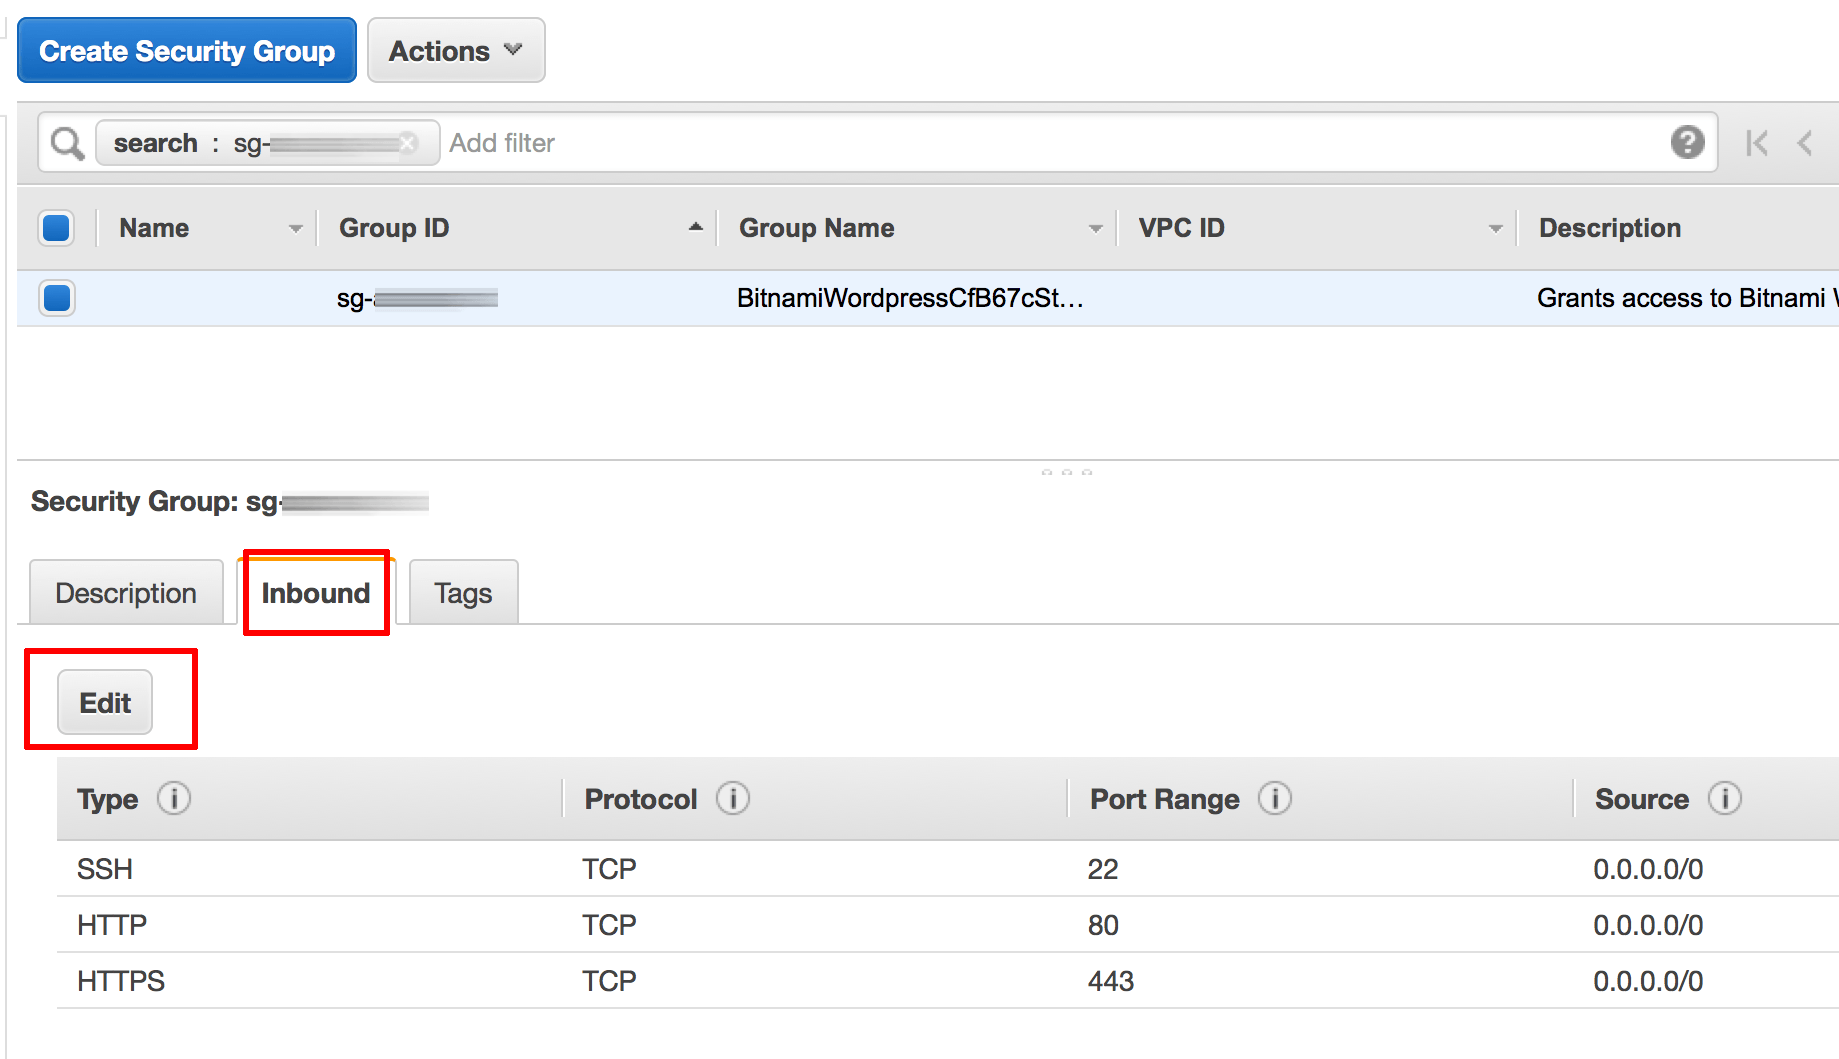
The resulting page will display the details of the selected security group. In the lower panel, select the “Inbound” tab to display a list of all the ports allowing inbound traffic.
-
Click the “Edit” button.
-
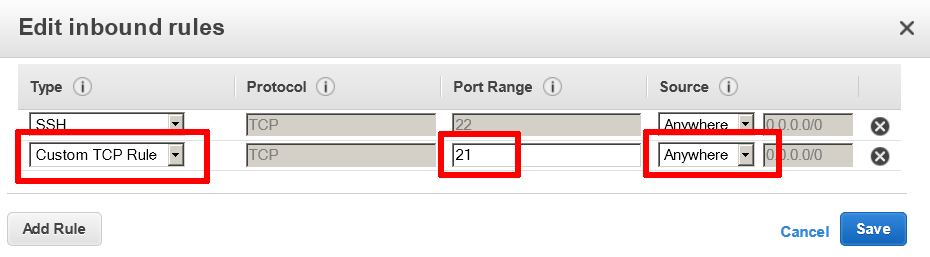
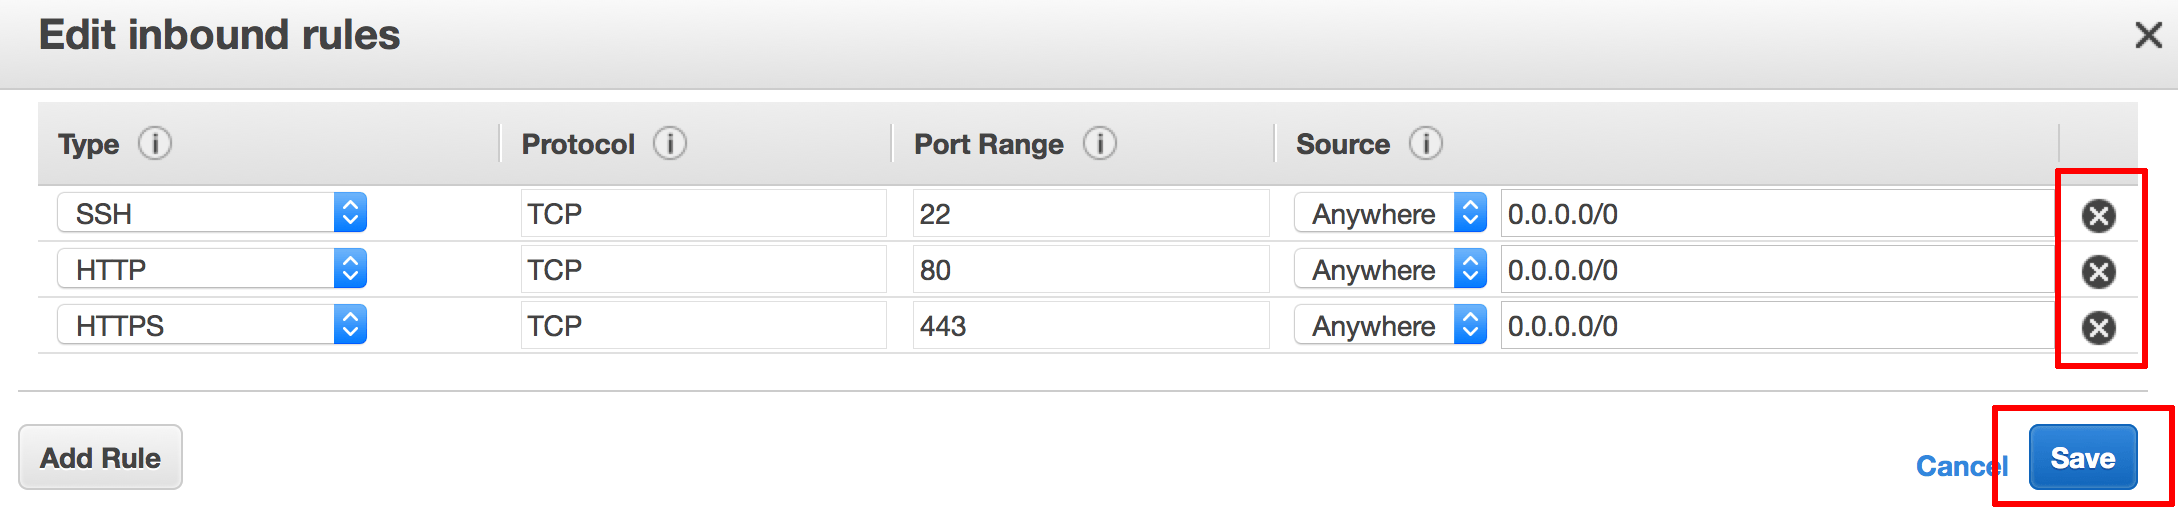
In the resulting dialog, select the “Add Rule” button and add a new “Custom TCP Rule” using the following guidelines:
-
Port: Enter the port number or port range needed by the application
-
Source: Use “Anywhere” to allow access from anywhere, or use “Custom IP” and specify an IP address range
NOTE: We recommend that inbound connections be allowed only from known and trusted IP ranges. Entering “Anywhere” allows access by anyone on the Internet. This is very strongly discouraged and may result in unknown parties gaining access to your application and data.
-
-
Click the “Save” button to save your changes.
As an example, review the image below which demonstrates opening port 21 (the FTP port) for access.
Your security rule comes into effect immediately without any need to restart the server.
Using Amazon Lightsail
To open other ports for remote access, follow these steps:
-
Log in to the AWS Console.
-
If required, use the region selector in the top right corner to switch to the region where your instance was launched.
-
From the Amazon Web Services menu, select the Lightsail service and choose the server you wish to obtain credentials for.
-
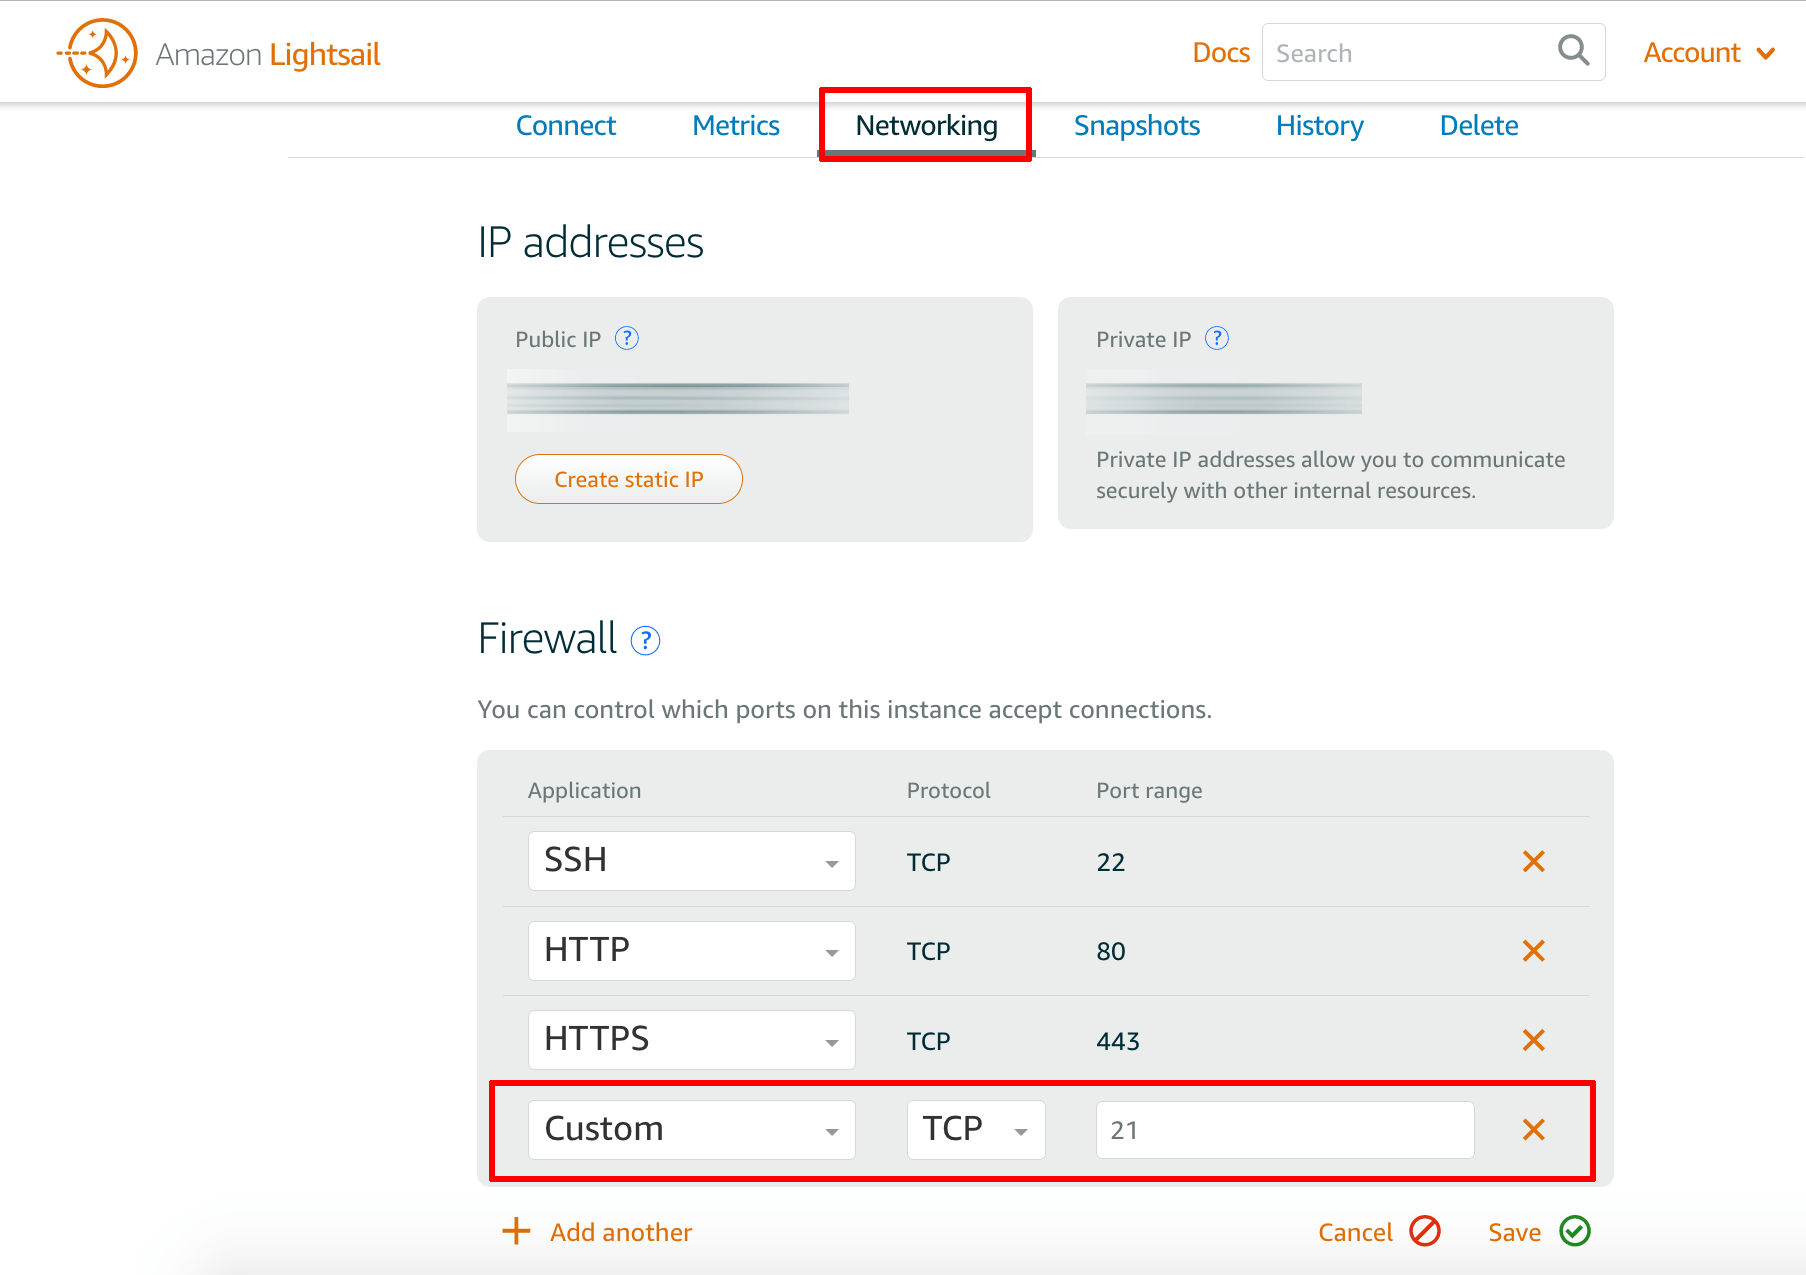
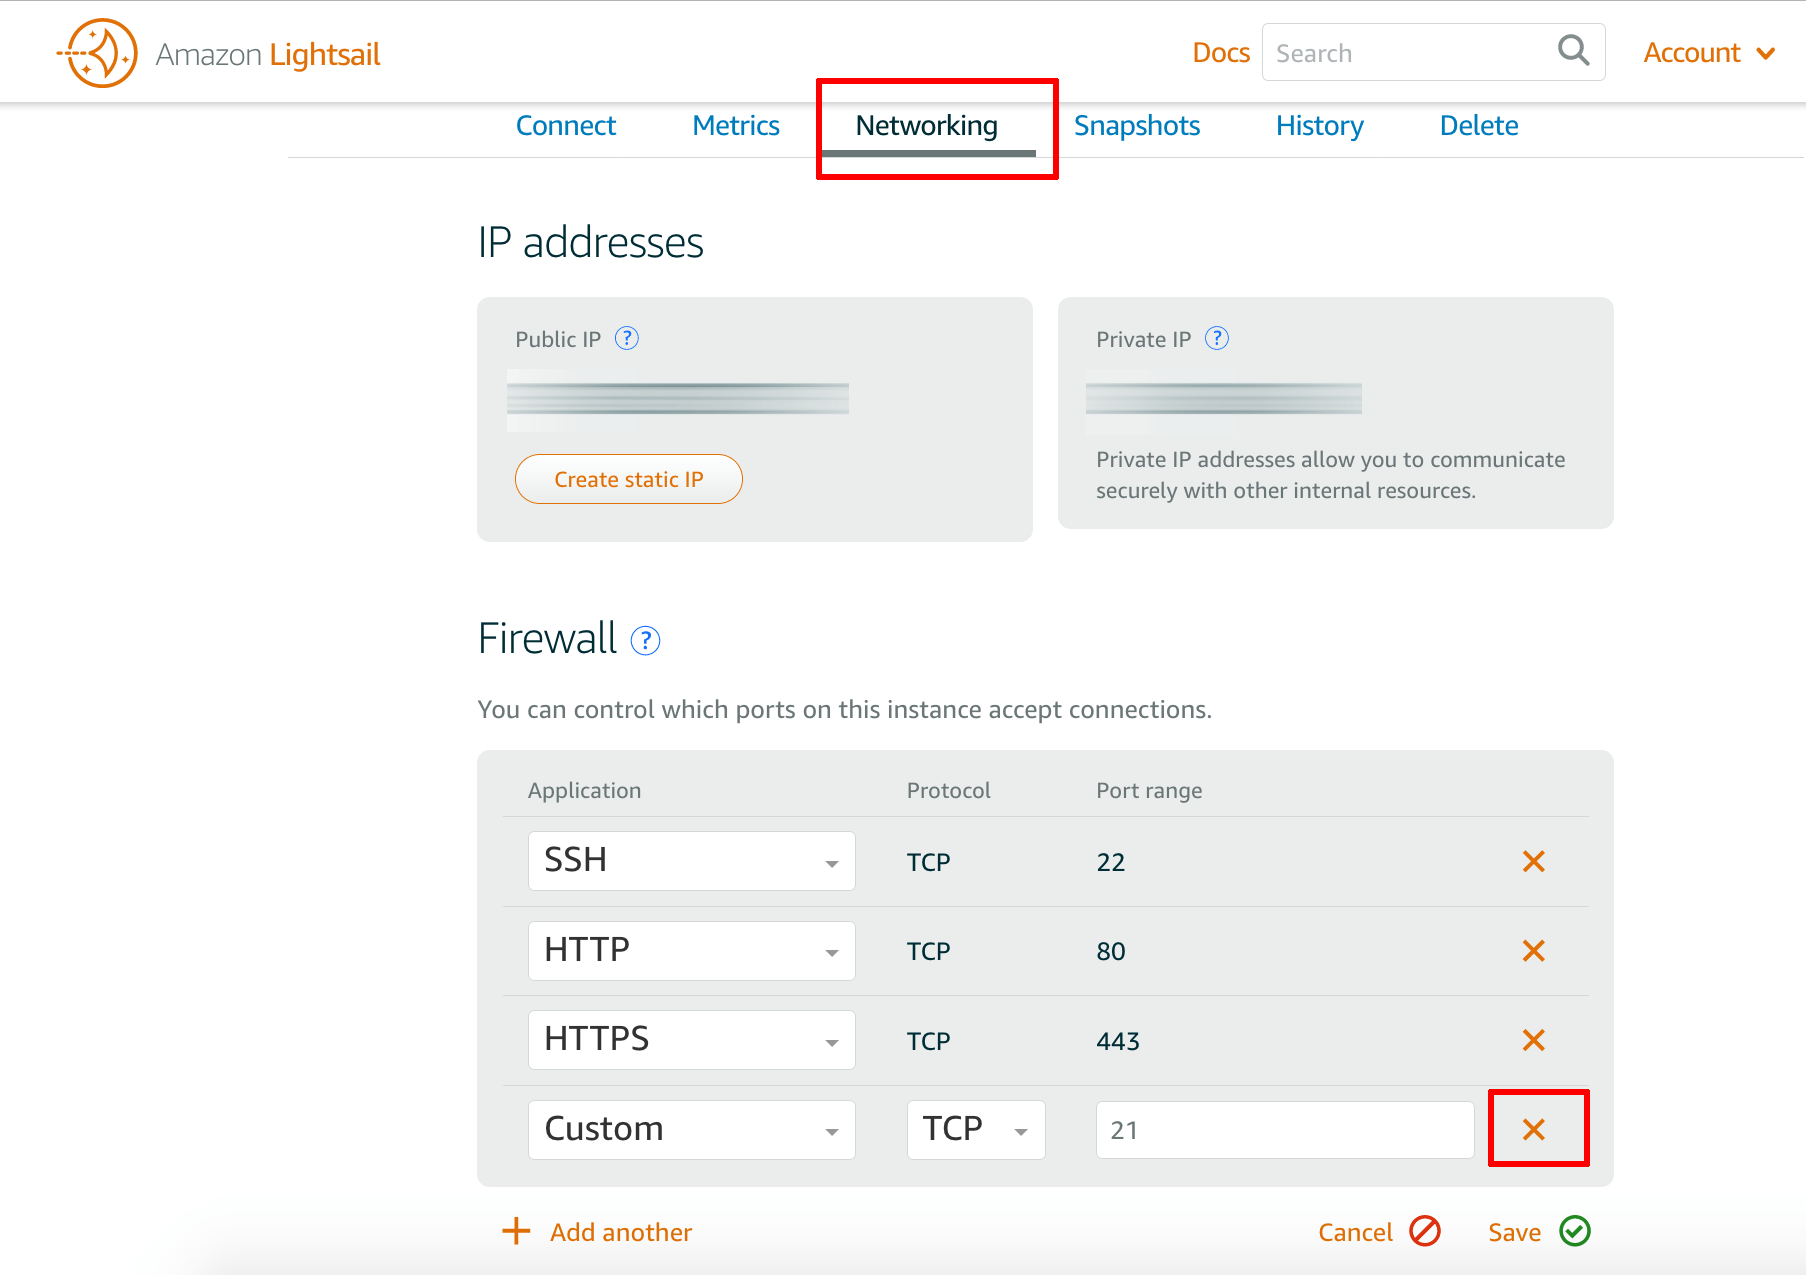
On the server detail page, click the “Networking” tab.
-
In the “Firewall” section, click the “Edit rules” link.
-
Click the “Add another” link and add a “Custom” application using the following guidelines:
- Protocol: Select “TCP”, “UDP” or “ALL”.
- Port range: Enter the port number or port range needed by the application
NOTE: We recommend that inbound connections be allowed only from known and trusted IP ranges. Entering “All” allows access by anyone on the Internet. This is very strongly discouraged and may result in unknown parties gaining access to your application and data.
-
Click the “Save” link to save your changes.
As an example, review the image below which demonstrates opening port 21 (the FTP port) for access.
Your security rule comes into effect immediately without any need to restart the server.
Close server ports and deny remote access
NOTE: If the server was launched using Amazon Lightsail, ports should be modified through the Amazon Lightsail dashboard instead.
Using the AWS Console
To close a server port and deny remote access on that port, follow these steps:
-
Select the instance in the dashboard.
-
In the lower panel, click the name of the security group used by the instance.
-
The resulting page will display the details of the selected security group. In the lower panel, select the “Inbound” tab to display a list of all the ports allowing inbound traffic.
-
Click the “Edit” button.
-
In the resulting dialog, click the cross next to the security rule for the port(s) you wish to close. This will delete the security rule, thereby denying inbound traffic on that port
-
Click the “Save” button to save your changes.
Your security rule comes into effect immediately without any need to restart the server.
Using Amazon Lightsail
To close a server port and deny remote access on that port, follow these steps:
-
Log in to the AWS Console.
-
From the Amazon Web Services menu, select the Lightsail service and choose the server you wish to obtain credentials for.
-
On the server detail page, click the “Networking” tab.
-
In the “Firewall” section, click the “Edit rules” link.
-
Click the cross next to the firewall rule for the port(s) you wish to close. This will delete the security rule, thereby denying inbound traffic on that port.
-
Click the “Save” link to save your changes.
Your security rule comes into effect immediately without any need to restart the server.