Install and use the Amazon CloudWatch agent
Amazon CloudWatch makes it easy to track performance and health metrics for your Amazon Web Services (AWS) instances in real time.
To install and use the Amazon CloudWatch agent with your Bitnami application instance running on AWS, follow these steps:
-
Run the following commands at the console to download and install the Amazon CloudWatch agent:
$ wget https://s3.amazonaws.com/amazoncloudwatch-agent/debian/amd64/latest/amazon-cloudwatch-agent.deb $ sudo dpkg -i -E ./amazon-cloudwatch-agent.deb -
Download and install the collectd daemon:
$ sudo apt-get update && sudo apt-get install collectd -
Create the Amazon CloudWatch configuration file by running the Amazon CloudWatch configuration wizard:
$ sudo /opt/aws/amazon-cloudwatch-agent/bin/amazon-cloudwatch-agent-config-wizardThe wizard will prompt you to answer various questions. In most cases, the default settings are fine. However, when asked whether to store the final configuration SSM parameter store, select “No” to have the configuration file stored locally. The resulting configuration file will be stored as /opt/aws/amazon-cloudwatch-agent/bin/config.json.
NOTE: Learn more about using the Amazon CloudWatch configuration wizard in the official documentation.
-
Log in to the AWS IAM console and select the “Roles” menu item. Click the “Create role” button.

-
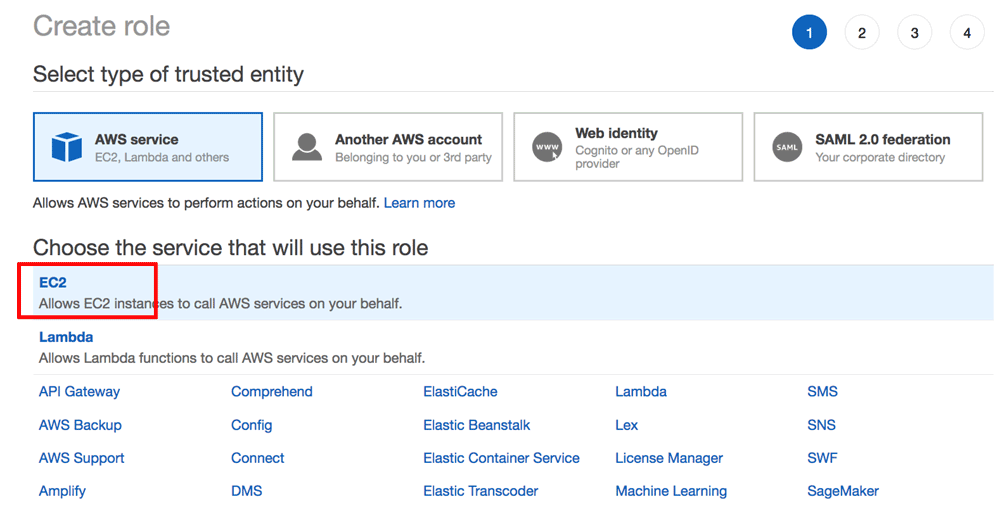
On the “Select type of trusted entity” page, select “EC2” as the service to be associated with the new role. Click the “Next: Permissions” button to proceed.
-
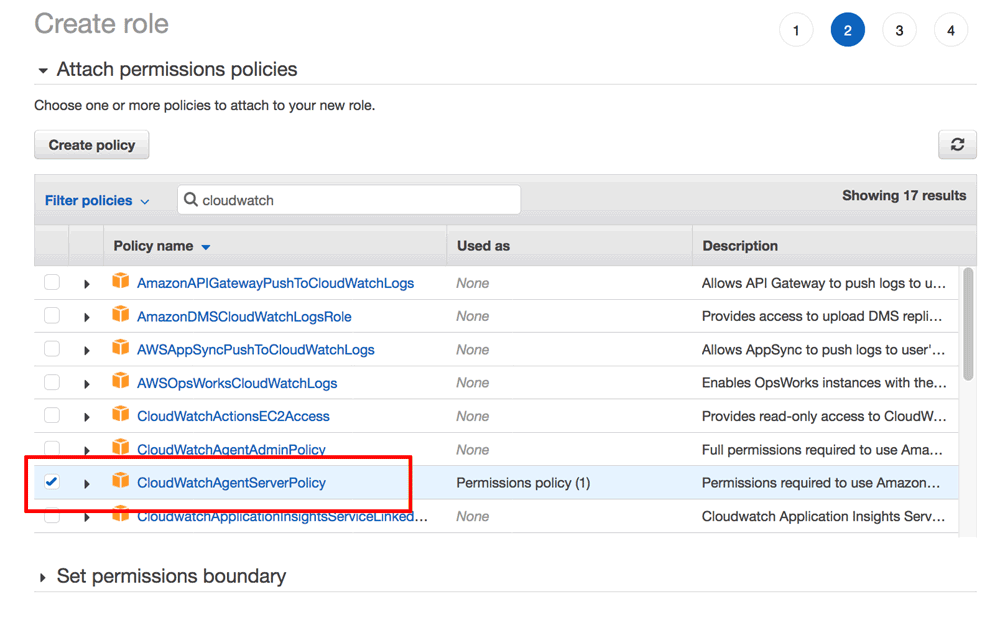
On the “Attach permissions policies” page, select the “CloudWatchAgentServerPolicy”. Click “Next: Tags” to proceed.
-
On the “Add tags” page, add tags if required (optional). Click “Next: Review” to proceed.
-
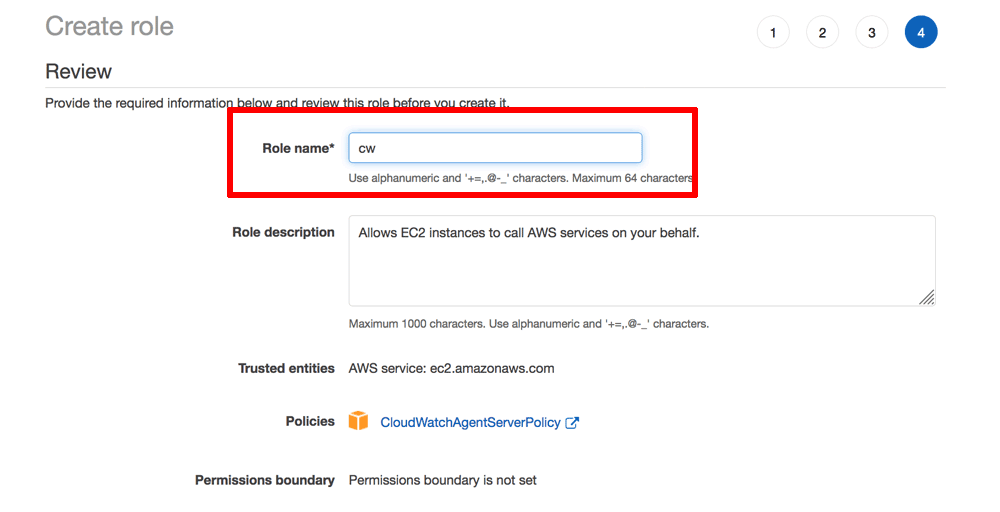
On the “Review” page, enter a name for the new role. Click “Create role” to proceed and create the new role.
-
Click your username in the top right corner of the navigation bar and select the “My Security Credentials” menu item from the resulting drop-down menu.
-
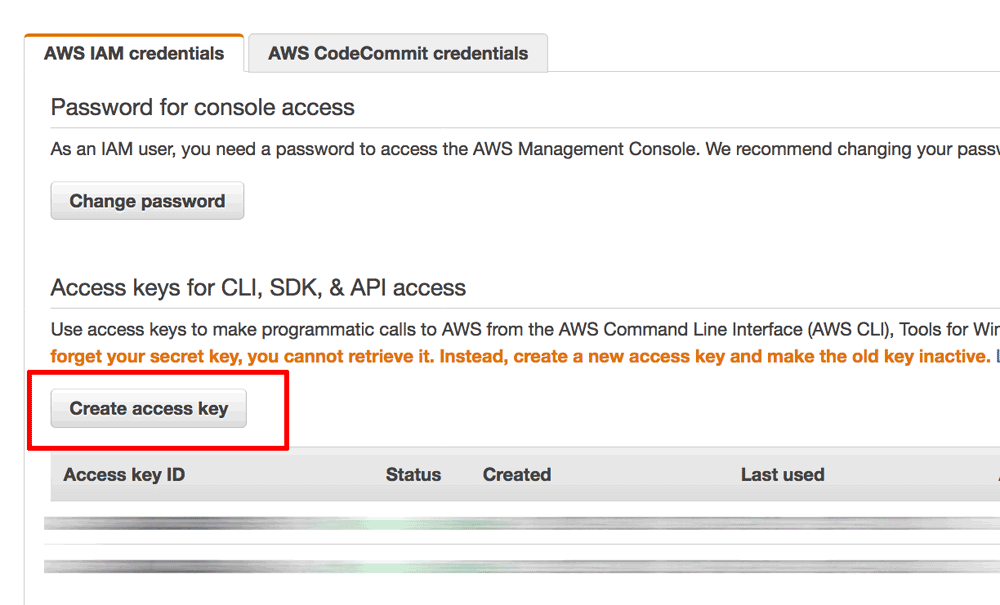
On the “My security credentials” page, click the “Create access key” button.
-
In the resulting dialog, note the new AWS access key ID and corresponding secret access key
-
Create an AWS credentials file with the AWS access key ID and shared access key at /home/bitnami/.aws/credentials with the following content. Replace the AWS-ACCESS-KEY-ID and AWS-SECRET-ACCESS-KEY placeholders with the keys obtained in the previous step:
[default] aws_access_key_id=AWS-ACCESS-KEY-ID aws_secret_access_key=AWS-SECRET-ACCESS-KEY -
Edit the common configuration file for the Amazon CloudWatch agent at /opt/aws/amazon-cloudwatch-agent/etc/common-config.toml and specify the path to the credentials file created in the previous step.
$ sudo vi /opt/aws/amazon-cloudwatch-agent/etc/common-config.tomlUpdate the file with this content:
[credentials] shared_credential_file = "/home/bitnami/.aws/credentials" -
Start the Amazon CloudWatch agent with the following command:
$ sudo /opt/aws/amazon-cloudwatch-agent/bin/amazon-cloudwatch-agent-ctl -a fetch-config -m ec2 -c file:/opt/aws/amazon-cloudwatch-agent/bin/config.json -s -
Check that the agent is running with the following command:
$ sudo /opt/aws/amazon-cloudwatch-agent/bin/amazon-cloudwatch-agent-ctl -m ec2 -a status
The steps above will also automatically configure the Amazon CloudWatch agent to automatically start on server reboot.
TIP: If the Amazon CloudWatch agent fails to start, you can debug the error by reviewing the Amazon CloudWatch log files. Learn more about the log files and other troubleshooting steps in the official documentation.