Change Azure Subscriptions with Bitnami Images
Introduction
Bitnami is moving its images from the common EA agreement to the more flexible and cost-effective CSP subscription. Thus, users only need to pay for the resources they consume. For that reason, some of the Bitnami images you could find under the “Bring Your Own License” plan, are now under the “Starting at Free” software plan.
In case you currently are running an image on a Microsoft Azure server that has changed its Azure subscription, you should move your resources to a server that runs under the new software plan.
This guide will walk you through the process of migrating your resources from your current Azure server to another that runs under the new CSP subscription. The example application used in this guide is WordPress, although the steps will work generically for any Bitnami application stack.
NOTE: Before following the steps in this guide, ensure that you have a Microsoft Azure account, that you have access credentials for your Bitnami application stack database, and that the server running your Bitnami application stack has a static public IP address.
Assumptions and prerequisites
This guide assumes that:
- You have a Microsoft Azure account. If you don’t, create a Microsoft Azure account.
- You have a working WordPress server running on the Microsoft Azure Portal.
- Your server has already assigned a static IP address.
Step 1: Backup existing data
Begin by creating a backup of the existing data that you have in your running server, as described below:
-
Connect to the server console through SSH.
-
Stop all services:
$ sudo /opt/bitnami/ctlscript.sh stop -
Create a tarball with the instance data. In this case, you need to backup the entire /opt/bitnami directory. Remember that APP is a placeholder, replace it with the name you gave to your instance:
$ sudo tar -czvf APP.tar.gz /opt/bitnami -
Download the tarball file to your computer using SFTP.
-
Restart all services:
$ sudo /opt/bitnami/ctlscript.sh start
Step 2: Dissociate the IP address of the existing server
To make sure that the new server will be accessible using the same IP address, you first need to dissociate it from the original server. That way, it will be available as a resource in the Azure Portal. Follow the instructions below:
IMPORTANT: Before following the steps below, make sure that your server has already assigned a static IP.
-
Log in to the Microsoft Azure Management Portal if you are not already logged in.
-
Navigate to the “Resource Group Overview” page of your original server and click on the public IP address resource link.
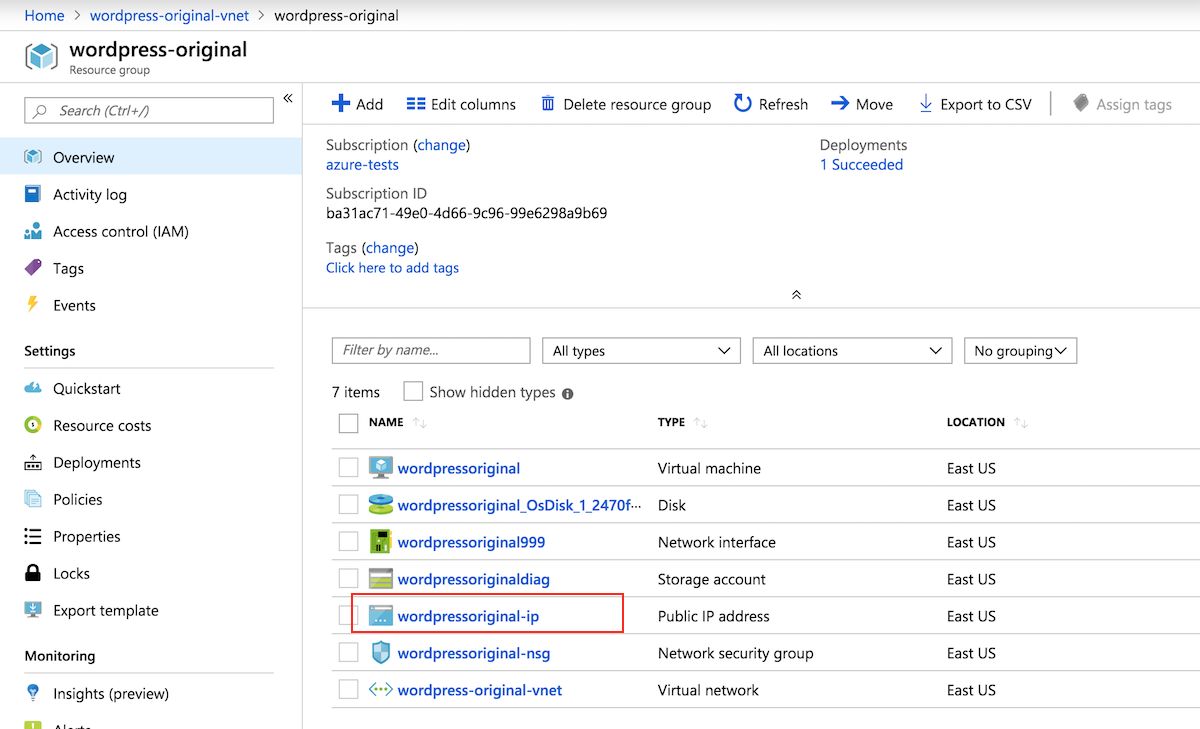
-
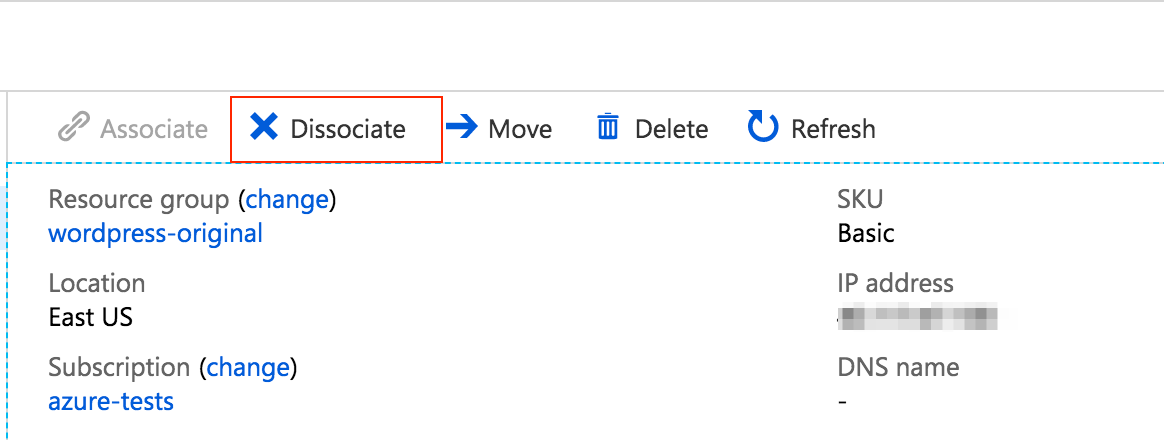
In the resulting screen, click “Dissociate” to make its IP address and network interface available. Confirm the action by clicking “Yes”.
Step 3: Create a new server on Microsoft Azure and prepare it for migrating the data
Once you have saved the file that contains the data of the original server and dissociated its IP address, it is time to spin up a new server in the new subscription and prepare it for stating the data migration. Follow these instructions:
-
Return to the Microsoft Azure Management Portal.
-
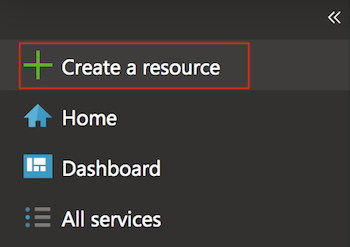
From the left-side menu, select the “Create a resource” option.
-
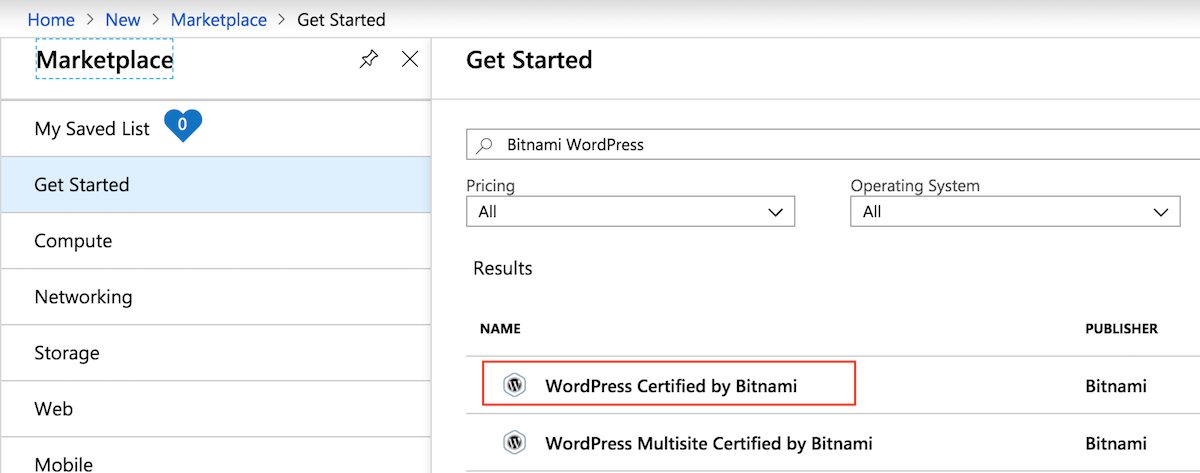
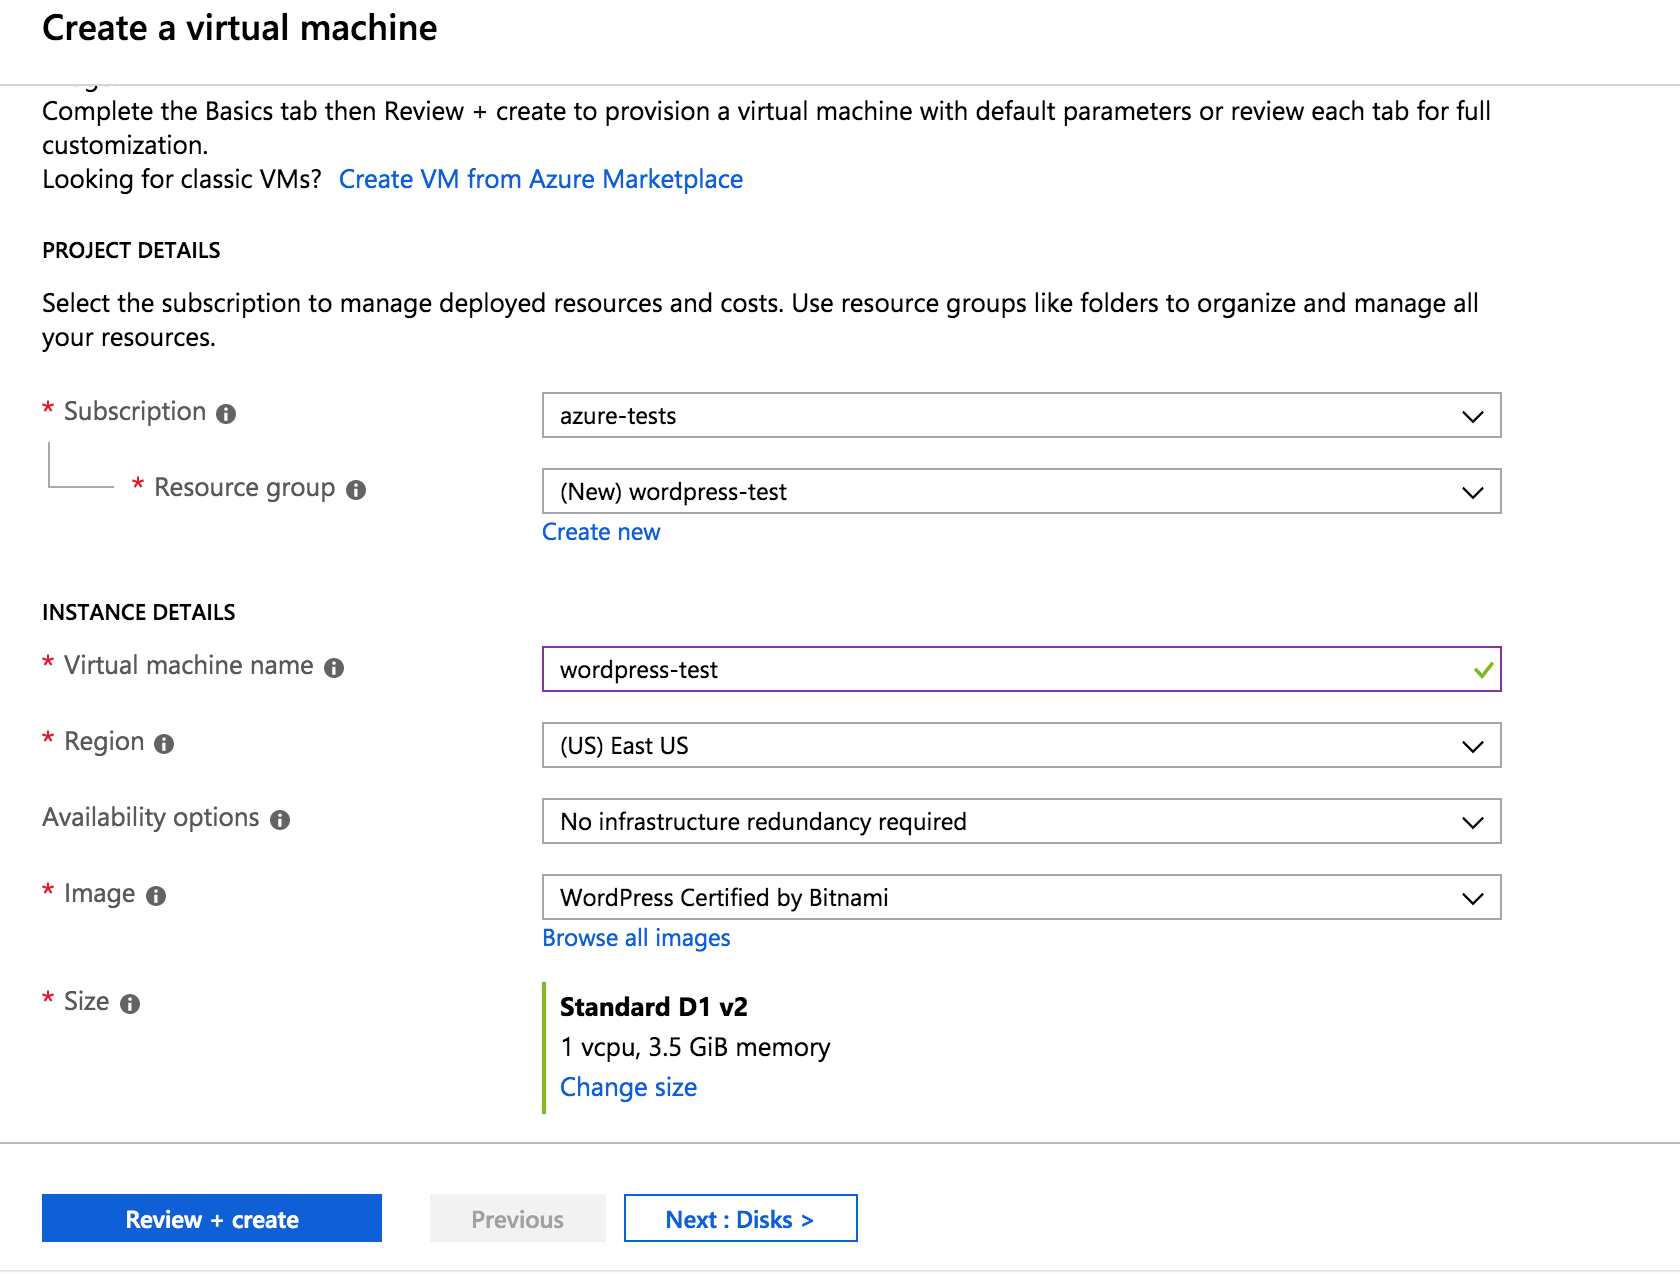
Search for the resource you want to create. In this case, WordPress Certified by Bitnami.
-
In the resulting screen, click “Create” to start the process.
-
Provide the required information to create the virtual machine, and select the authentication mode: SSH public key or password.
-
Navigate directly to the “Networking” tab. In the “Public IP” section, select the IP of your original server as shown below:

-
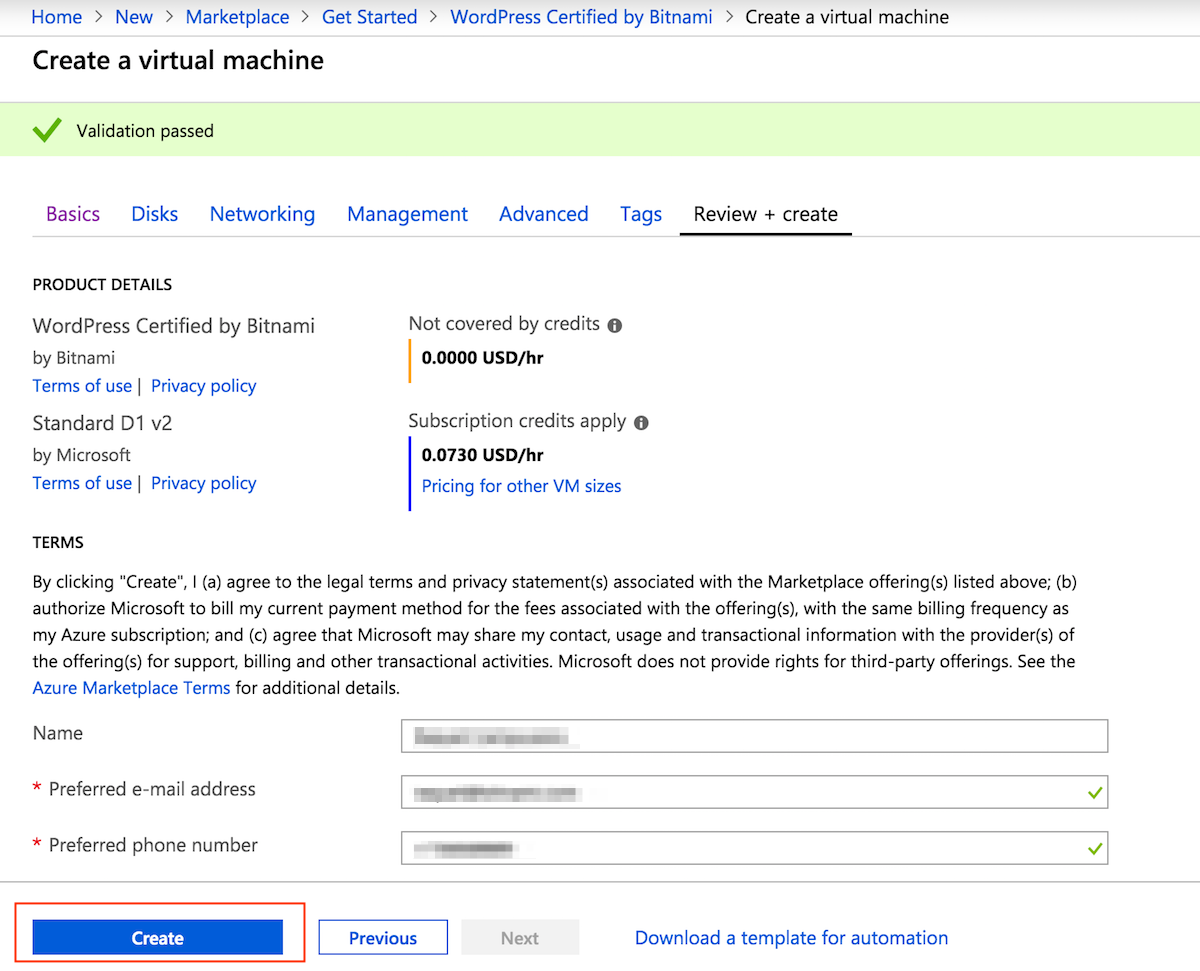
Click on the “Review+create” button to go to the validation process.
-
Once the validation message is displayed, click “Create” to finish the process.
-
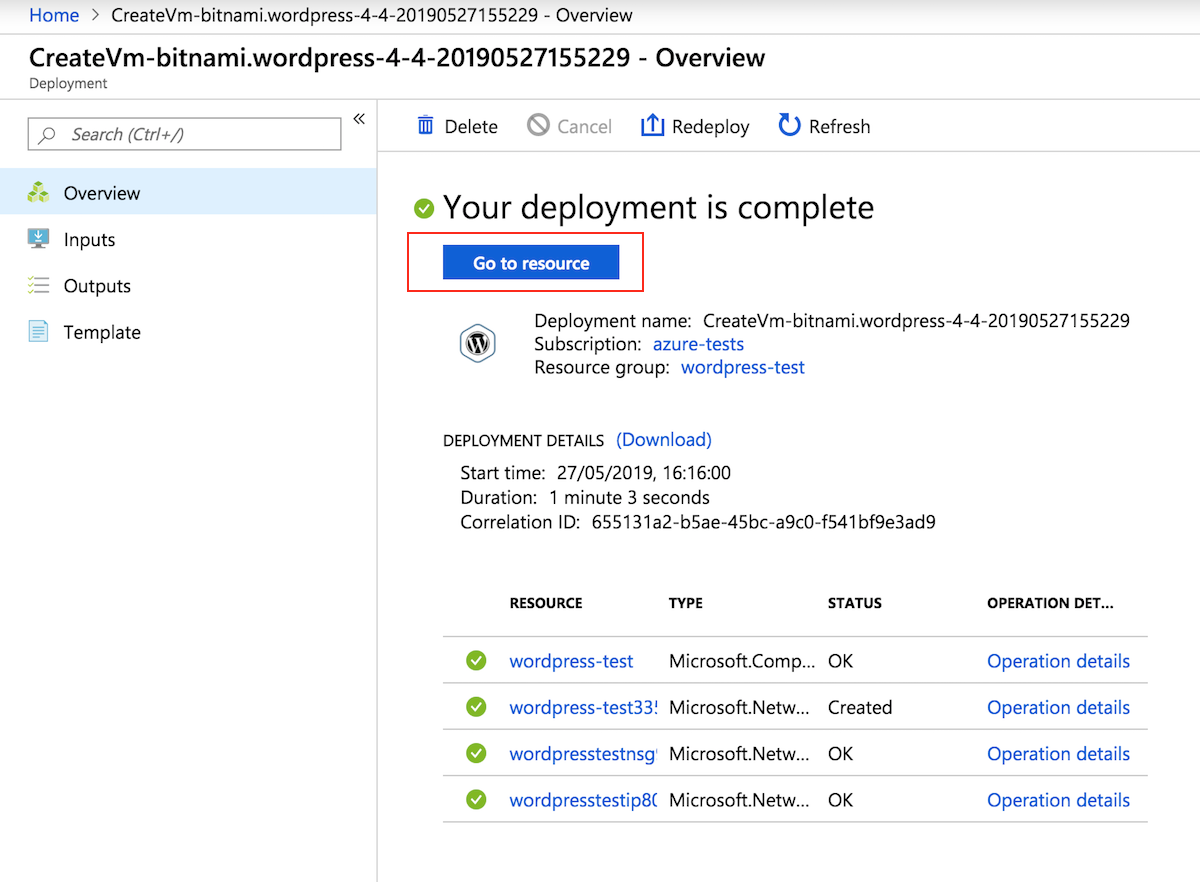
When the server deployment finishes, click “Go to resource” to get the public IP address you will need to connect to the server. This should be the same as the one you have in your original instance.
-
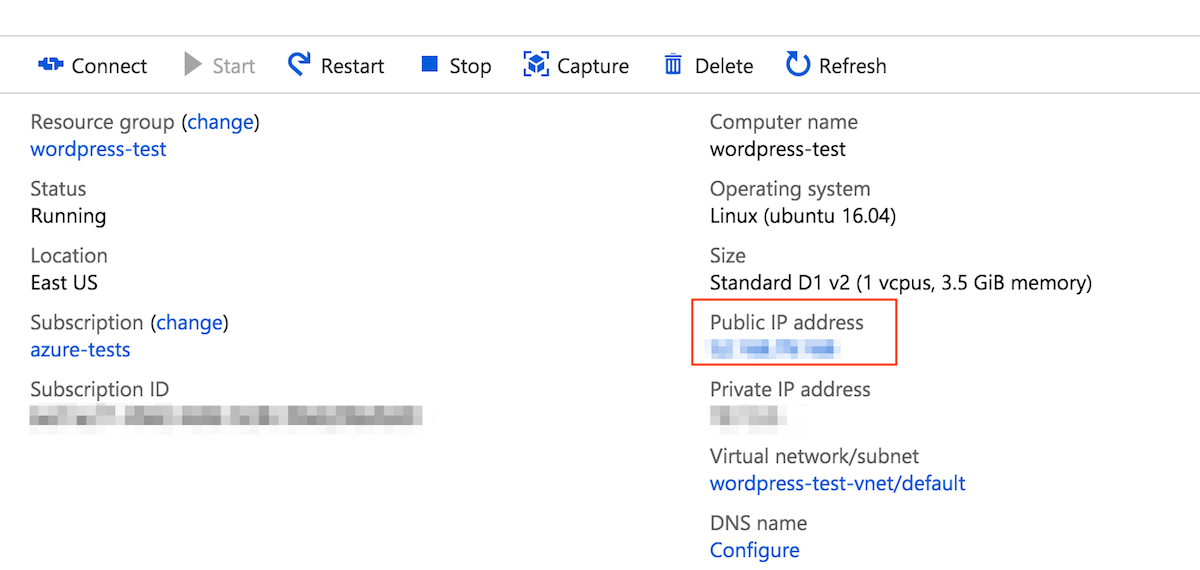
In the “Overview” page, copy the IP address of the server.
-
Open a terminal and connect to the server through SSH following these instructions.
-
Stop all services:
$ sudo /opt/bitnami/ctlscript.sh stop -
Delete the entire /opt/bitnami directory by executing:
$ sudo rm -rf /opt/bitnami
Your server is ready for restoring the data from the original instance.
Step 4: Copy and restore data on the new instance
To make your application runs on the new server using the new subscription, it is necessary to upload the compressed file that contains all the original data to the new server. To do so:
-
Upload the tarball file that contains the application data to the new server using SFTP. Once the upload finishes, you will see the file in your server.

-
Uncompress the .tar file by executing the following (remember that APP.tar.gz is a placeholder, replace it with the name of the uploaded file):
$ sudo tar -xzvf APP.tar.gz -C / -
Restart all services by executing the command below:
$ sudo /opt/bitnami/ctlscript.sh restart -
Open a browser and go to http://SERVER-IP/ replacing the SERVER-IP placeholder with the public IP address of your server. You should see your original application maintaining the same appearance, themes, plugins, etc.:
IMPORTANT: Remember that your new instance currently has all the data from the original server. This means that for access your application you need to log in with the credentials from the original server.
Congratulations! You successfully migrated your Azure server from one subscription to another and all your application data, including its IP address, are remaining still the same.