Run Redmine in the Cloud
Introduction
Regardless of the size of the team on a project, project management is necessary for planning, organizing and controlling resources. The primary objective of project management is to achieve all of the goals of a particular project, so it is important to have a clear view of the project status and the remaining tasks. This also allows the project manager to make decisions in early stages of the project or to change the delivery timeline.
There are several software tools that help project managers analyse data and display it graphically, such as Microsoft Project, SAP, Atlassian JIRA or Redmine. Redmine is a flexible project management web application. It is a Ruby on Rails-based application and supports several features that facilitate project management tasks: multiple project support, flexible role-based access control, issue tracking, Gantt chart and calendar, wiki, forums, and document management among others.
This guide describes how to use Redmine in the cloud with the Bitnami Redmine Stack.
NOTE: The steps below assume that you already have the Bitnami Redmine Stack running on a cloud server and that you have the credentials for the GitLab administration panel.
Step 1: Configure Redmine
Most of the configuration is performed through the “Administration” panel, accessible through the top menu when logged in as an administrator. The main sections you will use are:
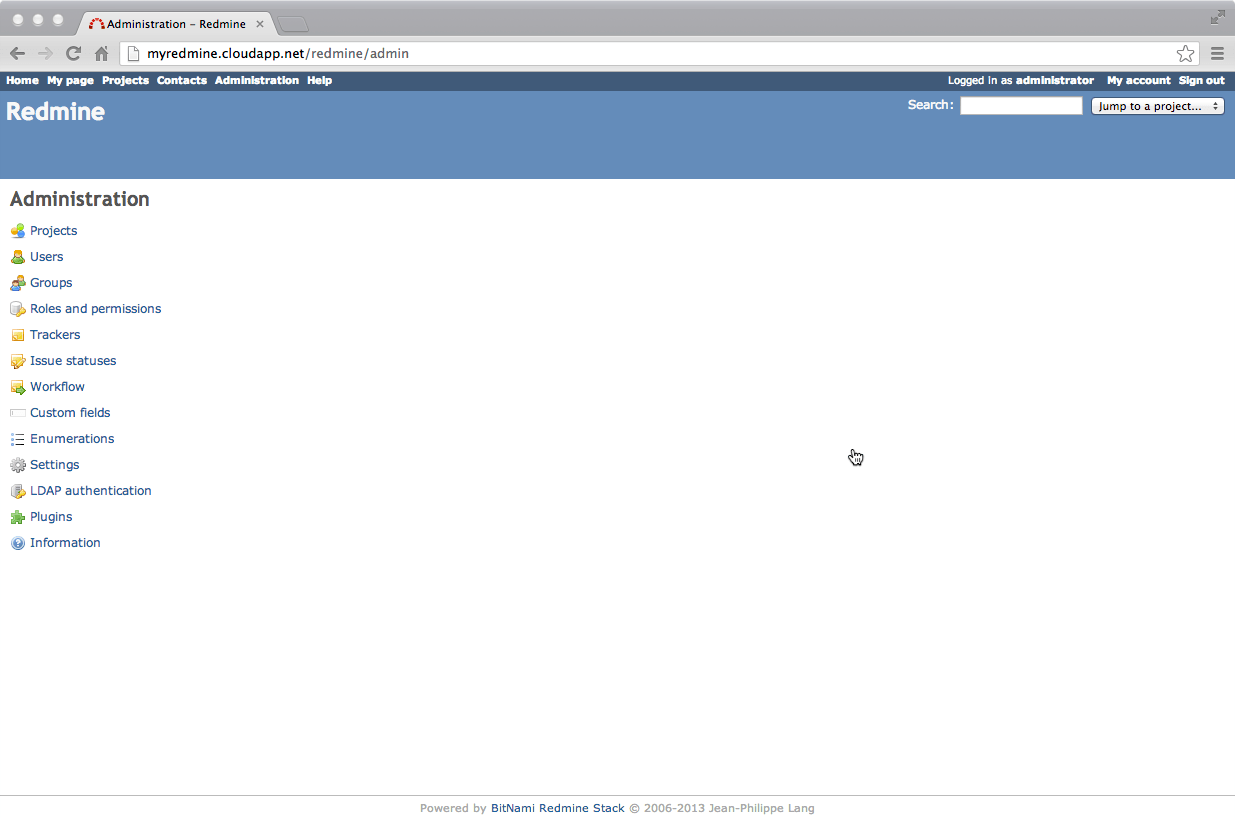
- Projects: Allows creating, editing, deleting, copying and archiving projects.
- Users: Allows creating, editing, locking and deleting users
- Groups: Allows creating groups to classify your users.
- Roles and permissions: Allows managing the available roles (which will determine which permissions your users will have in each project).
- Trackers: Allows managing the types of issues you will be working with: Bugs, Features, etc. Trackers are useful to classify issues.
- Issue Statuses: Allows you to change the status of issues as well as define new ones. For example, you could create a new status type called “Waiting for user feedback”.
- Workflow: Allows defining the available transitions between status types, depending on the role of the user.
- Custom fields: Allows customizing most of the available entry fields in all of the forms (issues, projects, users, groups, …). For example, you could add a new field called “Twitter account” for the new user form.
- Settings: Allows changing the application main settings.
- Plugins: Provides an overview of all the installed plugins and allows you to configure them
Change the administrator credentials
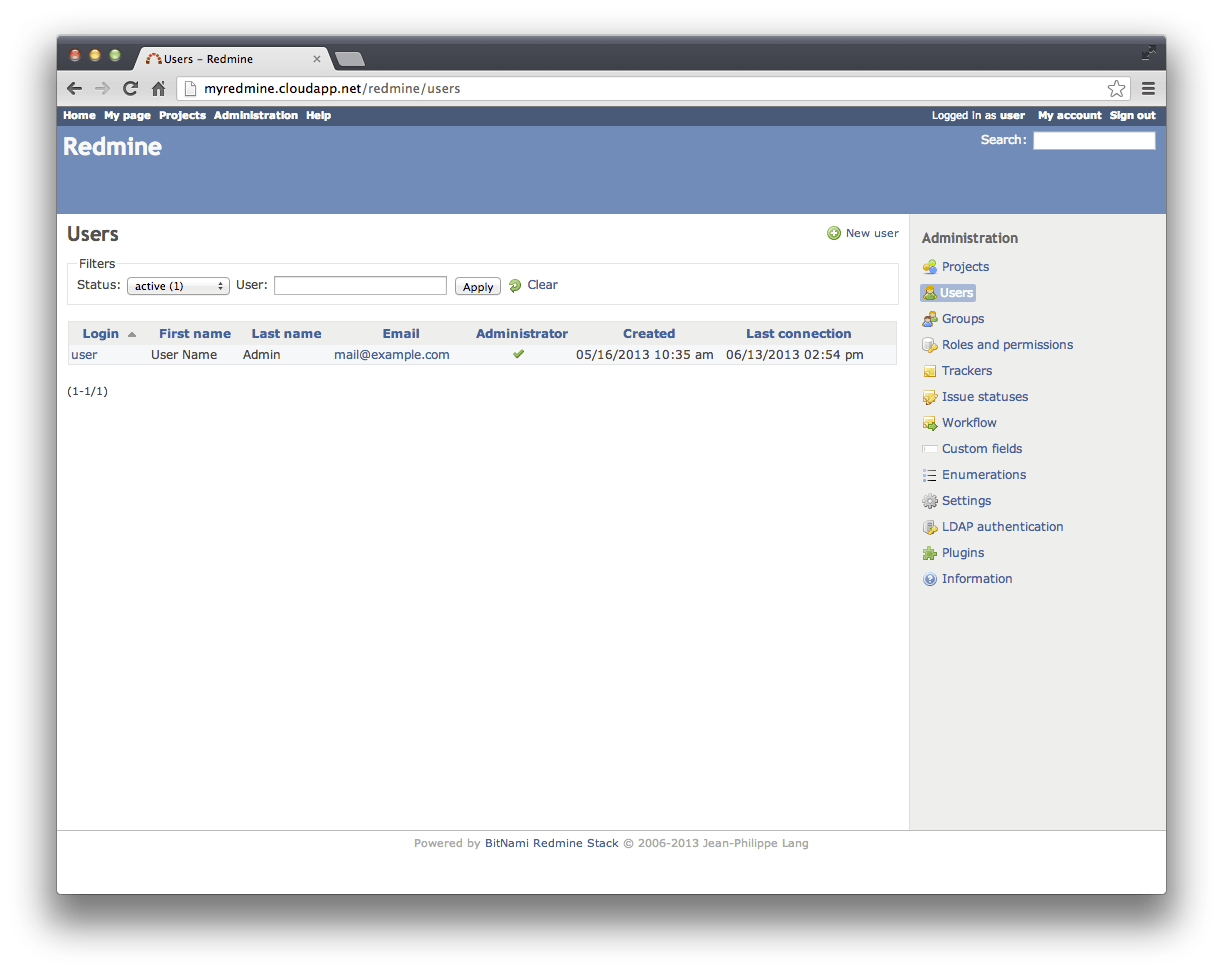
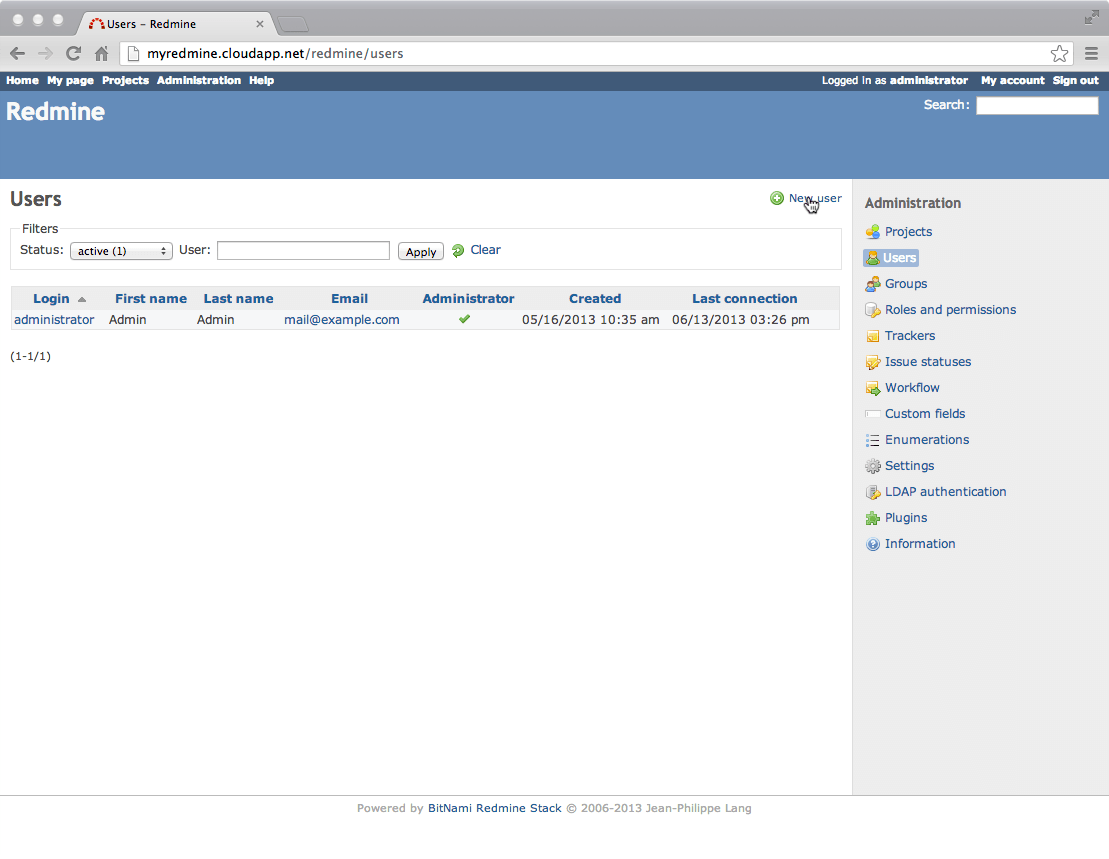
To change the default user settings such as the password, email and login, click on the “Administration” link in the top menu and navigate to the “Users” section, where you should see the default administrator:
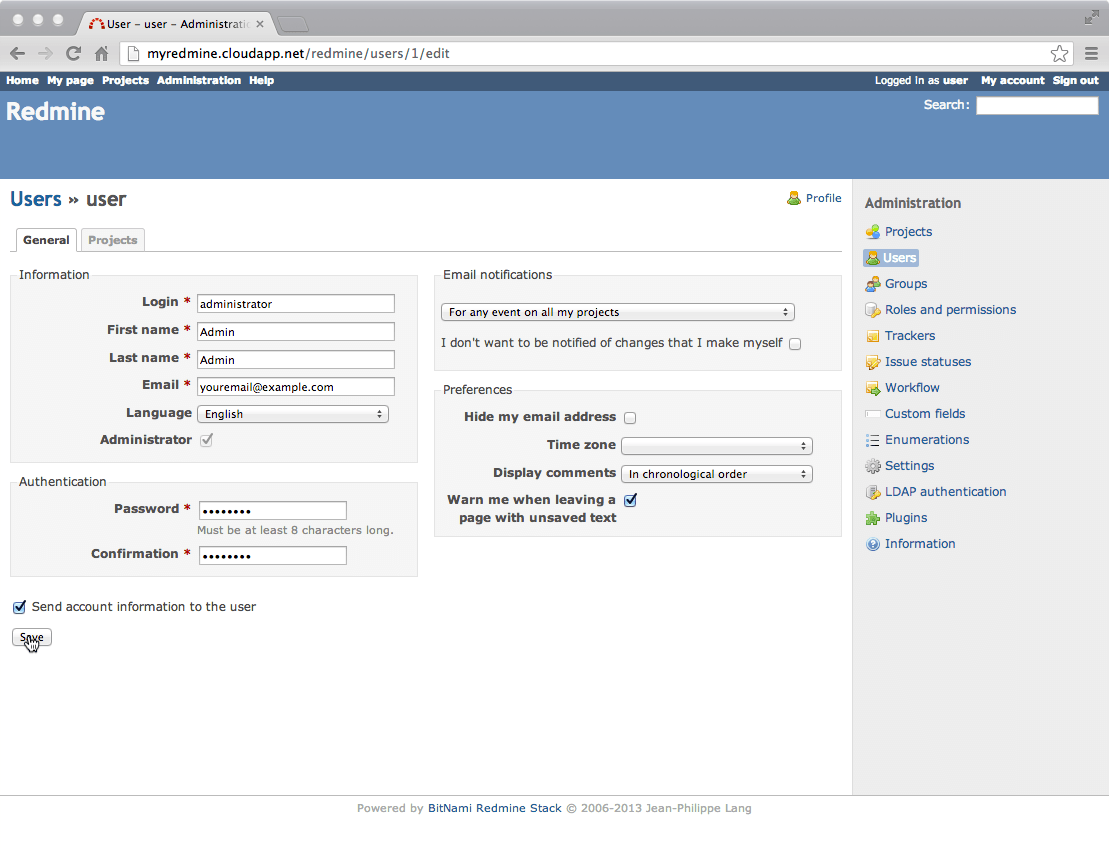
Clicking the administrator account name (user) allows you to edit it. At a minimum, you should modify the password and email, but you can also configure the login name and language. Once you save this form you will be able to login with the new, secure user credentials (and, naturally, other people will not be able to login with the default credentials).
Once done, log out and log in again with the new user credentials.
Customize the registration mechanism
By default, the application is configured to allow new users to register but requires an administrator to manually enable their accounts. This setting is also configurable and available under the “Settings” section of the administration pages. You can review the available options in the “Authentication” tab:
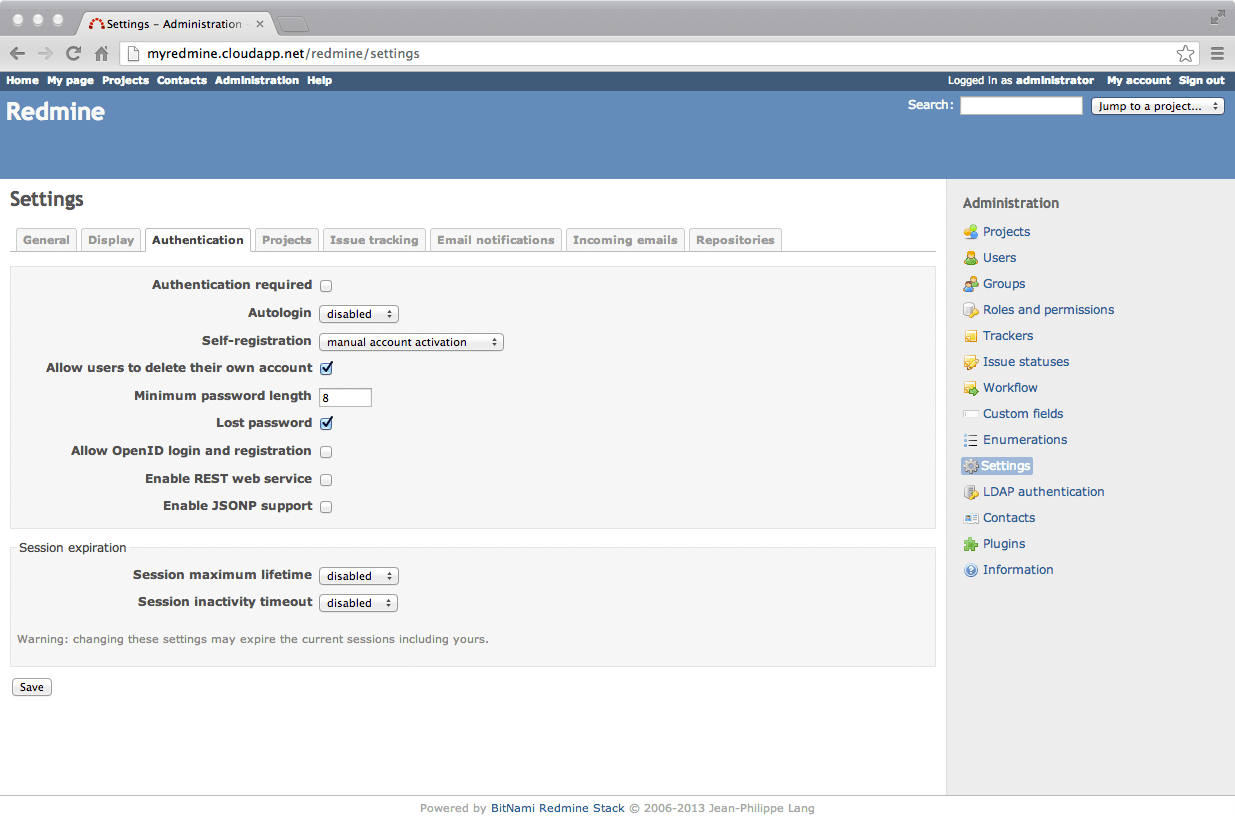
The most important settings to consider in this section are:
-
Authentication required: If enabled, this setting forces users to be logged in to use the application.
-
Self-registration: This setting allows you to specify how new users are registered. If you want to have full control over which users use your application, you should set this setting to “account activation by email” or at least keep the default “manual account activation”, which will force you to manually enable new accounts from the “Users” overview page. It is also possible to allow users to automatically register without manual activation, but this is not usually recommended.
Configure email settings
The Bitnami Redmine Stack does not configure email settings by default, so another important initial step is to configure the application email settings so it is able to send notifications or invitations to your users. Detailed instructions can be obtained from this page.
Step 2: Manage users
Redmine includes a powerful user management system that allows you to give different sets of permissions to members of your team on a per-project basis. With this flexible system you will be able to, for example, give manager permissions to a user in “Project A” while restricting him to being a reporter in “Project B”.
The “Users” section on the “Administration” panel provides an easy way of adding, deleting and configuring them.
To make use of your new issue tracking system, you will find it useful to have some users who are able to act upon the issues recorded. You can easily create them in the “Users” page of the “Administration” panel. On this page, you will see a summary of all the existing users. When you first access this page, you will only see the administrator that is created when deploying the application
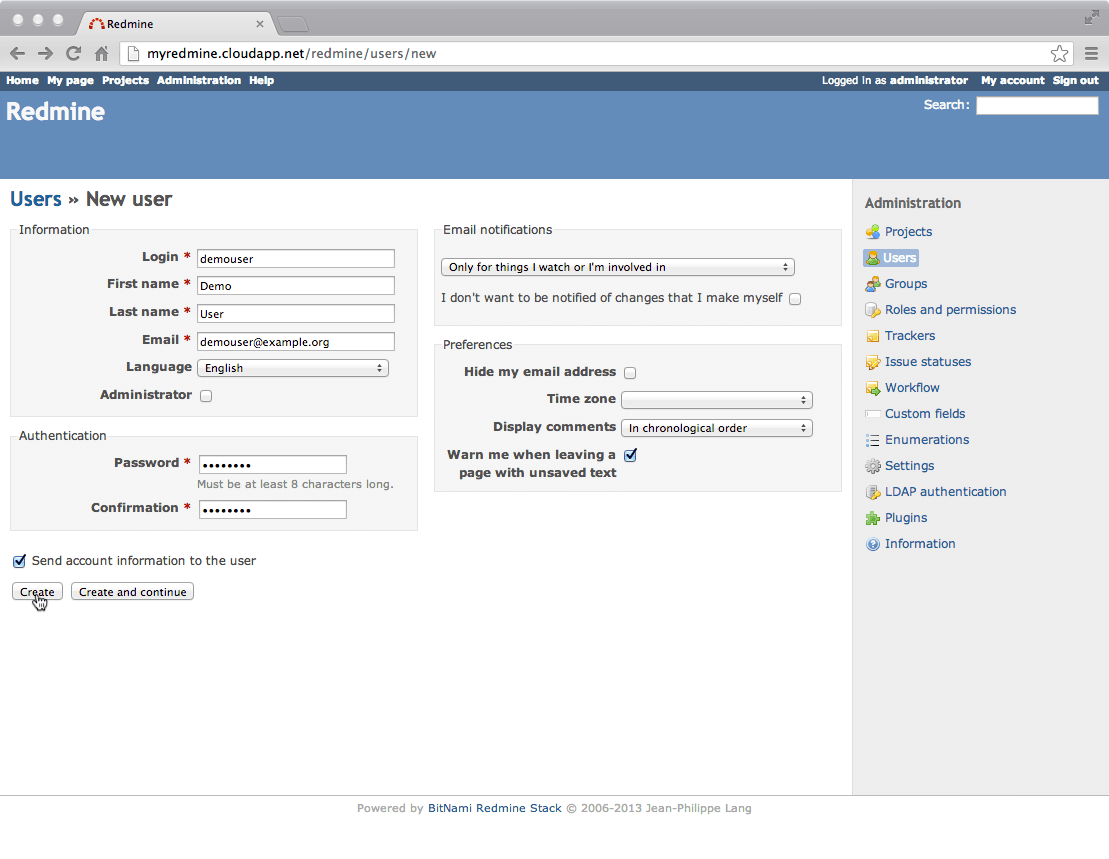
To add other members to your team, just click the top button marked “New User”. On the resulting page, provide some basic information about the user (name, email address and so on). Note the “Administrator” checkbox, which will configure the level of privileges the new user has. If the email settings are already configured, check the “Send account information to the user” field to ensure the user is notified of the new account and password.
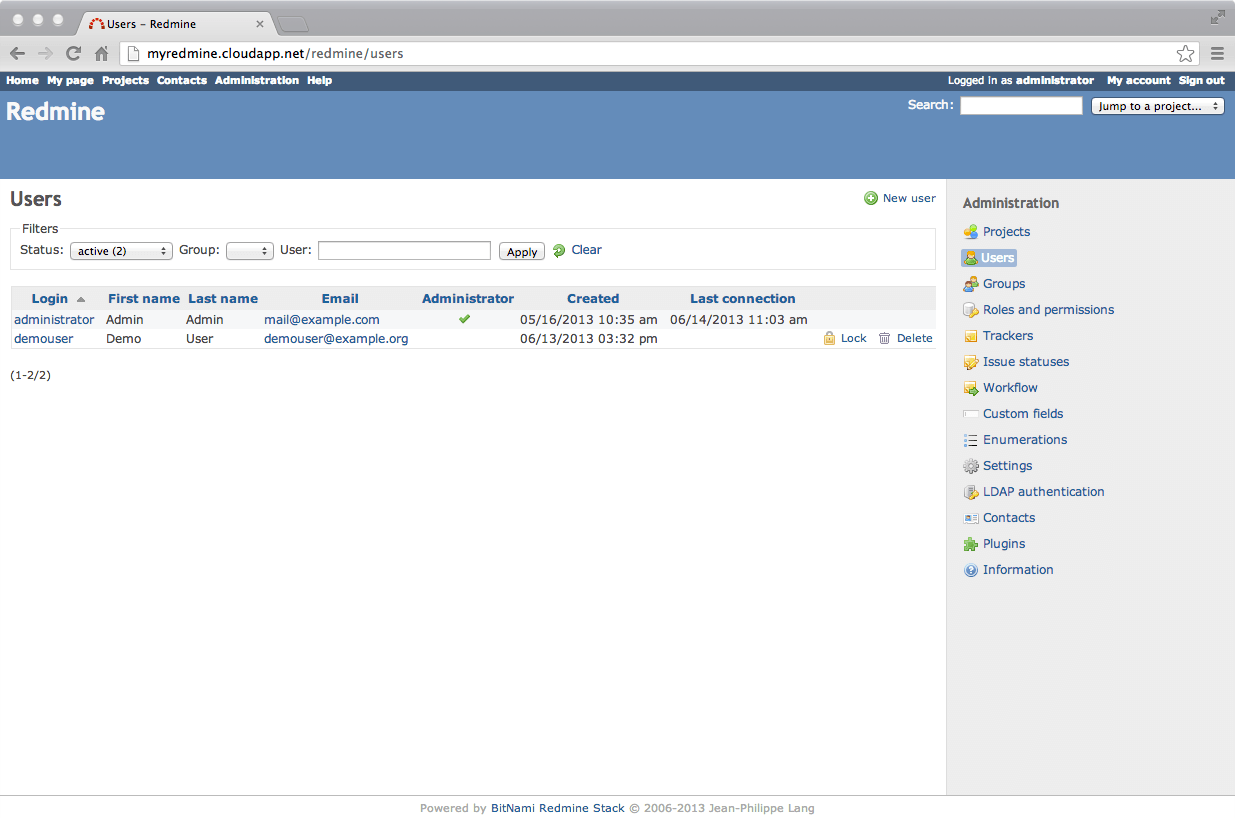
The “Users” overview page should now show the new user in the list. You can lock and delete the user directly from this list.
Create groups
In addition to creating individual users, you can also group them for more convenient management. Groups can be added as members of projects as if they were regular users. This results in all individuals in that group being added to the project. In addition, by adding a user to a group, the user automatically inherits the group’s privileges.
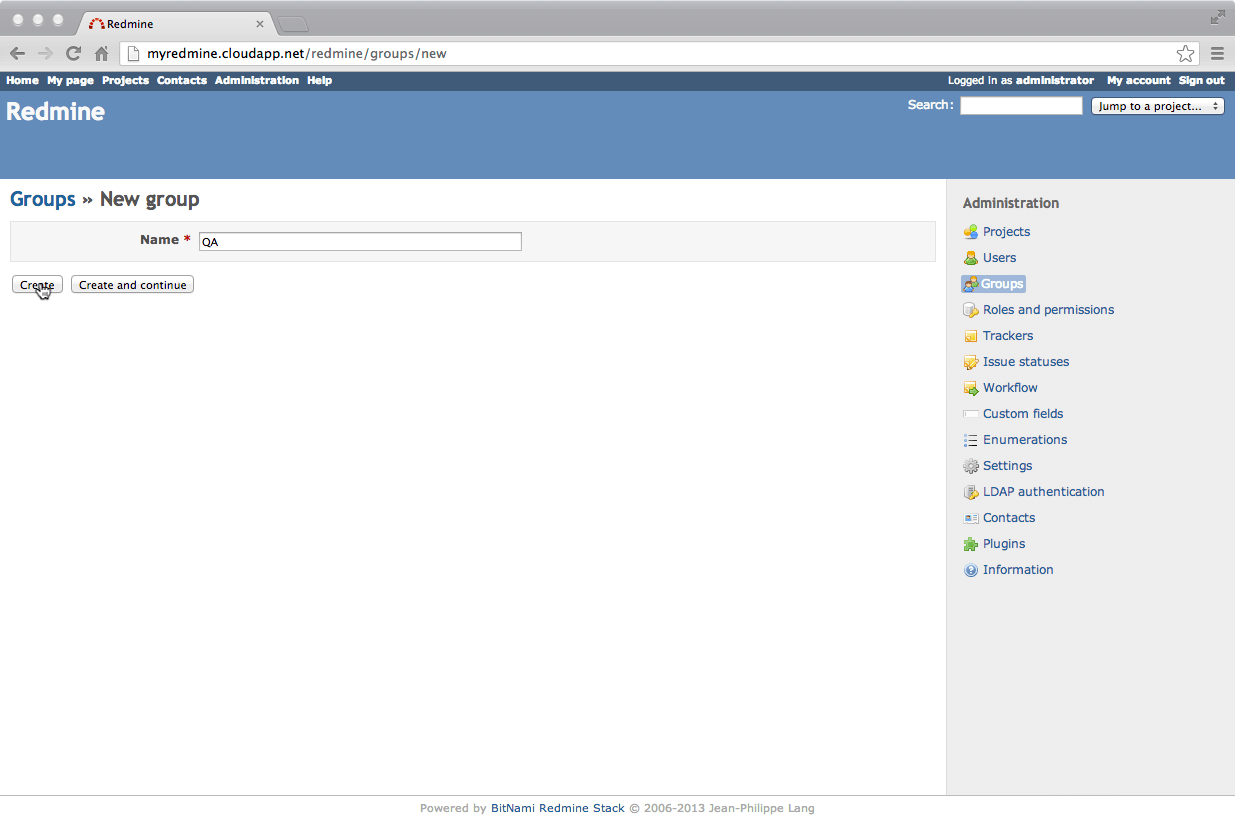
To manage groups, navigate to the groups section from the “Administration” panel and click the “New Group” option. Give the group a name and click the “Create” button.
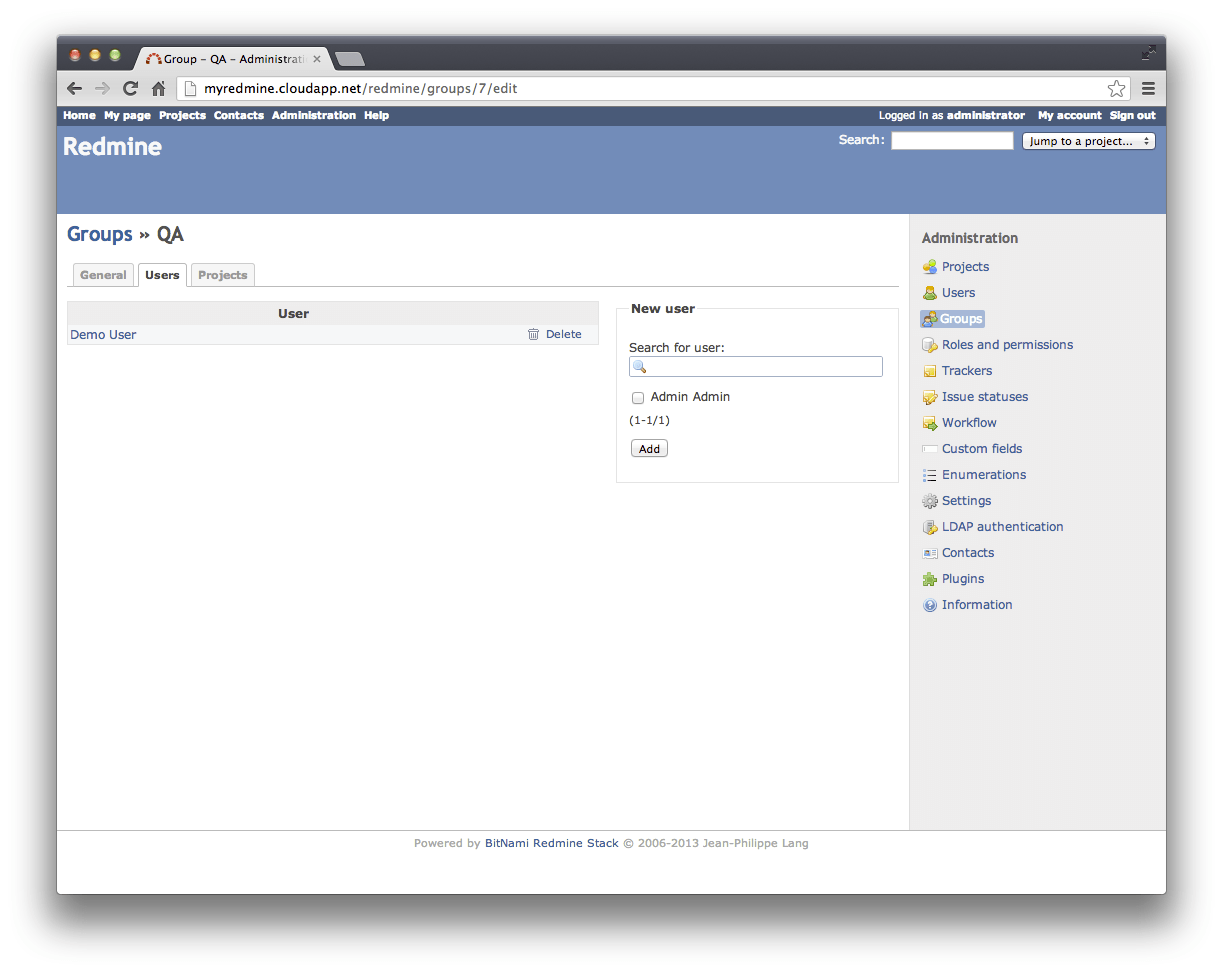
By clicking on the newly created group from the “Groups” overview page, you can edit it and add new users to it through the “Users” tab:
Lock and delete users
When a user is no longer involved in a project, you may want to prevent them from accessing your application. The easiest way of doing this is by locking the user’s account. A locked user won’t be able to login to the application, nor will he or she receive notifications or be listed as a member of the project. The user will, however, still be listed in old issues, and comments made by the user will still be credited to them.
NOTE: Locking a user is a reversible change, so if you need to unlock a user, you can simply click the “Unlock” link. Doing so will make it appear as though they were never removed.
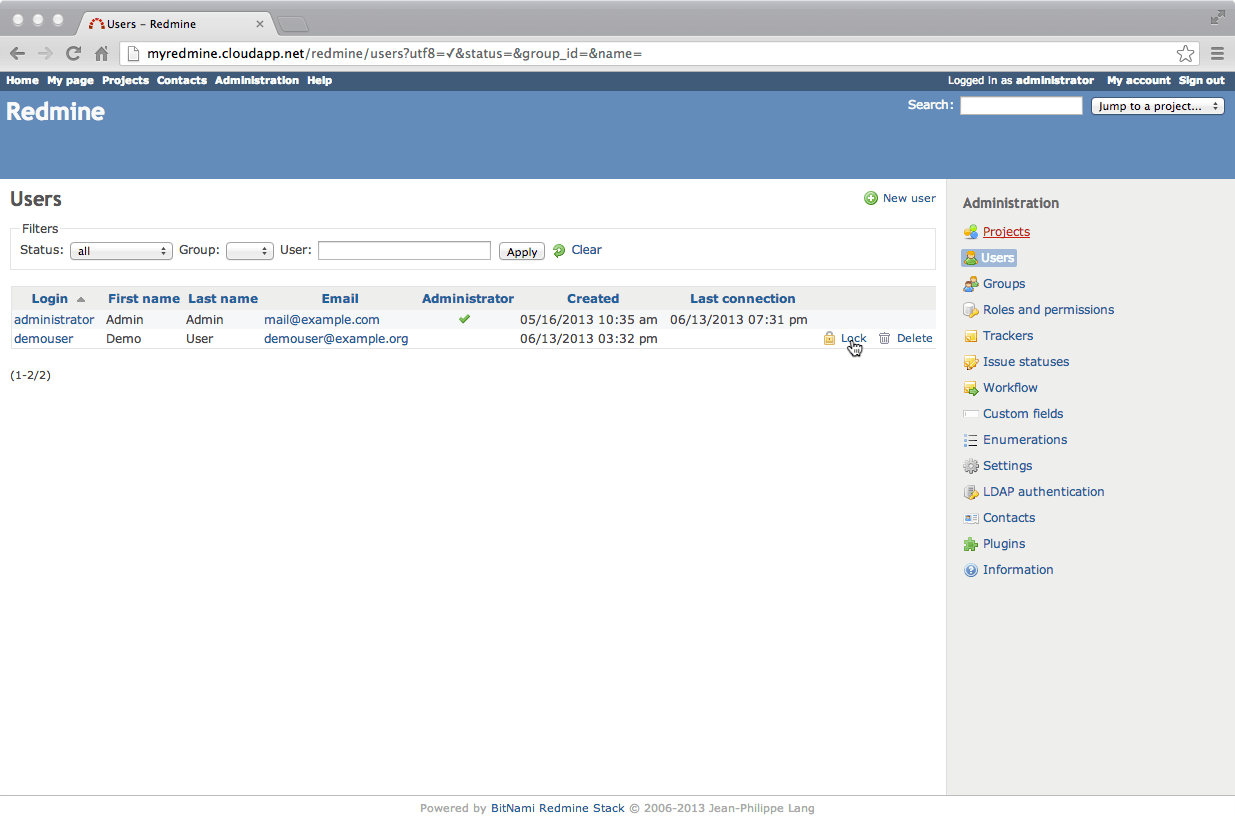
To lock a user, click the “Lock” link on the “Users” overview page:
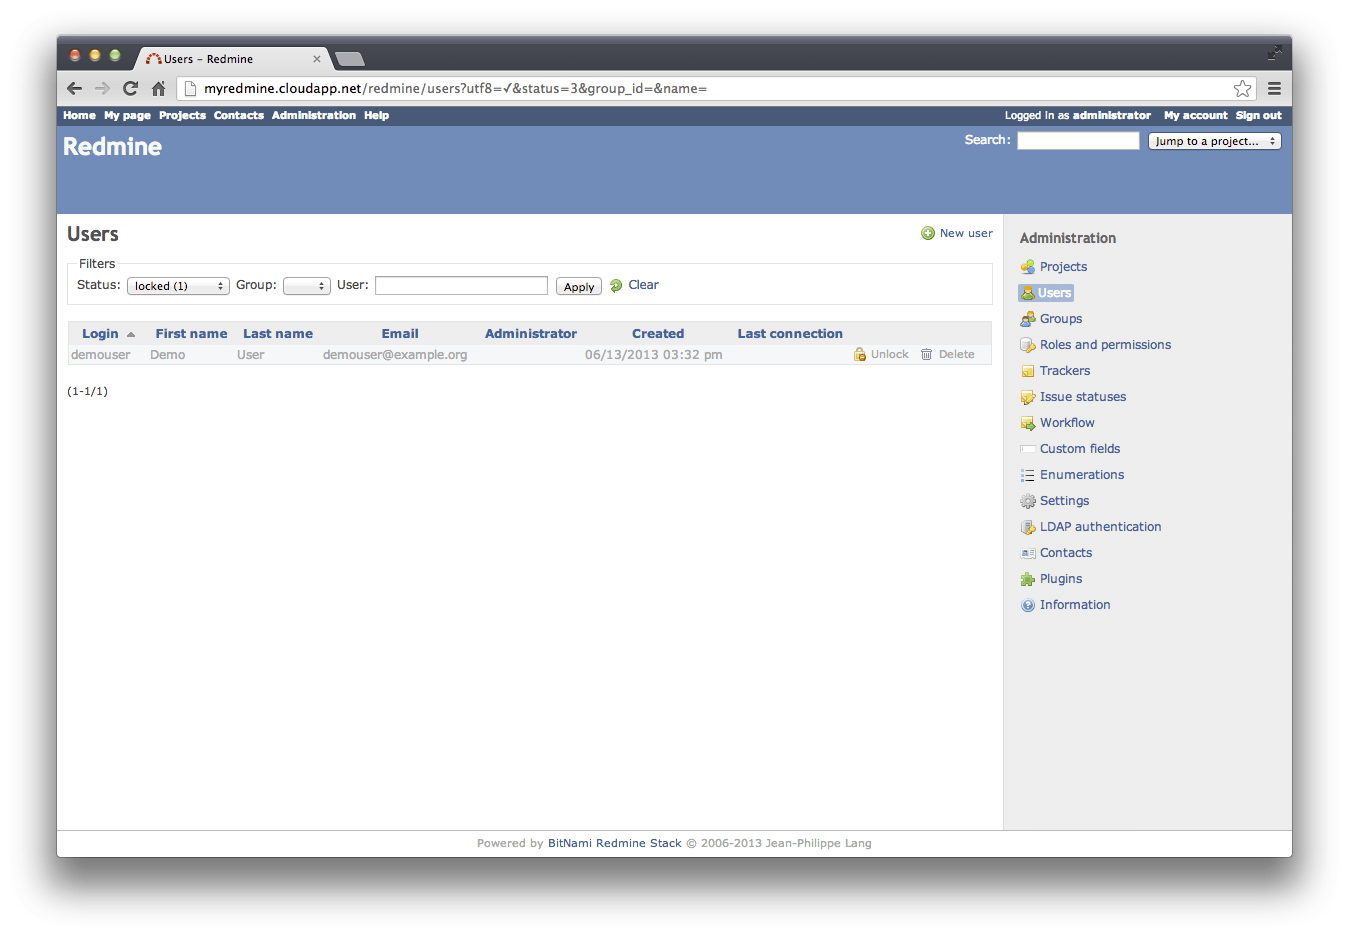
Locked users are not listed by default in the user list. To view locked users, adjust the search filters to show the users with “locked” (or “all”) status. This is necessary if you want to unlock a user.
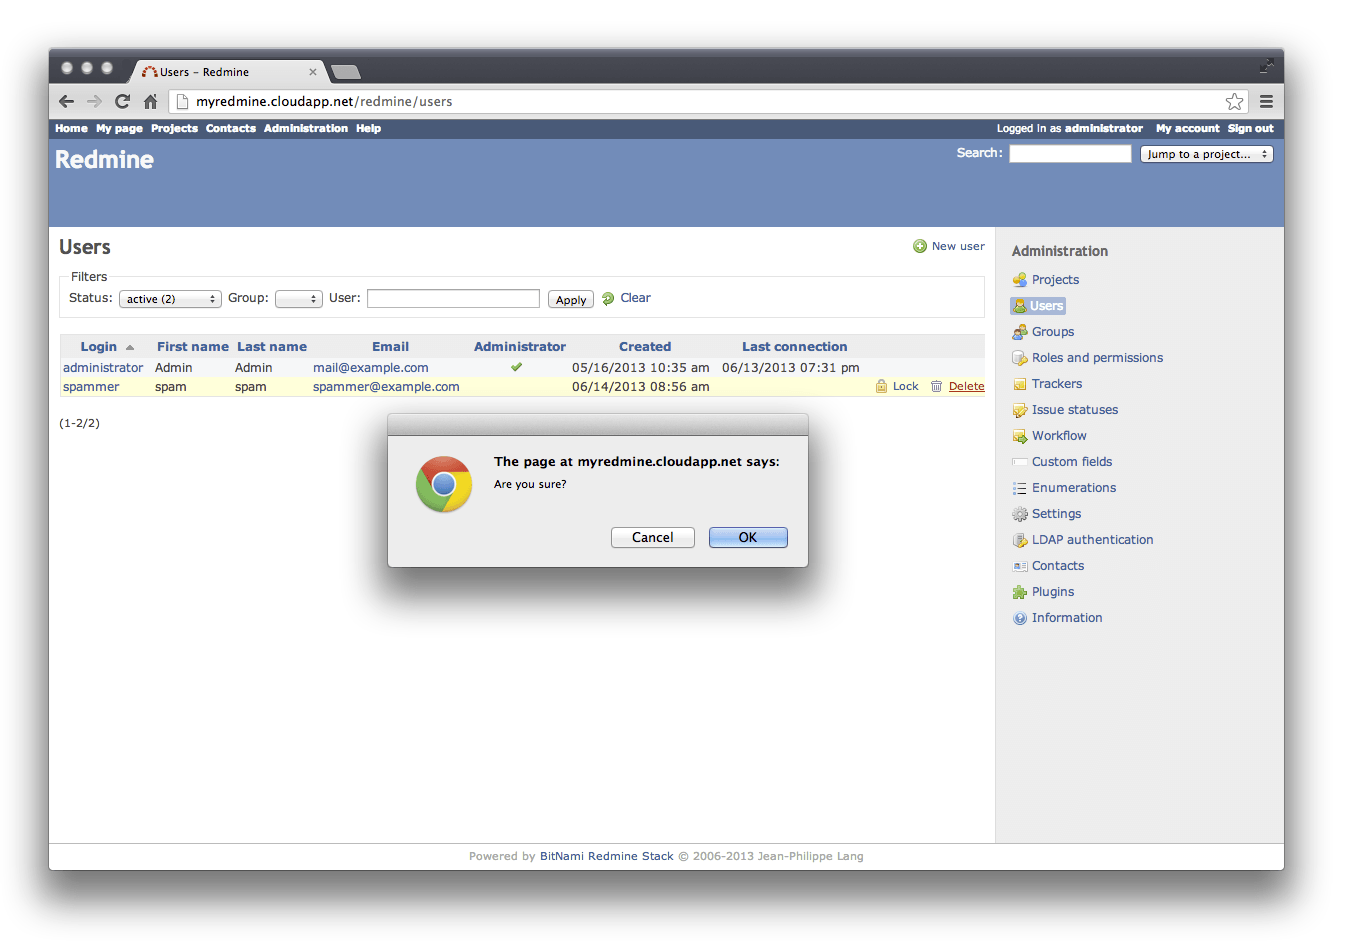
Sometimes, locking a user is not the best solution. A common example is when the automatic account registration is enabled and spam accounts are created. In this scenario, you wouldn’t be interested in keeping the user accounts, even in a locked state. This is where deletion becomes useful.
Deleting users is also performed from the “Users” overview page and will fully remove the account. Any entries in the system that are associated with that user will now be associated with “Anonymous”.
NOTE: Removing a user is not reversible, so use with care.
Accept new users
If you kept the default “Self-registration” setting as “manual account activation” in the “Authentication” section, new users are able to register themselves to use Redmine and will be kept in an inactive status until an administrator manually accepts their requests. Review which users are pending activation in the “Users” overview, by setting the status filter to “registered”.
The resulting list allows you to quickly “activate” users, which marks their accounts as active and allows them to login to the system, or “delete” them, which removes their accounts. Unlike deleting a previously active account, deleting an account at this stage will not result in any “Anonymous” entries in the application.
Step 3: Work with projects
Redmine allows you to manage multiple projects with a single installation. It also allows you to specify configuration settings for each of them, such as the project visibility or configuring different sets or roles to users for different projects.
Create projects
To create a new project, navigate to the “Projects” link in the top menu and click on the “New project” link. A form will appear asking for some basic information:
- Name: A printable name of the project
- Description: Where you can write a description of the project.
- Identifier: A unique identifier for the project. By default, it is created based on the “Name” so you do not need to provide any value. However, note that this is used in the URL for your project pages so you might want to make sure it is both meaningful and short.
- Public: This setting configures whether or not the project is visible for all users. If it is unchecked, only the project members will have access to it.
- Homepage: The link to the project in the Projects overview page
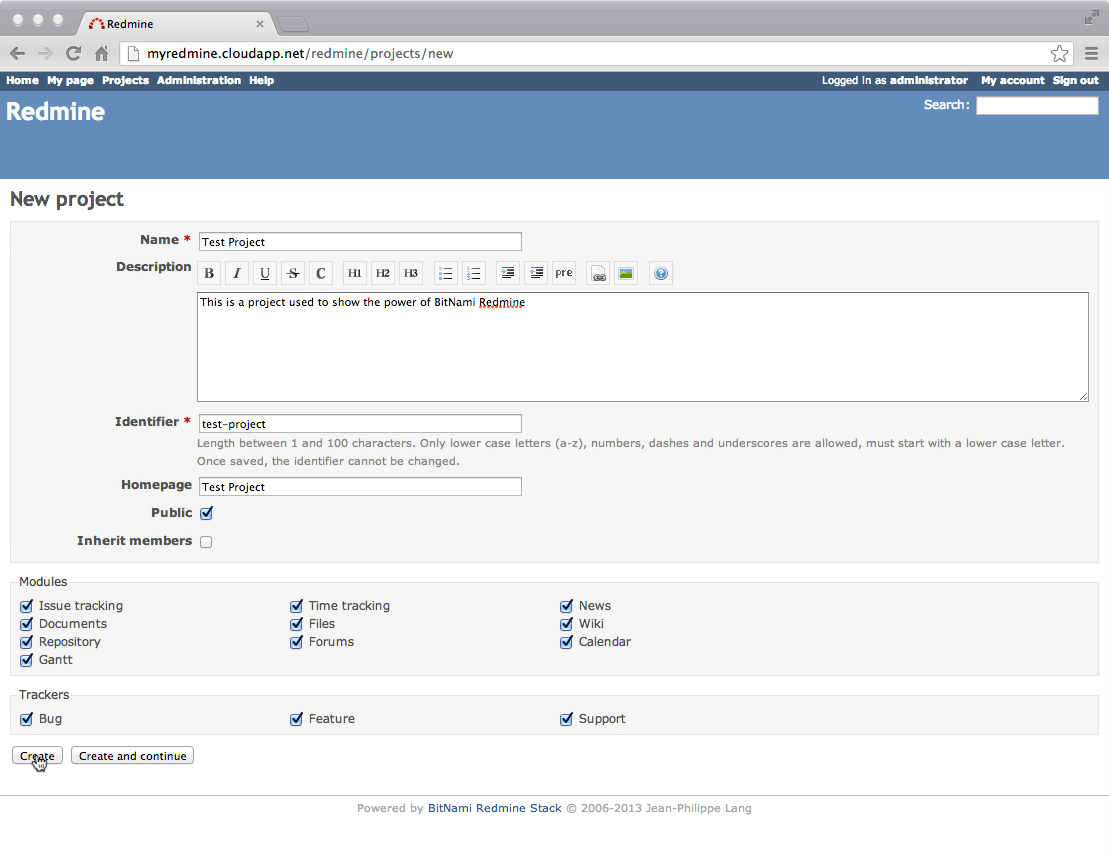
The form also allows you to configure which modules you will use for the project. The basic modules included by default are:
- Issue tracking: Enables tracking of the versions, categories and roadmap for the project.
- Time tracking: Allows tracking the time spent when working on the issues
- News: Allows publishing news related to the project
- Documents: Allows adding documents to the project
- Files: Allows attaching files to the project
- Wiki: Enables the project wiki
- Repository: Allows browsing the repository and view the latest commits
- Forums: Enables the project forum
- Calendar: Creates a calendar with the project issues
- Gantt: Creates a Gantt diagram with the project issues

You can select which trackers to enable. For example, if you are creating a project for bug submissions, you could simply disable all but “Bug”.

After completing the form, you will be redirected to the project settings page. You can modify all of the configured settings with the exception of the “Identifier”, which cannot be changed after the creation of the project.
Depending on which modules were selected when creating the project, the number of tabs will vary. Each tab provides features for managing one aspect of the project. For example, the “Members” tab lets you add users to a project.
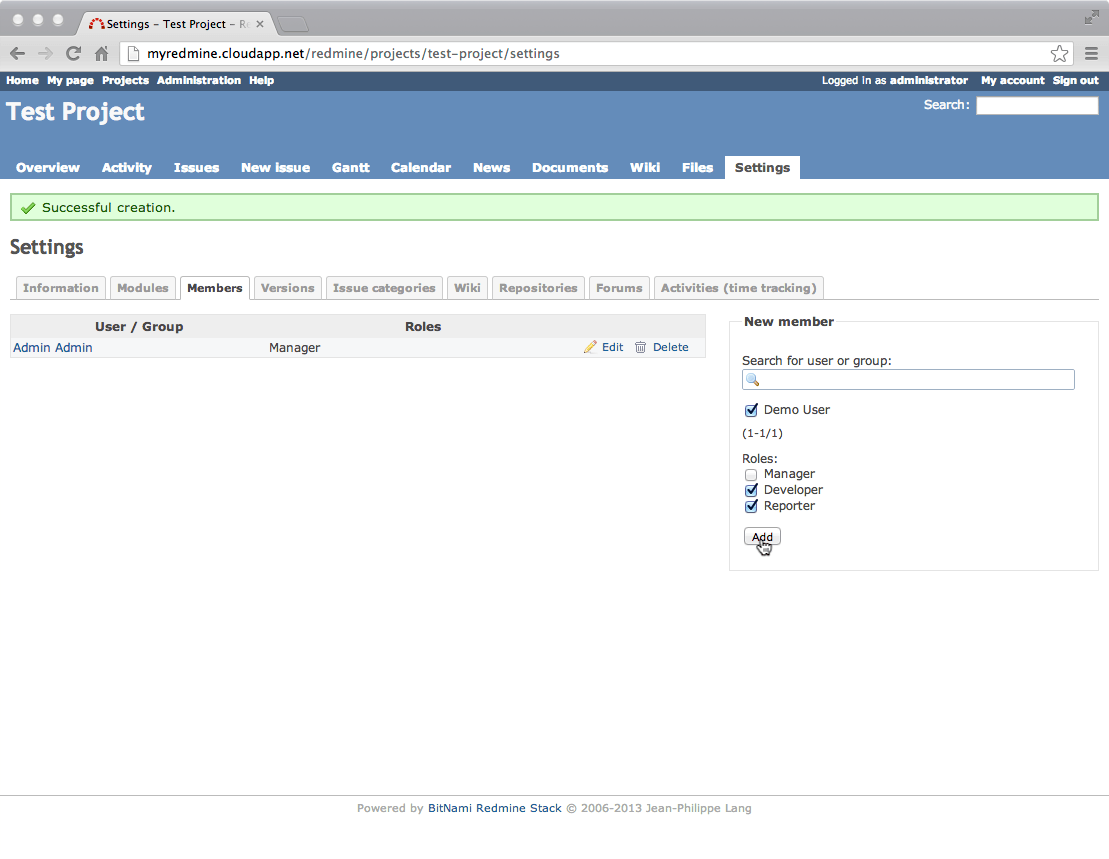
A pop-up window lets you search for users and add them. Depending on the role assigned to those users, they will have higher or lower privileges for that specific project. For example, “Admin” was added as a Manager (will have full privileges in the project), where “Demo User” will only be a Reporter and Developer. Please note that these roles are specific to the current project. The “Demo User” added as a “Developer” and “Reporter” to the “Test Project” could be a “Manager” in a different one.
Version projects
Another nice feature supported by Redmine is the ability to version projects. This makes it easy to plan different features for each of the planned versions. These versions can be managed from the “Versions” tab in the project settings. This tab will list all the available versions and provide a “New version”. The “Test Project” doesn’t currently have a new version so create one by providing some basic information:
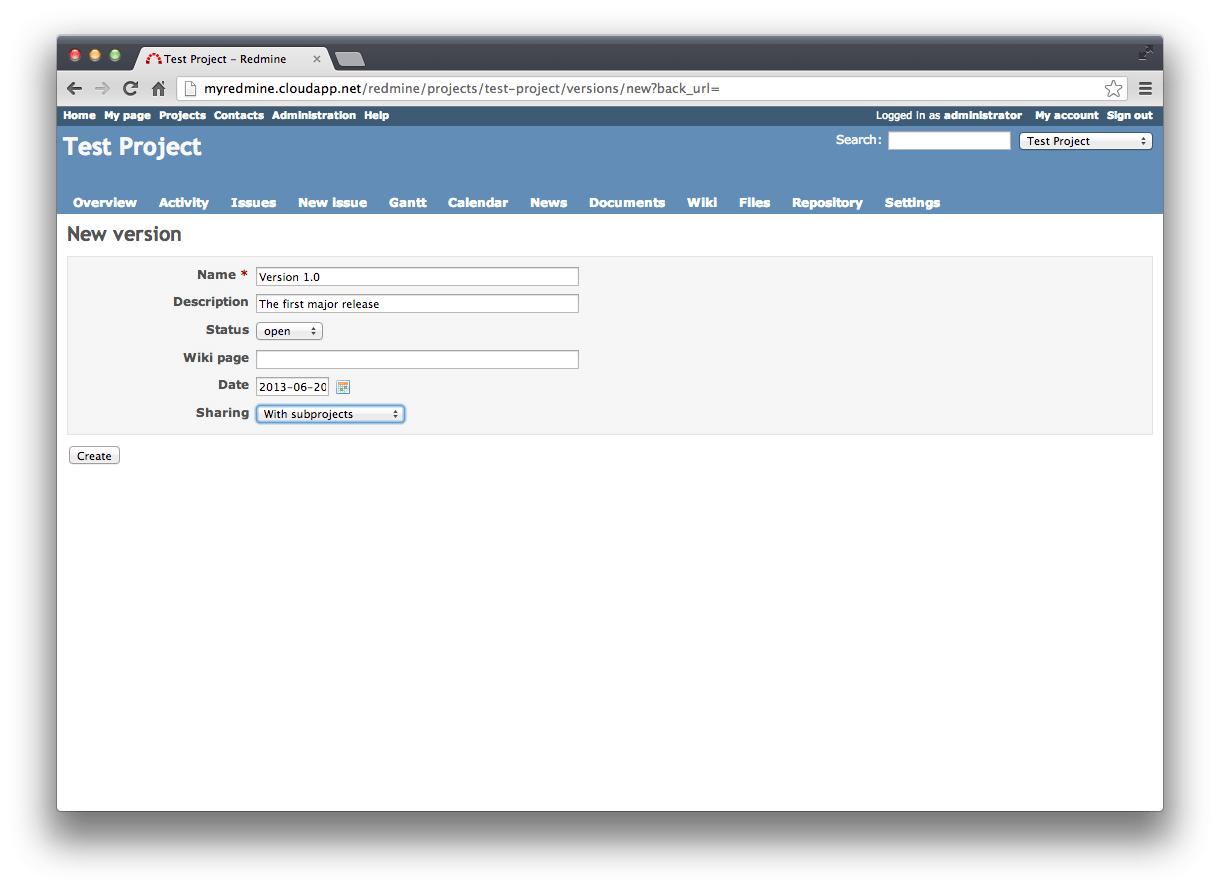
After adding versions, a new field labeled “Target version” will be available in appropriate places within your project (e.g. issues can be assigned to a specific target version).
Create categories
You can further tweak projects by creating categories. Categories are useful to classify issues, for example, based on different parts of your product (frontend, backend, documentation, …). As with versioning, create new categories from the “Issue categories” in the project settings. Simply click “New category” and provide a “Name” and an optional “Assignee”, to whom all new users with that category will be assigned:
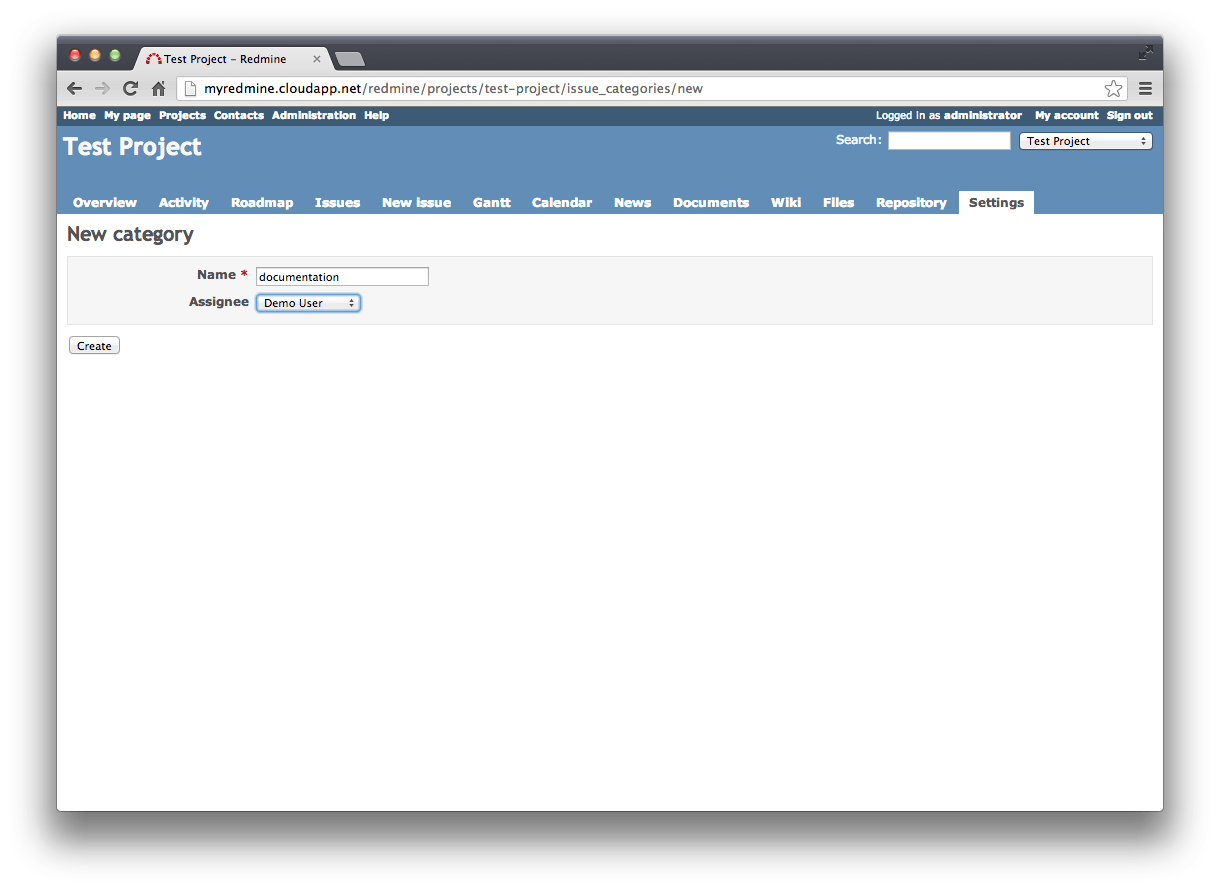
After adding a new category, the “Category” field will automatically be available in your issues.
Step 4: Add new trackers and customize workflows
Add trackers
As previously mentioned, “trackers” can be used to classify your issues. Redmine includes some predefined trackers (bug reports, feature requests and support requests) but you can add new ones as well. To create a new Tracker, navigate to the “Trackers” subsection under “Administration” and review the built-in trackers included in Redmine, as shown below
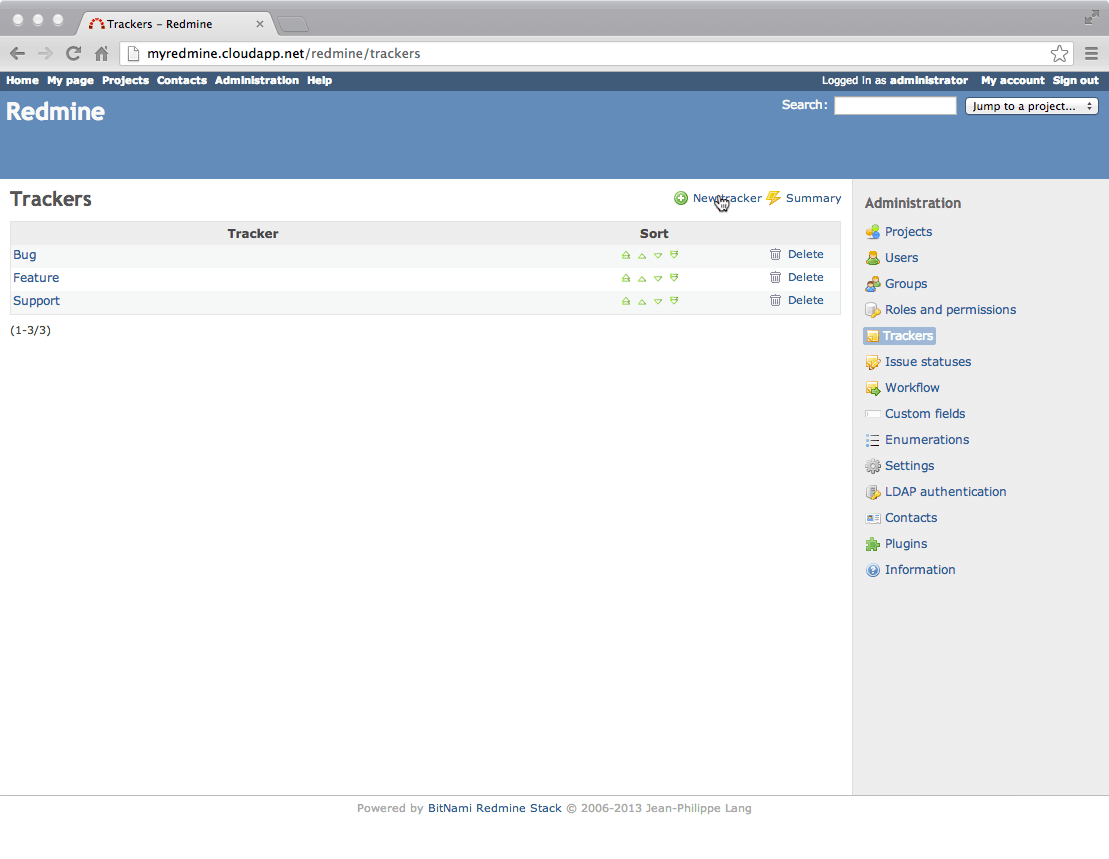
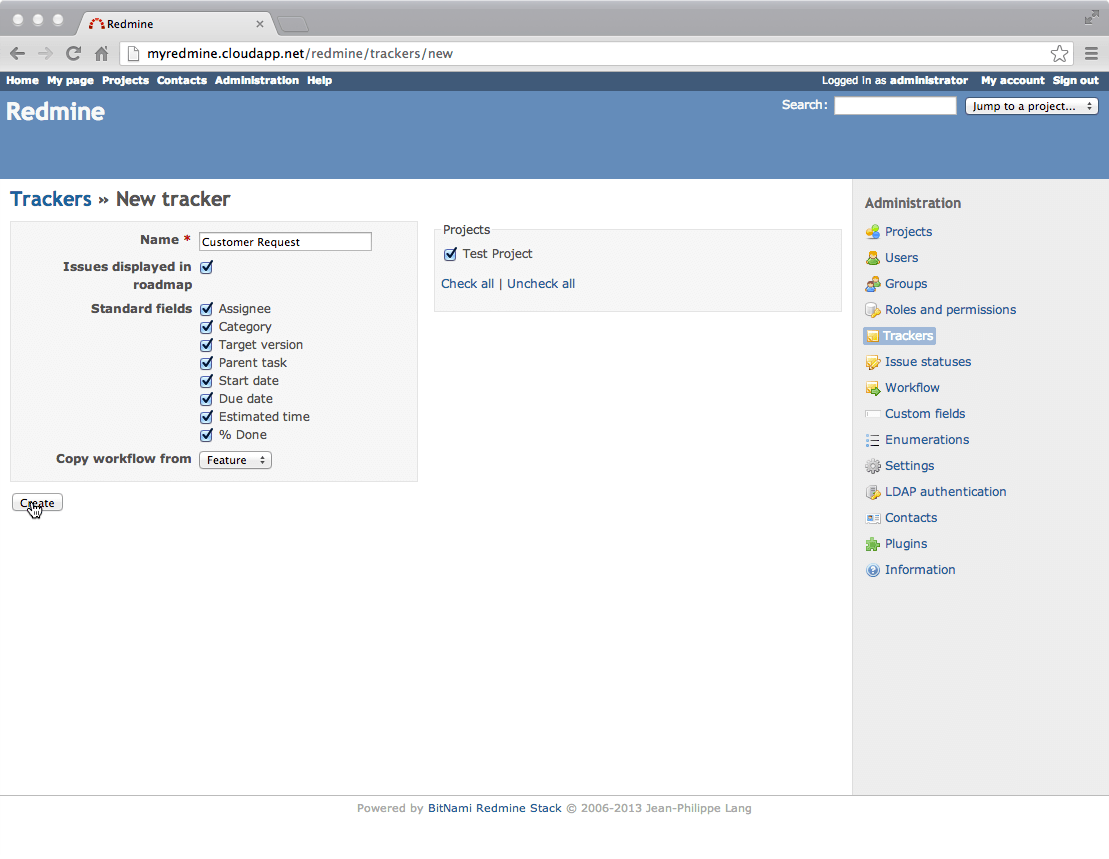
To add a new one, simply click “New tracker”. Enter details such as the name of the new tracker, the projects it will be used in, and the fields it will include. You can also specify an existing tracker to copy its workflow. If you don’t copy an existing workflow, you will need to create one from scratch.
Customize workflows
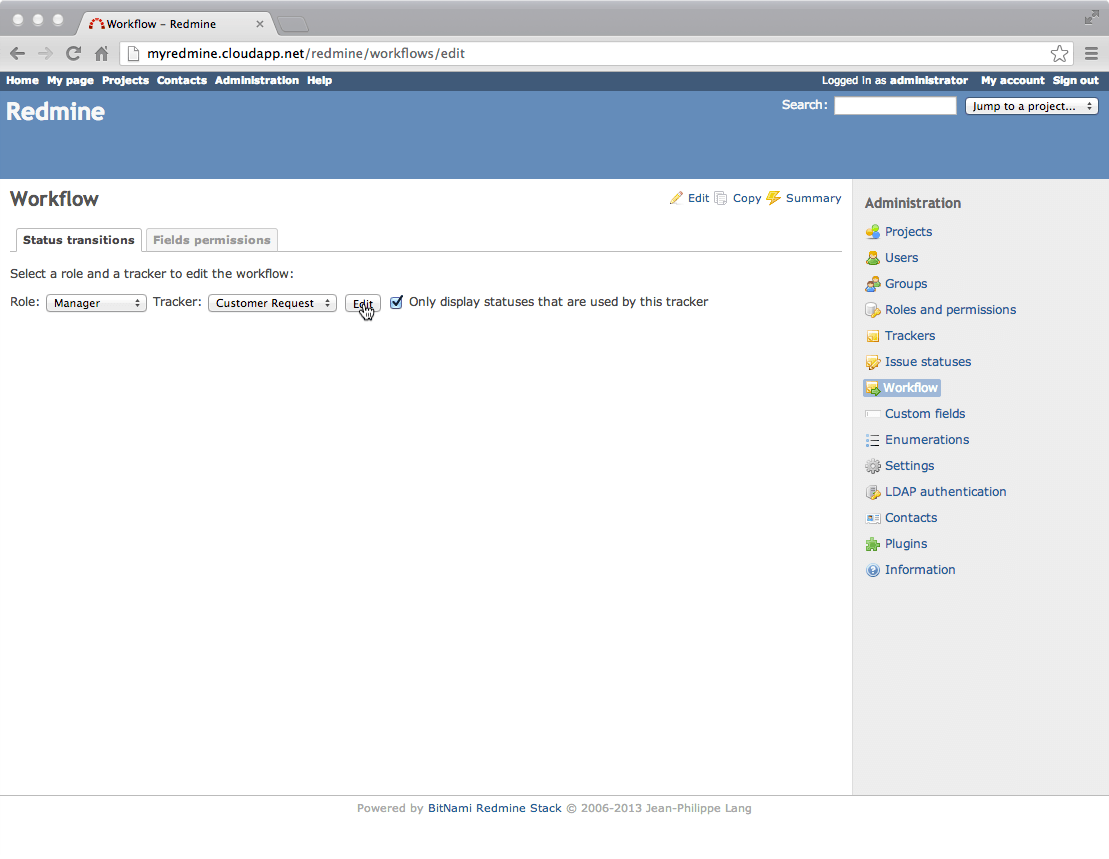
Workflows allow you to define transitions between states for items recorded in your trackers. The states available are dependent on the roles assigned to the user and the kind of tracker in use. You can modify workflows or define new ones in the “Workflow” section. To change the workflow, select a tracker and the role you wish to change and click “Edit”.
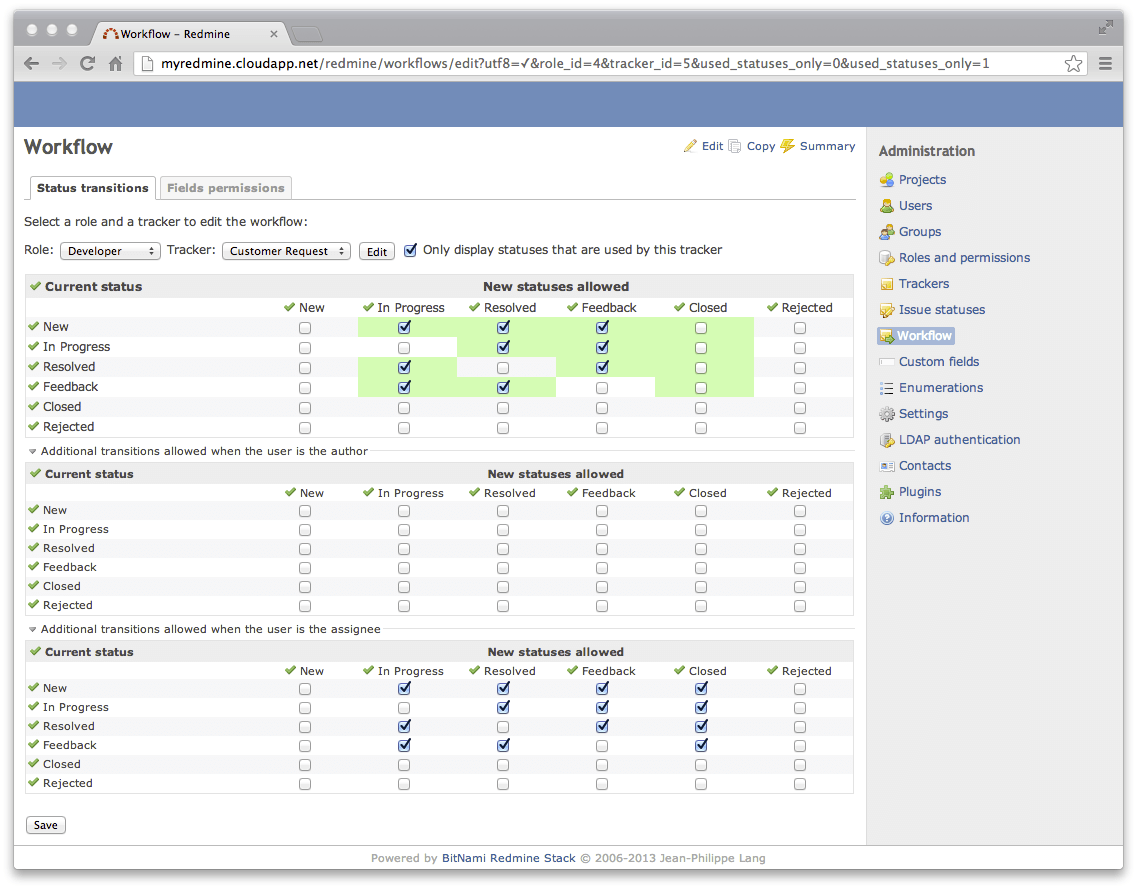
You will see a set of tables that allows you to configure the allowed state transitions. Note that you can provide additional transitions when the user is the author or the assignee.

The workflow definition is a powerful tool. For example, you can specify that developers cannot close cases unless they are the ones implementing them (the assignee), as shown below:
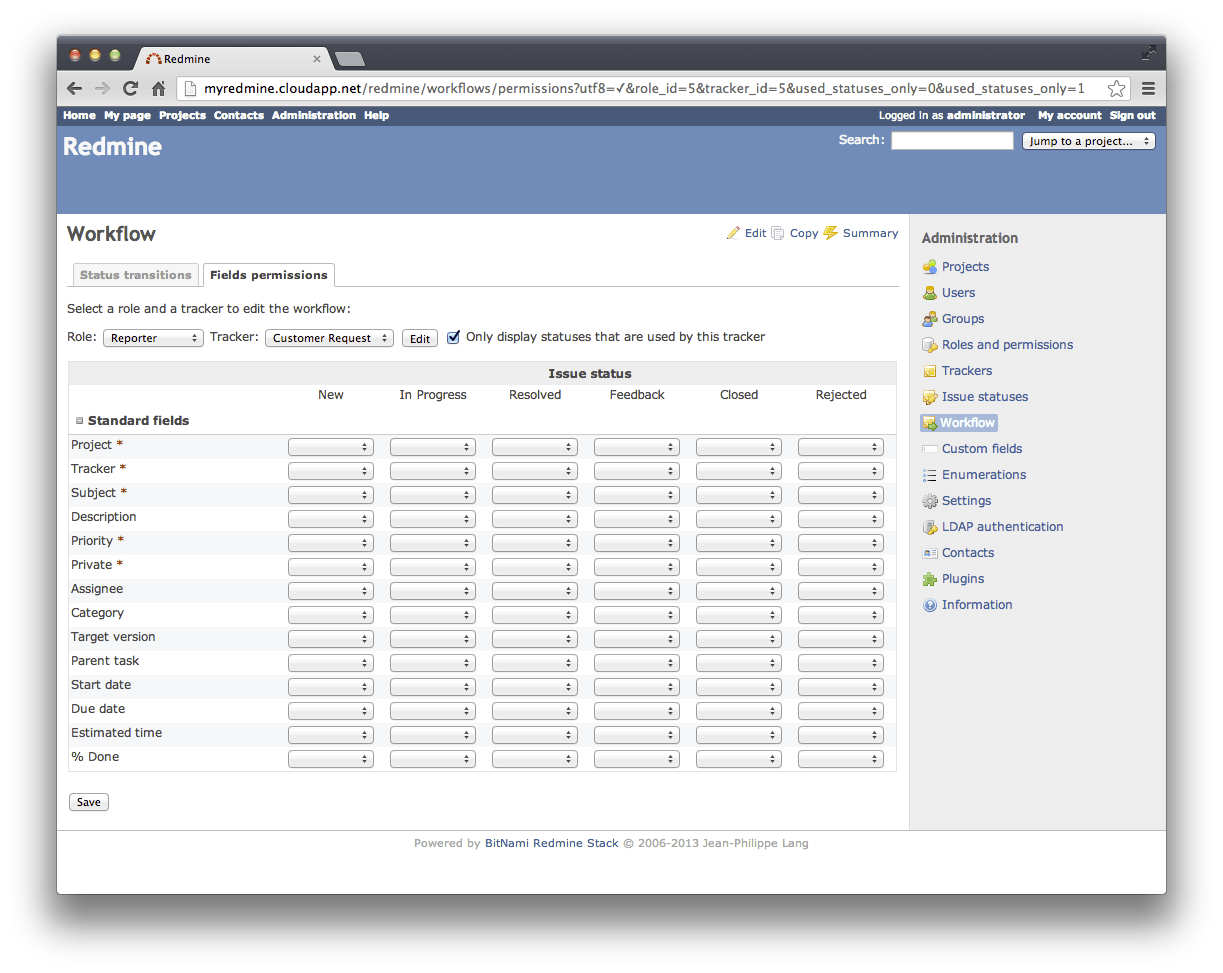
In addition to defining state changes in workflows, you can also specify which fields each role can modify based on the current state of the issue (see the “Fields permission” tab).
Step 5: Work with issues
Issues are created to define tasks for projects (bugs, feature requests or improvements) and easily track who will be taking care of them and their current status. You can review all of the issues associated with a project from its main page.

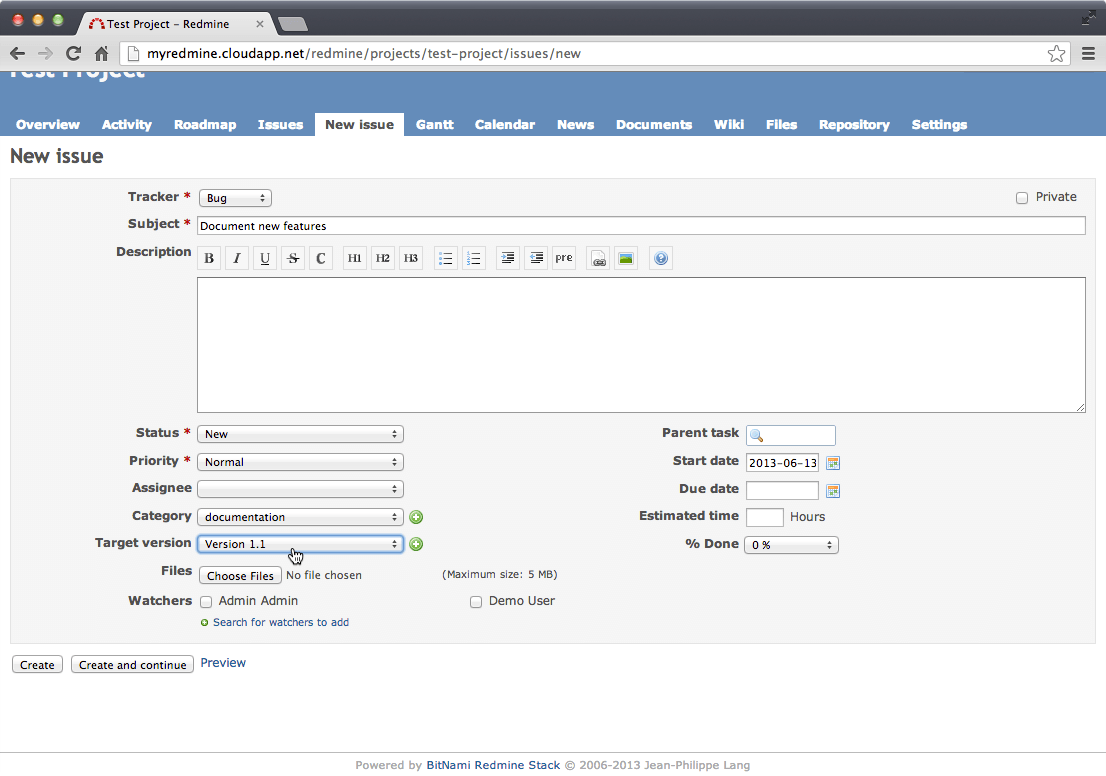
Depending on the modules enabled when the project was created, you will see a set of tabs (Activity, Issues, Gantt, …). The “New issue” tab displays a form for filing a new issue against the project, which requires the information below
- Tracker: The kind of issue being created (a bug, a new feature…)
- Subject: A concise and clear description of the issue
- Description: A detailed description of the issue
- Status: Current status of the issue, defaults to “New”
- Priority: The priority of the issue
- Assignee: The project member who will take care of resolving the issue.
- Start Date: The start date for the task
- Due date: The deadline for the task
- Estimated time: An estimate of how much time the task will take
- % Done: The current progress of the issue (defaults to 0%)
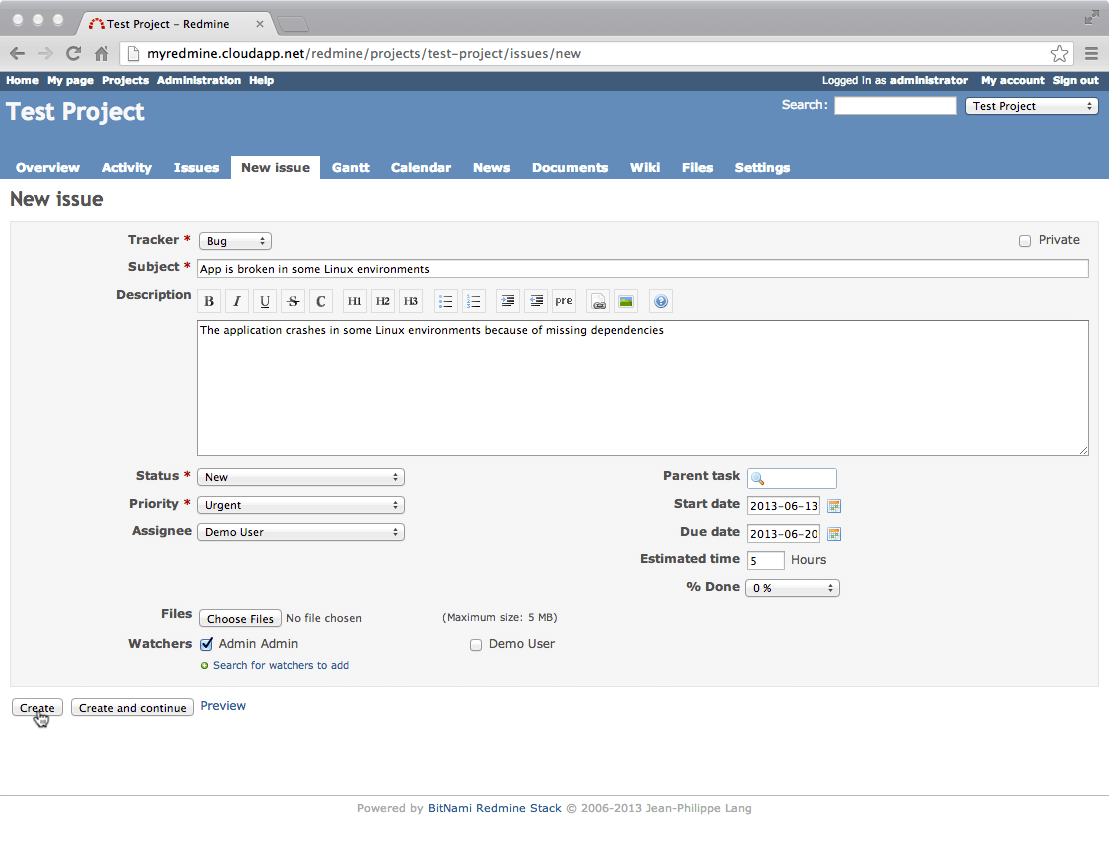
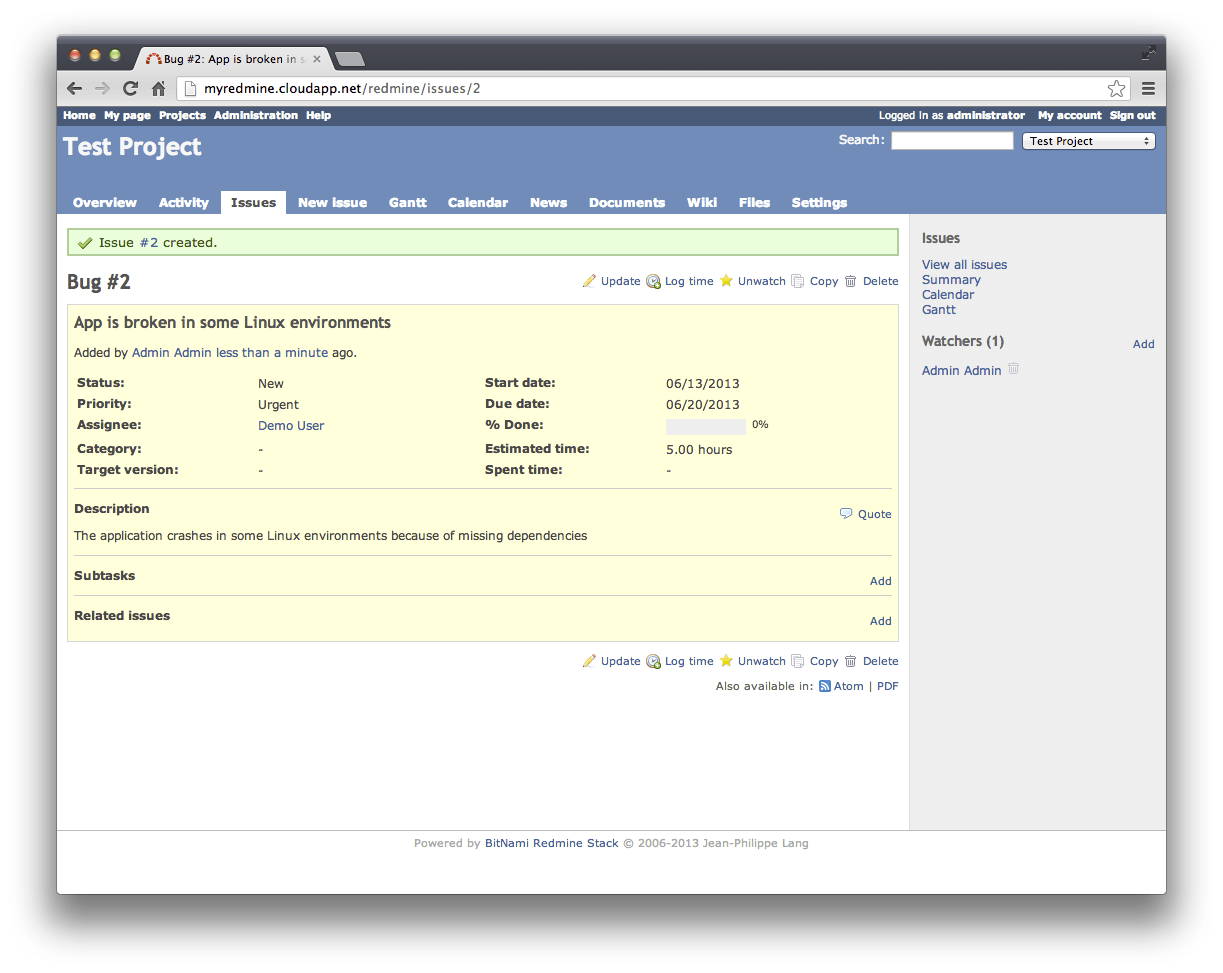
You will also be able to attach files and register watchers to be notified when the issue changes. Once the form is completed and submitted, confirmation of the issue creation will appear.
The “Issues” tab in the project page provides easy access to all issues that have been created in the project. By default this page only shows open issues.
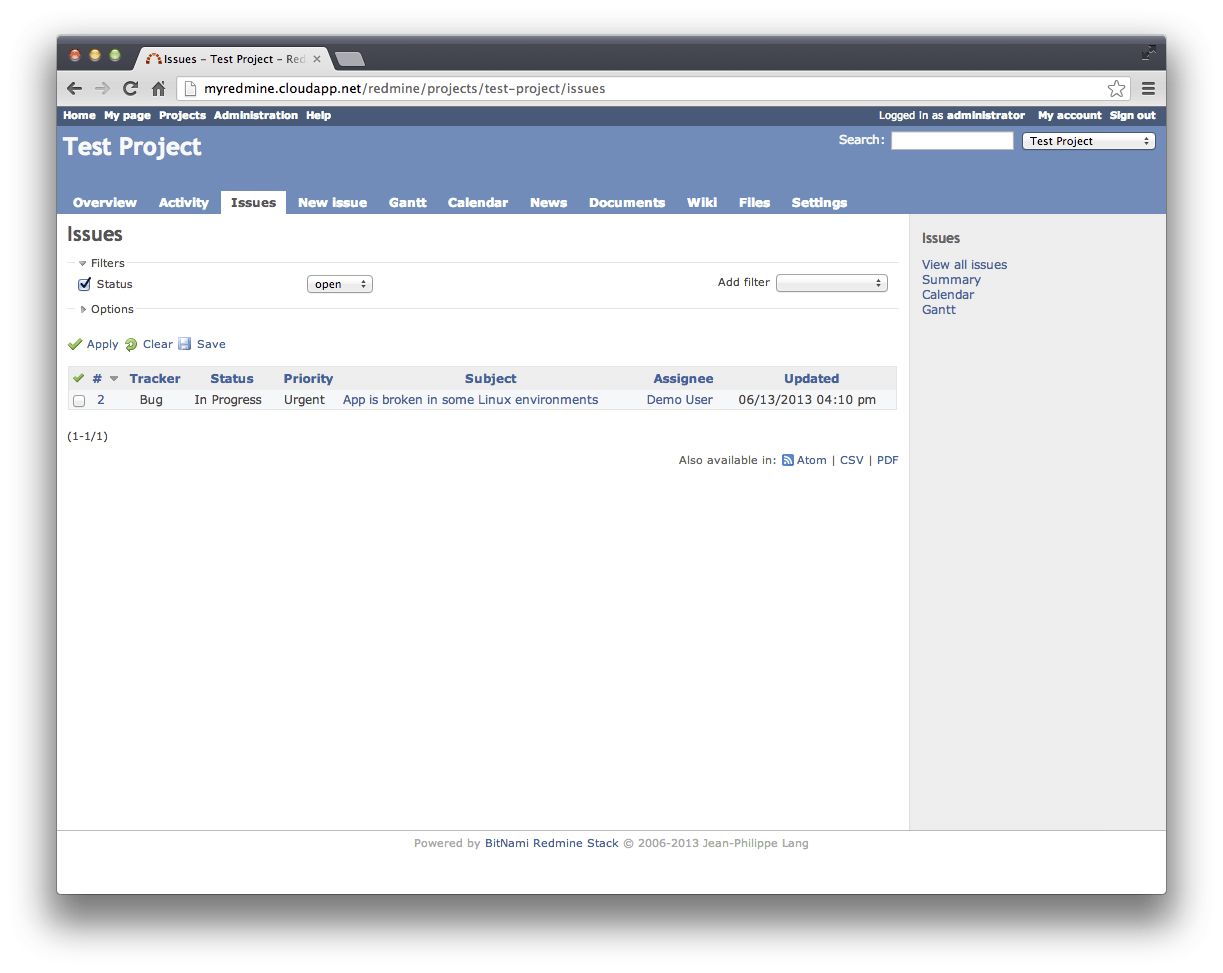
The issues overview page allows you to filter by various criteria, such as the status or the assignee.
A good way to work with Redmine issues is to track your progress against issues as you work on them. To do this, visit the issue page, click “Update” and change the various options on the resulting page:
- Status: Update this whenever there is a significant change in the issue status. For example, when you start working on an issue, set it to “In Progress”, and when you finish it, mark it a “Closed”.
- % Done: Update this as the task progresses.
- Log Time: This allows visibility into where the time spent on the issue went. It is useful to estimate time for similar future tasks and to justify time to your customers. The time logged will be added to the overall spent time, and you will be able to review a time summary by clicking the “Spent time” link
- Notes: Comment on the evolution of the issue using this field.
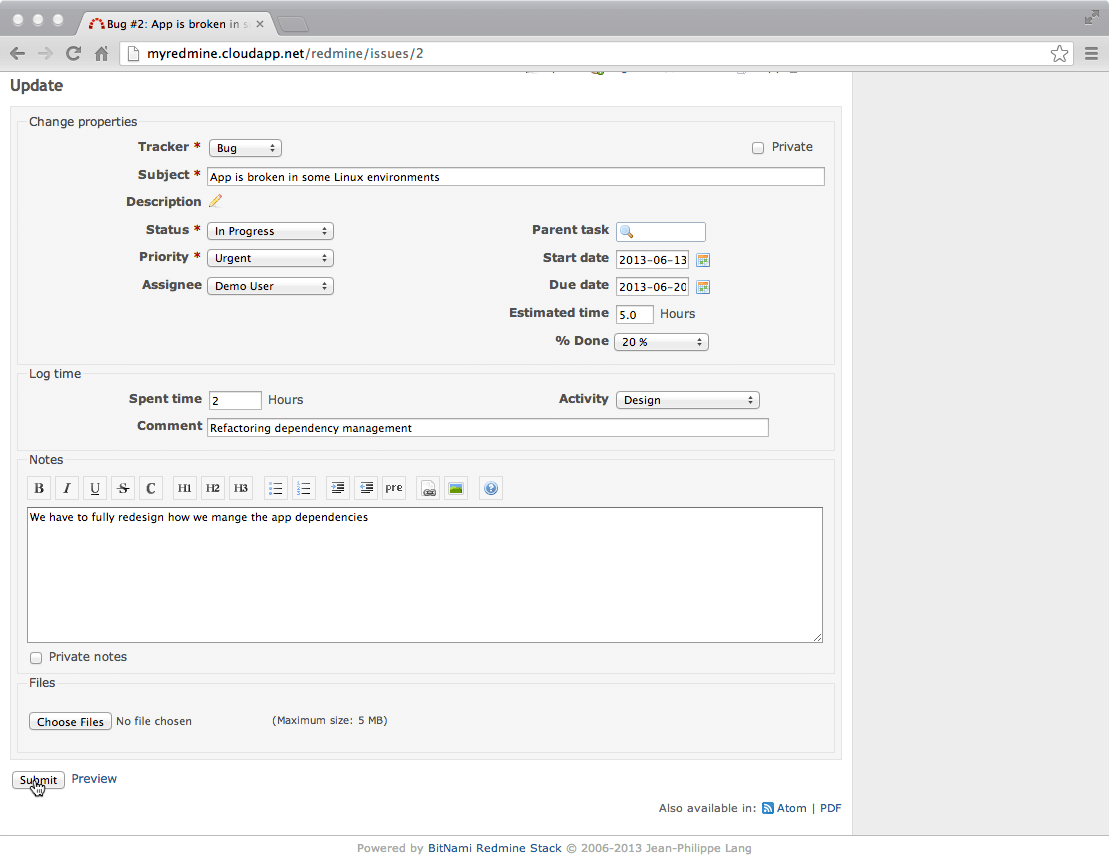
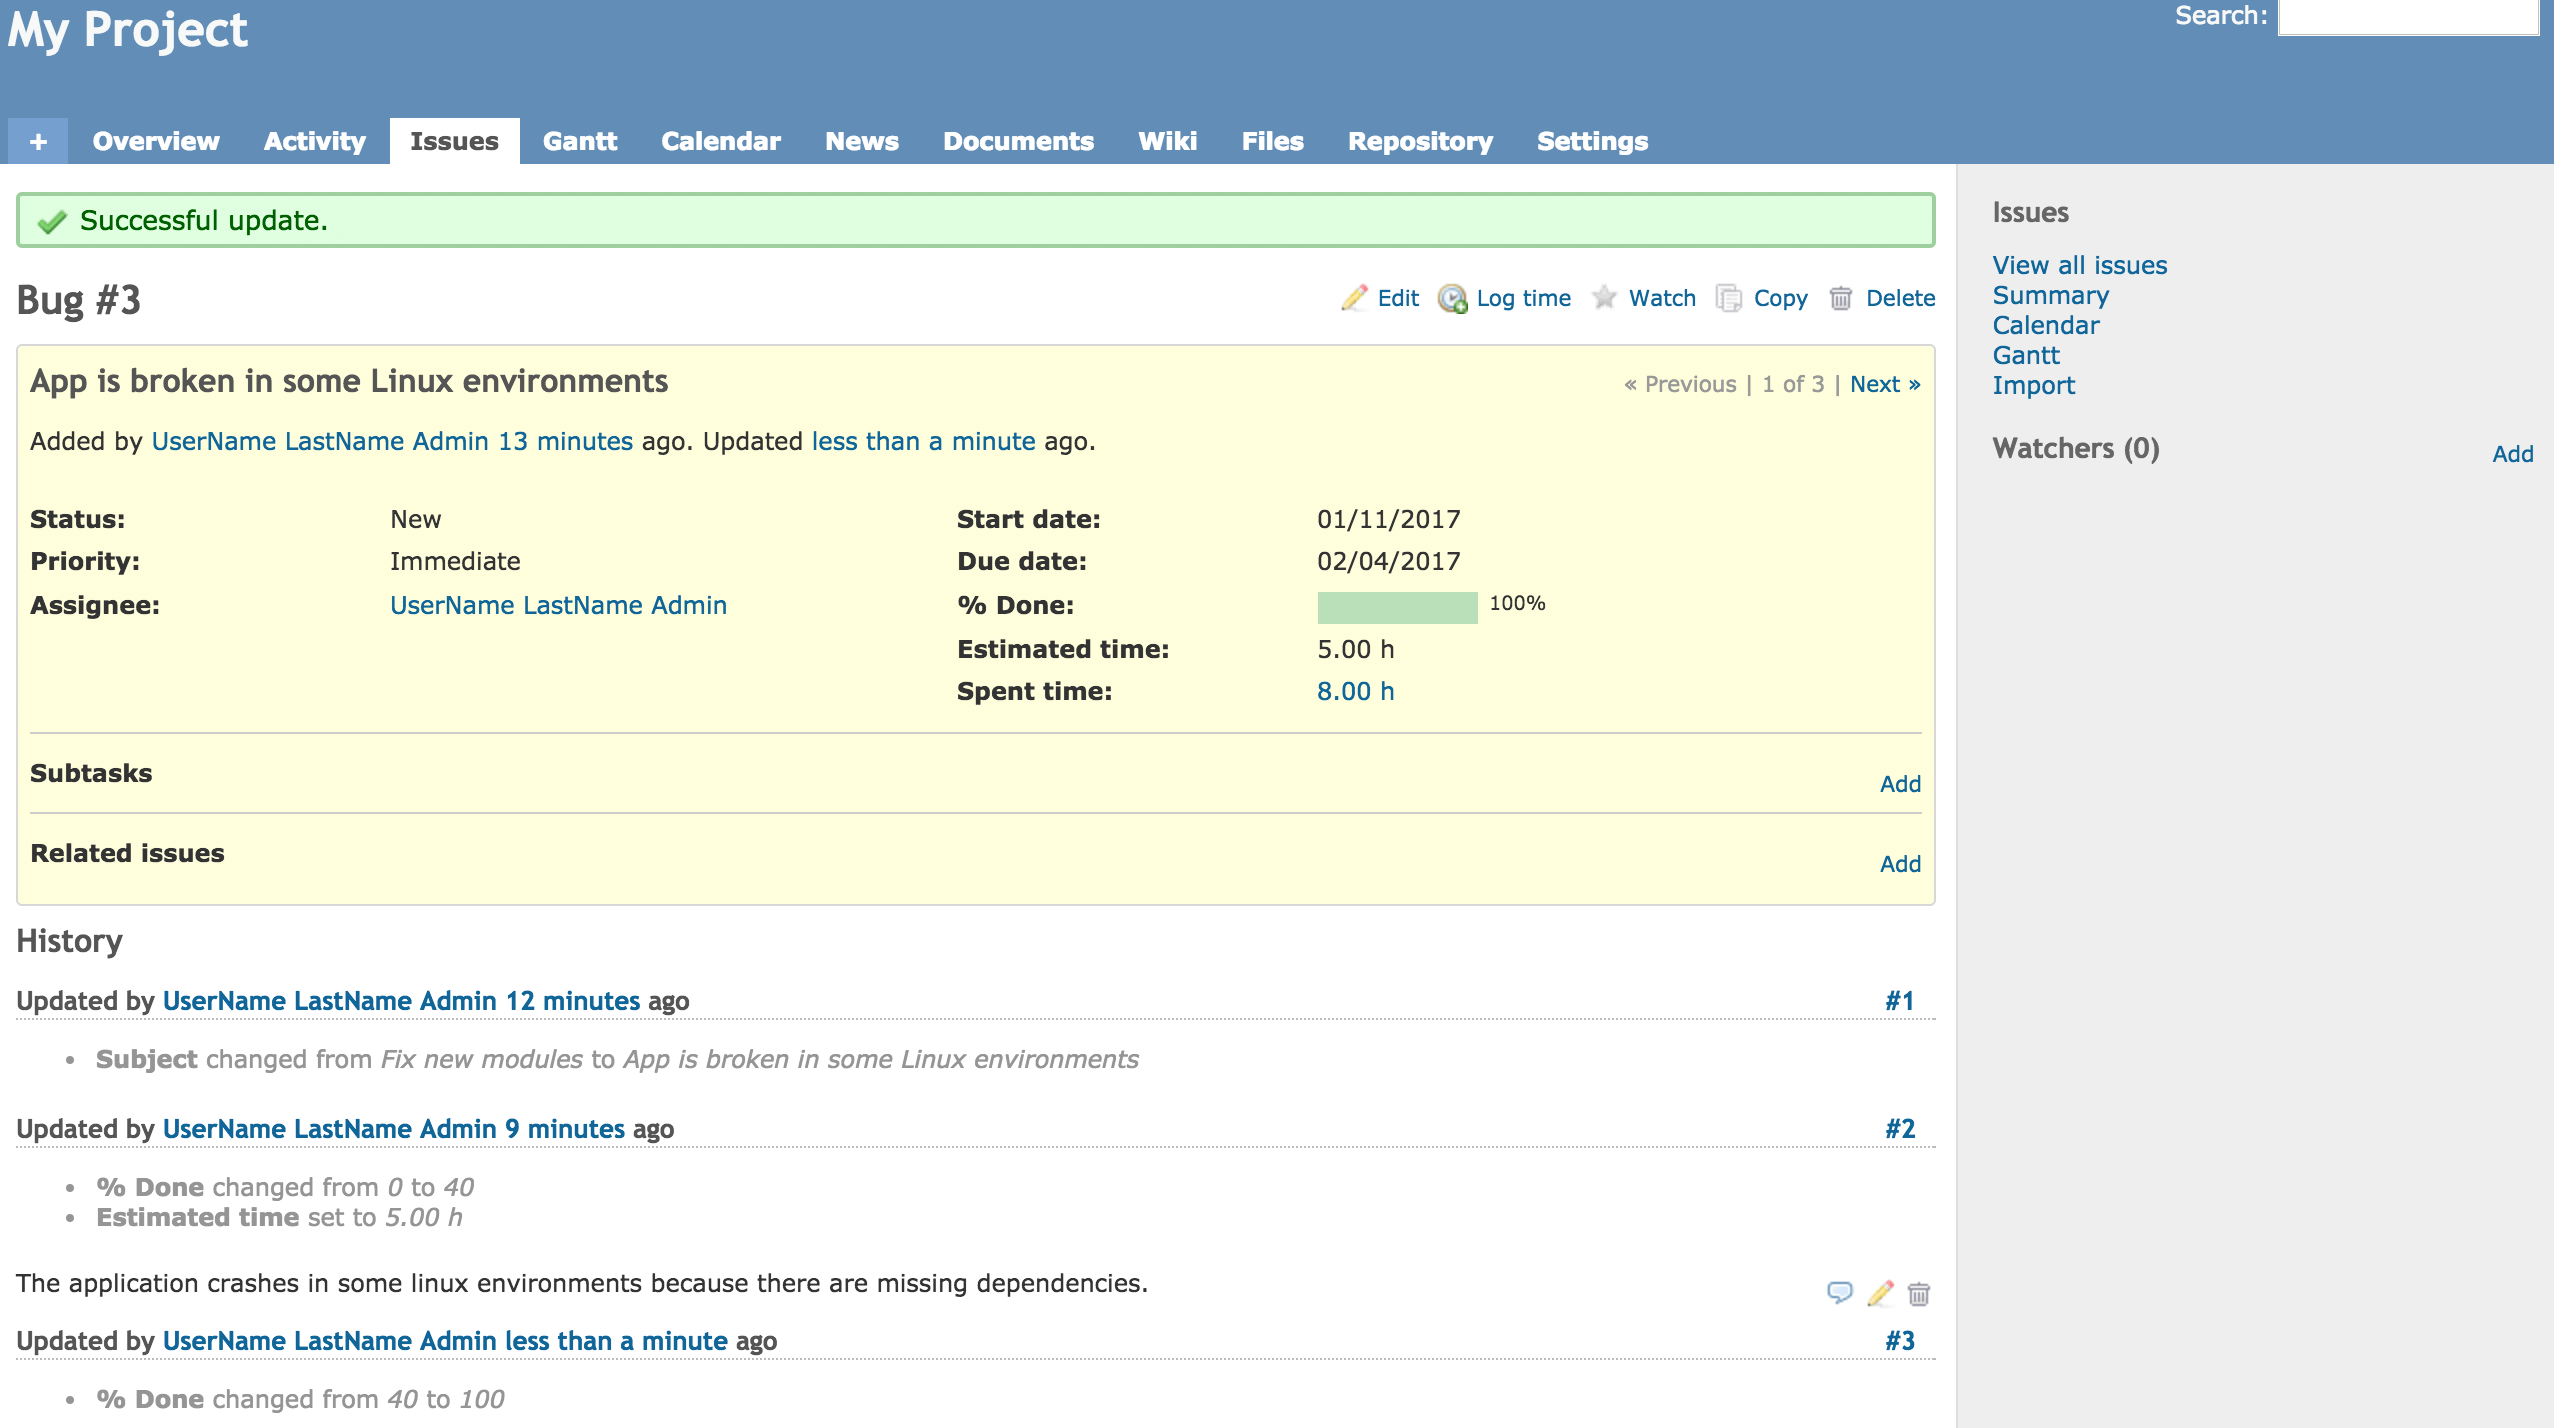
Submit the form and the changes will be recorded in the tracker.
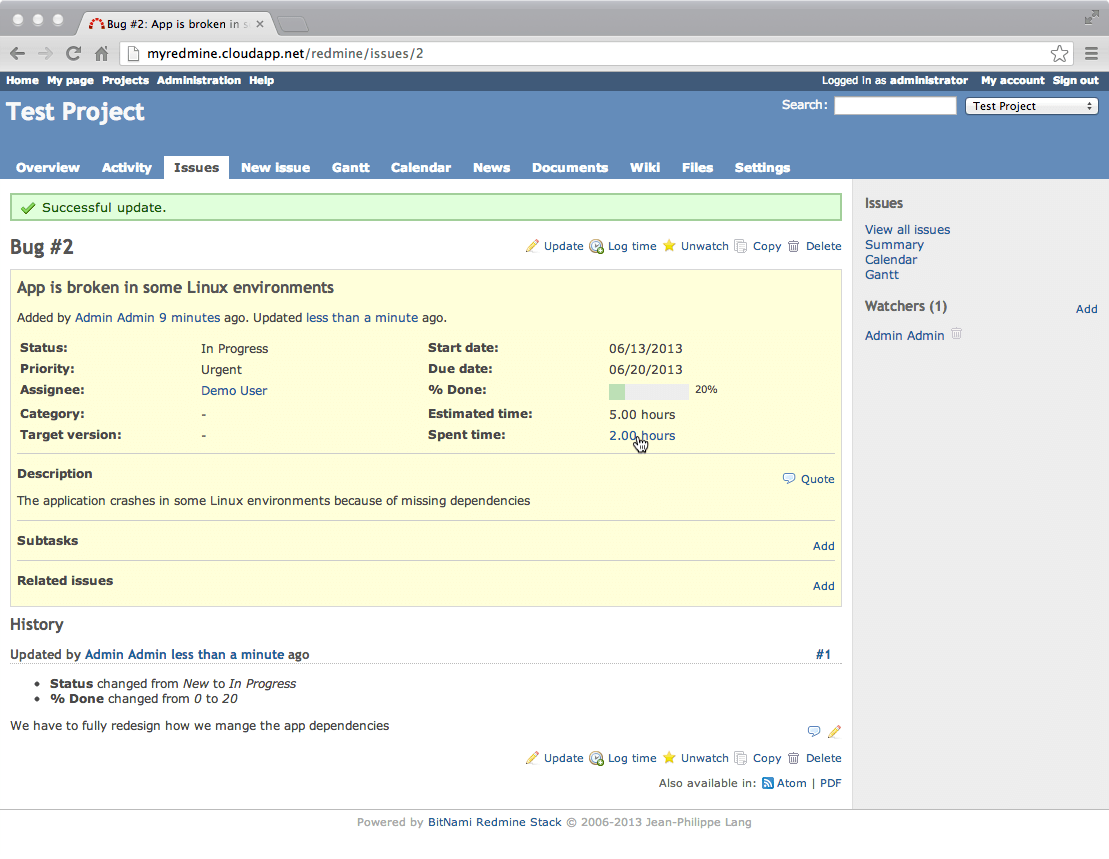
The “Log time” feature displays a report of where time is being spent on the project, as seen in the example below:
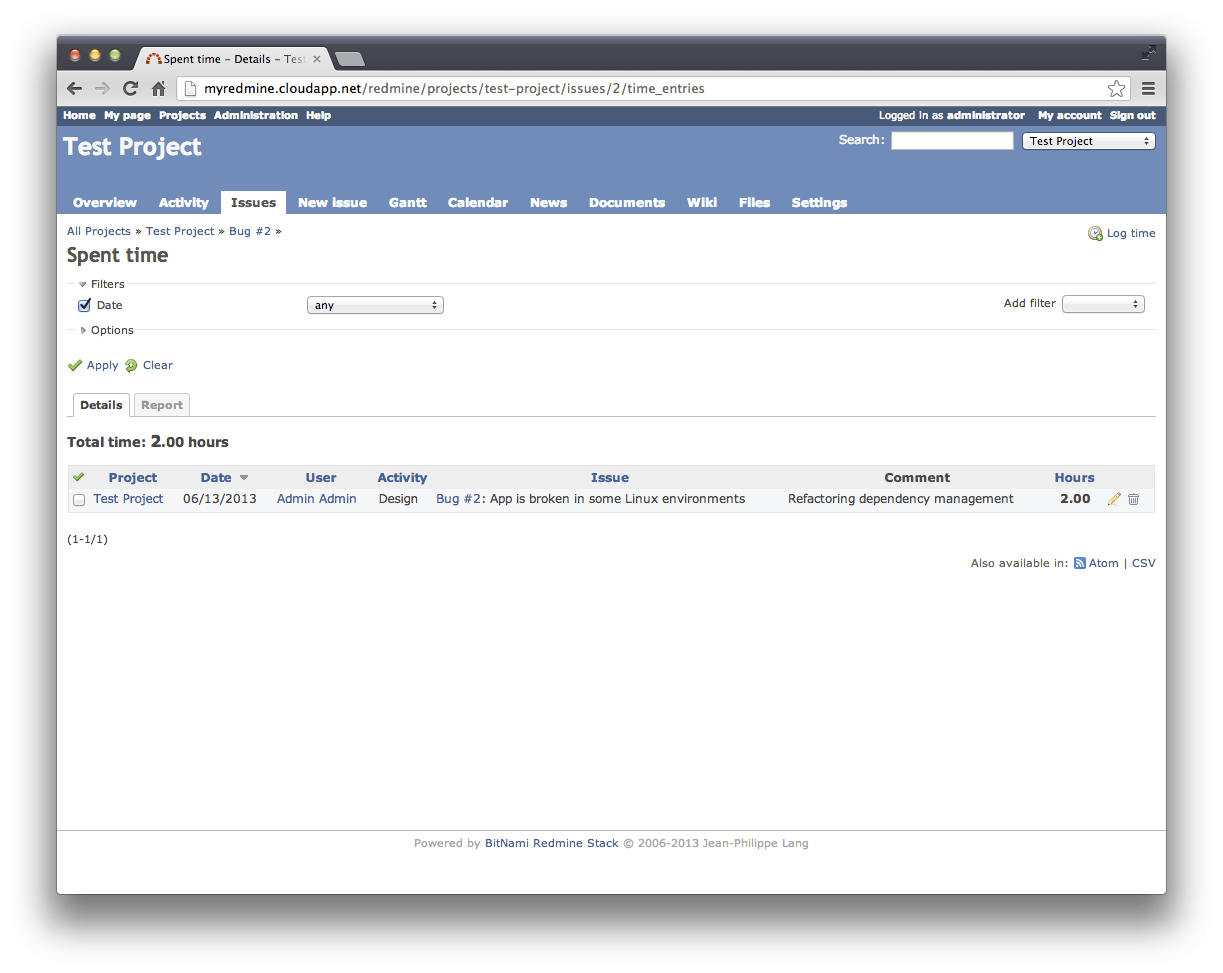
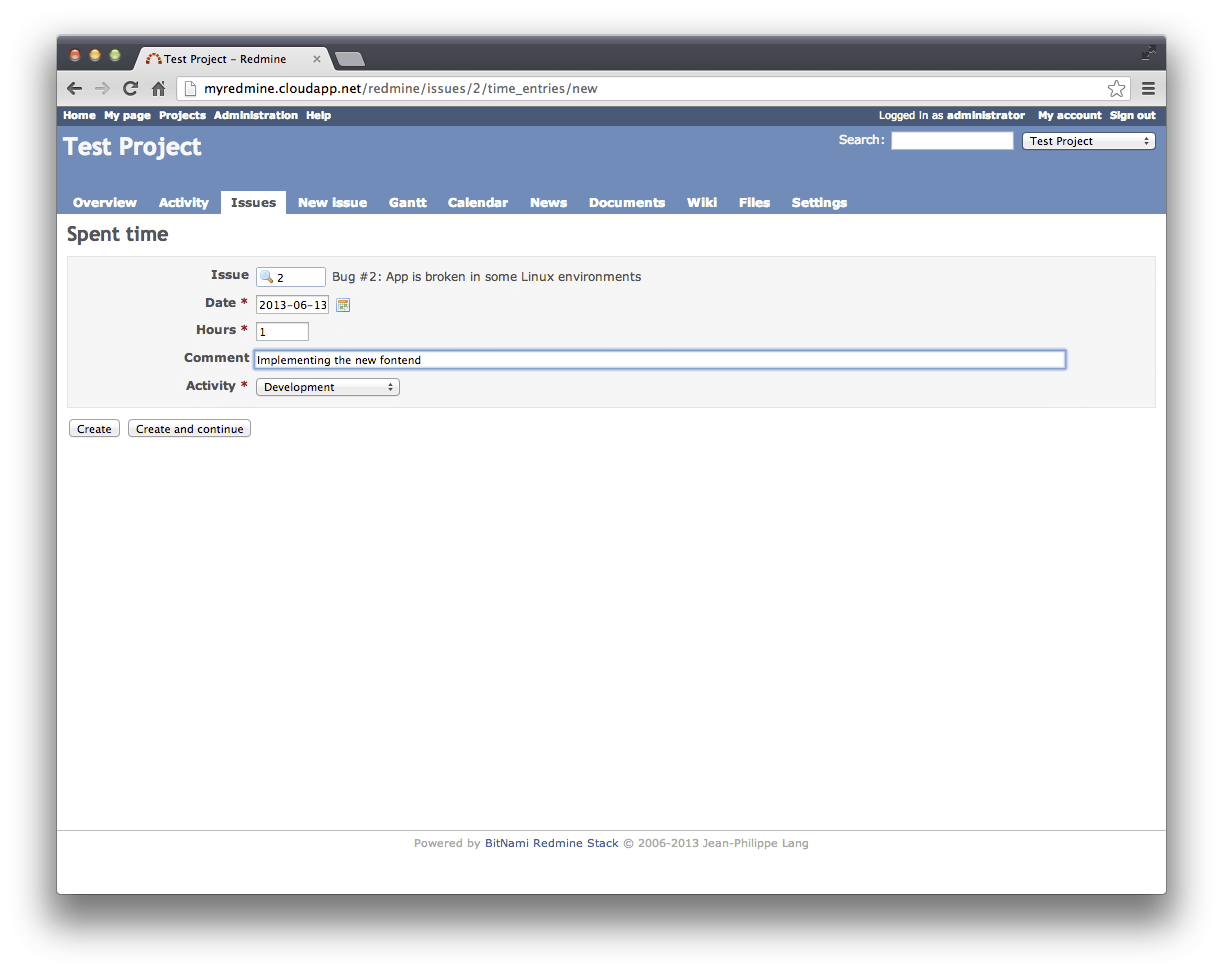
If you simply want to log time against an issue, rather than update the issue itself, do so using the “Log Time” functionality at the top of the issue overview page. Clicking this link will open a window to enter the spent time, the date, and a basic description. Keep adding new activities and time logs by clicking “Create and continue” in this window.
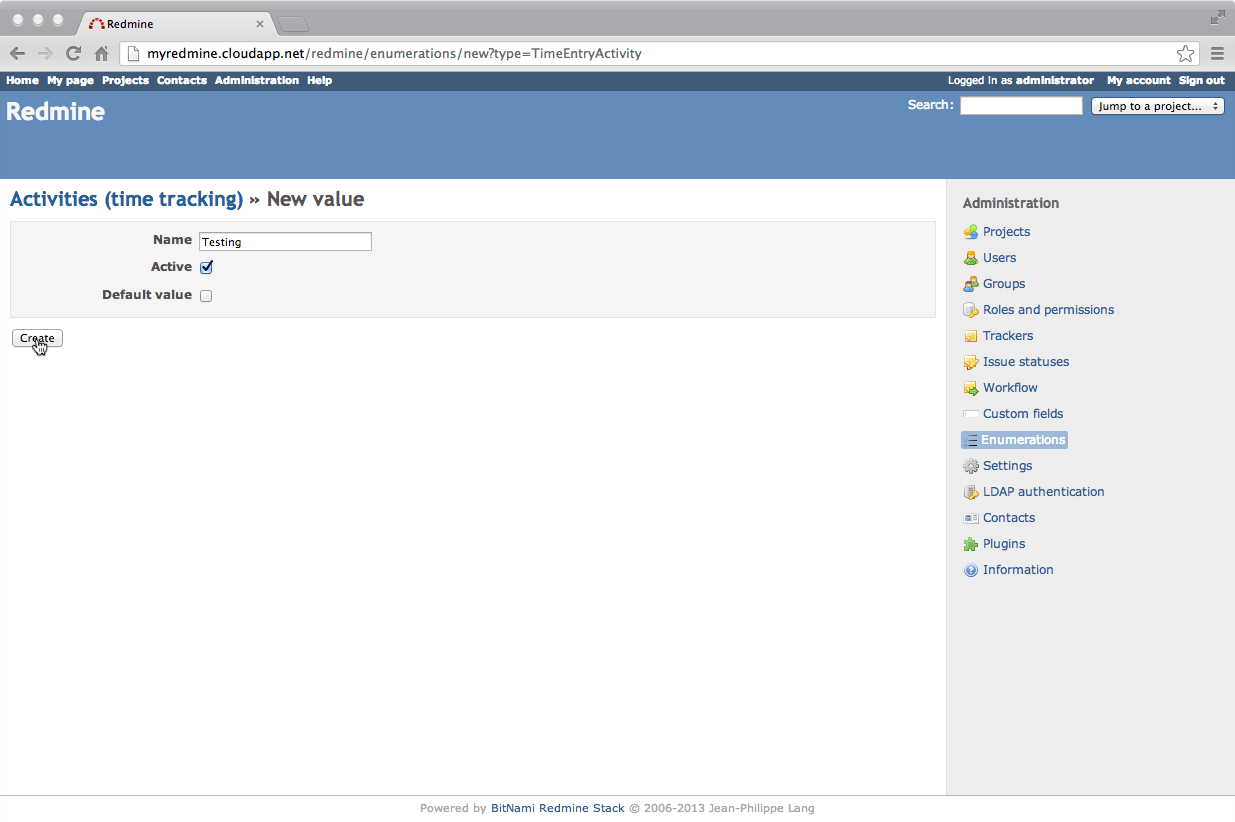
If the predefined list of activities does not fit all your needs, add new ones in the “Enumerations” section of the “Administration” panel (which also allows defining new categories and priorities for your issues).
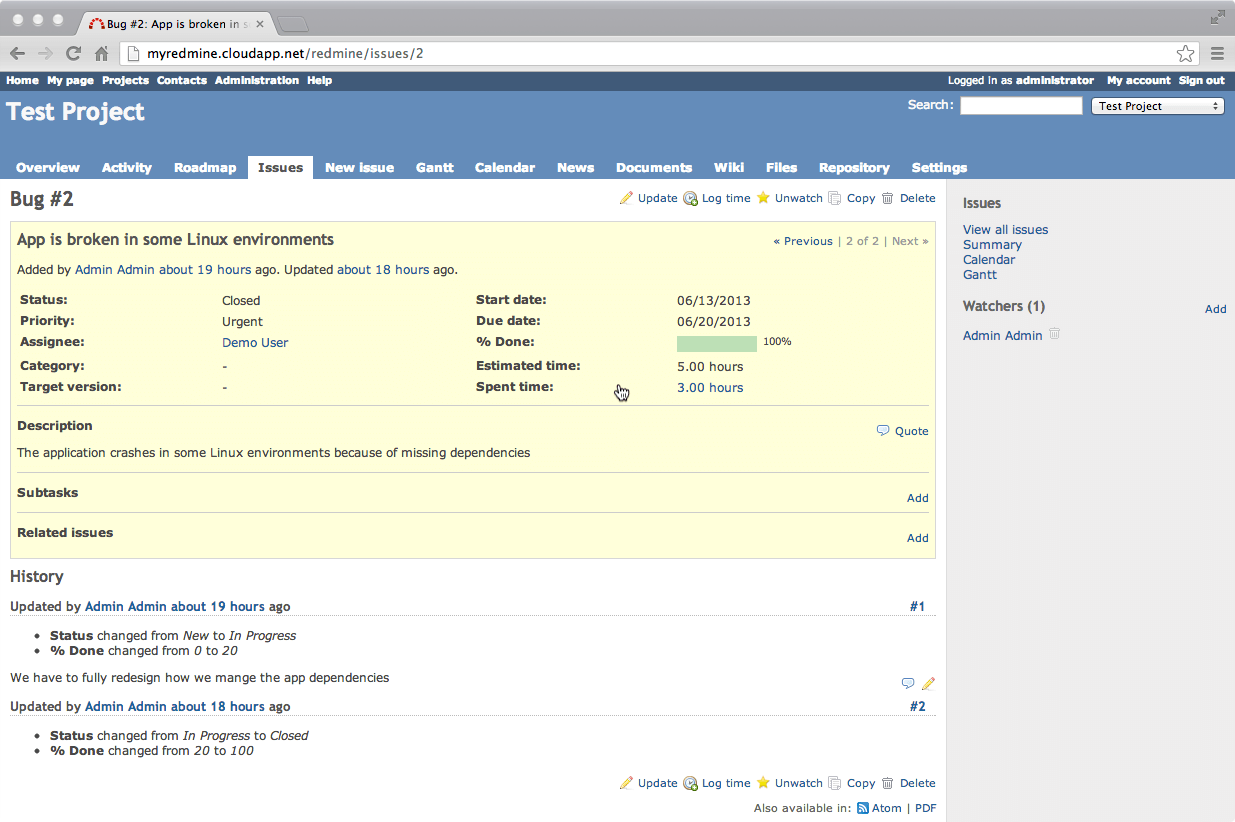
The last step is to close the issue, which will usually also involve setting its the “% Done” field to “100%” or setting the status to “Closed”.
Step 6: Install plugins
Redmine is highly extensible thanks to its plugin system. You can extend it with everything from code review tools to improved graphs passing through CRMs and improvements in time tracking. To install plugins, refer to these instructions.
Step 7: Integrate with SCM tools
Redmine supports integration with different Version Control systems like Git, Subversion, CVS or Mercurial. For each project defined inside Redmine, it is possible to add application code repositories and follow them directly through the Redmine console.
Redmine is capable of providing basic read-only access to code repositories, but it can also parse every commit and bind each one to a specific project issue based on the commit message. This significantly improves users' daily workflow, allowing them to do things like close issues with a special commit message.
Learn more about integrating Redmine with Git, Subversion and Mercurial.