Migrate a Local PHP Application to the Cloud
Introduction
This guide describes the process of migrating a PHP-based Bitnami application (such as Moodle, SugarCRM or Magento) that is locally installed on your system to a cloud server. At the end of the process, you will have an exact copy of the locally installed Bitnami application running in the cloud.
NOTE: This is a general guide that describes the steps you should perform to migrate any PHP-based Bitnami application to the cloud. Given the diverse nature of PHP applications, these steps are indicative and not exhaustive. You may need to perform additional steps apart from those described here. You can also refer to specific migration guides for WordPress, Drupal and Joomla!.
Step 1: Backup existing data
Back up the existing application database, either by using the command-line mysqldump tool or the browser-based phpMyAdmin application.
Using the command line
Use the mysqldump tool to create a backup of the current database as follows:
-
Open a new console window on the local system.
-
Execute the following command to create a backup of the current database. In this example, the database is named bitnami_app. Replace this with the name of the database you wish to export.
$ mysqldump -u root -p bitnami_app > backup.sql -
Enter the database password when prompted. This is the same password entered by you when installing the Bitnami stack.
This will produce a backup.sql file in the current directory with the content of the selected database. Store this file carefully, as you will need it in the next step.
Using phpMyAdmin
You can also accomplish this with the browser-based phpMyAdmin application included by default with Bitnami stacks.
-
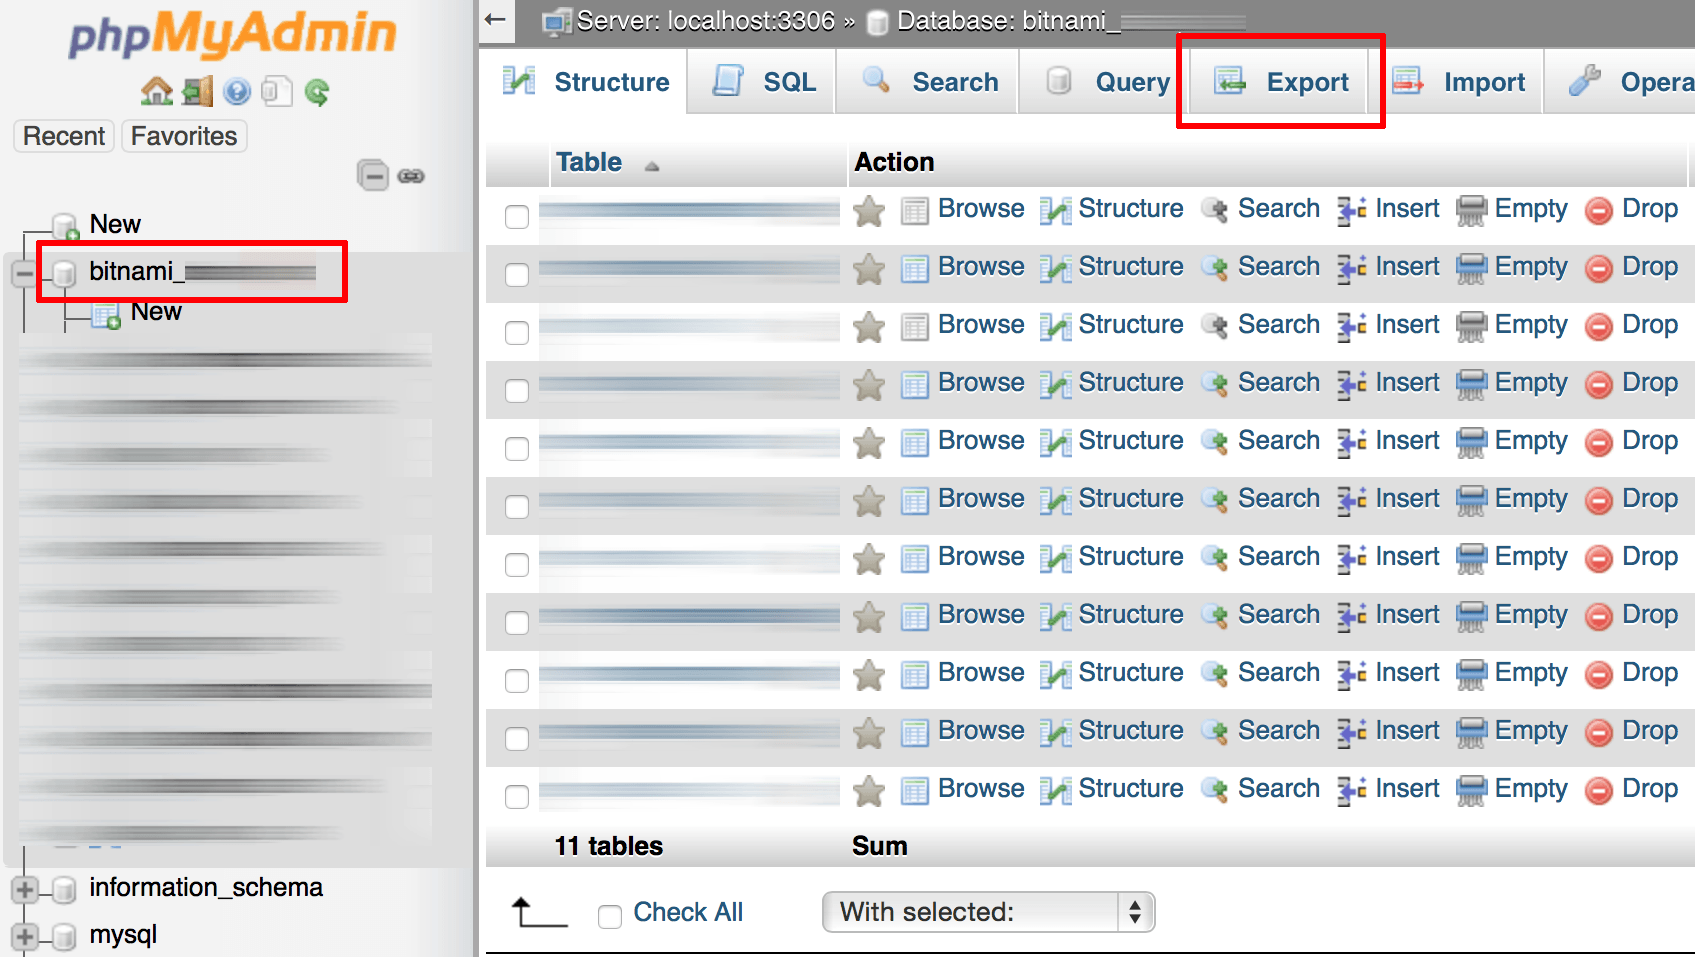
Select the application database in the left navigation menu.
-
Select the “Export” menu item.
-
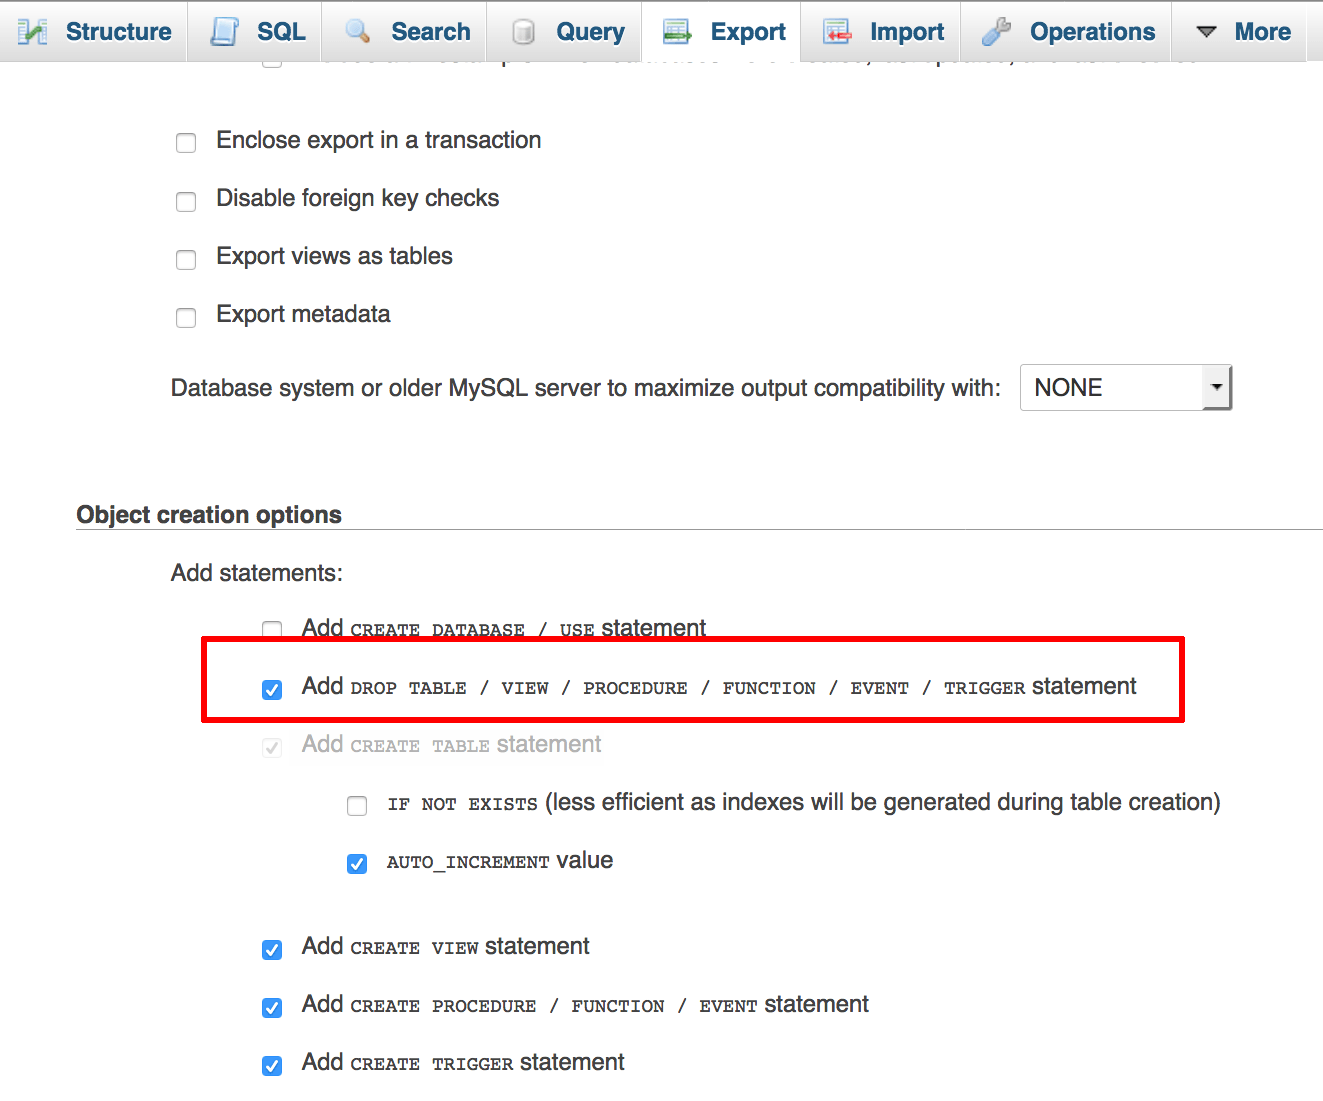
On the resulting page, select the “Custom” export method and the “SQL” output format.

-
In the “Object creation options” section, tick the “Add DROP TABLE / VIEW / PROCEDURE / FUNCTION / EVENT statement” checkbox.
-
Click “Go”.
An SQL export file will be created and downloaded to your desktop. Store this file carefully, as you will need it in the next step.
Step 2: Launch a cloud server
The next step is to launch a cloud server with the Bitnami application you wish to migrate. To do this, you would typically log in to the Bitnami website, select the Bitnami application and deploy a cloud server with the application. For complete details and a walkthrough, refer to our “Get Started” tutorials.
Step 3: Copy files to the cloud server
IMPORTANT: When a new cloud server is launched, its database is configured with a random password and the Bitnami application on it is automatically configured to use this password. This password will be different from the database password on your local system. Therefore, when copying files from the local system to the new cloud server in this step, it is extremely important to ensure that you do not overwrite the application configuration file on the new cloud server with the corresponding file from your local system.
To copy and restore files from the local instance to the new one in the cloud, complete the following steps:
-
Most PHP applications include a configuration file that contains access credentials for the application database. Identify this file on your local system.
-
Connect to the cloud server using SFTP or SCP. For more information, refer to the FAQ.
-
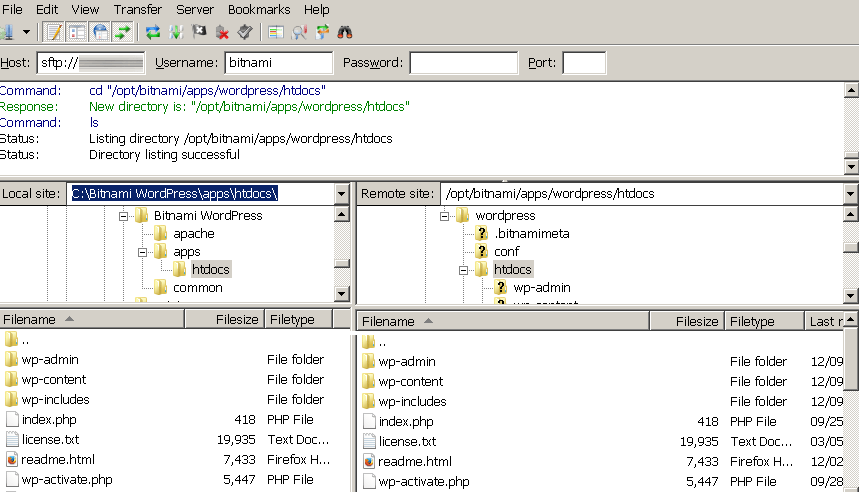
In your SFTP or SCP client, in the left pane for your local system, navigate to the directory containing your Bitnami application and within that, to the apps/APP_NAME/htdocs directory. Replace the APP_NAME placeholder with the correct directory name.
-
Similarly, in the right pane for the cloud server, navigate to the /opt/bitnami/apps/APP_NAME/htdocs directory. Replace the APP_NAME placeholder with the correct directory name.
-
Copy all the files from the htdocs/ directory on the local system to the htdocs/ directory on the cloud server by dragging and dropping them from the left pane to the right pane. Ensure that you exclude the PHP configuration file containing database access credentials, to avoid overwriting the pre-configured credentials on the cloud server.
TIP: In case you accidentally overwrite the configuration file on the cloud server with your local version, all is not lost. You can always obtain the database access password for the cloud server from the server detail page in your cloud dashboard, and then manually update the PHP application’s configuration file with the correct credentials.
-
Copy the database backup file from Step 1 to the same htdocs/ directory on the server.
Step 4: Transfer the application database to the cloud server
The final step is to populate the new application database with data from the previous installation. Again, you can do this by using the command-line mysqldump tool or the browser-based phpMyAdmin application. Follow these steps:
Using the command line
Use the mysql command-line client to connect to the database instance on the cloud server and import the previous database content as follows:
-
Log in to the server console via SSH. Refer to the FAQ for more information.
-
Change to the htdocs/ directory (or, if you copied the database backup file from Step 1 to a different directory, change to that directory instead). Replace the APP_NAME placeholder with the correct directory name.
$ cd /opt/bitnami/apps/APP_NAME/htdocs -
Execute the following command to connect to the remote MySQL database. Replace the example database name bitnami_app with the correct database name.
$ mysql -u root -p -D bitnami_app < backup.sqlWhen prompted, enter the database password for the root user. You can obtain the database password from the server detail page in your cloud dashboard.
The original application database content will now be imported into the database on the cloud server.
-
Disconnect from the remote MySQL database by typing:
mysql> exit
Using phpMyAdmin
You can also accomplish this with the browser-based phpMyAdmin application included with the Bitnami stack.
-
Browse to the phpMyAdmin application on the cloud server using these instructions.
-
Log in with the database username root. You can obtain the database password from the server detail page in your cloud dashboard.
-
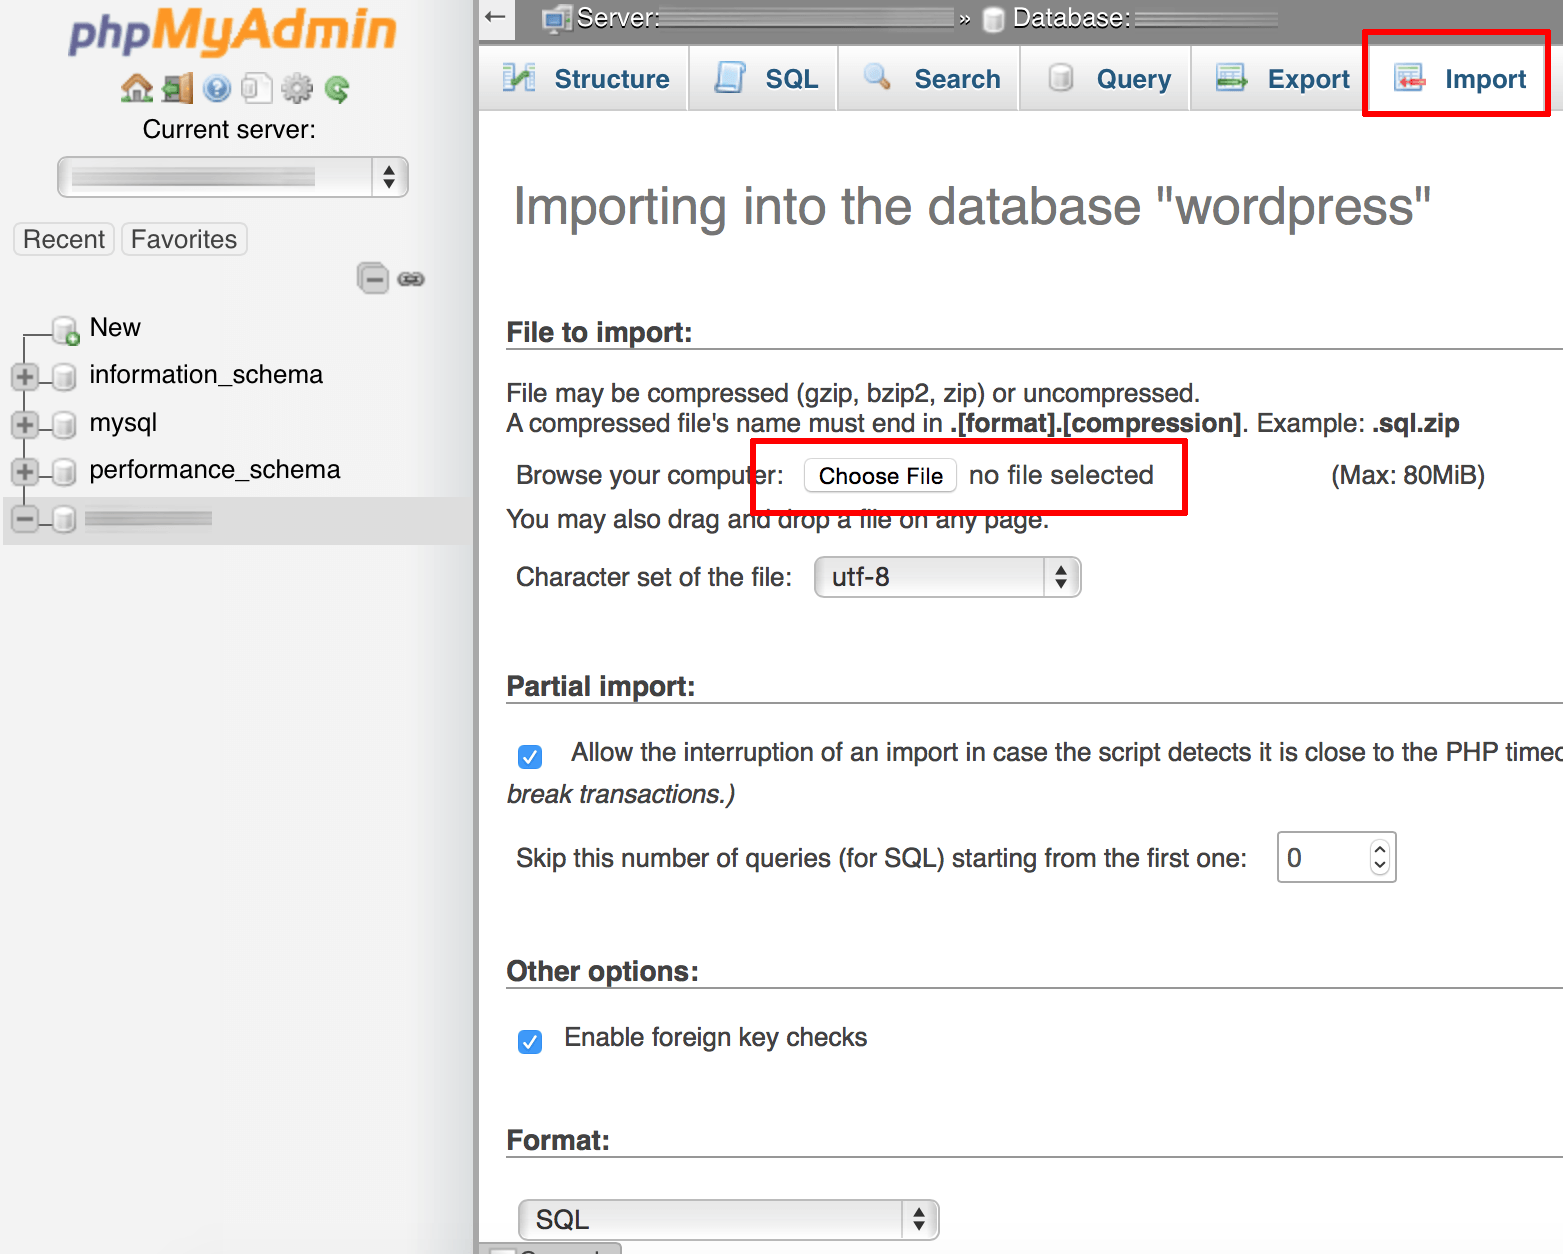
Select the application database in the left navigation menu.
-
Select the “Import” menu item.
-
On the resulting page, select the SQL export file created in Step 1.
-
Click “Go”.
The original application database content will now be imported into the database. A confirmation message will be displayed.
IMPORTANT: Once the application database has been imported, note that the credentials to log in to the cloud version of the application will change and become those originally set in the local version of the application.
Step 5: Restart the server
Some applications require a server restart. This can usually be done from the cloud dashboard for the server.
Your PHP application should now be available in the cloud, with the same data as was originally present on the local system.