Increase Disk Space of your Azure Virtual Machine
Introduction
When you create a new virtual machine in a resource group, the size for the OS disk depends on the image you select. The default size for Linux is around 30 GB. As you deploy more applications, increase the load of your databases or need more resources, one option is to add data disks to the existing VM.
However, if you are running into issues due to insufficient disk space or legacy applications, the simplest choice is to increase the size of your virtual machine data disk.
This guide shows you how to resize virtual machine disks to provide extra storage space using the Azure portal.
IMPORTANT: Remember that you can only resize a disk to a larger size.
Assumptions and prerequisites
This guide makes the following assumptions:
- You have basic knowledge about the elements that make up the Azure Resource Manager (ARM). For more information about the ARM, see the Azure official documentation.
- You already have a virtual machine running on Azure.
Step 1: Increase the disk size
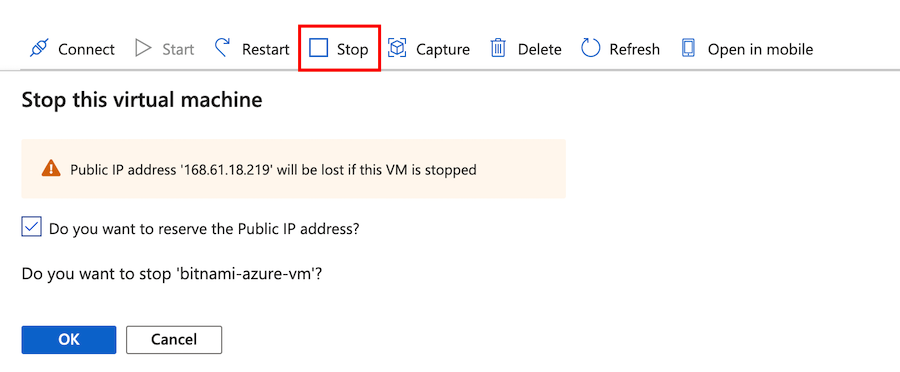
Before starting the process of resizing the VM data disks, you need to stop it, to do so:
-
Log in to the Microsoft Azure Cloud.
-
On the Azure portal, navigate to “Virtual Machines”. Select the VM you want to resize and in the toolbar, click “Stop”.
-
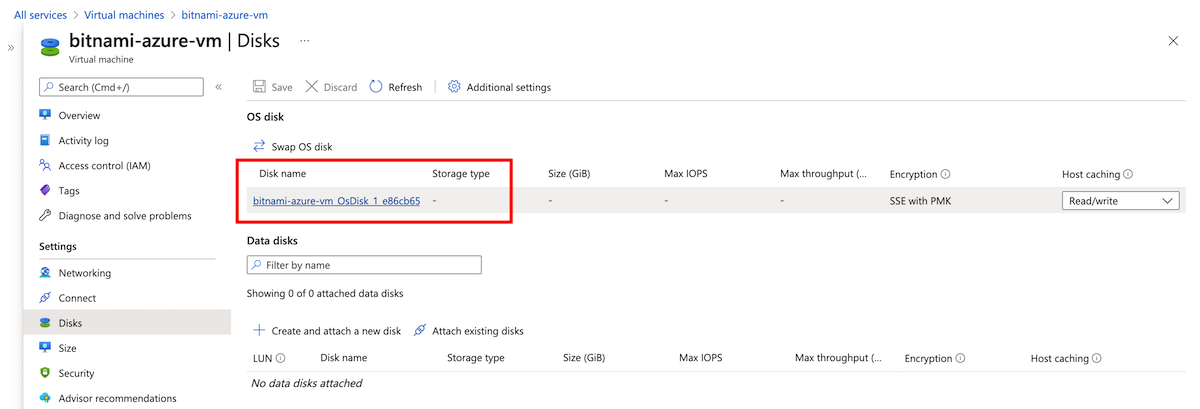
Once the machine is stopped, navigate to the “Settings” section and click “Disks”. You will see the list of attached disks to your VM. Click on the one you want to resize.
-
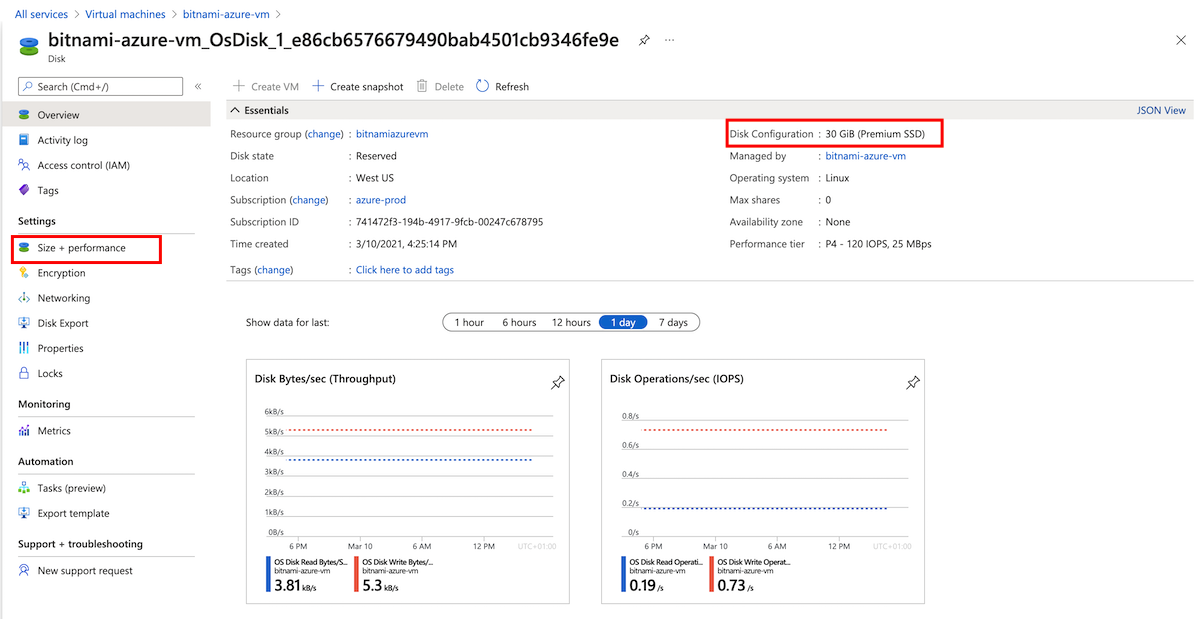
In the disk overview page, you can see the default size of your disk. To increase its storage capacity, navigate to “Settings -> Size + performance”.
-
On the resulting screen, modify the value of the “Custom disk size (GiB)” section. Click the “Resize” button to finish the process. In this example, the size was increased from 30 to 64 GB and the performance tier has also changed accordingly from P4 to P6 as shown below.
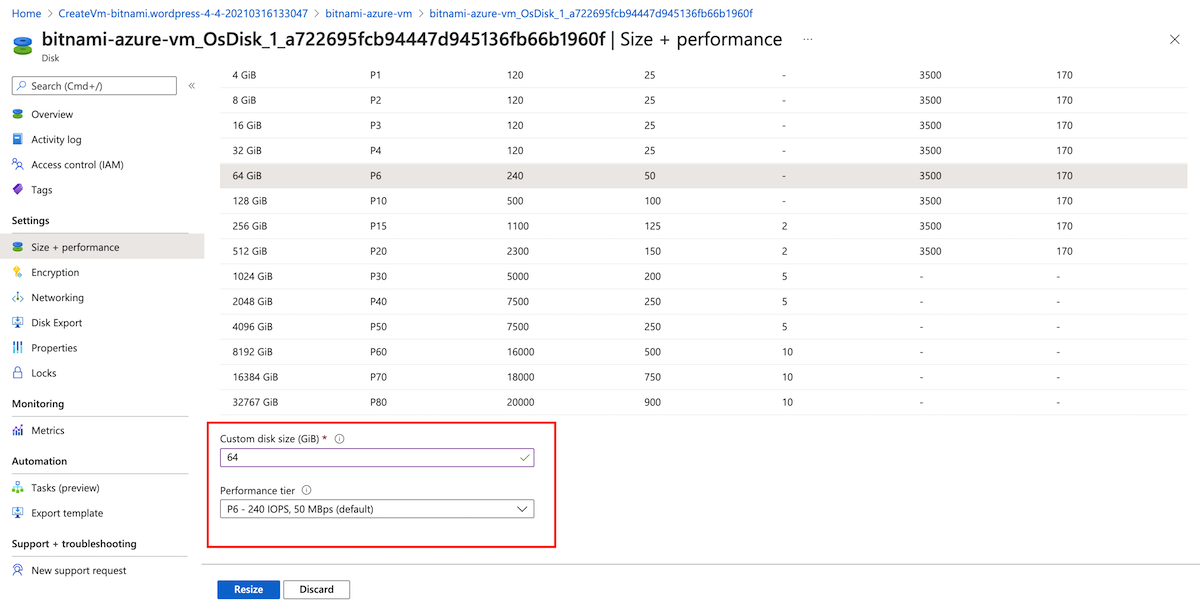
IMPORTANT: Changing the size of the disk can also change the level of the disk tier and may have extra costs.
- Back to the virtual machine overview page to start it. Click the “Start” button and wait until the “Status” section change from “Stopped (deallocated)” to “Running”.
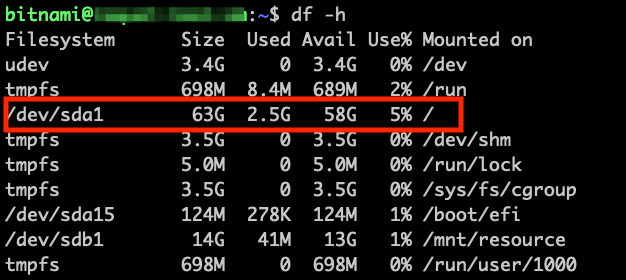
Step 2: Confirm that the disk has been resized
The next step is to check that the partition and filesystem have been resizing as well to make sure that the disk is usable with the new storage space size. To do so, connect to the VM through SSH and run the following command:
$ df -dh
This command will show you the amount of disk space available on the filesystem. As you can see in the output below, the disk space was correctly resized: