Connect Instances in Different Private Networks using Network Peering
Introduction
When experiencing scalability issues, isolating resources can be a way of extending workloads in the cloud. An alternative solution for scalability issues is to use a multi-tier backend database internally connected to the application frontend.
This guide walks you through the process of enabling a Virtual Net (VNet) peering which makes an internal connection between a frontend stack (in this guide we will use a Bitnami WordPress as an example) and an existing backend (a sample MySQL with replication) both deployed in different resource groups.
Assumptions and prerequisites
This guide focuses on enabling a VNet peering which internally connects frontend and backend stacks belonging to different resource groups. For the purposes of demonstration, we will use a WordPress and MySQL with replication deployments as an example.
This guide makes the following assumptions:
- You have an account in the Microsoft Azure Cloud.
- You have basic knowledge about the elements that make up the Azure Resource Manager (ARM). For more inforamtion about the ARM, see the Azure official documentation.
- You have a multi-tier solution running in an existing resource group, or you have created a new one during the deployment. (In this guide, we use a MySQL with replication deployed in a resource group named bitnami-mysql).
Your deployments must meet the following prerequisites:
- All the resources have been launched using the ARM, and not the classic deployment mode. Learn how to check your deployment model.
- The new deployment (in this guide, Bitnami WordPress) must be launched using the same subscription and region (location) as the existing one but belongs to a different resource group.
NOTE: If you have launched an application and a database in the same resource group, see our guide on how to share a virtual network to link different instances from the same Resource Group .
Step 1: Deploy an application from the Azure Portal
Launch a cloud server with an application running on it. It must meet the prerequisites listed in the “Assumptions and prerequisites” section of the guide. To launch a cloud server with an application running on it, follow the instructions below:
-
Log in to your Microsoft Azure account. You will be redirected to your dashboard.
-
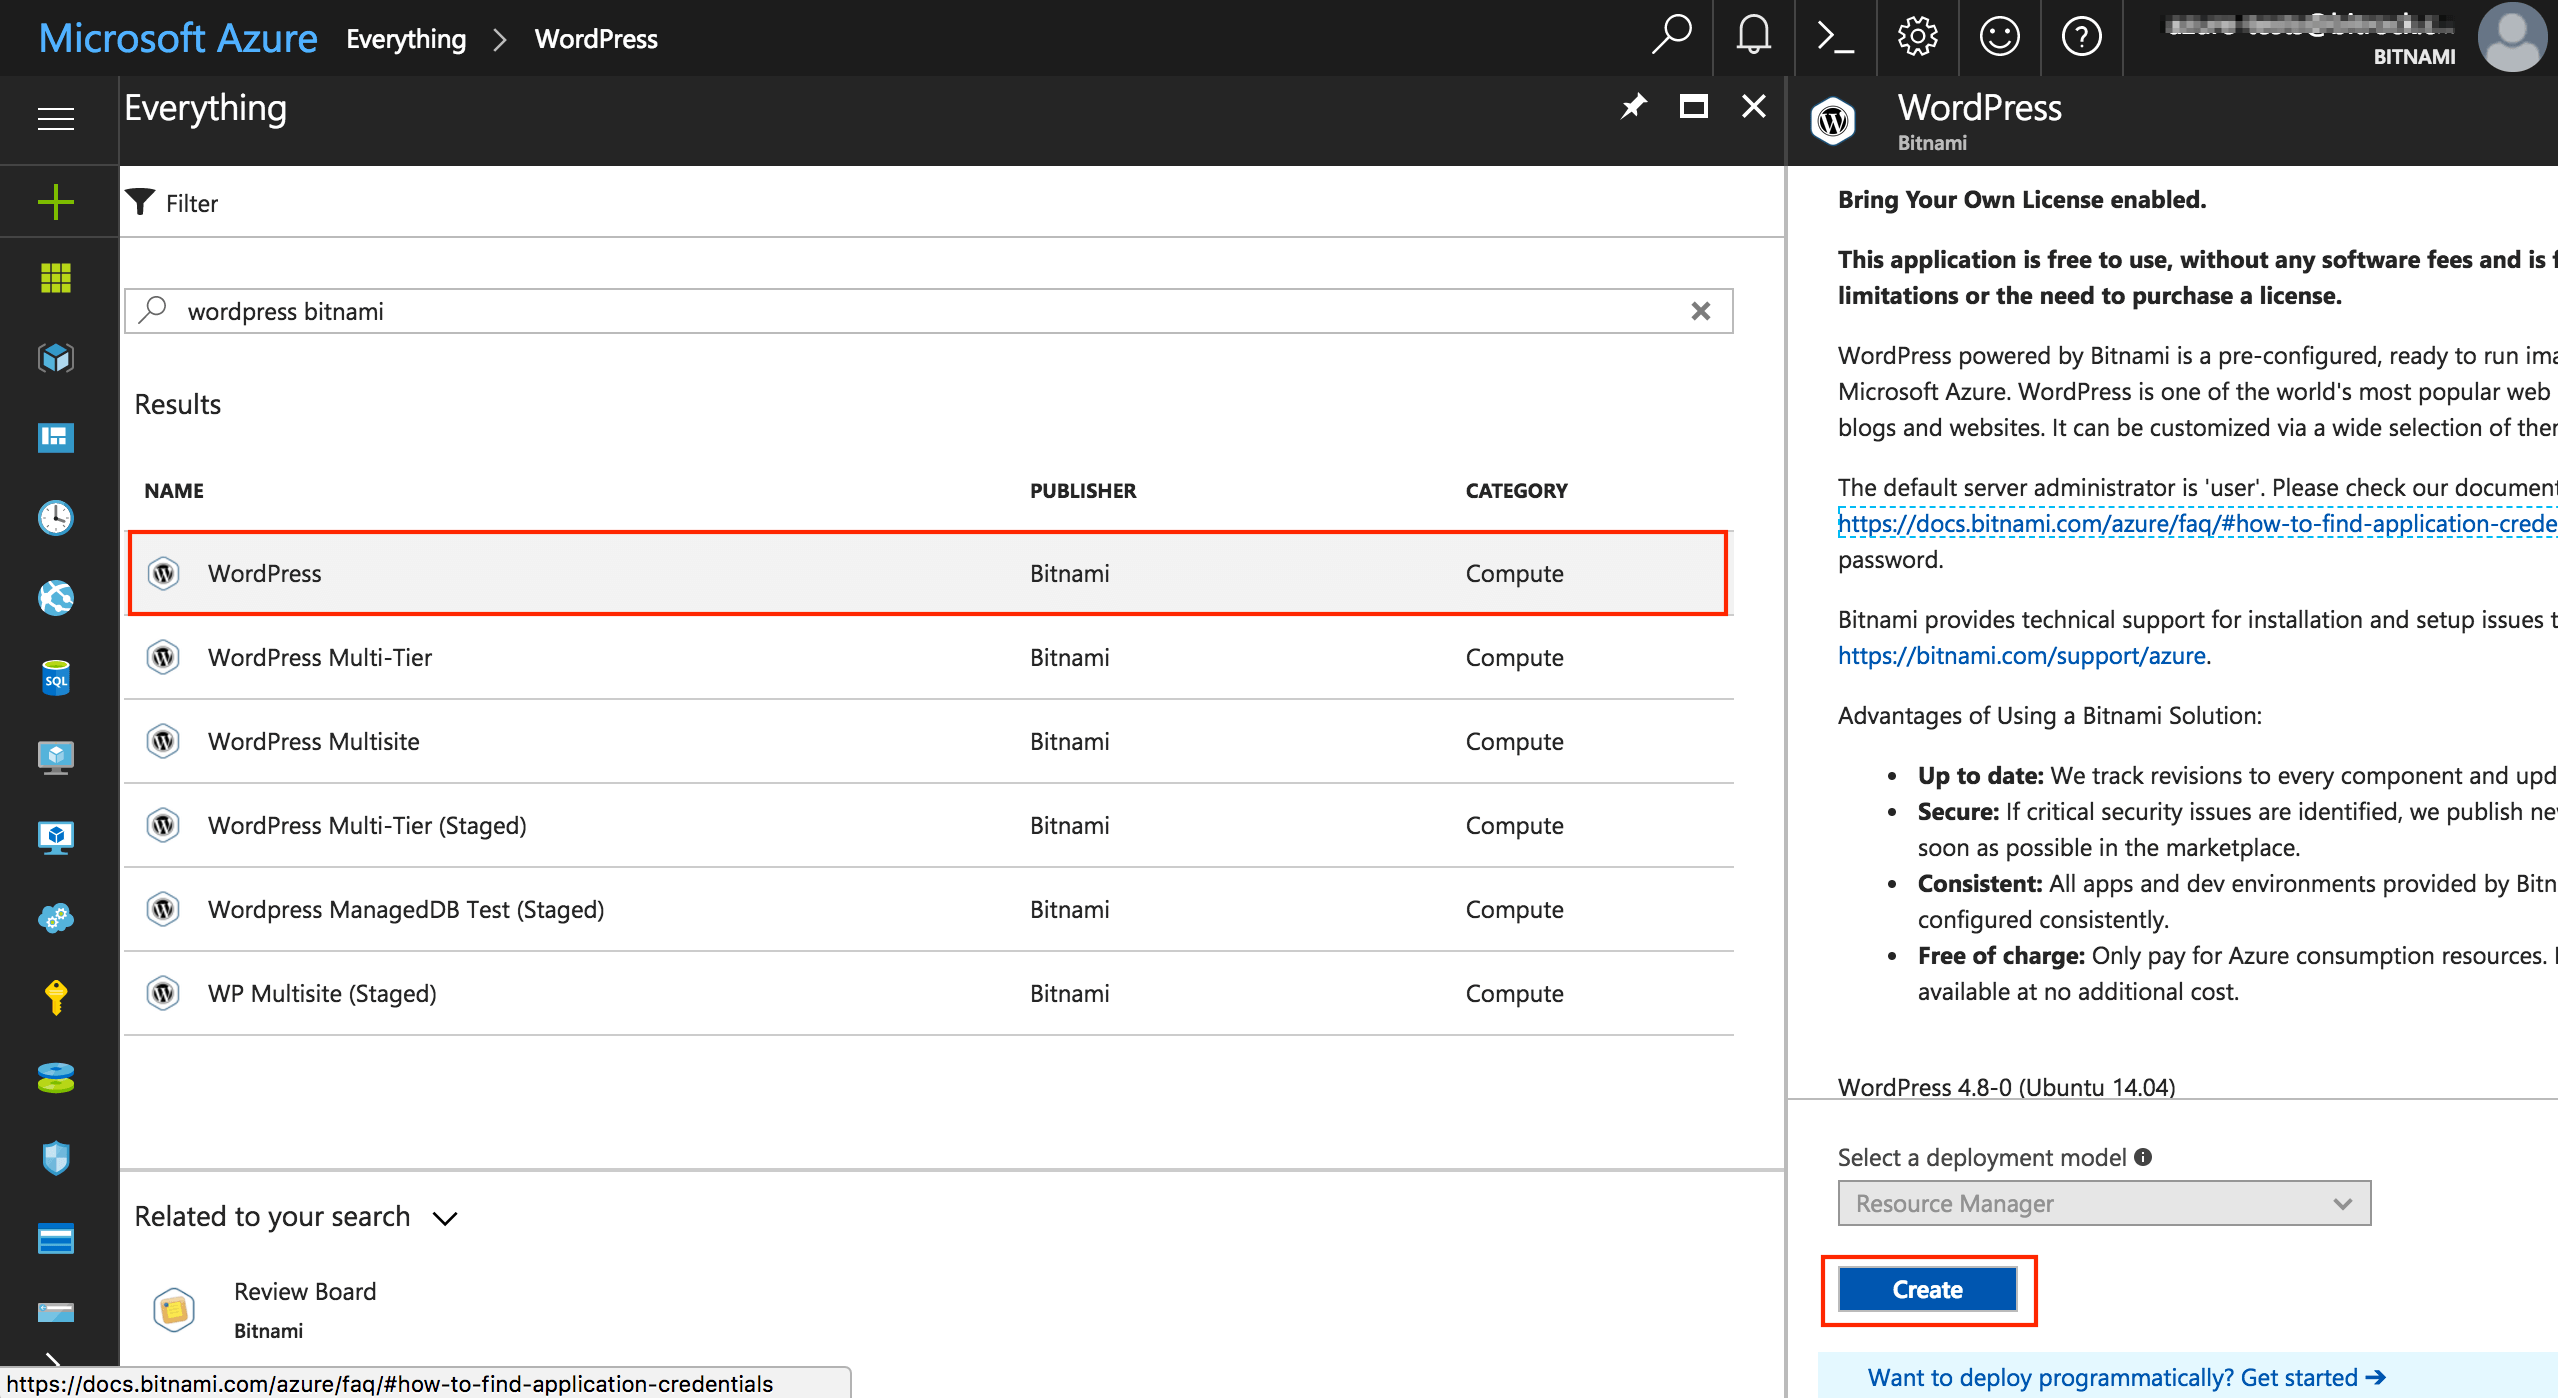
In the left-side menu, select “New” and in the marketplace search box, enter “WordPress Bitnami”.
-
Click on the first result. You will see the application description on the right side of the screen. To create the new virtual machine, click “Create”.
-
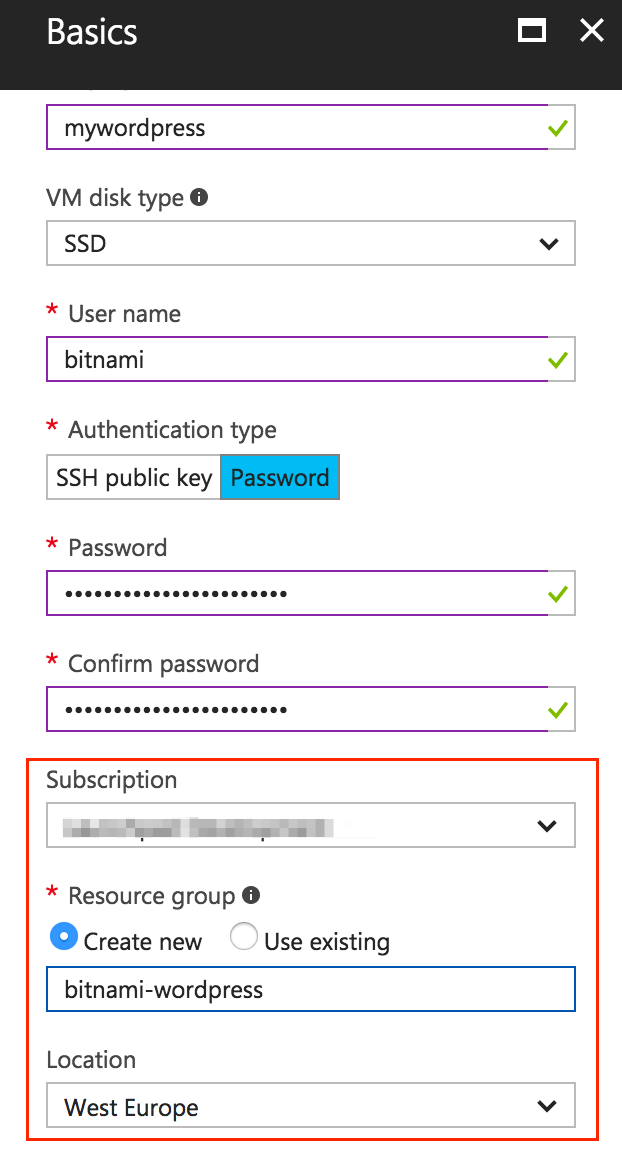
In “Create virtual machine -> Basics” complete the required fields as follows:
-
Enter a name, VM disk type, user name, authentication type, and password.
-
In the Subscription field, select the same subscription as the existing multi-tier database.
-
In the Resource Group field, select the “Create new” option and enter a name for the new resource group.
-
In the Location field, select the same location that you entered when deploying the existing multi-tier database.
-
-
To finish the application deployment, complete the remaining steps.
Once you have the application deployed, you can enable the VNet peering to connect to the existing multi-tier database.
Step 2: Enable VNet peering
To enable the VNet peering between two instances from different resource groups, you must activate VNet peering in both directions. In the current example, this means that we will enable both the VNet peering from WordPress to MySQL and from MySQL to WordPress. To do this, follow the steps below:
Adding a VNet peering from the application to the existing multi-tier database
-
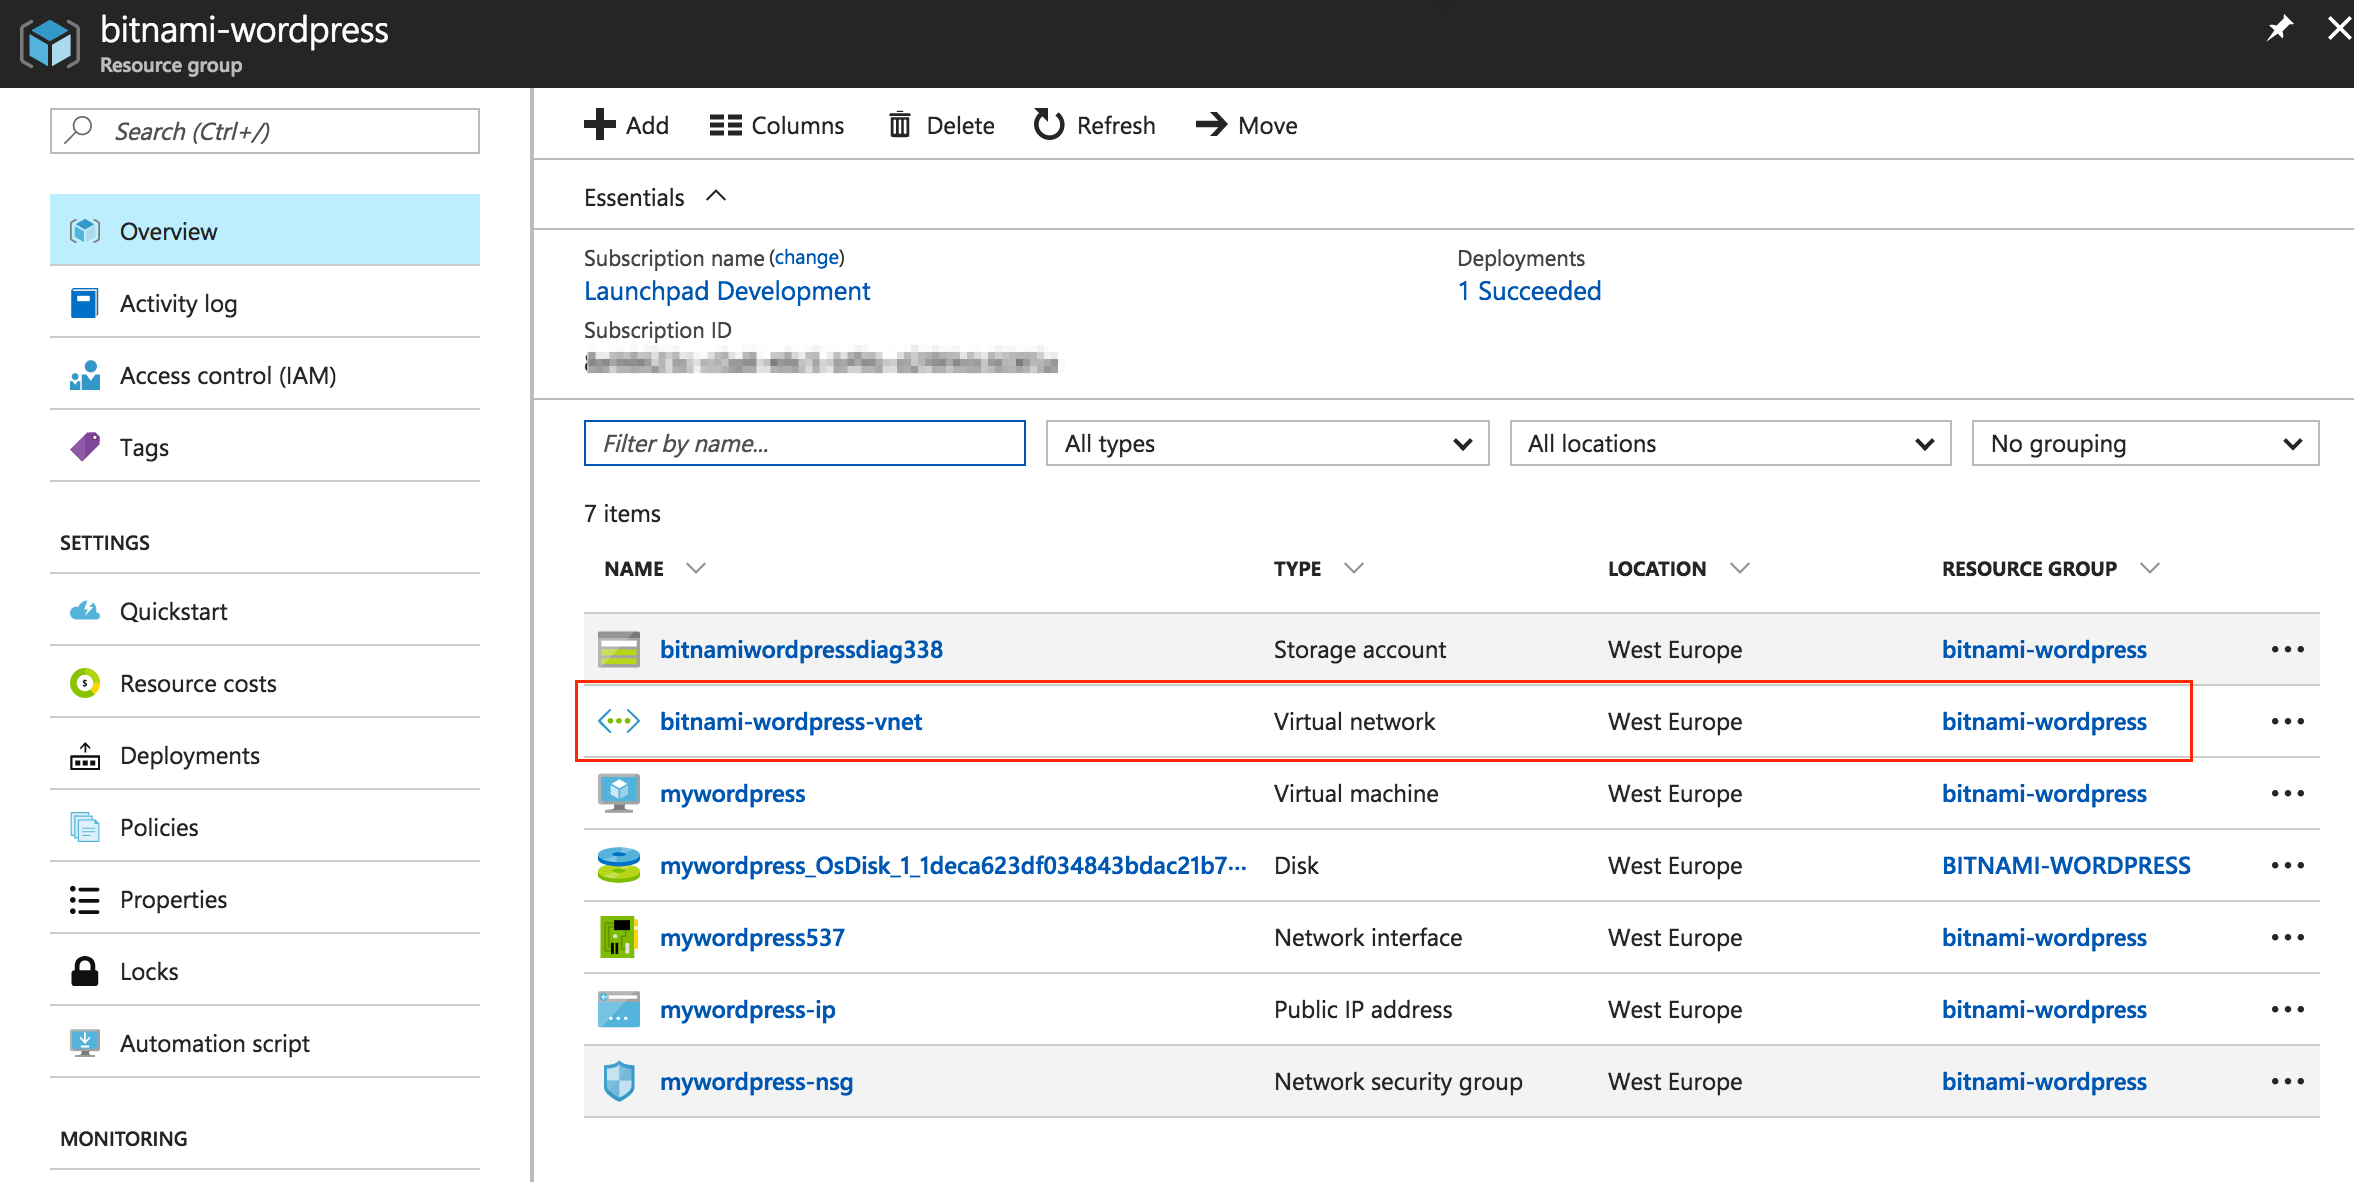
Navigate to the Resource Group panel of the application and select the “Virtual network” item from the list of resources:
-
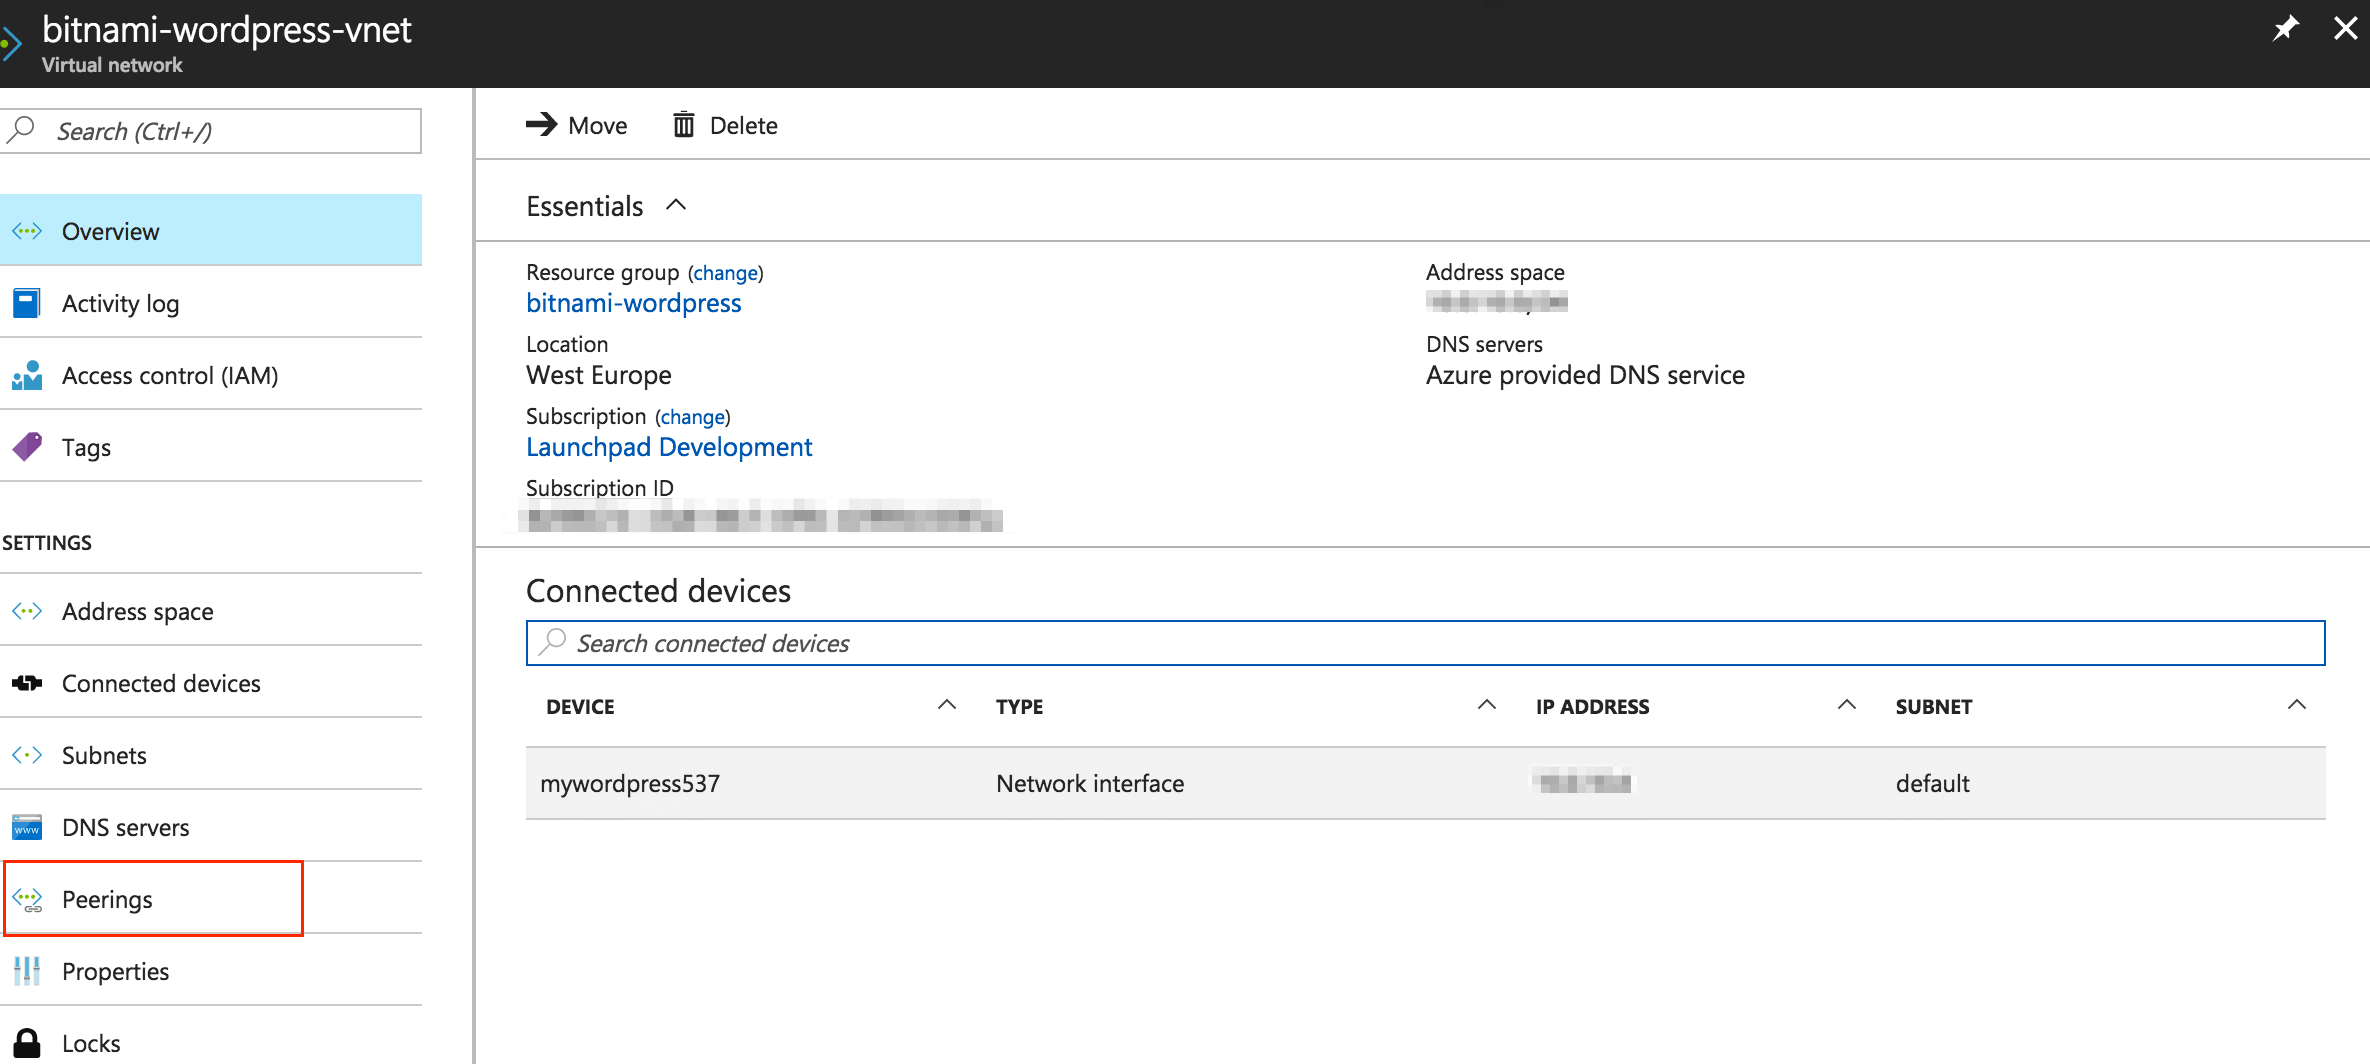
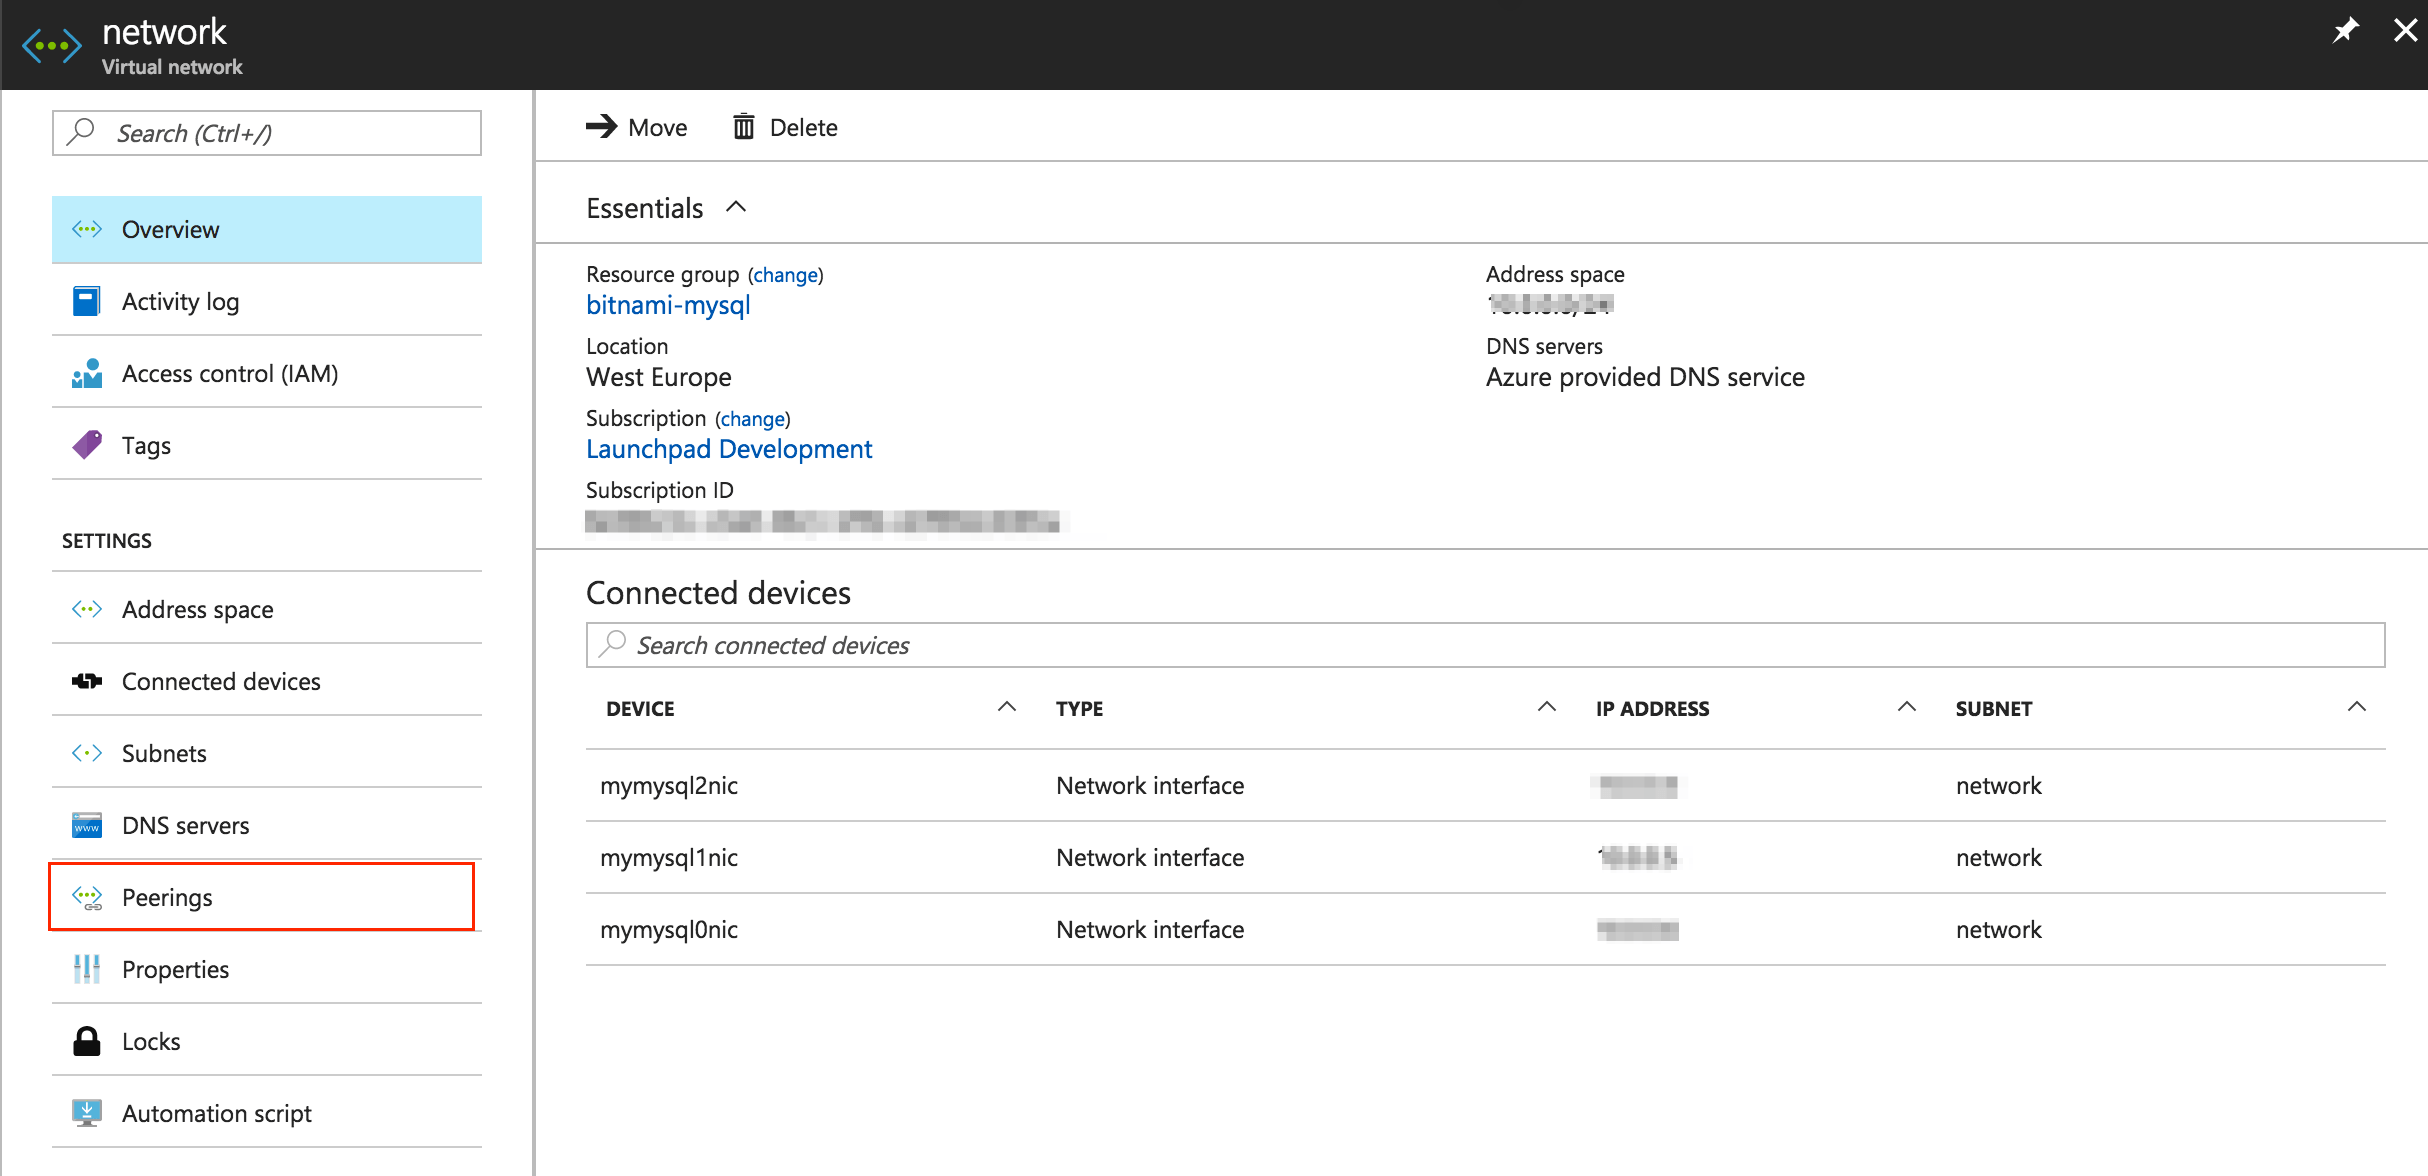
In the virtual network panel, go to the left-side menu and click “Peerings”.
-
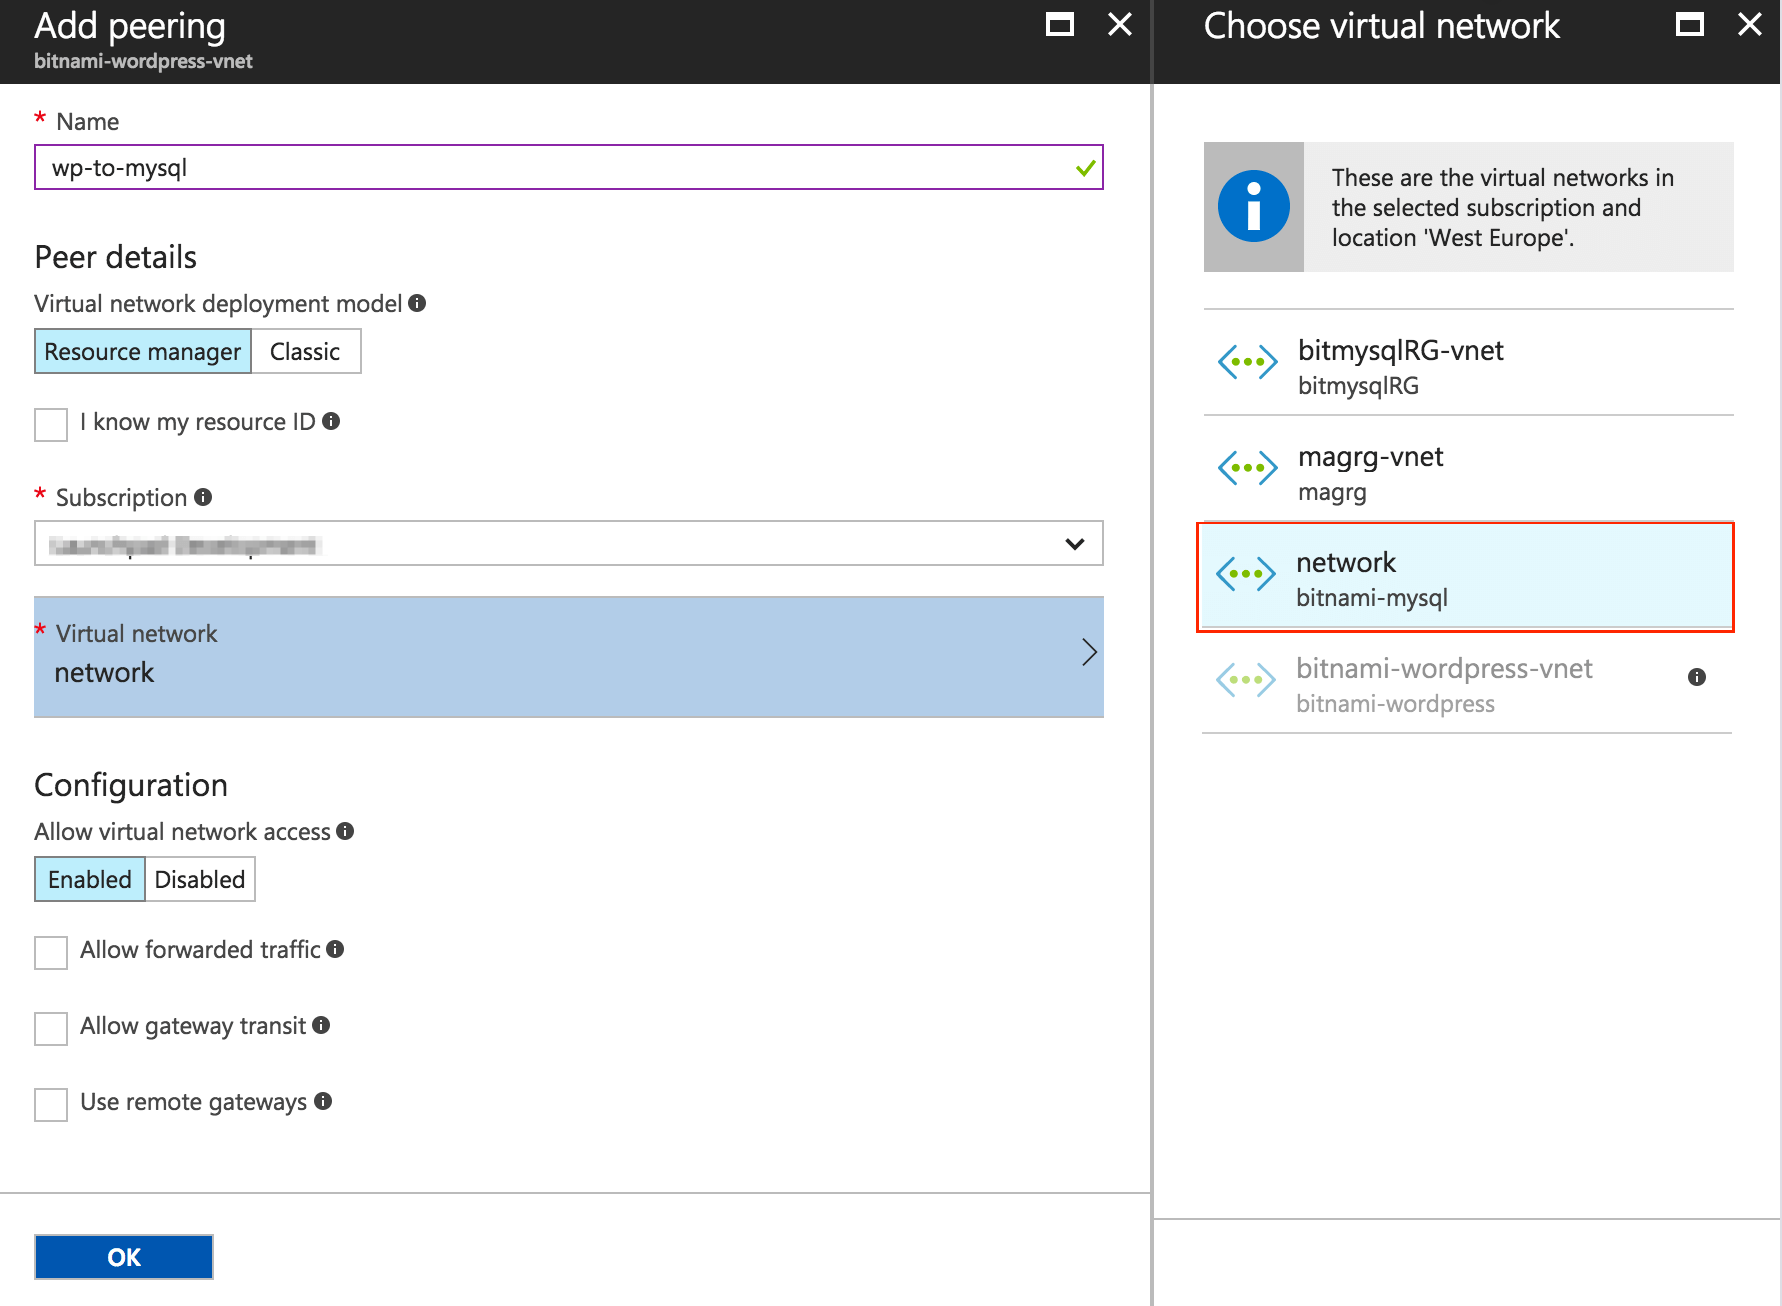
In the resulting page, click “+Add”, and complete the required information as follows:
-
Enter a descriptive name for the network peering.
-
Select the same subscription that you selected during the application deployment.
-
In the “Virtual network” section, select the virtual network of the existing multi-tier database. Leave the rest of the sections with the default values. To complete the process, click “OK”.
-
You should see the recently created VNet peering in the list of the associated peerings to the virtual network of the application. Ensure that the peering status is “connected”.
Adding a VNet peering from the existing multi-tier database to the application
-
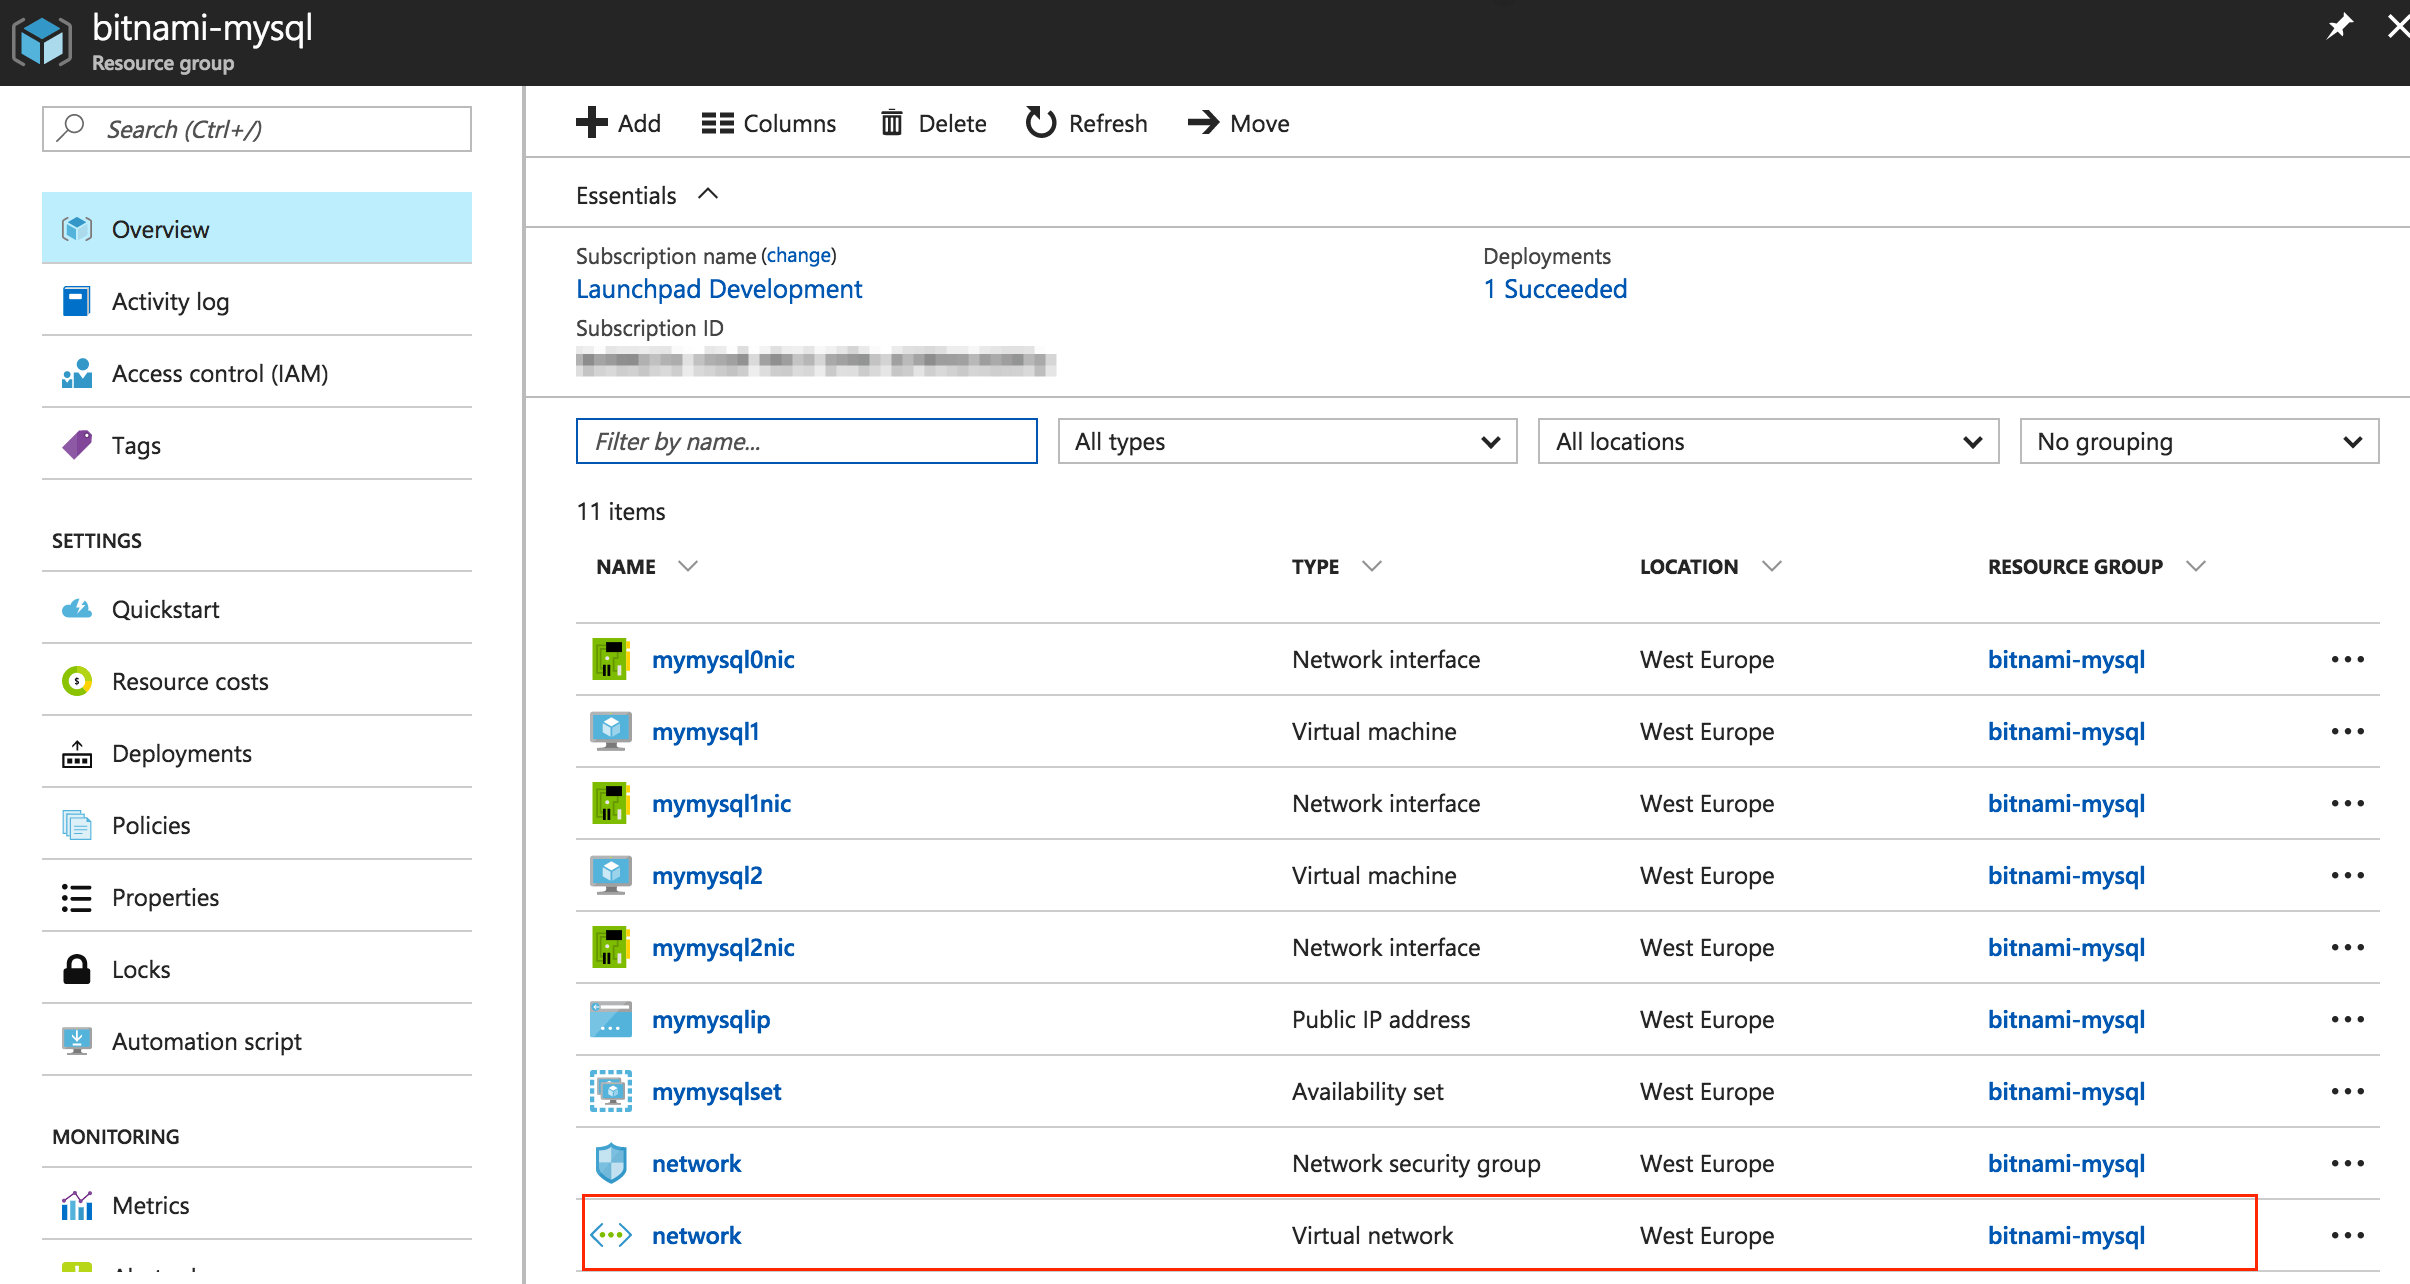
Navigate to the Resource Group panel of the database and select the “Virtual network” item from the list of resources:
-
In the virtual network panel, go to the left-side menu and click “Peerings”.
-
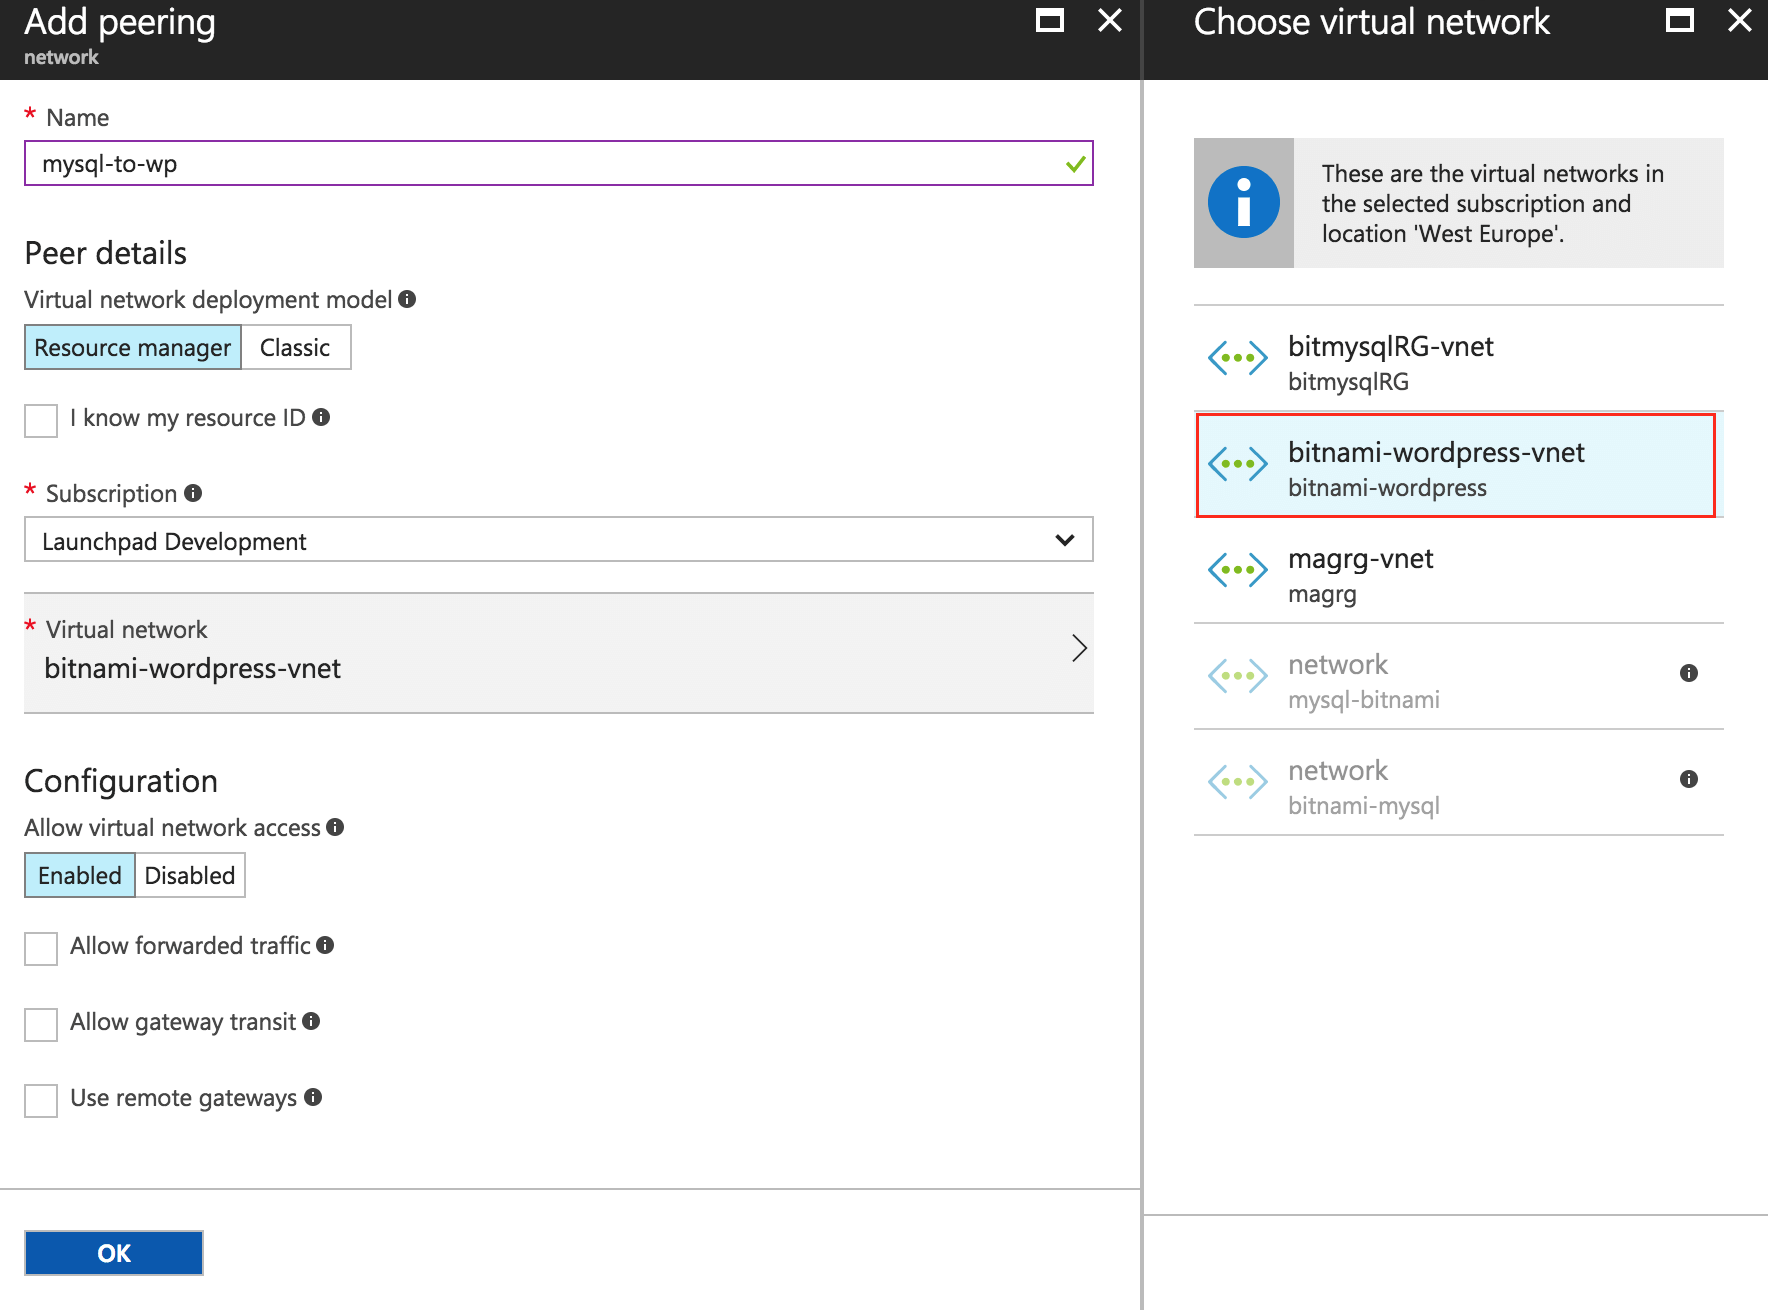
On the resulting page, click “+Add”, and complete the required information as follows:
-
Enter a descriptive name for the network peering.
-
Select the same subscription that you selected during the database deployment.
-
In the “Virtual network” section, select the virtual network of the application. Leave the rest of the sections with the default values. To complete adding the peering, click “OK”.
-
You should see the recently created VNet peering in the list of the associated peerings to the virtual network of the application. Ensure that the peering status is “connected”.

Step 3: Test the internal database and application connection
The final step is to ensure that the database and the application are internally connected. The best way to check this is to try and connect to the database (backend) from the application (frontend) server. To check the internal connection, follow the instructions below:
- Connect to the WordPress application server through SSH. Learn how to connect to the server with an SSH client in our FAQ.
Once you have connected to the frontend server, the next step is to connect to the backend database (MySQL with replication).
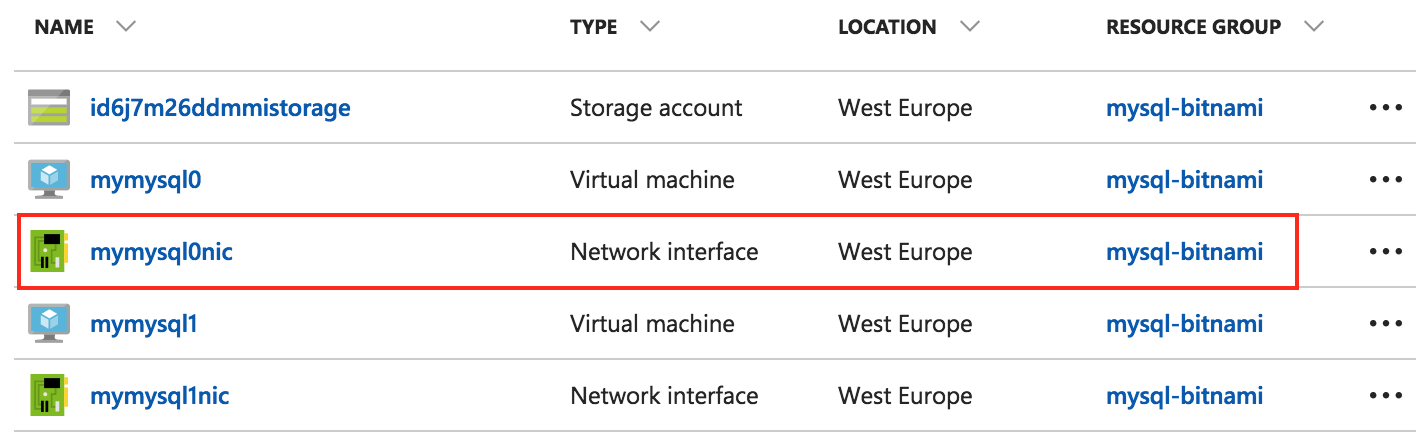
-
In the Resource Group panel, select the “Network interface” of the master node:
-
In the resulting page, note the database’s private IP address:
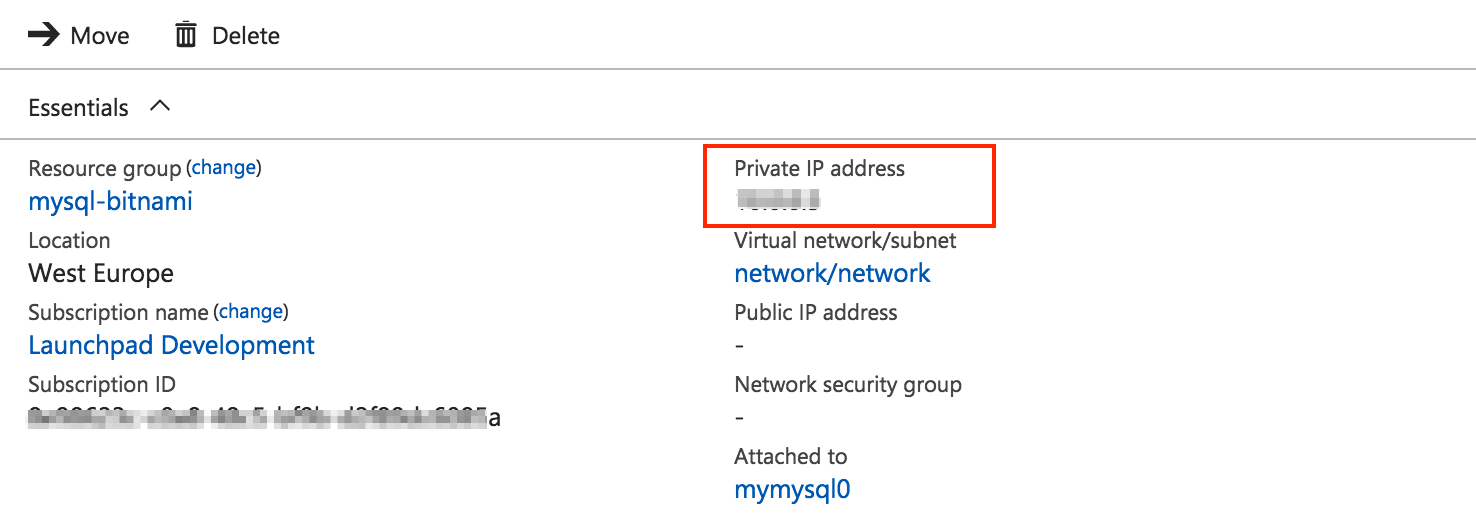
-
From the shell prompt, run the following command. Remember to replace PRIV_DB_IP_ADDRESS with the IP address you obtained in the previous step:
$ mysql -u root -p -h PRIV_DB_IP_ADDRESSYou will be prompted to enter the root user password. This is the password you entered during the database deployment.
Now you are connected to the backend database. To ensure that the internal connection between the two instances (frontend and backend) has been successful, you can run the command below:
mysql> show databases;
You will see an output similar to the following:
+--------------------+
| Database           |
+--------------------+
| information_schema |
| bitnami            |
| mysql              |
| performance_schema |
| sys                |
+--------------------+
5 rows in set (0.00 sec)
Step 4: Migrate the current WordPress database and specify the new database IP and credentials
To use the new multi-tier database as the backend of the application, you must migrate the current WordPress database and specify the new IP and credentials of the remote database.
Learn how to migrate the current bitnami_wordpress database to the new remote database by following the how to create a database backup and restore it sections.
To specify the new database IP and credentials, change these values in the /opt/bitnami/apps/wordpress/htdocs/wp-config.php file.
Useful links
To learn more about the topics discussed in this guide, see the links below: