Get Started with Bitnami Containers using Amazon EKS and the AWS Marketplace
Introduction
Amazon Web Services (AWS) provides a number of different cloud and container services, including the Amazon Elastic Container Service for Kubernetes (EKS), which allows users to quickly and easily create Kubernetes clusters in the cloud. But starting up a cluster is just the beginning: the next step is to deploy applications on it.
That’s where this tutorial comes in. It will walk you, step by step, through the process of using the AWS Marketplace to deploy containers on a running EKS cluster.
Overview
This guide will walk you through the process of deploying and managing containers in an EKS cluster using the AWS Marketplace.
For illustrative purposes, this guide will show you the steps to deploy the Bitnami Prometheus Push Gateway container on your EKS cluster. But this is just an example, there are many other containers available to choose from, and they’re all equally easy to deploy from the AWS Marketplace by following the same steps.
Here are the steps you’ll follow in this tutorial:
- Subscribe to the Bitnami Push Gateway container using the AWS Marketplace
- Deploy the Bitnami Push Gateway container on EKS
The next sections will walk you through these steps in detail.
Assumptions and prerequisites
This guide assumes that:
- You have an active AWS account. If you don’t have this, create a new account.
- You have a running EKS cluster with kubectl installed. If you don’t, follow the instructions in our EKS guide and launch a new EKS cluster on AWS.
Step 1: Subscribe to the Bitnami Push Gateway container using the AWS Marketplace
At the end of this step, you will have subscribed to the Bitnami Push Gateway container solution in the AWS Marketplace and obtained the details of the registry.
Follow these steps:
-
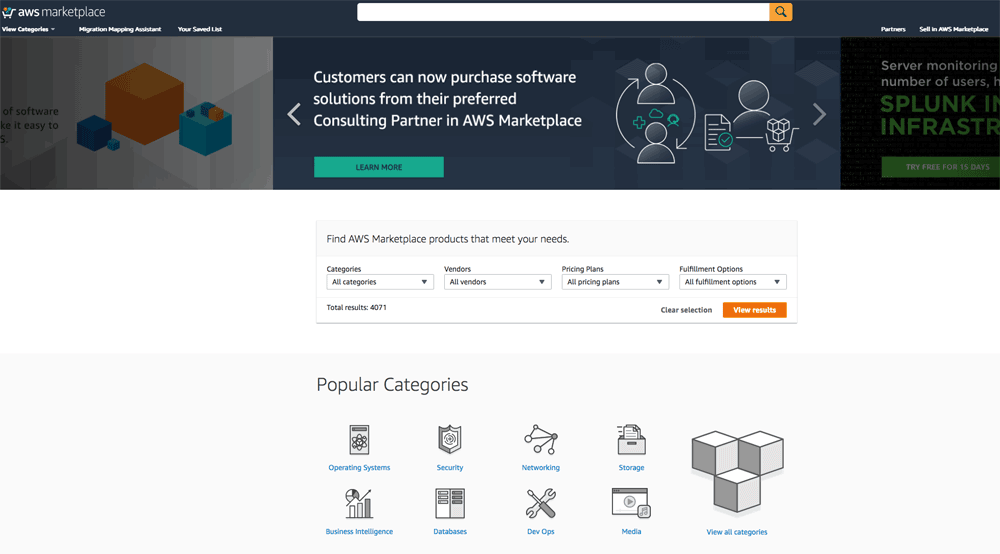
Log in to the AWS Marketplace.
-
Search for the Bitnami Push Gateway container by entering the search term “bitnami push gateway container” in the search bar at the top.
-
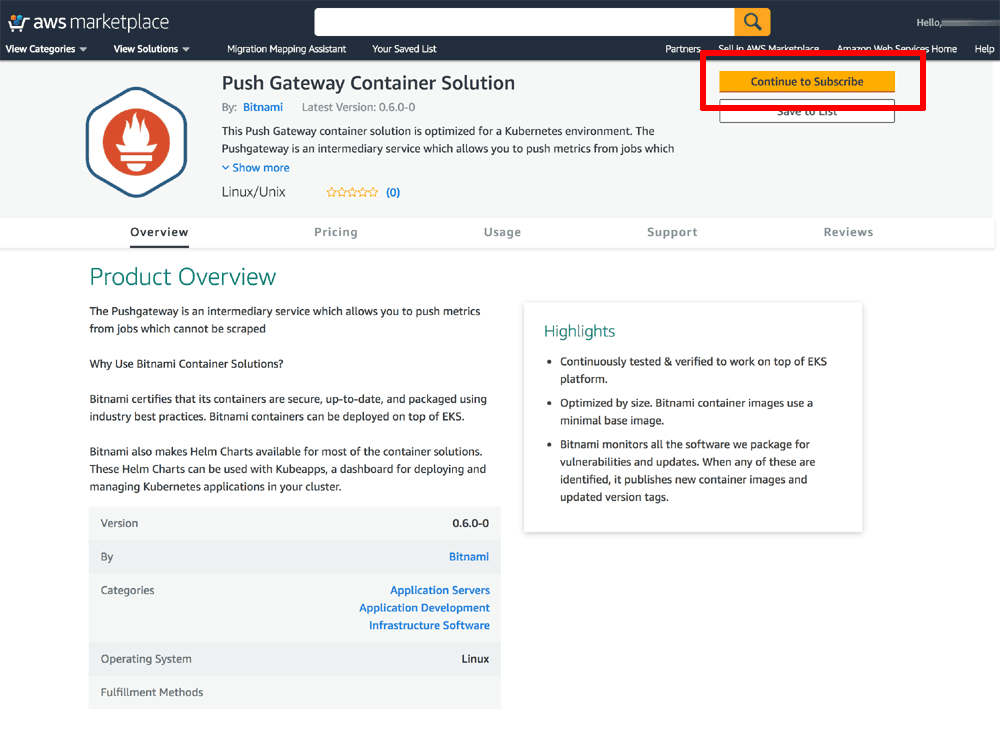
Select the Bitnami Push Gateway container in the list of search results.
-
On the product detail page, review the details of the solution and click the “Continue to subscribe” button.
-
On the product subscription page, select “Push Gateway Container Solution” as the software option and accept the terms.
-
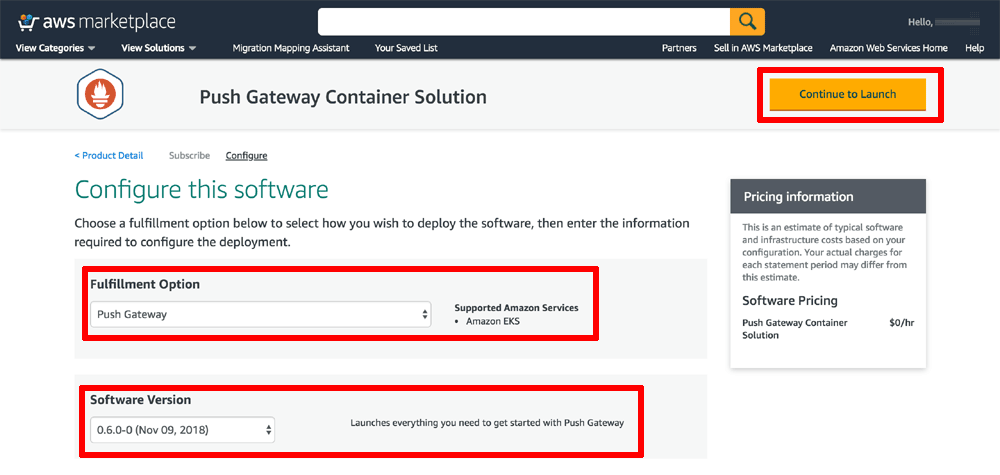
On the product configuration page, select “Push Gateway” as the fulfillment option and click the “Continue to Launch” button.
-
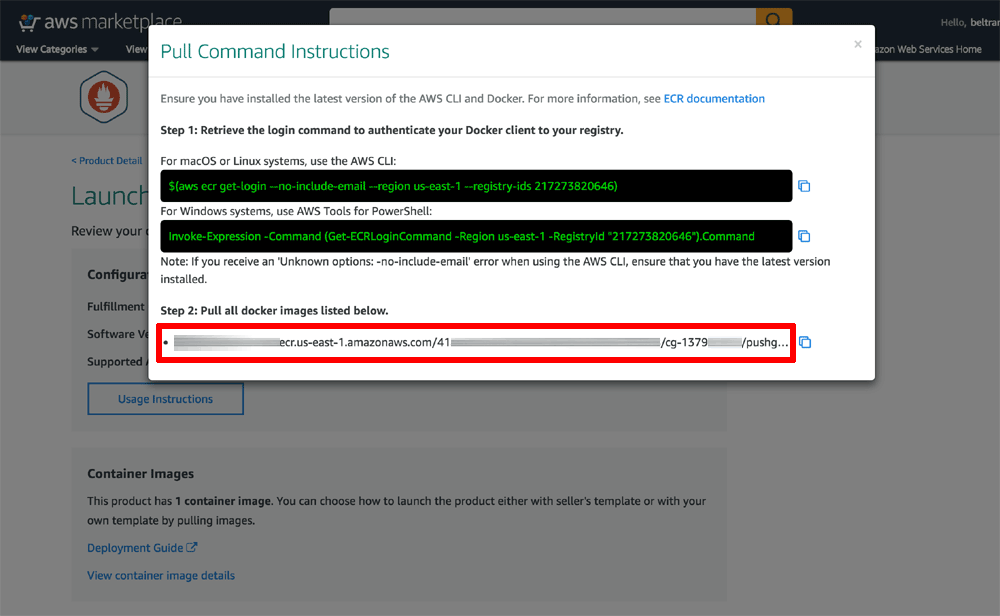
On the product fulfillment page, copy the URL to the AWS Marketplace registry. This URL also contains the container name and tag. You will need these details in the next step.
Step 2: Deploy the Bitnami Push Gateway container on EKS
At the end of this step, you will have deployed the Push Gateway container on your EKS cluster.
The next step is to deploy the Push Gateway container on your EKS cluster using kubectl. You can do this by running the command below. Replace the REGISTRY-URL placeholder with the URL to the AWS Marketplace registry (which also contains the container name and tag) as obtained in the previous step.
$ kubectl run pushgateway --image=REGISTRY-URL
Use the kubectl get pods command to verify that the container is running, as shown below:

Troubleshooting
If Kubernetes reports an error, use kubectl describe pods and kubectl logs to obtain more detailed information on the error. For example, if the pod name is pushgateway-12abcd-45efgh, use the command kubectl describe pods pushgateway-12abcd-45efgh to obtain a description of the error.
Some containers require other services to be up and running before they can start successfully. For example, a Web application might require a database server to be running. Refer to the container’s GitHub repository to check depdendencies, available options and environment variables that the container needs.
If applying this additional configuration/starting the required additional services does not resolve the error, refer to our troubleshooting guide for more information on common errors and their solutions.
Useful links
To learn more about the topics discussed in this tutorial, use the links below: