Get Started with Bitnami Charts using the Amazon Elastic Container Service for Kubernetes (EKS)
Introduction
Amazon Web Services (AWS) is a well-known provider of cloud services, while Kubernetes is quickly becoming the standard way to manage application containers in production environment. Amazon Elastic Container Service for Kubernetes (EKS) brings these two solutions together, allowing users to quickly and easily create Kubernetes clusters in the cloud.
This guide walks you, step by step, through the process of provisioning a new Kubernetes cluster using Amazon EKS and then deploying WordPress to the cluster using a Bitnami Helm chart.
Overview
This guide will introduce you to Amazon EKS by provisioning a Kubernetes cluster and deploying the Bitnami WordPress Helm chart on it. This will give you a pre-configured WordPress blog that you can start using right away. But WordPress is just an example: there are hundreds of other Bitnami applications to choose from, and they’re all equally easy to set up.
Here are the steps you’ll follow in this tutorial:
- Generate an AWS Access Key ID and Secret Access Key
- Create an AWS IAM service role
- Generate an AWS key pair for the worker nodes
- Create an AWS VPC
- Create and connect to an Amazon EKS cluster
- Add worker nodes to the Amazon EKS cluster
- Add a storage class to the Amazon EKS cluster
- Install Helm
- Deploy the WordPress Helm chart
- Log in and start using WordPress
The next sections will walk you through these steps in detail.
Assumptions and prerequisites
This guide assumes that:
- You have an AWS account with an active subscription and are able to log in using AWS IAM account credentials. If you don’t have either of these, create a new account and then create an IAM user in your AWS account.
- You have installed the latest version of aws, the AWS command-line interface (CLI), to a location in your system path. In case you haven’t, install it using these instructions.
- You have installed the latest version of heptio-authenticator-aws, the Heptio Authenticator for AWS, to a location in your system path. In case you haven’t, install it using these instructions.
- You have installed the latest version of kubectl, the Kubernetes command-line tool, to a location in your system path. In case you haven’t, install it using these instructions.
NOTE: You must use kubectl v1.10 or later with Amazon EKS.
IMPORTANT: At the time of writing, Amazon EKS is only available in the us-west-2 and us-east-1 regions. Therefore, before proceeding with the remainder of this guide, select one of these two regions in the AWS console and perform the operations listed below in that region alone.
Step 1: Generate an AWS Access Key ID and Secret Access Key
At the end of this step, you will have generated an AWS Access Key ID and Secret Access Key and created a local AWS profile to hold these credentials. If you already have an AWS Access Key ID and Secret Access Key and a local AWS profile, you can skip this step.
The first step is to generate an AWS Access Key ID and Secret Access Key, which will be used to authenticate your interaction with the Amazon EKS service. To do this:
-
Log in to the AWS IAM console using your AWS IAM account credentials.
-
Select the “Users” section in the left navigation bar and search for your IAM user record.
-
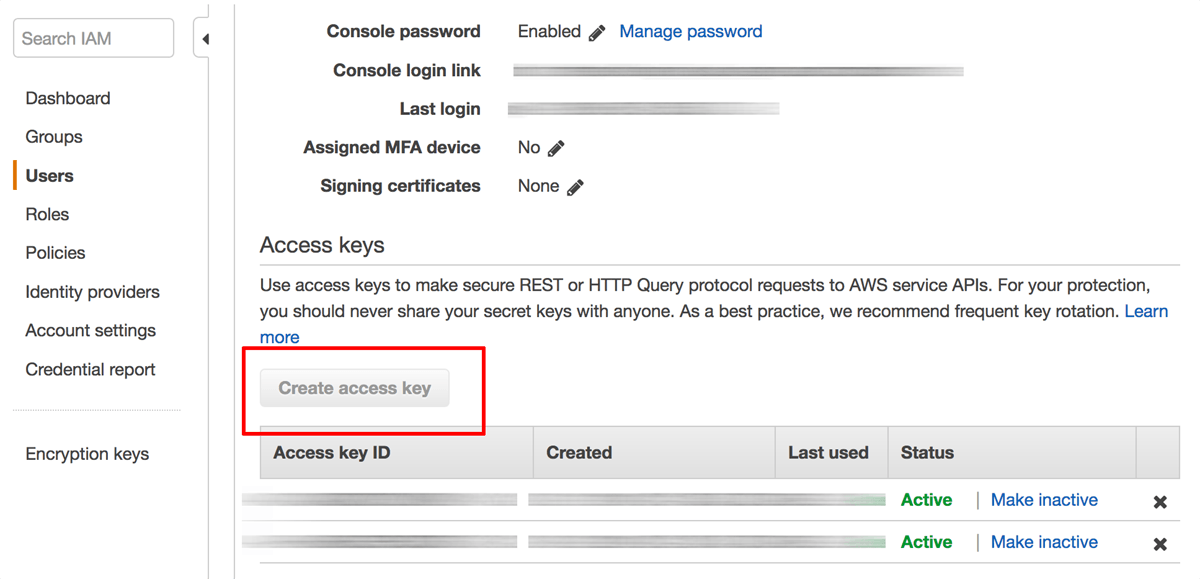
Within the user record, select the “Security credentials” tab and find the “Access keys” section.
-
Click the “Create access key” button.
A new key pair, consisting of an “Access Key ID” and “Secret Access Key”, will be generated and displayed. The “Secret Access Key” value will not be displayed again, so accurately down the “Access Key ID” and “Secret Access Key” values displayed.
On your local system, run the following command to create an AWS profile. Enter the AWS Access Key ID, Secret Access Key and selected region when prompted.
$ aws configure
This will create a profile file in your home directory on your local system named ~/.aws/credentials. Typically, this file contains a default profile named default with your credentials. These credentials will be used when interacting with your Amazon EKS cluster.
Step 2: Create an AWS IAM service role
At the end of this step, you will have created an AWS IAM service role to handle operations related to your Amazon EKS cluster.
The next step is to create a service role that will interact with the Amazon EKS cluster. To do this:
-
Navigate to the AWS IAM console and log in (if you’re not already logged in).
-
Select the “Roles” section in the left navigation bar and click the “Create role” button.
-
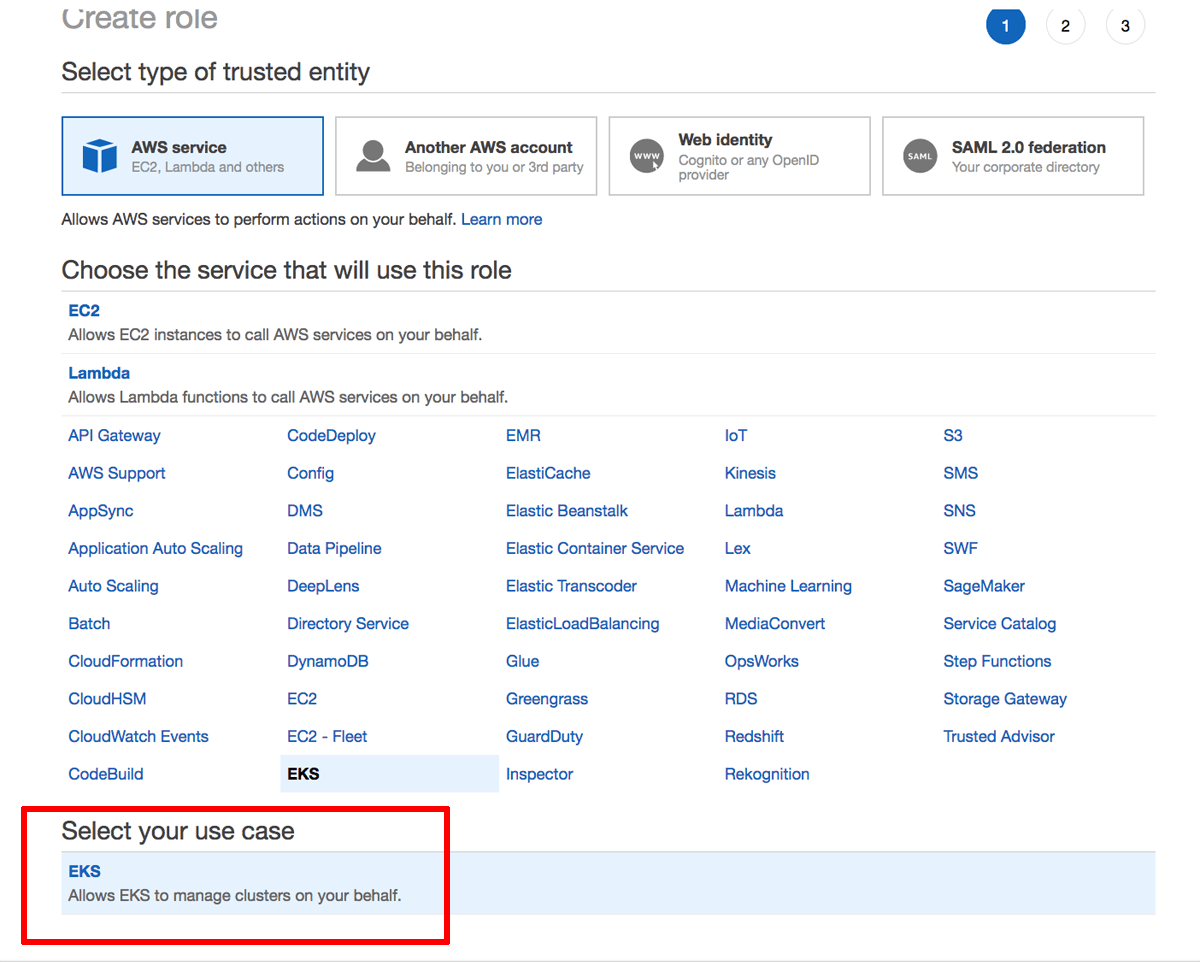
Select “AWS service” as the type of entity and “EKS” as the service. Click the “Next: Permissions” button to proceed.
-
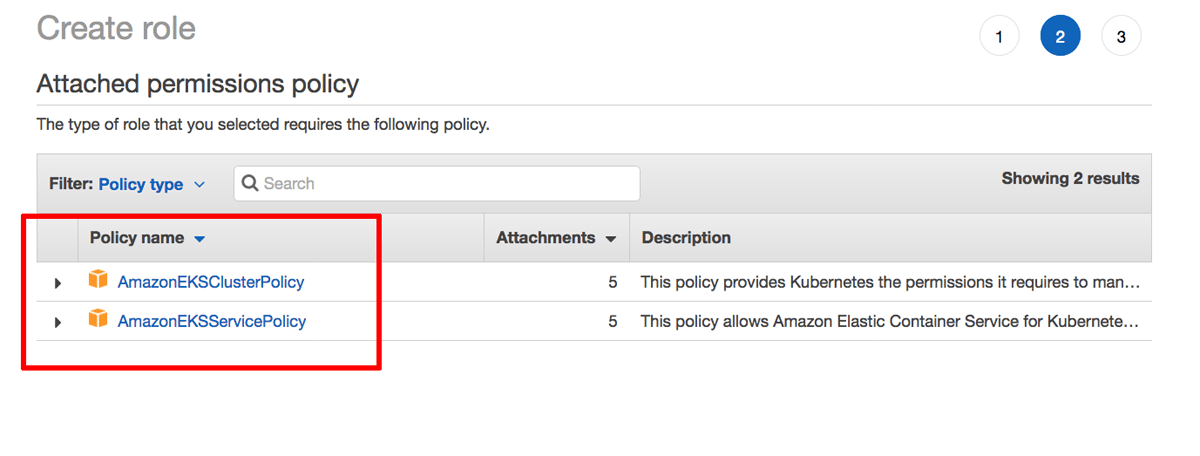
Click the “Next: Review” button to proceed.
-
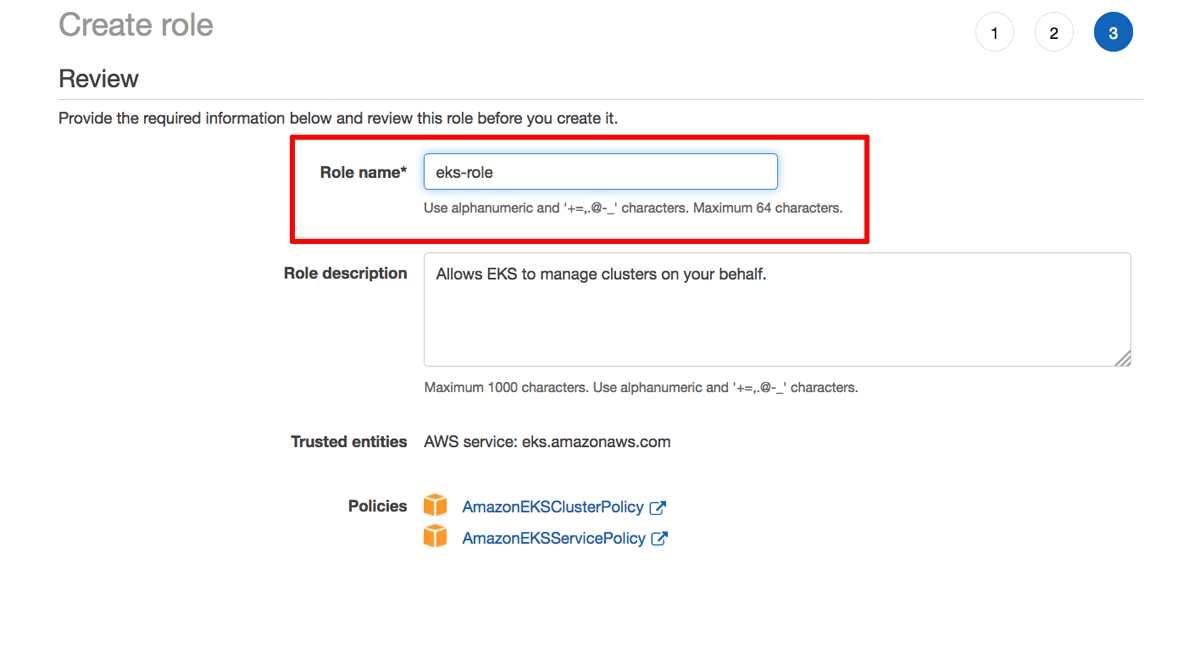
Enter a name for the service role and click “Create role” to create the role. Note the name of the service role.
Step 3: Generate an AWS key pair for the worker nodes
At the end of this step, you will have generated an SSH key pair to access your EC2 instances. If you already have an SSH key pair for the AWS region you are operating in, you can skip this step.
To generate an SSH key pair, which you will need to log in to your EC2 instances, follow the steps below:
-
Log in to the AWS Console.
-
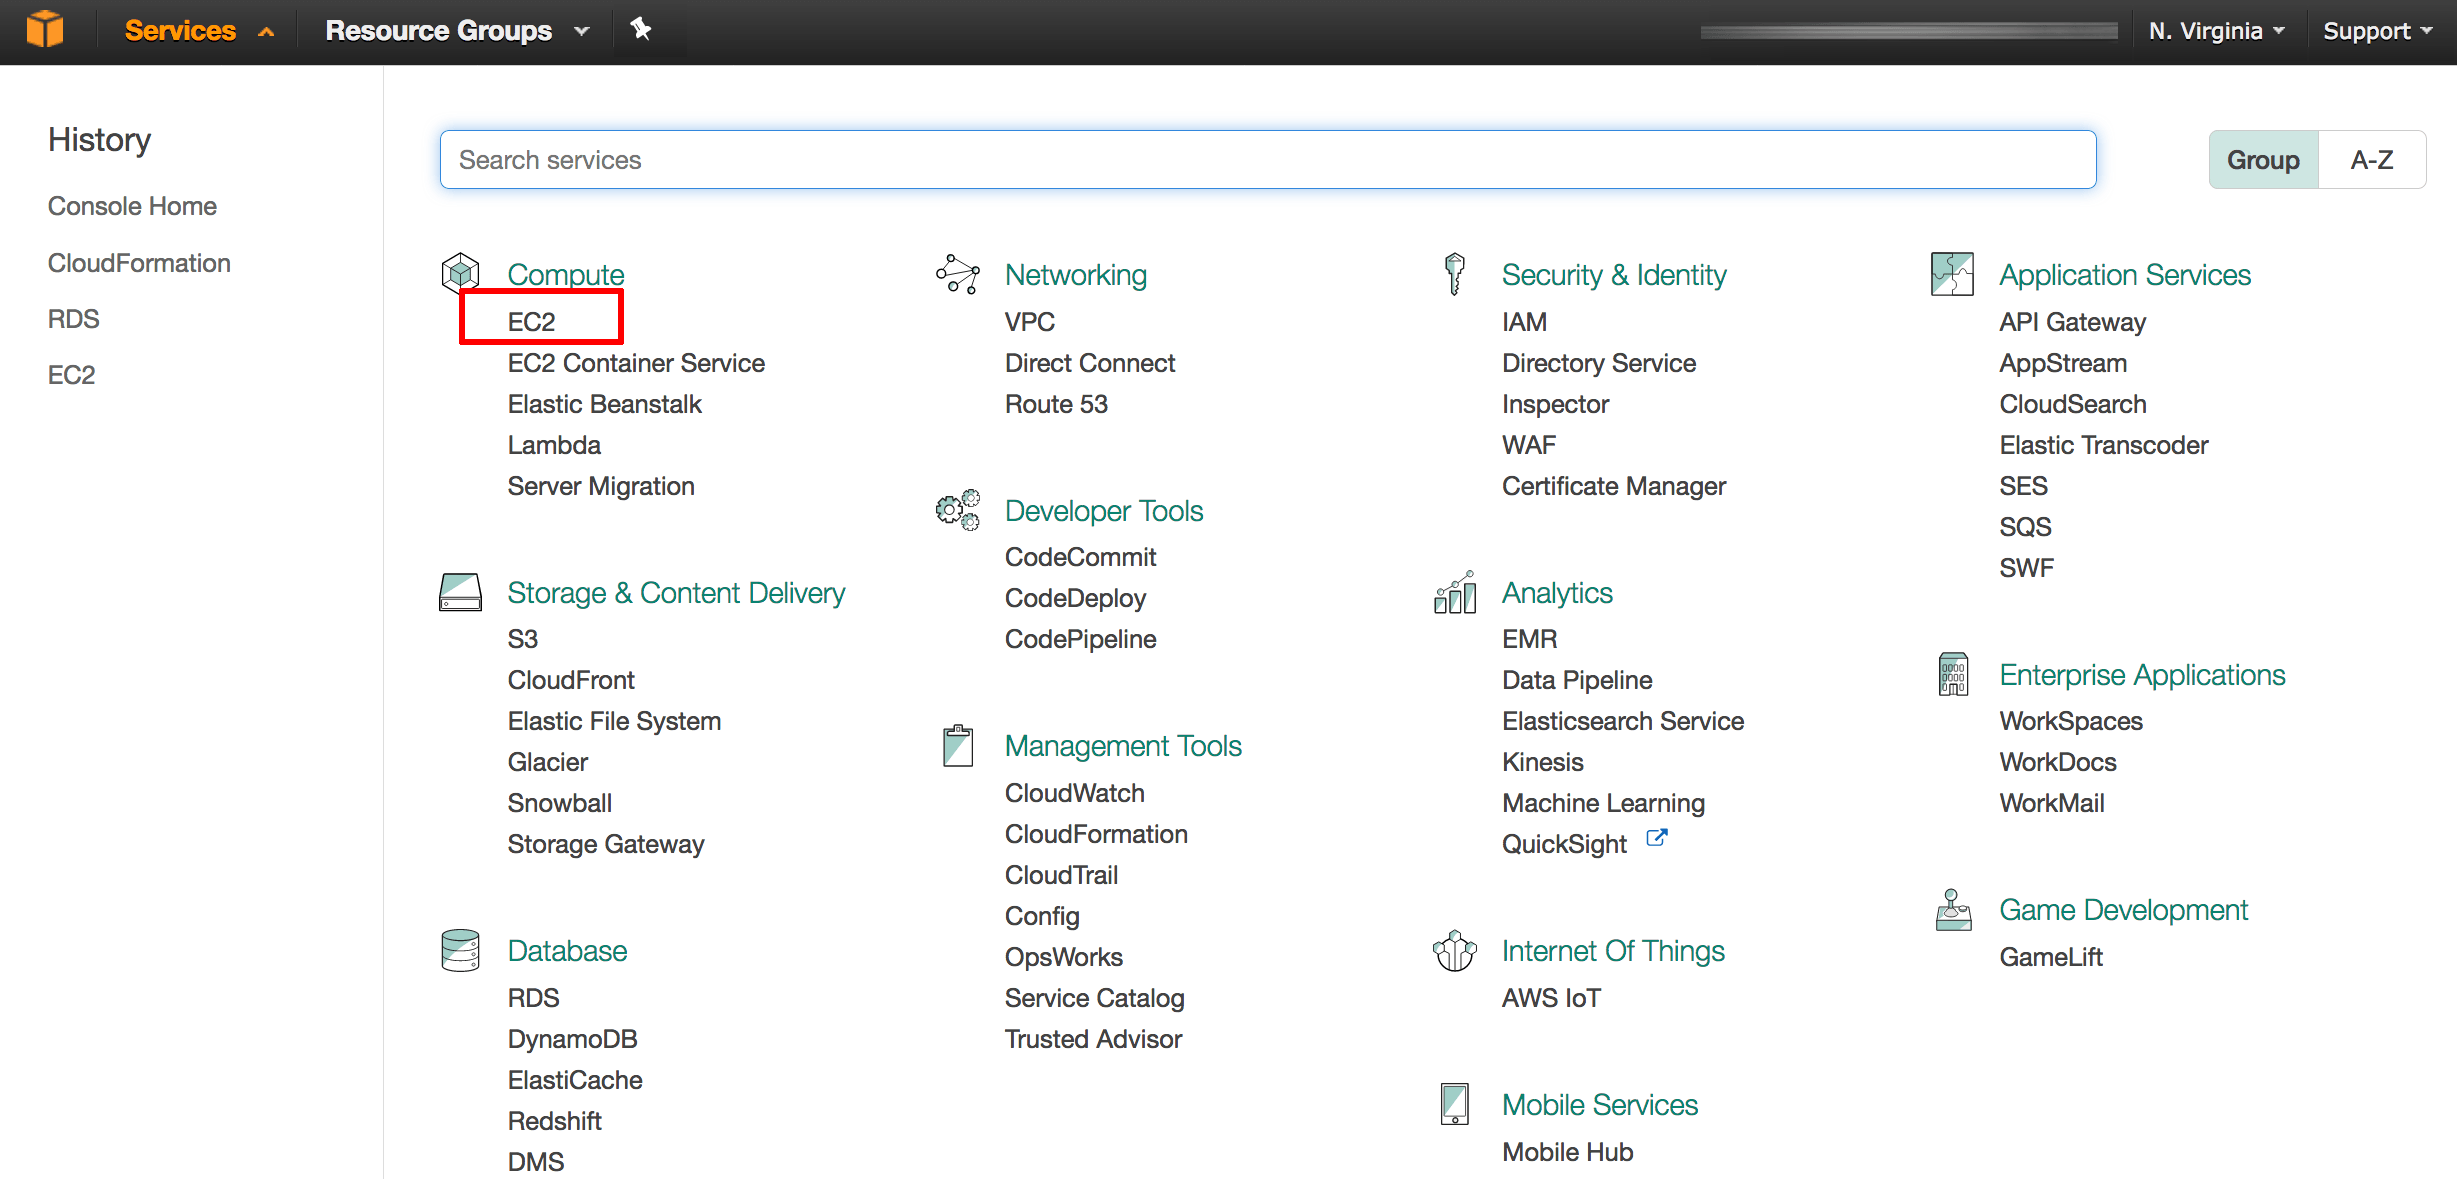
From the Amazon Web Services menu, select the EC2 service.
-
If required, use the region selector in the top right corner to switch to the region where your instance will be launched.
-
From the Amazon EC2 dashboard, select the “Key Pairs” option in the “Network & Security” menu.
-
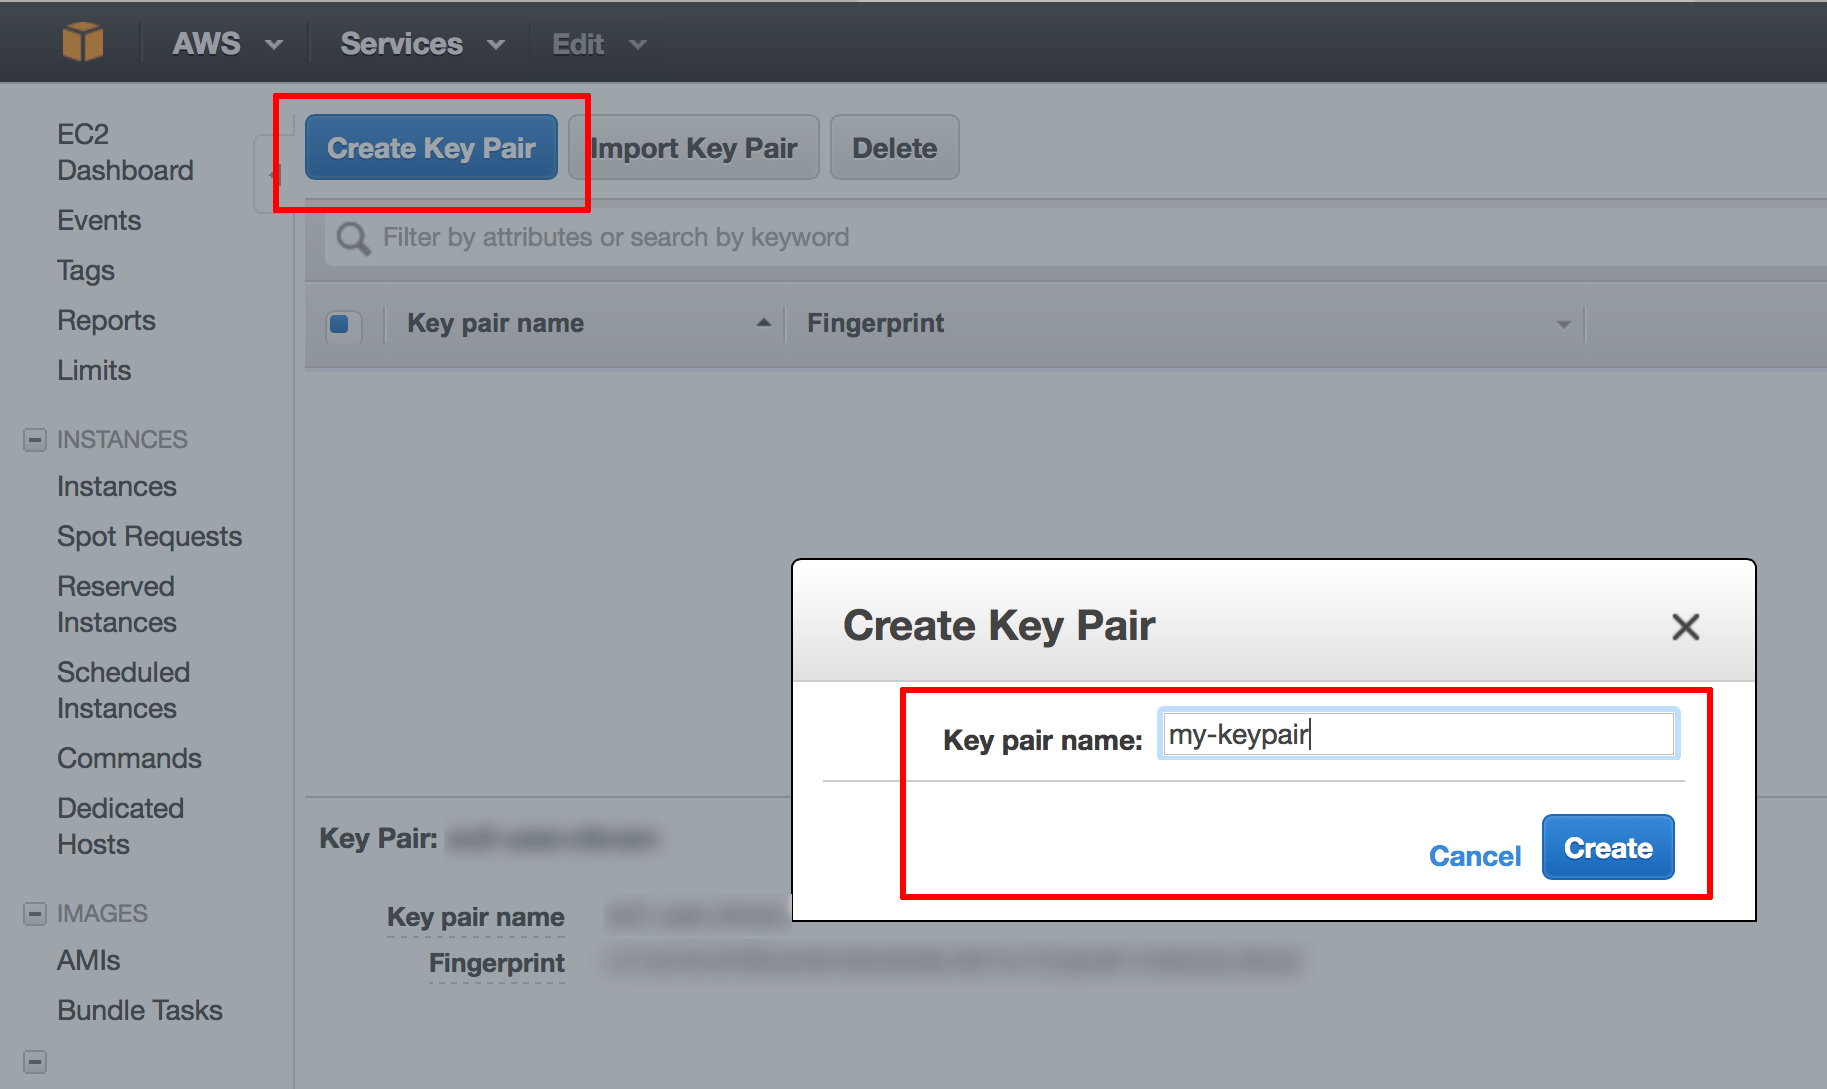
Click the “Create Key Pair” button. In the resulting dialog box, enter a name for the new key pair and click the “Create” button.
-
A new key pair, consisting of an SSH public and private key, will be generated. You will be prompted to download the private SSH key to your computer.
NOTE: You will only be able to download the private SSH key once. Store it safely as you will not be able to log in to your AWS servers without it.
Step 4: Create an AWS VPC
At the end of this step, you will have created an AWS VPC to host your Amazon EKS cluster.
Amazon EKS also requires a Virtual Private Cloud (VPC) in which to deploy the cluster. To create this VPC:
-
Navigate to the AWS CloudFormation console and log in (if you’re not already logged in).
-
Click the “Create Stack” button.
-
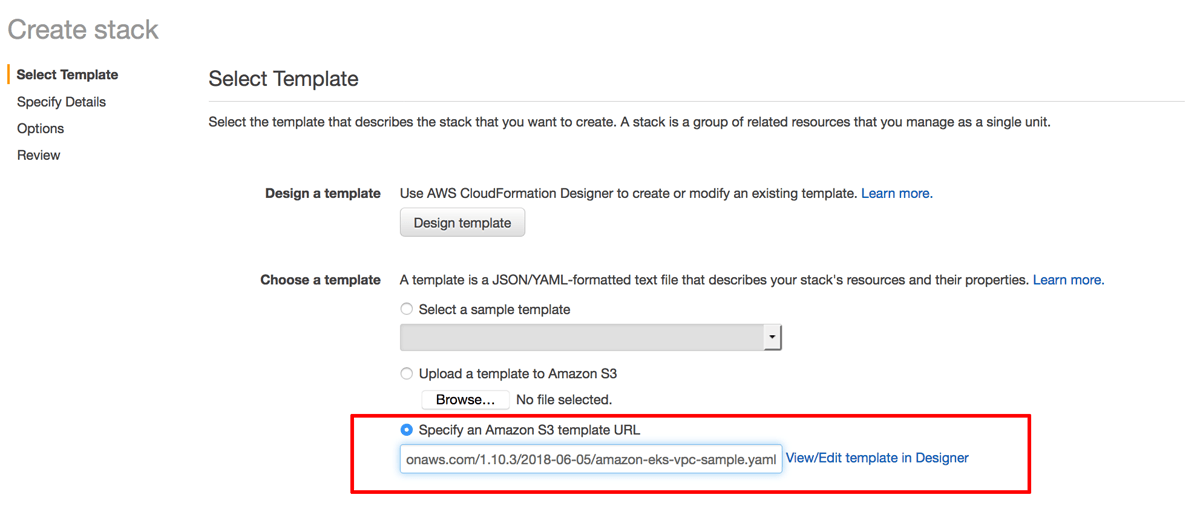
On the “Select Template” page, select the option to “Specify an Amazon S3 template URL” and enter the URL below:
https://amazon-eks.s3-us-west-2.amazonaws.com/1.10.3/2018-06-05/amazon-eks-vpc-sample.yamlClick “Next” to proceed.
-
On the “Specify Details” page, enter a name for the new stack. Click “Next” to proceed.
-
On the “Options” page, leave all values at their defaults. Click “Next” to proceed.
-
On the “Review” page, review and confirm the details of the stack. Click “Create” to proceed.
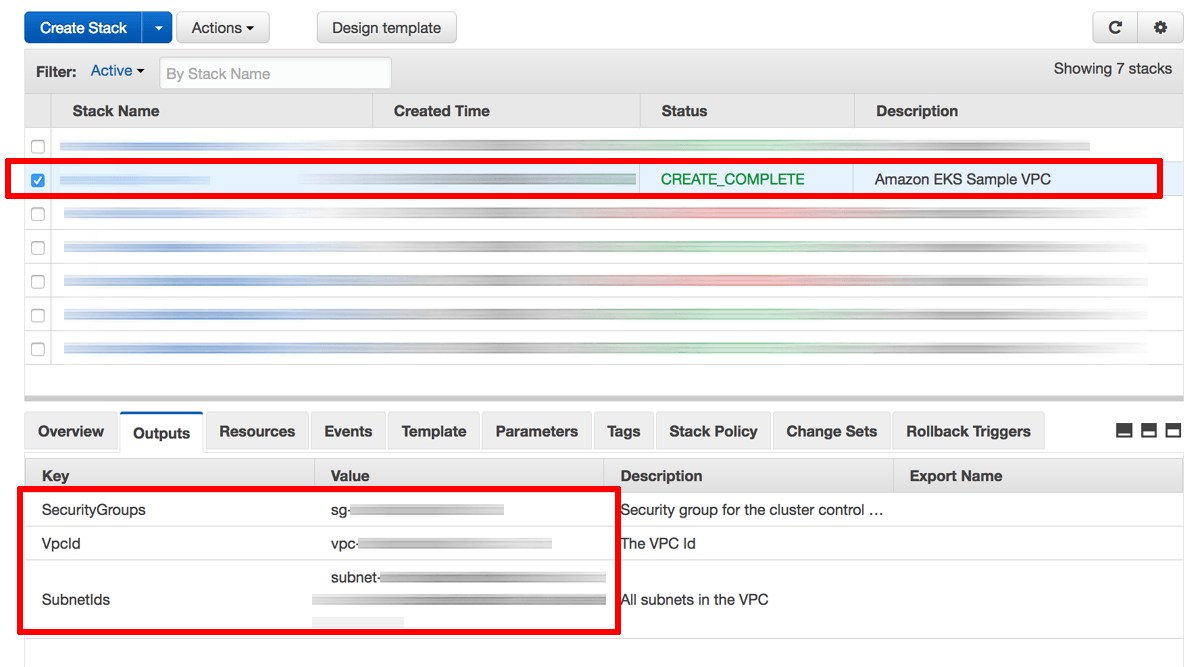
Stack creation will take a few minutes. Once complete, select the stack name in the list of available stacks and select the “Outputs” section in the lower left pane. Note the identifiers of the security group, VPC and VPC subnets.
Step 5: Create and connect to an Amazon EKS cluster
At the end of this step, you will have created an Amazon EKS cluster and configured kubectl to connect to its control plane.
At this point, you are ready to create a new Amazon EKS cluster. To do this:
-
Navigate to the Amazon EKS console and log in (if you’re not already logged in).
-
Click the “Create cluster” button.
-
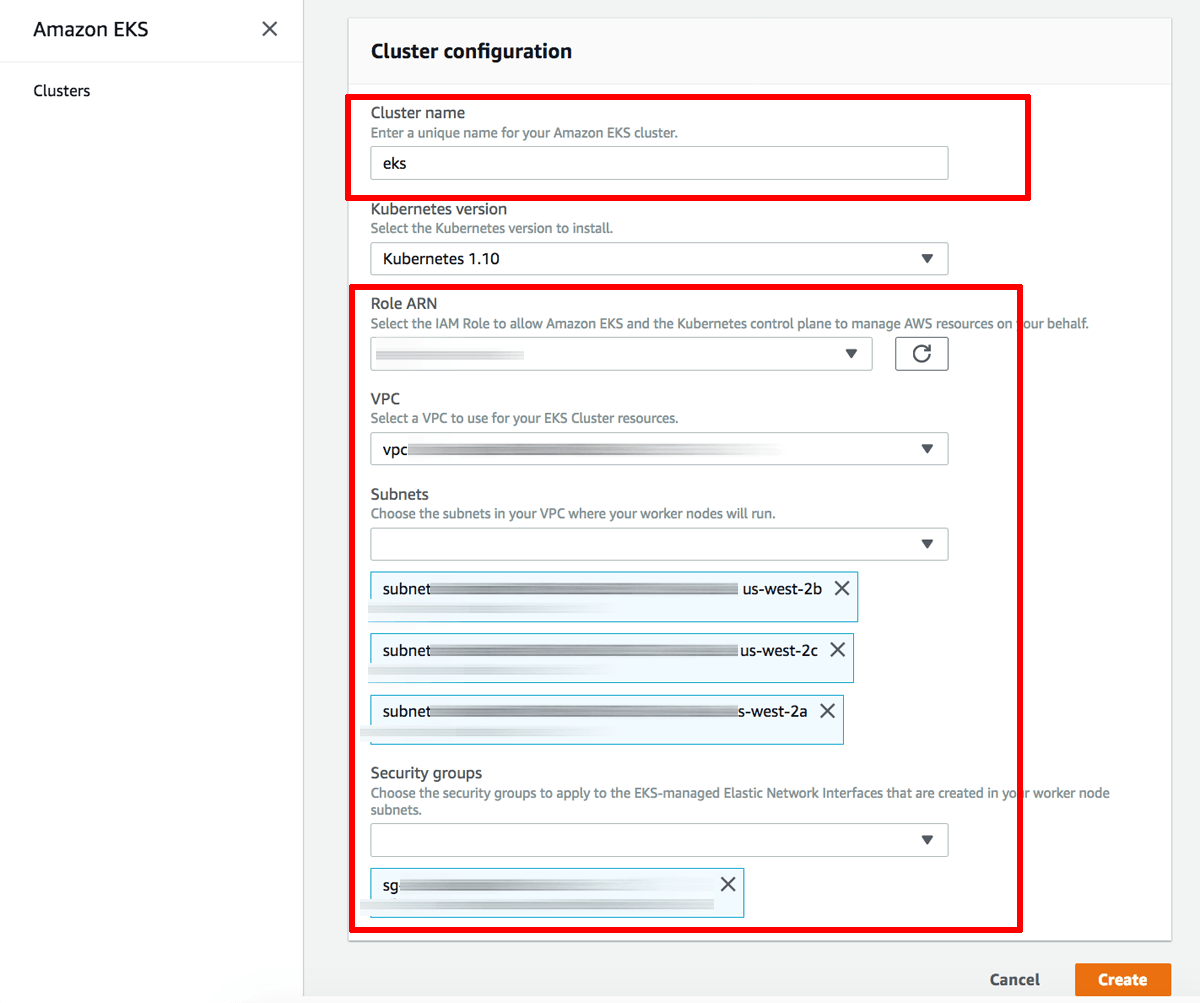
Enter details into the EKS cluster creation form as follows:
- In the “Cluster name” field, enter a descriptive name for the cluster. Note this name as it will be required later.
- In the “Role ARN” field, select the IAM service role created in Step 2.
- In the “VPC” field, select the VPC identifier from Step 4.
- In the “Subnets” field, select the VPC subnet identifiers from Step 4.
- In the “Security groups” field, select the security group identifier from Step 4.
-
Click “Create” to create the Amazon EKS cluster.
NOTE: If cluster creation fails due to insufficient capacity in your selected region or unavailability of subnets in certain zones, repeat the process using a different region.
Cluster creation may take up to 10 minutes. You can monitor the status of the cluster from the Amazon EKS console. Once complete, the cluster status will change to “Active” as shown below.
The next step is to configure kubectl to recognize the new cluster’s control plane. To do this:
-
Select the new cluster in the Amazon EKS console. From the cluster details page, note the API server endpoint and certificate authority data.
-
Create a kubectl configuration file in your ~/.kube directory as ~/.kube/config-eks:
$ mkdir ~/.kube $ touch ~/.kube/config-eks -
Add the file to the $KUBECONFIG environment variable so that kubectl is able to find it:
$ export KUBECONFIG=~/.kube/config-eks -
Fill the file with the following contents, replacing the placeholders shown as follows:
-
Replace the API-SERVER-ENDPOINT placeholder with the API server endpoint obtained from the cluster detail page.
-
Replace the CA-DATA placeholder with the certificate authority data obtained from the cluster detail page.
-
Replace the CLUSTER-NAME placeholder with the name of the Amazon EKS cluster.
-
Replace the PROFILE-NAME placeholder with the name of your AWS credentials profile from the ~/.aws/credentials file (typically, default).
  apiVersion: v1
  clusters:
  - cluster:
      server: API-SERVER-ENDPOINT
      certificate-authority-data: CA-DATA
    name: kubernetes
  contexts:
  - context:
      cluster: kubernetes
      user: aws
    name: aws
  current-context: aws
  kind: Config
  preferences: {}
  users:
  - name: aws
    user:
      exec:
        apiVersion: client.authentication.k8s.io/v1alpha1
        command: heptio-authenticator-aws
        args:
          - "token"
          - "-i"
          - "CLUSTER-NAME"
        env:
          - name: AWS_PROFILE
            value: "PROFILE-NAME"
-
-
Run the command below to confirm that kubectl is able to communicate with the new cluster’s control plane:
$ kubectl get svcYou should see output similar to what is shown below:
Step 6: Add worker nodes to the Amazon EKS cluster
At the end of this step, your Amazon EKS cluster will be fully operational.
Once the control plane of your cluster has been activated, the next step is to add nodes to it. To do this:
-
Navigate to the AWS CloudFormation console and log in (if you’re not already logged in).
-
Click the “Create Stack” button.
-
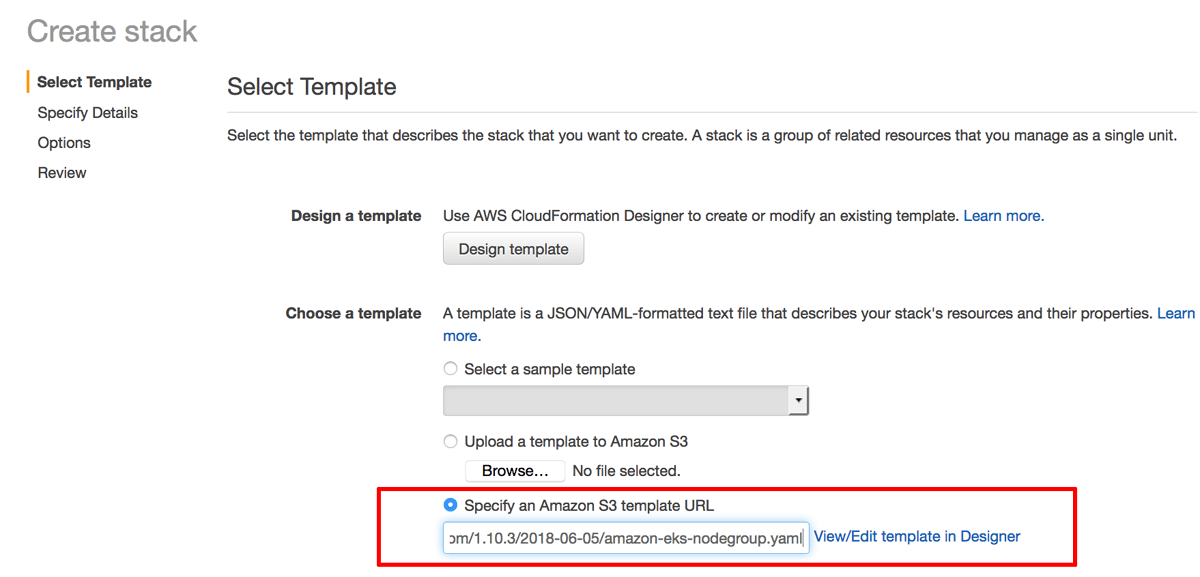
On the “Select Template” page, select the option to “Specify an Amazon S3 template URL” and enter the URL below:
https://amazon-eks.s3-us-west-2.amazonaws.com/1.10.3/2018-06-05/amazon-eks-nodegroup.yamlClick “Next” to proceed.
-
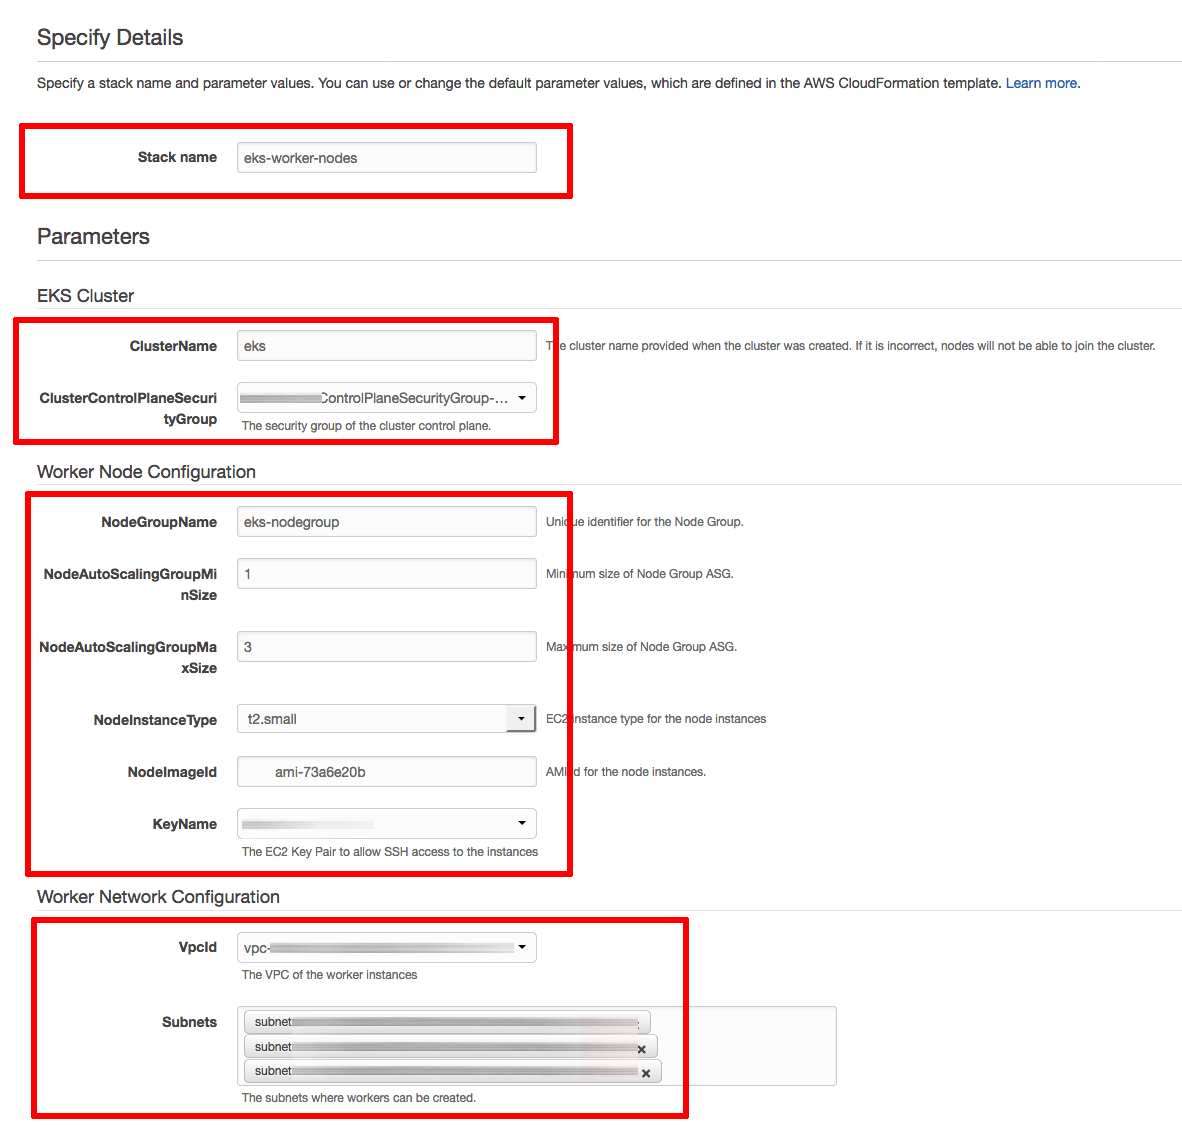
On the “Specify Details” page, enter details as follows:
- In the “Stack name” field, enter a descriptive name for the stack. Note this name as it will be required later.
- In the “Cluster name” field, enter the name of your Amazon EKS cluster as specified in Step 5.
- In the “ClusterControlPlaneSecurityGroup” field, select the security group identifier from Step 4.
- In the “NodeGroupName” field, enter a descriptive name for the node group.
- In the “NodeAutoScalingGroupMinSize” and “NodeAutoScalingGroupMaxSize” fields, enter the minimum and maximum number of nodes your cluster should have.
- In the “NodeInstanceType” field, choose a system configuration for the cluster nodes.
- In the “NodeImageId” field, enter ami-73a6e20b if you’re using the us-west-2 region or ami-dea4d5a1 if you’re using the us-east-1 region.
- In the “KeyName” field, select the SSH key pair you created in Step 3.
- In the “VpcId” field, select the VPC identifier from Step 4.
- In the “Subnets” field, select the VPC subnet identifiers from Step 4.
Click “Next” to proceed.
-
On the “Options” page, leave all values at their defaults. Click “Next” to proceed.
-
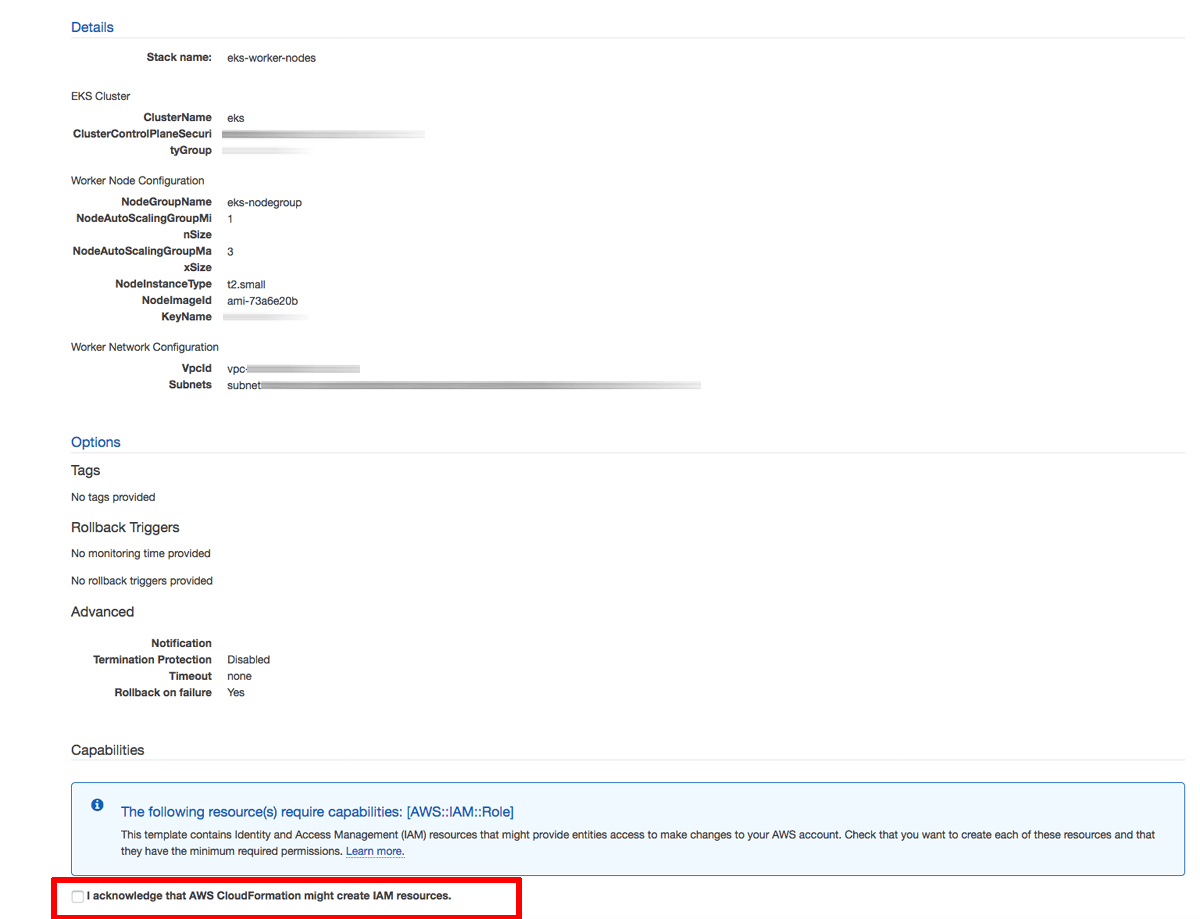
On the “Review” page, review and confirm the details of the stack and tick the checkbox to confirm that the stack can create additional IAM resources. Click “Create” to proceed.
-
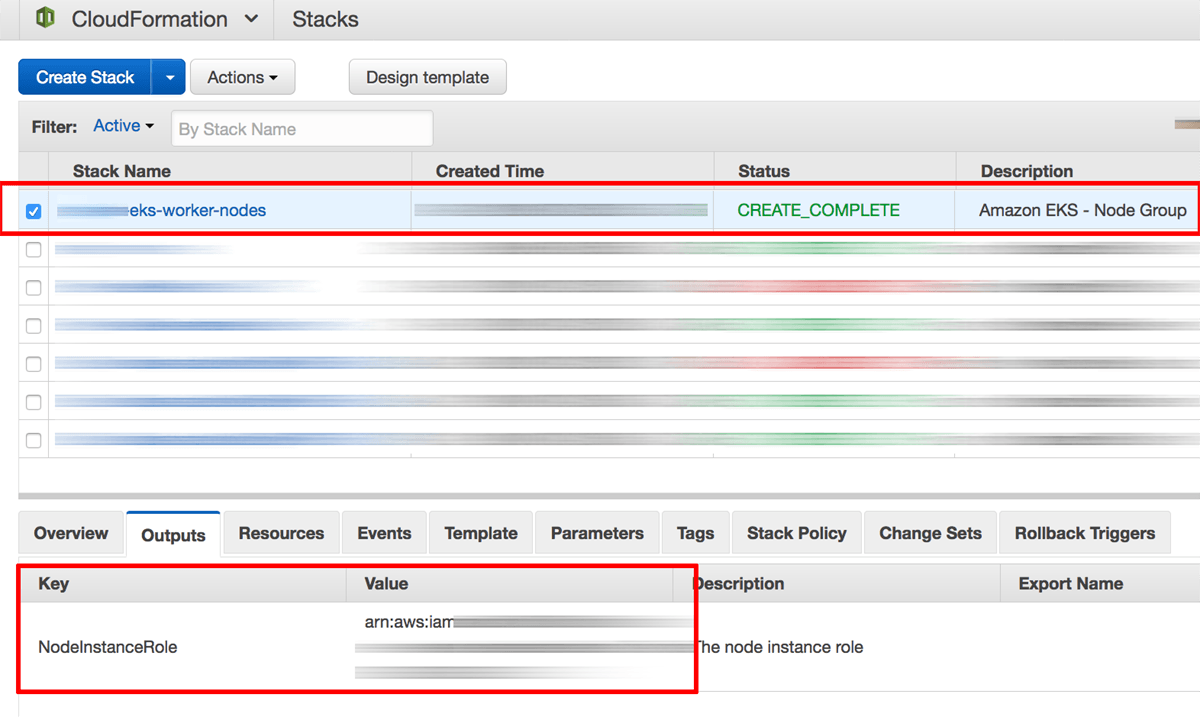
Once stack creation is complete, select the stack name in the list of available stacks and select the “Outputs” section in the lower left pane. Note the identifier of the node instance role.
-
On your local system, create a file named auth.yaml and fill it with the content below. Replace the ARN-ROLE placeholder with the node instance role obtained from the stack output.
apiVersion: v1 kind: ConfigMap metadata: name: aws-auth namespace: kube-system data: mapRoles: | - rolearn: ARN-ROLE username: system:node:{{EC2PrivateDNSName}} groups: - system:bootstrappers - system:nodes -
Apply the changes to the cluster configuration with kubectl:
$ kubectl apply -f auth.yaml
At this point, your nodes are configured to join the cluster. You can check the status of each node using the command below:
$ kubectl get nodes
Step 7: Add a storage class to the Amazon EKS cluster
At the end of this step, you will have added a storage class to your Amazon EKS cluster, to enable provisioning of EBS volumes for your applications.
By default, Amazon EKS does not create a storage class for a cluster. However, many Kubernetes applications (including the Bitnami WordPress Helm chart) request persistent volumes for storage, so a storage class is required to provide EBS volumes to applications. To do this:
-
On your local system, create a file named storage-class.yaml and fill it with the definition below:
kind: StorageClass apiVersion: storage.k8s.io/v1 metadata: name: gp2 provisioner: kubernetes.io/aws-ebs parameters: type: gp2 reclaimPolicy: Retain mountOptions: - debug -
Apply the changes to the cluster configuration with kubectl:
  $ kubectl create -f storage-class.yaml
  $ kubectl patch storageclass gp2 -p '{"metadata": {"annotations":{"storageclass.kubernetes.io/is-default-class":"true"}}}'
At this point, your storage class is provisioned. You can check this using the command below:
$ kubectl get storageclass
Step 8: Install Helm
At the end of this step, you will have installed Helm in your Amazon EKS cluster.
Helm is the easiest way to manage applications in a Kubernetes cluster. Helm allows you to perform key operations for managing applications such as installation, upgrade and removal.
Follow these steps:
-
To install Helm v3.x, run the following commands:
  $ curl https://raw.githubusercontent.com/kubernetes/helm/master/scripts/get-helm-3 > get_helm.sh
  $ chmod 700 get_helm.sh
  $ ./get_helm.sh
TIP: If you are using OS X you can install it with the brew install command: brew install helm.
Step 9: Deploy the Bitnami WordPress Helm chart
At the end of this step, you will have WordPress running in your Amazon EKS cluster.
You can also follow this other section to subscribe and launch the Bitnami WordPress Helm Chart through the AWS Marketplace.
Once Helm is installed, you’re ready to deploy WordPress using the Bitnami WordPress Helm chart.
-
Install the WordPress Helm chart:
$ helm install wordpress oci://registry-1.docker.io/bitnamicharts/wordpressPay special attention to the NOTES section of the output, as it contains important information to access the application.
-
Check pod status until both WordPress and MariaDB are “running”:
$ kubectl get pods -w -
Obtain the load balancer’s public hostname:
$ export SERVICE_IP=$(kubectl get svc --namespace default wordpress --template "{{ range (index .status.loadBalancer.ingress 0) }}{{ . }}{{ end }}") $ echo "WordPress URL: http://$SERVICE_IP/" $ echo "WordPress Admin URL: http://$SERVICE_IP/admin" -
Get the credentials for the application:
  echo Username: user
  echo Password: $(kubectl get secret --namespace default wordpress -o jsonpath="{.data.wordpress-password}" | base64 -d)
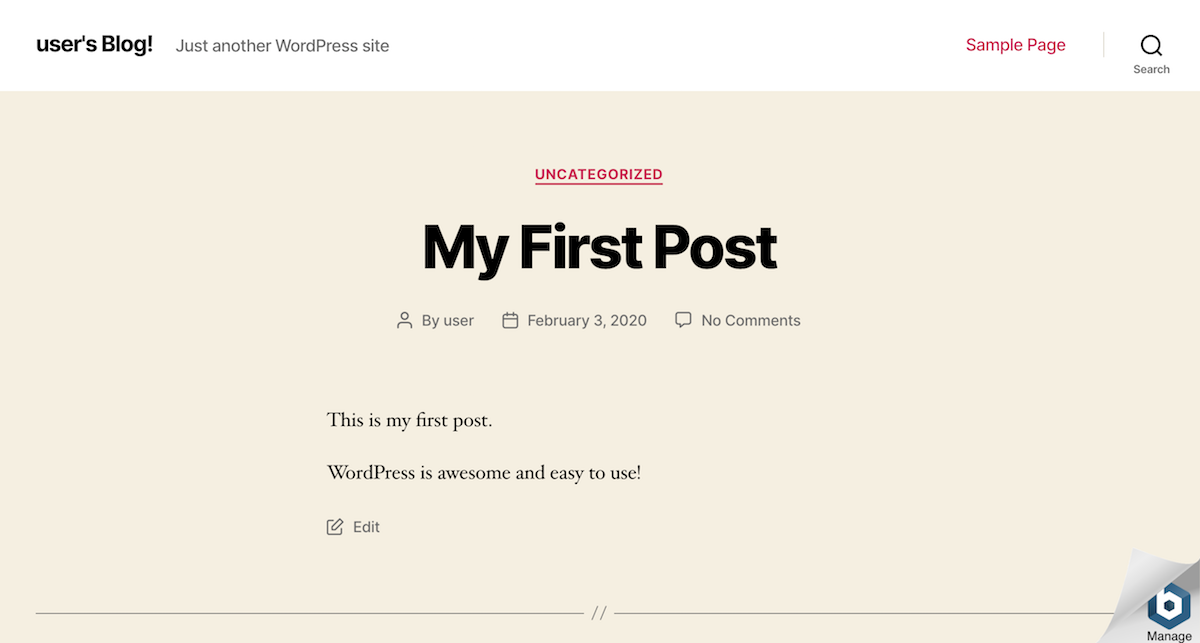
Browse to the load balancer’s external IP address and you should see WordPress running. Here’s what it should look like:
Step 10: Log in and start using WordPress
At the end of this step, you will have logged in to WordPress and created a new blog post.
To log in to the WordPress dashboard, follow these steps:
-
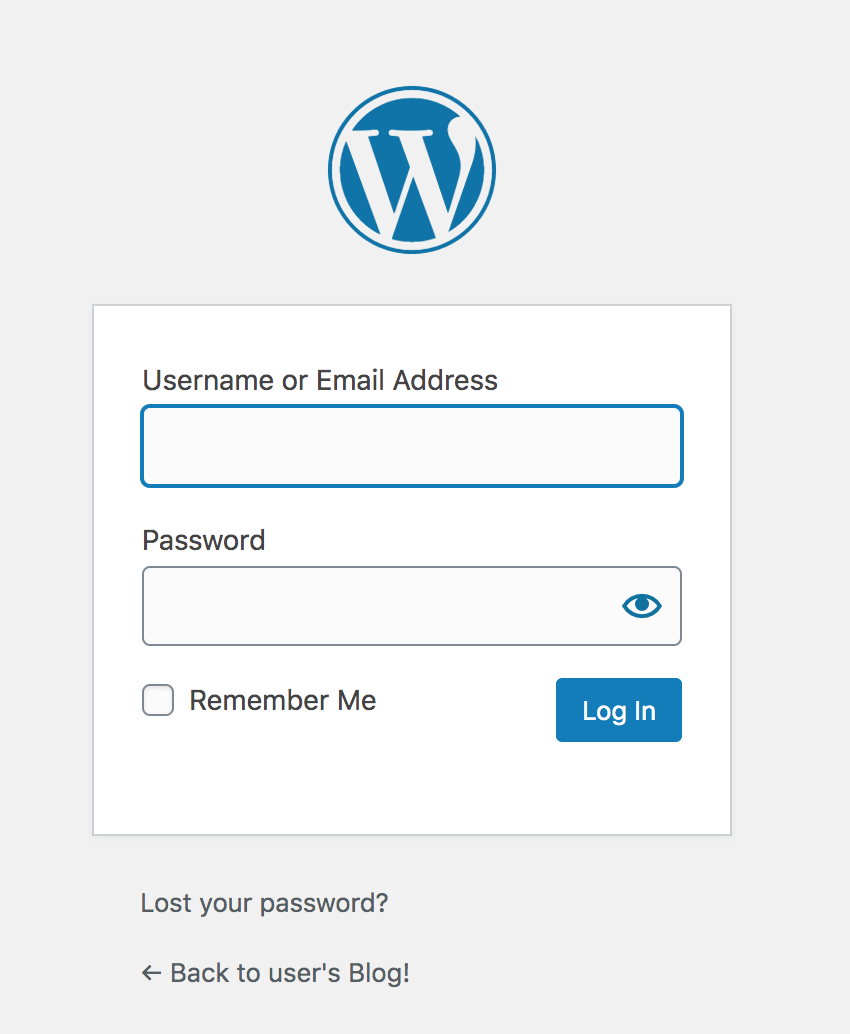
Browse to the WordPress dashboard, usually at the URL http://SERVER-IP/wp-admin.
-
Log in with the administrator credentials from the previous step.
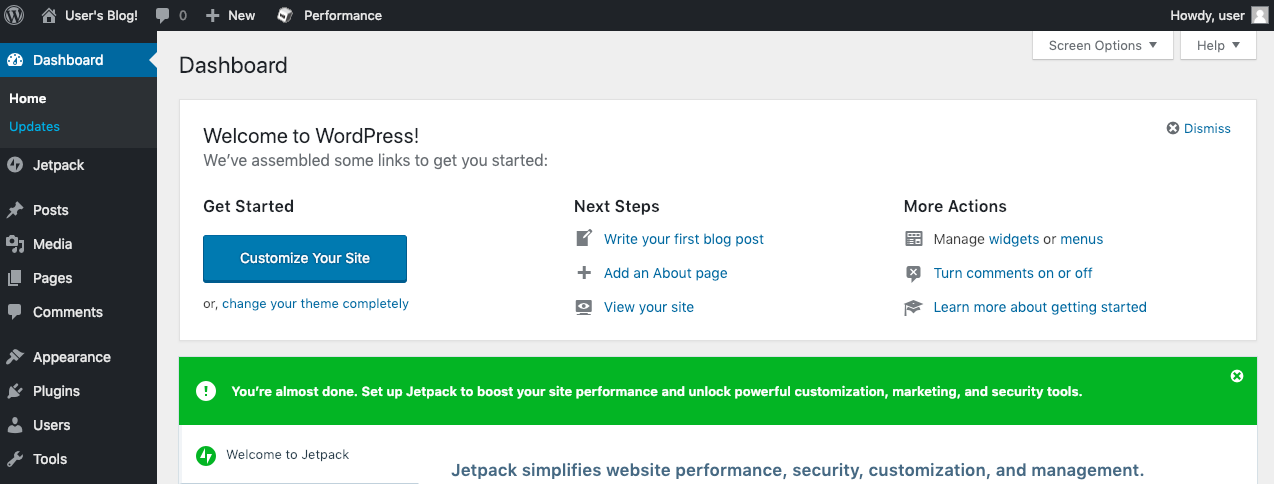
You should now arrive at the WordPress dashboard, which allows you to manage posts, pages and comments; customize your blog with themes and plugins; import and export content; manage navigation menus; add or delete new user accounts; and much more.
Create your first post
You can now add a new post using the following steps:
-
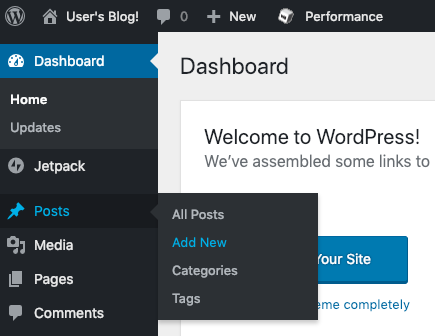
Select the “Posts -> Add New” menu option to create a new post.
-
Enter a title and content for the post. You can use the formatting tools at the top of the content area to format your post and add hyperlinks or images.
-
Optionally, choose the format and category for your post.
-
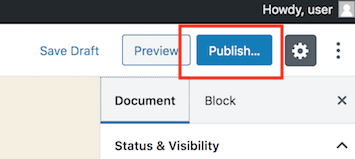
Publish it immediately using the “Publish” button.
And now, when you visit your blog’s front page, you should see your new post.
Congratulations! You now have a working, fully-functional WordPress blog in the cloud.
Keep your WordPress installation up-to-date
You can keep your WordPress installation up-to-date using tools such as VaultPress or the All-in-One WP Migration plugin. Alternatively, for simple upgrades that don’t involve chart changes, you need only to update the container tag/version used in your deployment.
Useful links
To learn more about the topics discussed in this tutorial, use the links below:

