Get Started with Bitnami Charts using VMware Tanzu Mission Control (TMC)
Introduction
VMware Tanzu Mission Control (TMC) is a centralized management platform to operate and secure Kubernetes infrastructure deployed across multiple clouds and managed by multiple teams. It allows you to create groups of clusters created directly from the TMC dashboard or attached from external cloud providers to have a unified overview of your infrastructure.
From the TMC user interface, you have full control of your multi-cloud deployments. This enables you to easily perform Kubernetes tasks such as upgrading clusters, setting policies and configurations, understanding the health of clusters, and much more.
This guide gets you started with basic operations in Tanzu Mission Control. At the end of this guide, you will have learnt you how to use Tanzu Mission Control to create a cluster (or attach an existing one) and deploy a MariaDB database cluster using the Bitnami MariaDB Helm chart. In addition, this guide shows you as an appendix how to attach a Kubernetes cluster deployed through the Azure Kubernetes Service (AKS).
Assumptions and prerequisites
This guide makes the following assumptions:
- You have access to the VMWare Cloud Services Portal (CSP) and your organization has Tanzu Mission Control available in the “My Services” section in CSP. If not, talk with an expert to request access.
- You have an AWS cloud account connected to Tanzu Mission Control to provision a new cluster. Learn how to connect Tanzu Mission Control with an AWS cloud account.
- You have the kubectl CLI and the Helm v3.x package manager installed. Learn how to install kubectl and Helm v3.x.
NOTE: Tanzu Mission Control will initially support provisioning, upgrading and scaling clusters on AWS, with other environments coming soon.
This guide uses the Bitnami MariaDB Helm chart as an example of deploying an application in a cluster created from TMC. The steps are similar for other Bitnami Helm charts.
Step 1: Create a new cluster group
TIP: This step creates a new cluster group in TMC. If you or your organization have already created a cluster group, you can go straight to Step 2.
To create a new cluster group, follow these steps:
-
Log in to Tanzu Mission Control using the domain provided by your organization or through the CSP console.
-
Navigate to the “Cluster groups” section and click “New cluster group”.
-
Give the cluster group a name, add a description and labels (optional), and then click “Create” to finish the process.
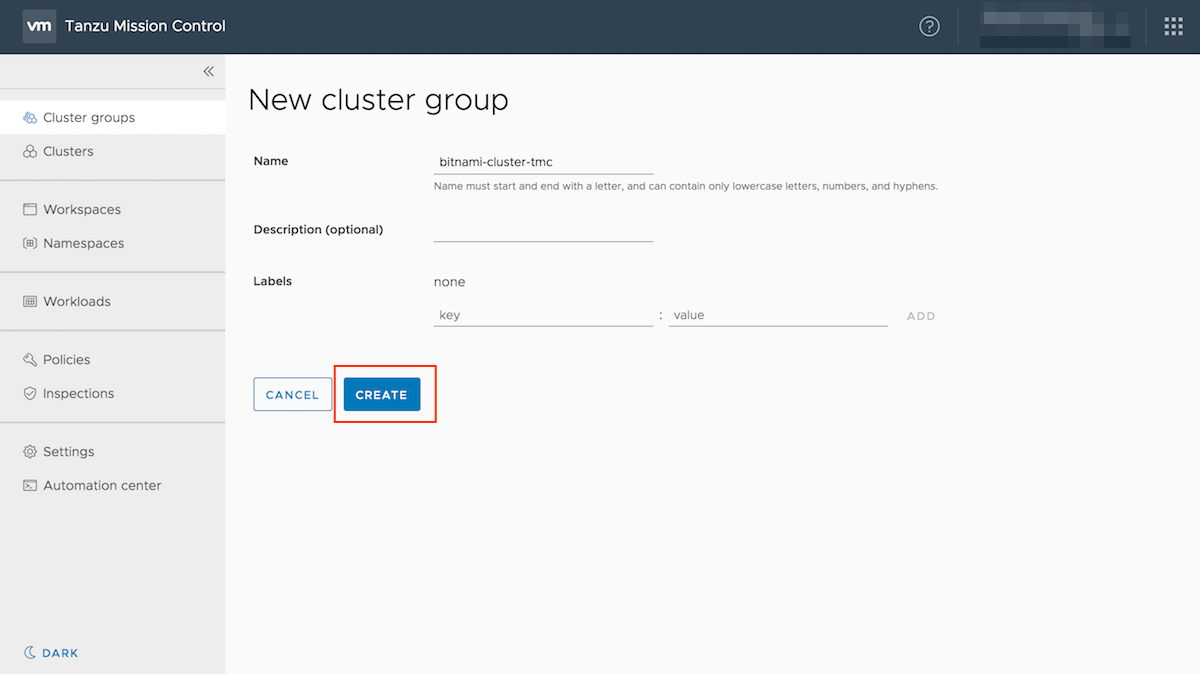
Once the new cluster group is created, it will appear in the list of available cluster groups.
Step 2: Provision a new cluster
Tanzu Mission Control allows you to directly provision a cluster from your AWS account. Once the cluster is deployed, you will be able to add new node pools, monitor its workloads, and manage access, image registry and network policies directly from the TMC admin panel.
To create a new cluster, follow the instructions below:
-
Navigate to the “Clusters” page.
-
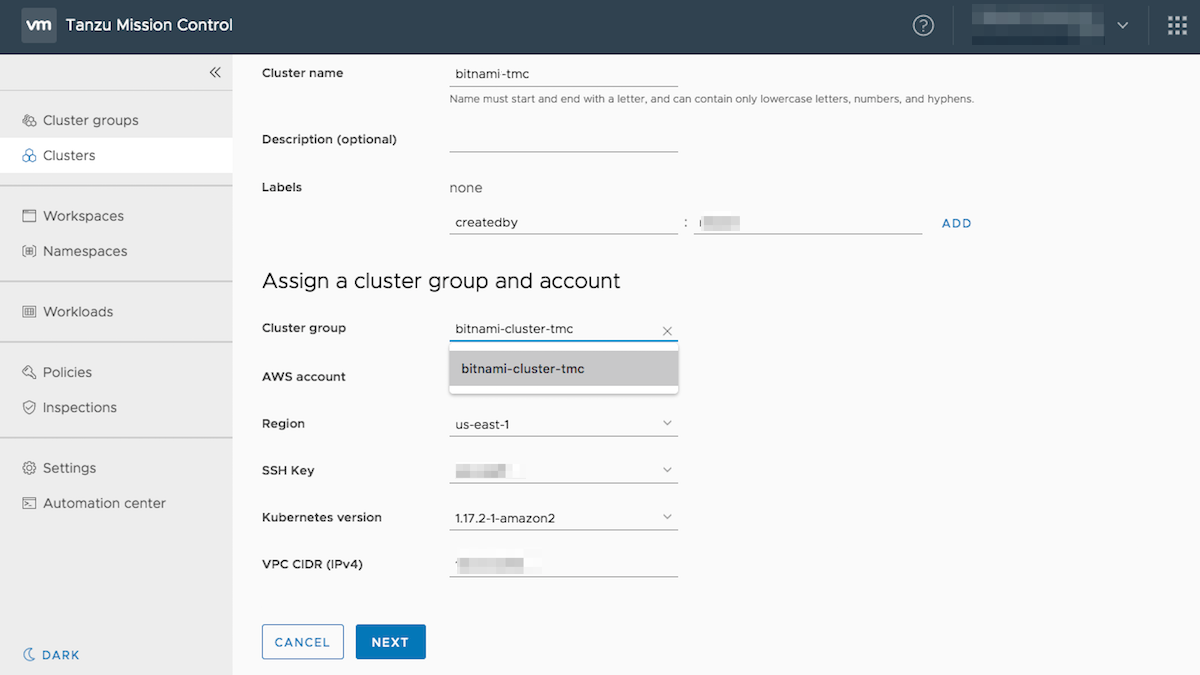
Click the “New cluster” button and select the AWS account to use for the cluster.
-
Enter a name for the cluster, choose the cluster group, and click “Next” to continue the process.
-
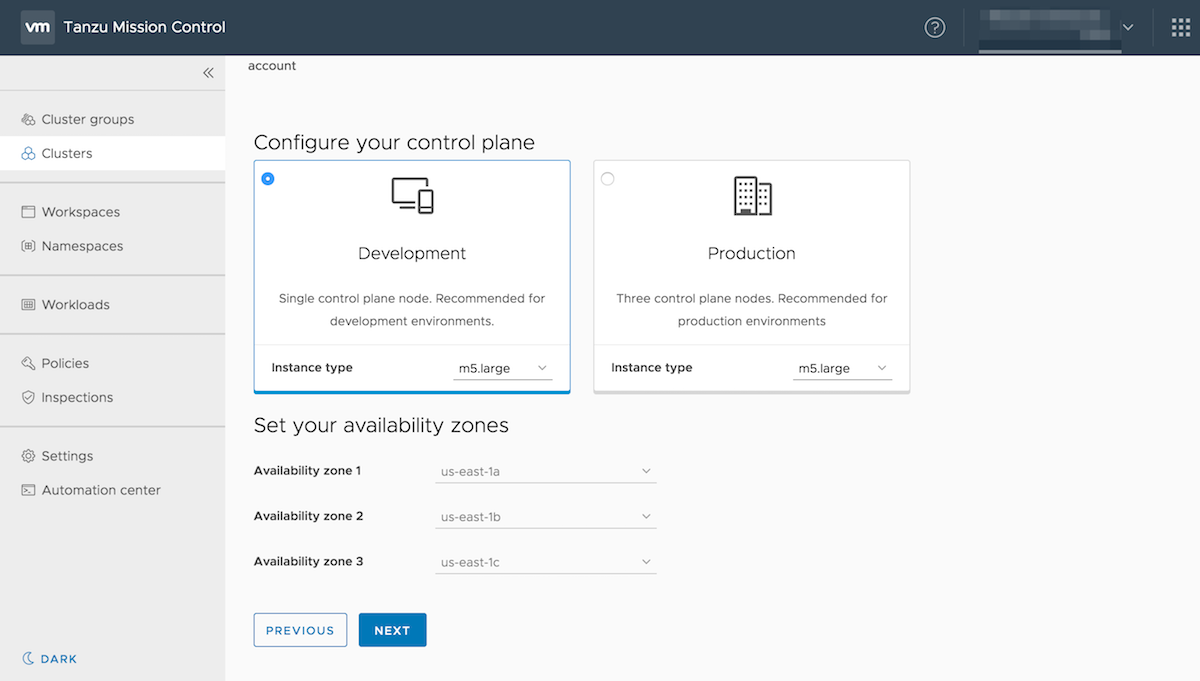
Configure your control plane by selecting the purpose of the cluster: development or production. Set the cluster availability zones and click “Next”.
-
In the resulting screen, check the default node pool and add new worker nodes by clicking “New node pool”. To finish the process, click “Create”.
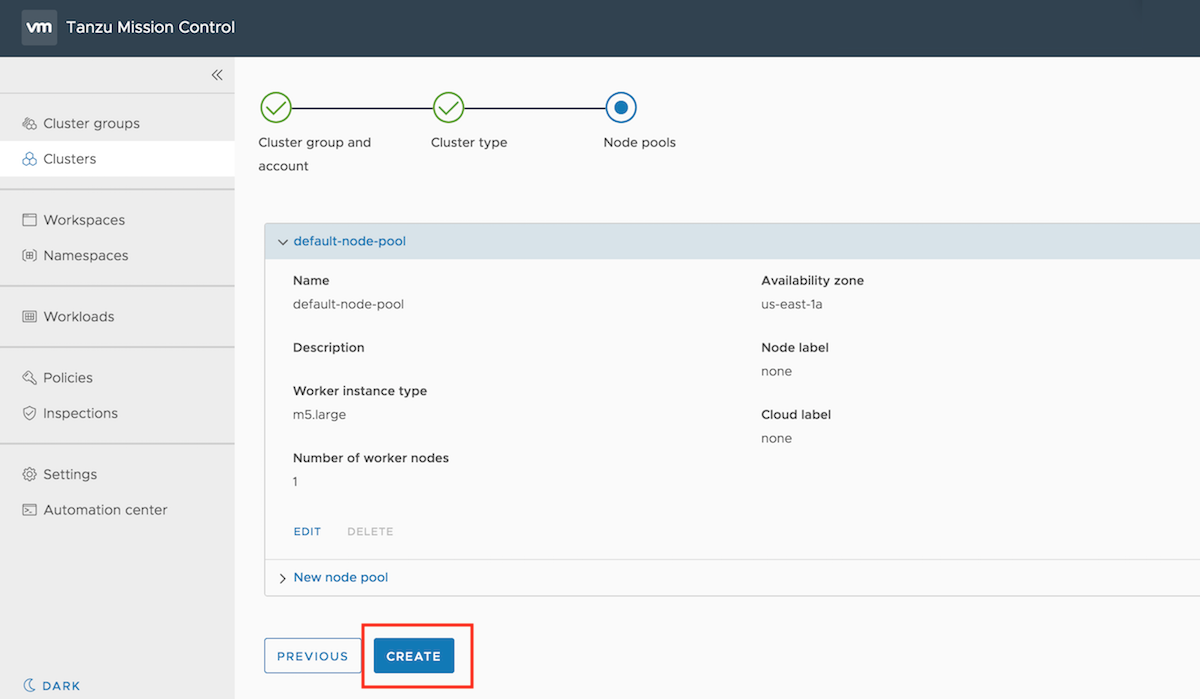
You will be redirected to the cluster dashboard. The process of creating the cluster may take several minutes. Once the cluster is created, you will see important information related to the nodes, pods, health and resources of the cluster.
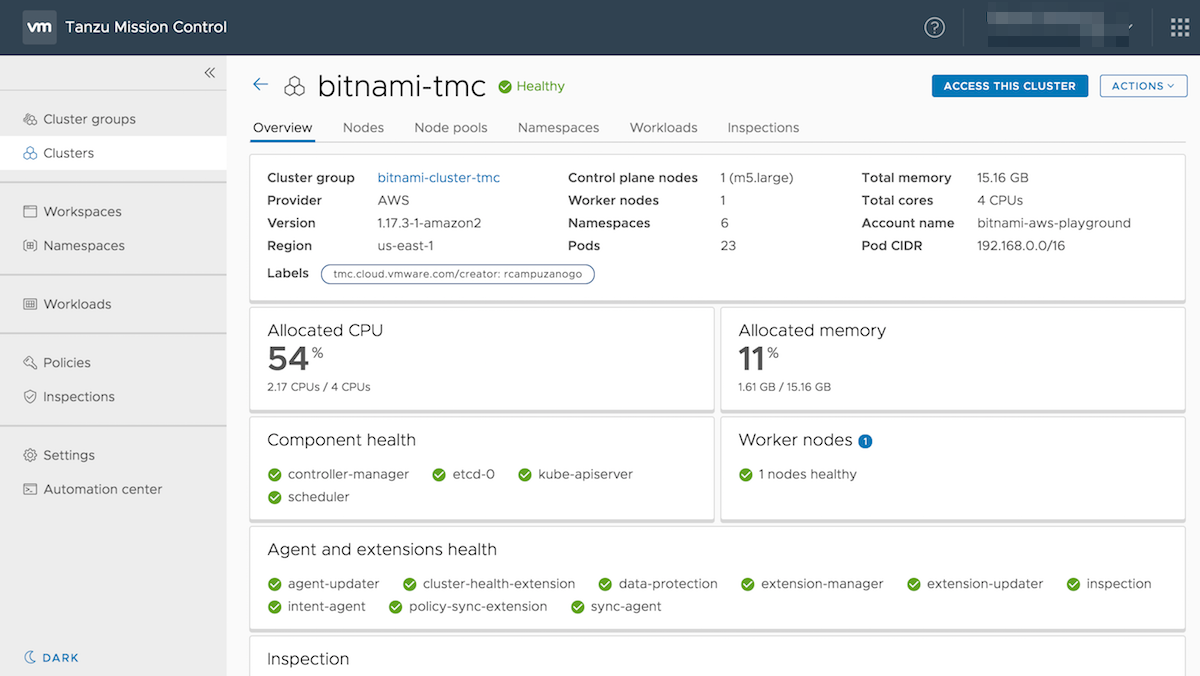
NOTE: Tanzu Mission Control bundles VMware Tanzu Kubernetes Grid to simplify the management of your cluster lifecycle. You can see all the in-cluster services that are automatically deployed when provisioning your cluster by checking the pods running in the cluster nodes. To keep your cluster always updated with the latest version of Tanzu Kubernetes Grid, check out Step 5 of this guide.
Check cluster components and resources
-
To check cluster components and resources, navigate through the different tabs available in the cluster overview screen. You can check in detail, for example, the status and health of the cluster nodes. To do so:
-
Click the “Nodes” tab and, from the list of cluster nodes, select a node to inspect.
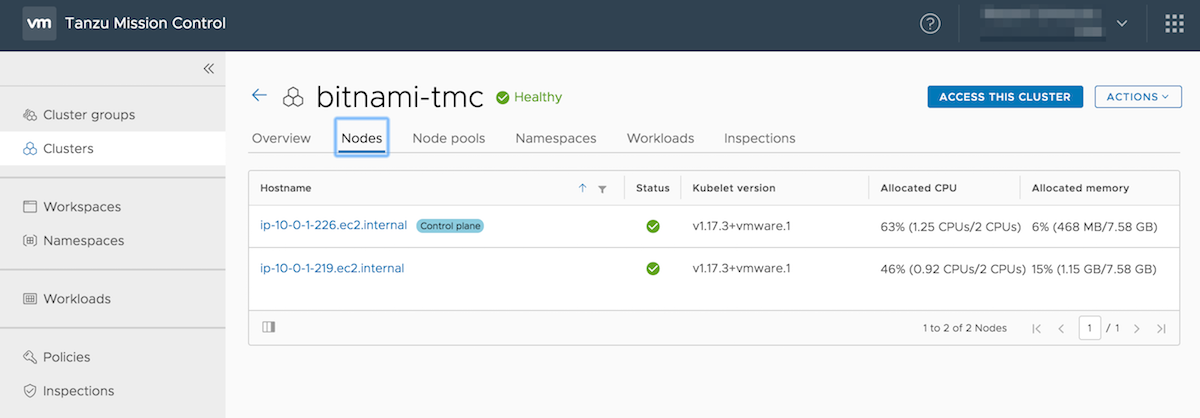
-
In the resulting screen, you will find general information related to the node such as the kernel version, container runtime, or the pod CIDR. You can also see important information about node status, CPU and memory usage. Scroll down to see a list of the pods deployed in that node:

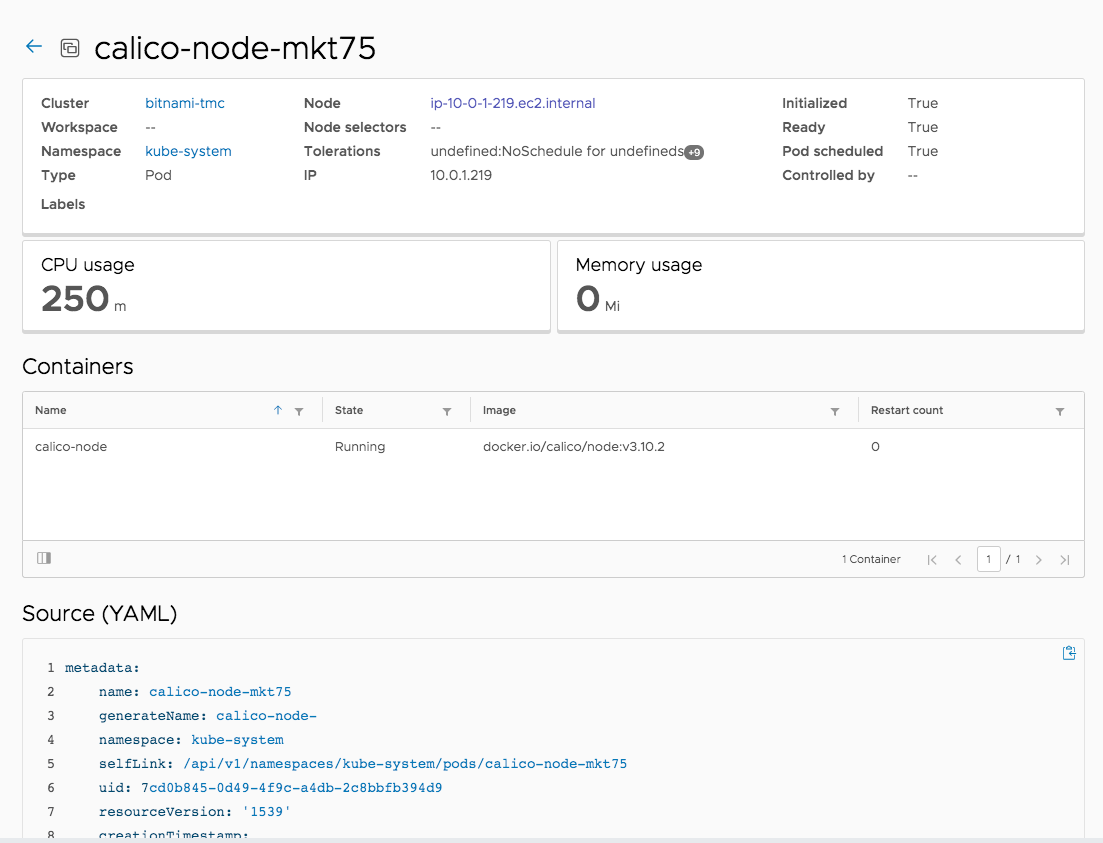
-
You can also inspect a specific pod by clicking on it. You will see information about the cluster, node, workspace and namespace to which that pod is associated. If you scroll down, you can find information about the container running in that pod and the yaml file that describes the containers and parameters of the running pod as shown below:
-
Step 3: Access the cluster
To deploy applications in the cluster, it is necessary to first connect to it. To do this, follow the steps below:
-
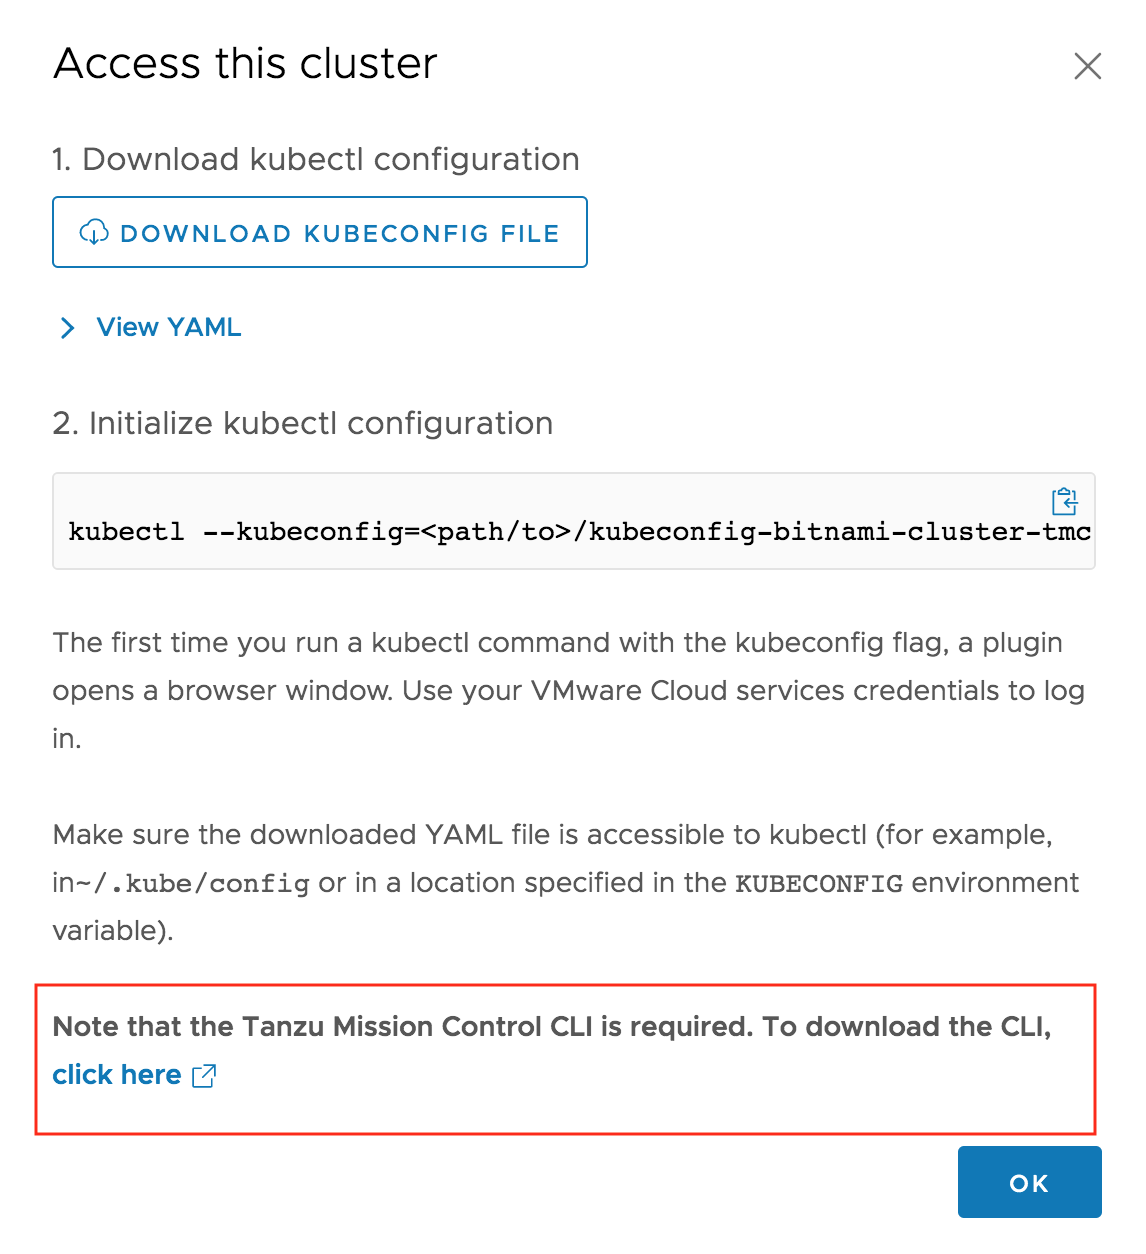
Click the “Access this cluster” button in the navigation panel.
-
Click the “click here” link. Following this link takes you to a page with instructions to download and install the Tanzu Mission Control Command-Line Interface (CLI) (tmc).
-
On the resulting page, click “Download CLI” and download the CLI for your platform.
-
Once the download is complete, move the downloaded binary to a directory in your execution path using the instructions shown for your platform.
-
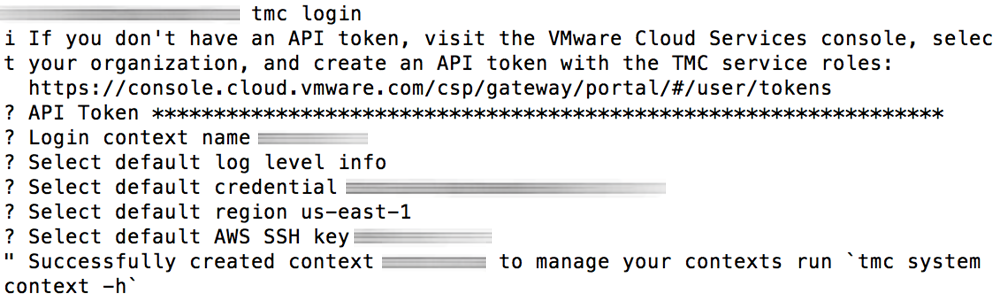
Execute the command below to start the Tanzu Mission Control CLI:
$ tmc loginYou will be prompted for an API token. If you have one, enter it at the prompt or, if not, create a new token as described below.
-
Navigate to the displayed URL, where you will be further prompted for various inputs to create an API token for Tanzu Mission Control.
- Enter a context name. This name must match your TMC organization domain.
- Select the default values unless you prefer different ones.
Your API token will be created and displayed. Copy the API token and enter it in the Tanzu Mission Control CLI to complete the CLI login process.
-
Navigate back to the cluster detail page in Tanzu Mission Control. From the “Access this cluster” dialog box, click “Download Kubeconfig file” and configure kubectl to connect to the cluster by executing the command below:
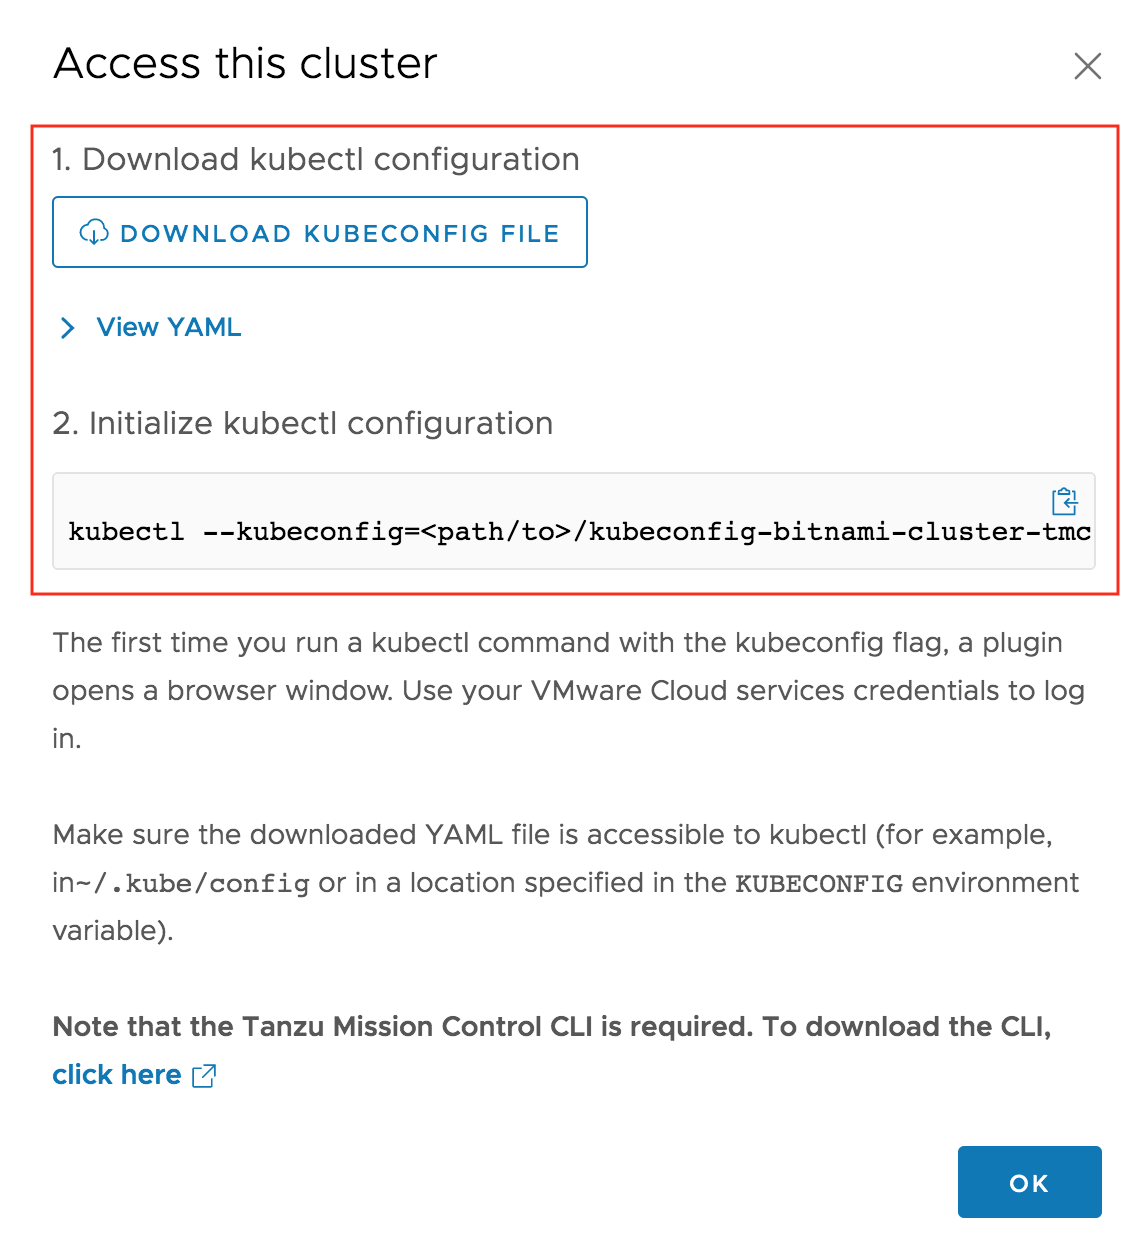
A new window will open in your browser to confirm that the TMC login flow is complete.
-
Confirm that you are able to successfully access the cluster by running the kubectl cluster-info command.
Congratulations! You are now authenticated in your cluster.
Step 4: Deploy the Bitnami MariaDB Helm chart
To deploy the Bitnami MariaDB Helm chart, follow the instructions below:
-
Deploy the Bitnami MariaDB Helm chart. Replace the PASSWORD placeholder with a password for the MariaDB administrator account.
$ helm install mariadb oci://registry-1.docker.io/bitnamicharts/mariadb --set rootUser.password=PASSWORD -
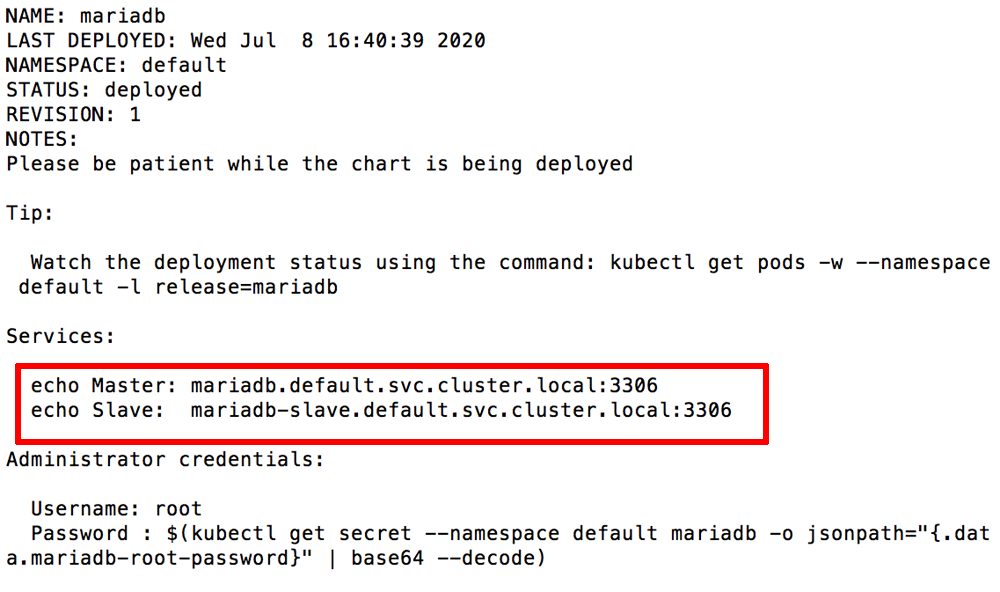
Once the deployment completes, refer to the output to obtain the MariaDB service URL:
-
Test the deployment by using the commands below to create a new MariaDB client pod. Replace the PASSWORD placeholder with the MariaDB administrator password.
$ kubectl run mariadb-client --rm --tty -i --restart='Never' --image docker.io/bitnami/mariadb:latest --namespace default --command -- bash $ mysql -h mariadb.default.svc.cluster.local -uroot -pPASSWORD -
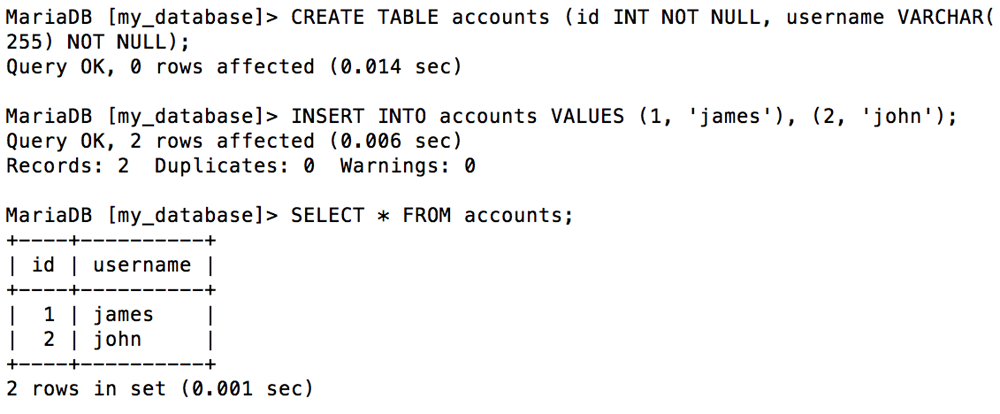
Execute some example SQL commands using the MariaDB CLI to confirm the operation of the MariaDB cluster:
  USE my_database;
  CREATE TABLE accounts (id INT NOT NULL, username VARCHAR(255) NOT NULL);
  INSERT INTO accounts VALUES (1, 'james'), (2, 'john');
  SELECT * FROM accounts;
  exit
The following image demonstrates the output you should see:
Step 5: Upgrade your cluster
IMPORTANT: This section only applies to those clusters that have been provisioned directly from Tanzu Mission Control.
You can easily keep the cluster up-to-date using Tanzu Mission Control. Check if there is a new version of the Tanzu Kubernetes Grid available for your cluster by following the steps below:
NOTE: It is highly recommended that you create a backup of the cluster before running the upgrade process. Check out this guide to learn how to backup and restore Bitnami Helm chart deployments using Velero.
-
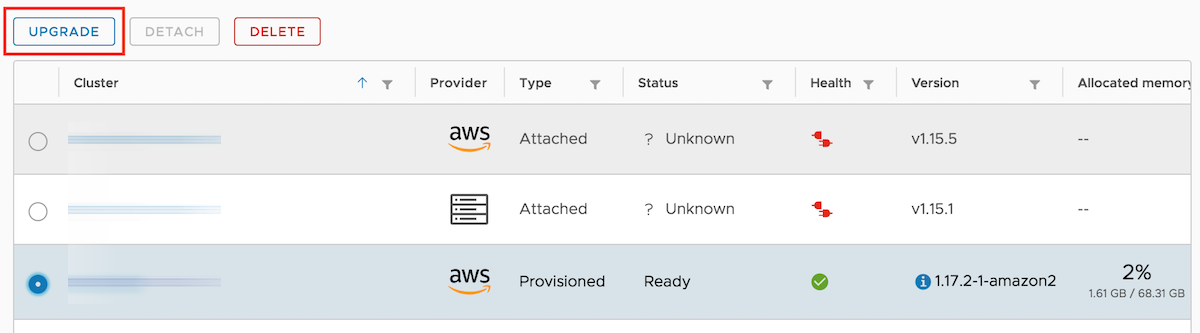
Select the cluster to upgrade. If a new version of the Tanzu Kubernetes Grid is available, the “Upgrade” button will be active. Click it to start the upgrade process.
-
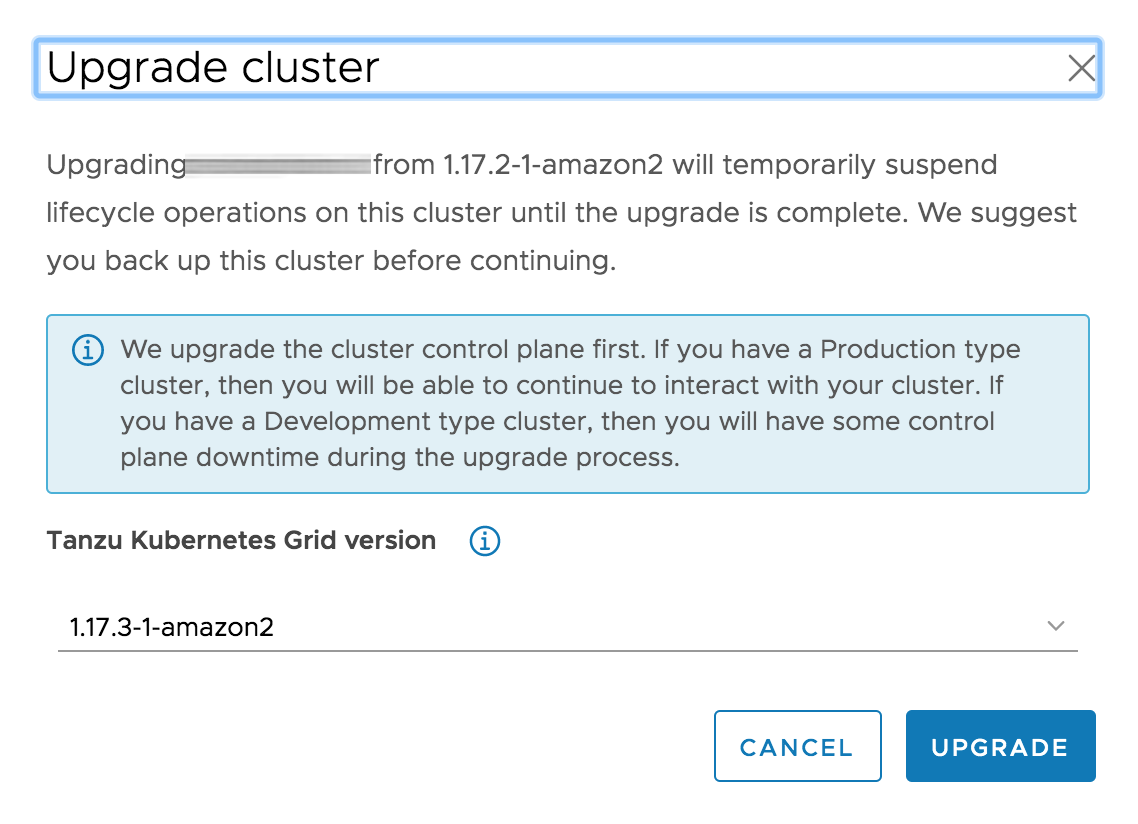
In the resulting window, you will see a warning message about the upgrade process and a list of the latest available version(s) of Tanzu Kubernetes Grid. Select the version you wish to upgrade to and click “Upgrade” to start the process.
-
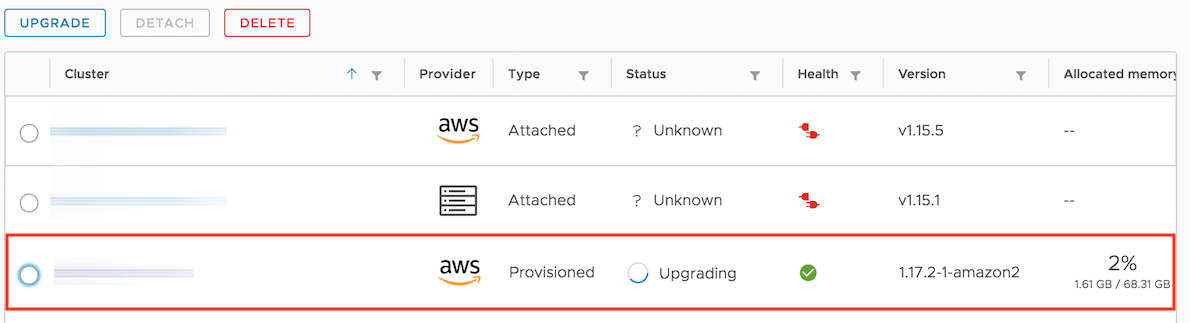
Track the progress of the upgrade in the “Clusters” section.
Once the upgrade is complete, the version number associated with your cluster will change to the latest one.
Appendix: Attach an existing cluster running on AKS
Tanzu Mission Control allows you to attach clusters that are running in other clouds. This provides a unified overview of your cluster infrastructure in a single interface allowing better visibility and control. This guide uses a cluster running on AKS, but the process to attach the cluster is similar for other Kubernetes cloud services (mainly differing in how the authentication process works).
NOTE: This section assumes that you have an account to create a new cluster or have an existing cluster already provisioned. This guide uses Azure Kubernetes Service (AKS) for the scenario of attaching an existing cluster.
To attach a cluster running on AKS to your TMC dashboard, follow these steps:
-
Navigate to the “Clusters” section and click the “Attach cluster” button.
-
Start the process by registering your cluster. Select a cluster group, enter a name for your cluster, and optionally, a description and labels. Click “Register” to continue.

-
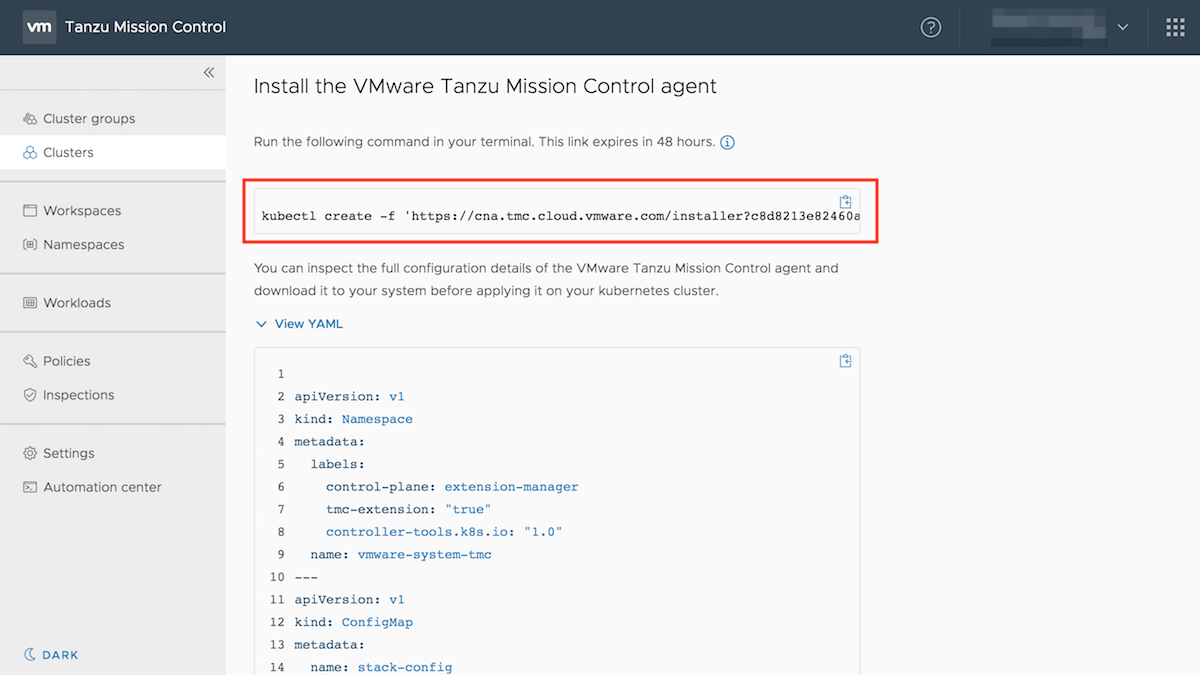
In the resulting screen, you will find a kubectl command for installing the VMware Tanzu Mission Control agent and a yaml file that contains the credentials that permit the cluster to attach to the cluster agent service. These credentials are valid for 48 hours.
-
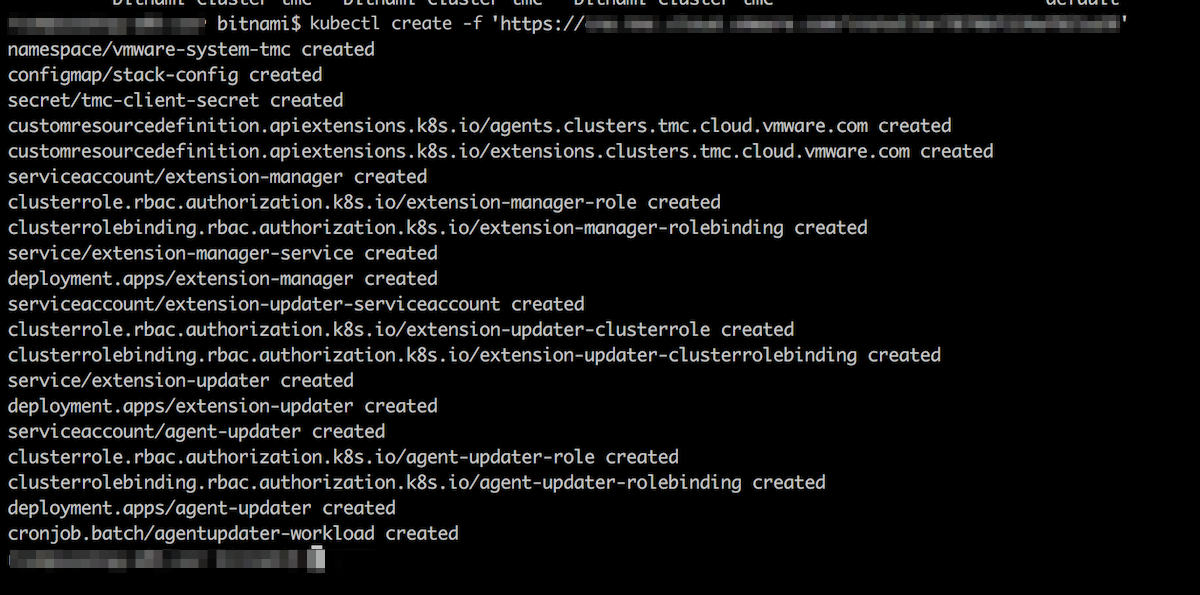
Copy the kubectl command and run it in the terminal to complete the process.
NOTE: Before installing the VMware Tanzu Mission Control agent, make sure that you are in the proper context by accessing your AKS cluster. Run the following command to configure kubectl to use the credentials for the AKS cluster:
$ az aks get-credentials --name aks-cluster --resource-group aks-resource-groupAfter accessing your cluster, run kubectl config get-contexts to make sure that you are authenticated in the right cluster.
You will see how the yaml manifest runs a small set of extensions in your cluster to connect it with the cluster agent service.
-
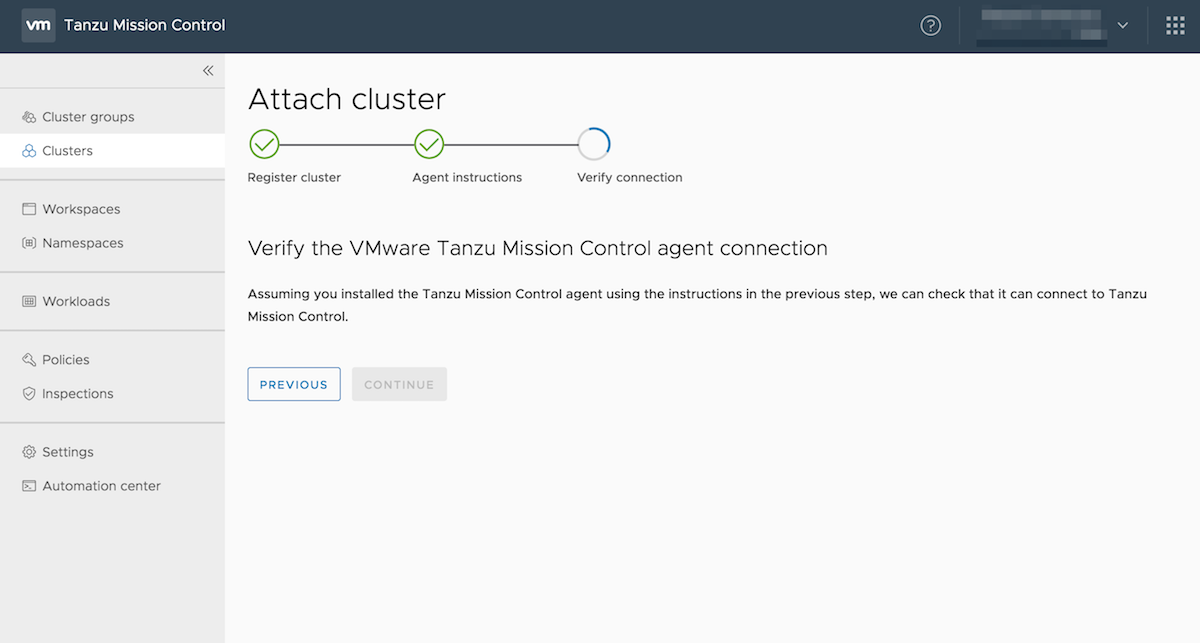
TMC will now verify your connection. Wait until this verification process completes and then click the “Continue” button to finish the process.
-
Congratulations, your cluster is attached to TMC and visible from the list of clusters that belong to the selected cluster group.

Now you can monitor your cluster from the TMC dashboard and check its nodes, namespaces, workloads, policies, or run an inspection.

Useful links
- Bitnami Helm charts
- Bitnami MariaDB Helm chart
- Get Started with Bitnami and Kubernetes
- VMware Tanzu Mission Control
- VMware Tanzu Mission Control Request Access
- VMware Tanzu Mission Control Documentation
- VMware Tanzu Mission Control Release Notes
- VMware Tanzu Mission Control Hands-On Lab
- VMware Tanzu Kubernetes Grid
- VMware Tanzu Kubernetes Grid Documentation