Connect Instances in Different Private Networks using Network Peering
Introduction
The Google Cloud Platform makes it possible to connect instances hosted in separate Virtual Private Clouds (VPCs), even if those instances belong to different projects or are hosted in different regions. This feature, known as VPC Network Peering, can result in better security (as services do not need to be exposed on public IP addresses) and performance (due to use of private, rather than public, networks and IP addresses).
This guide walks you through the process of internally connecting two deployments in separate private networks using VPC Network Peering, such that the deployments are able to communicate with each other internally using private IP addresses. For illustrative purposes, this guide will assume that you are trying to connect a Bitnami WordPress deployment with a Bitnami MySQL or Bitnami MySQL with Replication deployment.
Assumptions and prerequisites
This guide makes the following assumptions:
-
You have a Google Account and access to the Google Cloud Console.
-
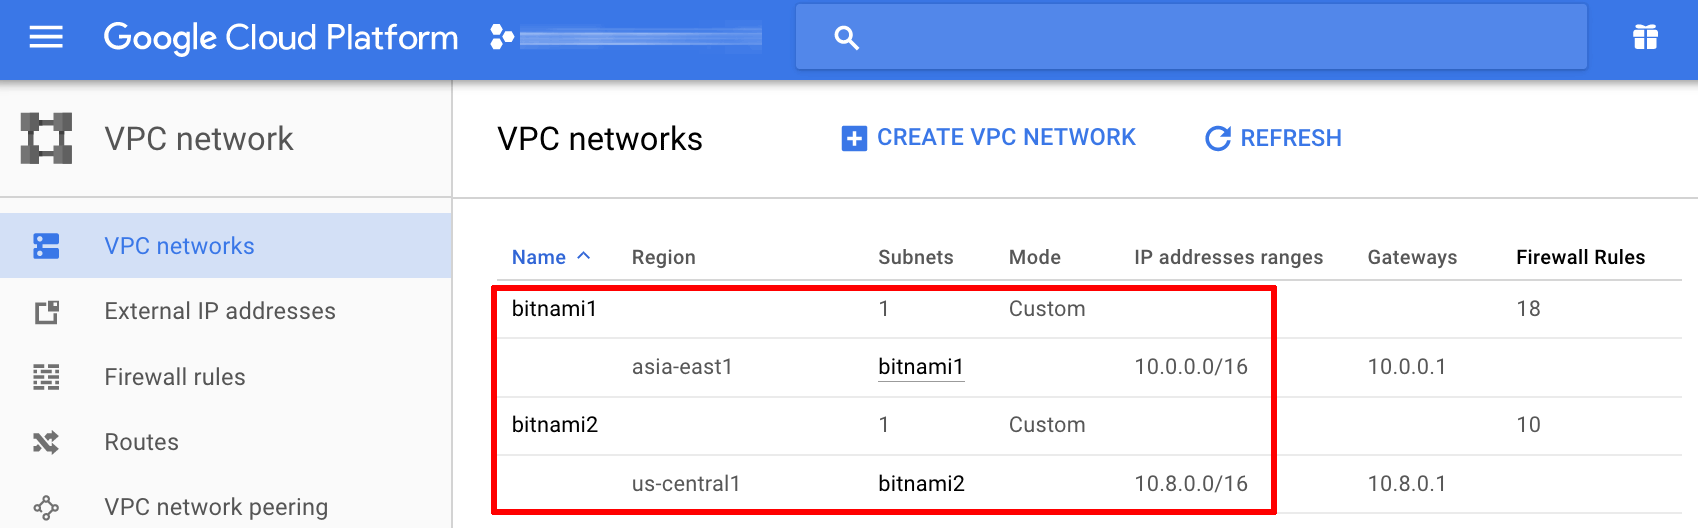
You have two separate VPC networks without overlapping subnet IP address ranges, as shown below:
-
Your Bitnami WordPress and Bitnami MySQL deployments have been launched through the GCP Marketplace, each in a different VPC network and each with one or more private IP addresses.
Step 1: Connect the VPC networks
To establish a peering connection between the two VPC networks, follow the steps below:
-
Log in to the Google Cloud Console.
-
From the left navigation menu, select the “Networking -> VPC network -> VPC network peering” menu item.
-
Click the “Create connection” button.
-
Read the warning message and click the “Continue” button.
-
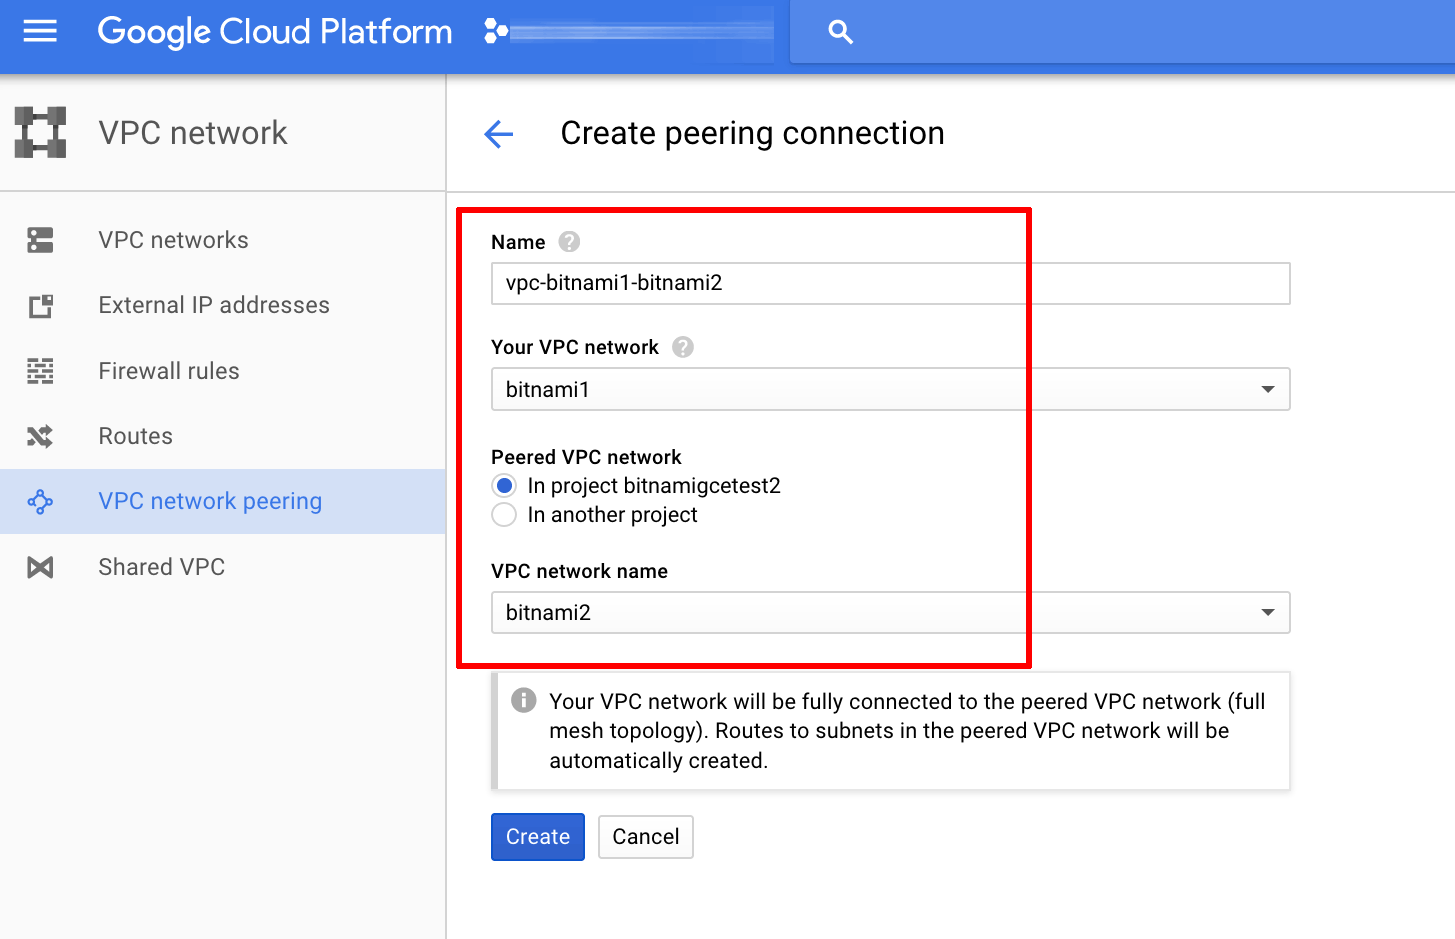
Enter a name for the peering connection and select the source and destination networks.
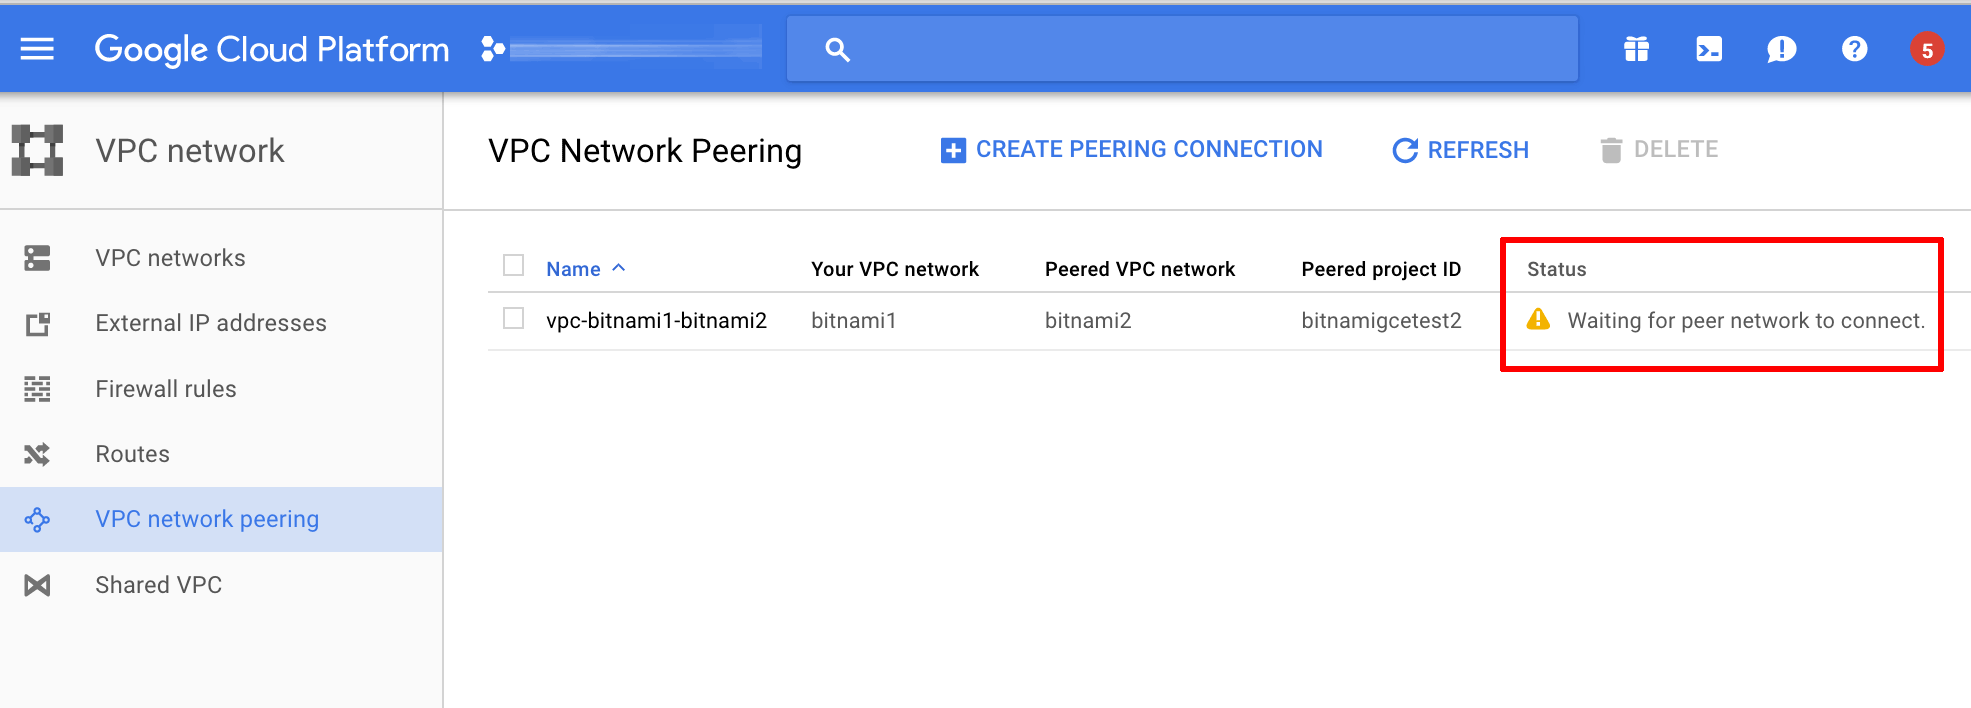
The peering connection will be created and should display the status “Waiting for peer network to connect”, as shown below:
Repeat the above process and create a second peering connection, this time reversing the source and destination networks, as shown below:
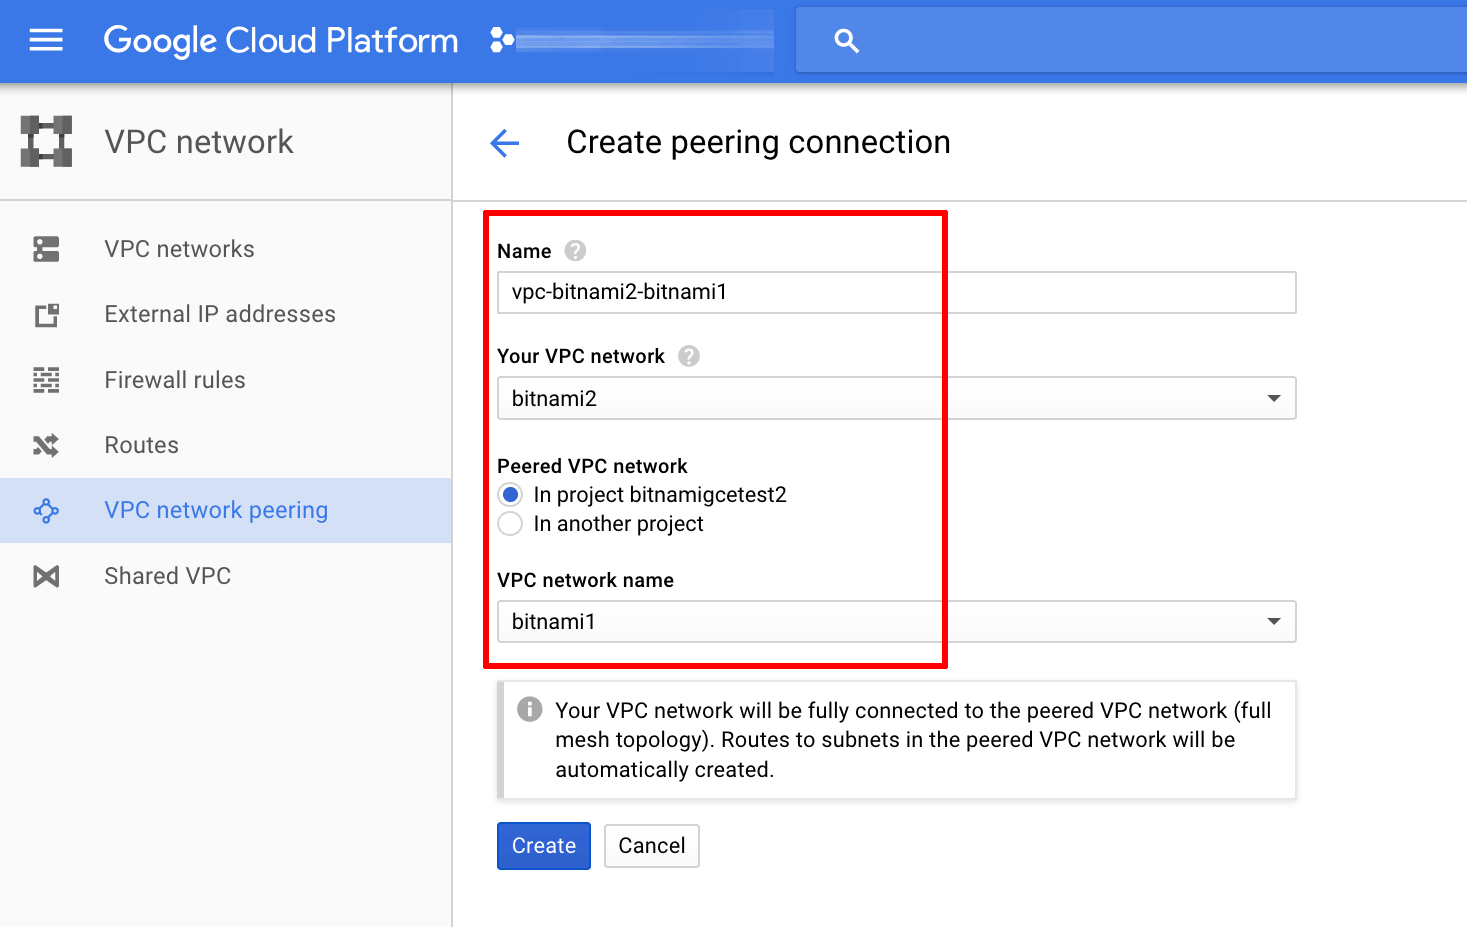
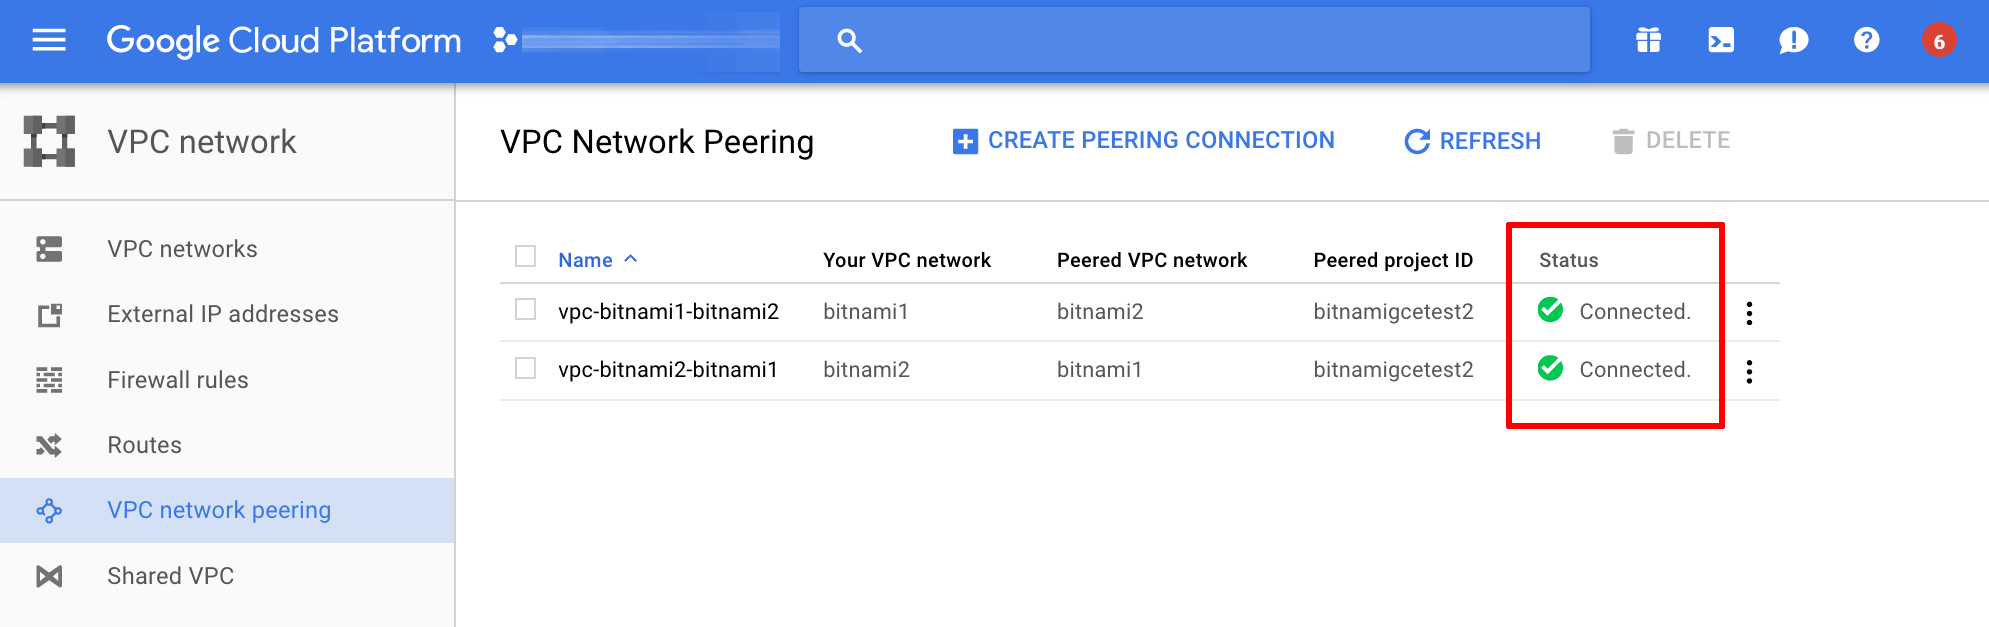
The second peering connection will now be created. Once created, the two networks will automatically connect to each other. The resulting status screen is shown below:
Step 2: Configure firewall rules
Once the networks are connected, the next step is to configure the firewall to enable traffic between them. For security reasons, you should only allow access to specific ports and from trusted source IP addresses.
In this example, the firewall should be configured to allow access from the Bitnami WordPress deployment (source) to the MySQL port on the node(s) of the Bitnami MySQL deployment (destination). The steps below should be adjusted depending on the requirements of your application and deployment.
To enable the firewall rule for this example, follow the steps below:
-
From the left navigation menu of the Google Cloud Console, select the “Networking -> VPC network -> Firewall rules” menu item.
-
Click the “Create firewall rule” button.
-
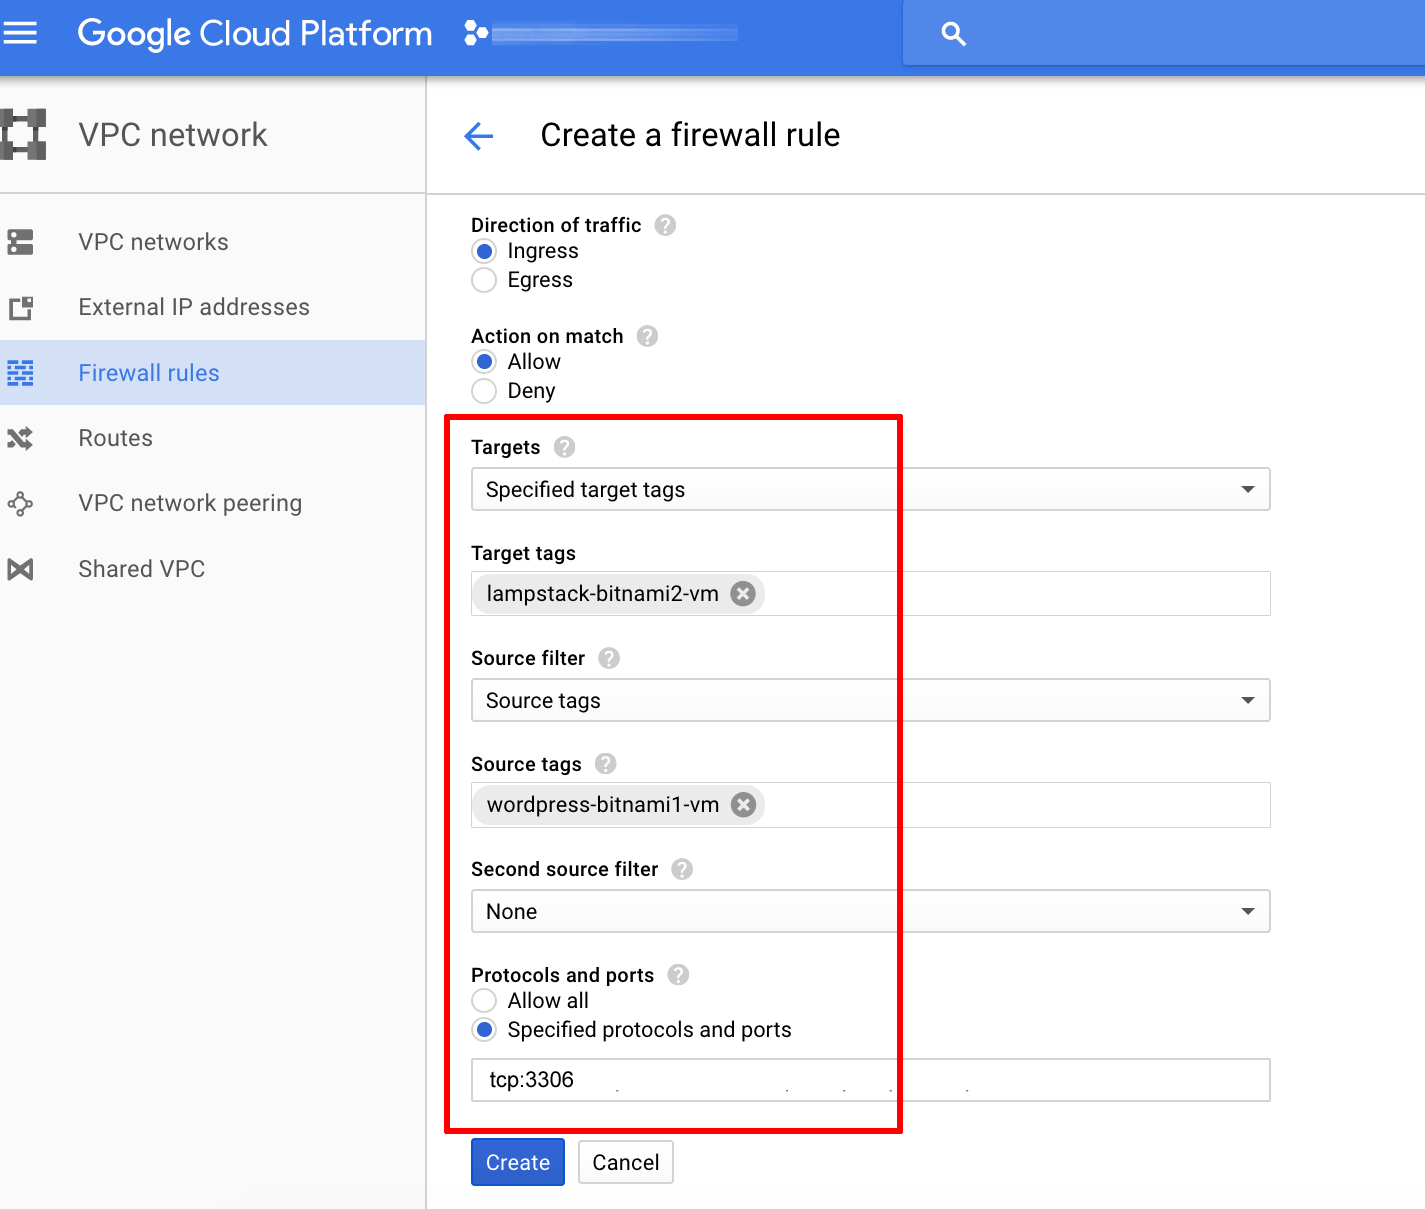
Enter a name for the firewall rule and the following details to configure it:
- Network: Select the network hosting the Bitnami MySQL deployment.
- Direction of traffic: Specify “Ingress”.
- Action on match: Specify “Allow”.
- Targets: Select “Specified target tags” or “All instances in the network”.
- Target tags: If restricting access based on tags, enter the tag for the Bitnami MySQL deployment. If the Bitnami MySQL deployment consists of multiple nodes, enter a tag for each, separated by commas.
- Source filter: Select “Source tags” or “IP ranges”.
- Source tags: If restricting access based on tags, enter the tag for the Bitnami WordPress deployment. To allow access from specific IP ranges, enter the private IP address range for the network hosting the Bitnami WordPress deployment.
- Protocols and ports: Enter “tcp:3306” for the MySQL port.
Here is an example of what the final firewall rule should look like:
-
Click “Create” to create and activate the new firewall rule.
NOTE: If necessary, follow the steps above to create additional firewall rules for SSH access or access on other ports.
Step 3: Test connectivity between the deployments
The next step is to ensure that the deployments in separate VPC networks are able to communicate with each other. In this example, the easiest way is to attempt to connect to the Bitnami MySQL deployment in one VPC network using the MySQL command-line client from the Bitnami WordPress deployment in the other VPC network.
Follow these steps:
-
Using the Google Cloud Console, note the private IP address(es) of the node(s) in the Bitnami MySQL deployment and obtain the MySQL access credentials. Learn how to obtain application credentials from the Google Cloud Console.
-
Connect to the Bitnami WordPress deployment using SSH. Learn how to connect to the server with an SSH client.
-
From the console, use the MySQL command-line client to connect to the Bitnami MySQL deployment using the command below. Replace IP-ADDRESS with the private IP address of the node you are attempting to connect to.
$ mysql -u root -h IP-ADDRESS -pYou will be prompted to enter the root user password.
-
Once connected, run the command below to view all available databases and confirm that the connection is successful:
mysql> SHOW DATABASES;
If you are unable to connect, refer to the documentation for the target deployment for troubleshooting steps or additional remote connection considerations.
Step 4: Connect the deployments
Once connectivity between the two deployments has been verified, the final step is to configure them to use private IP addresses instead of public IP addresses. The steps to do this will vary depending on the applications in use. In this example, the following steps should be performed:
- Migrate the database contents of the existing Bitnami WordPress deployment to the Bitnami MySQL deployment. Learn how to migrate the bitnami_wordpress database to the new remote database by creating and restoring a database backup
- Update the Bitnami WordPress configuration in the /opt/bitnami/wordpress/wp-config.php file to reflect the private IP address and credentials for the Bitnami MySQL deployment.
Useful links
To learn more about the topics discussed in this guide, see the links below: