Install the Amazon Polly plugin
NOTE: The Amazon Polly WordPress plugin requires an Amazon Web Services (AWS) account. If you don’t have an AWS account, you can register for one on the AWS website.
Amazon Polly is a text-to-speech service from Amazon Web Services. It supports multiple languages and voices, and its audio stream can be played back directly in an application or stored in a standard file format.
Amazon Polly can be used in WordPress via the included Amazon Polly plugin, which is installed but disabled by default. To configure and use it, follow these steps:
-
Log in to the AWS Console.
-
In the AWS services menu, scroll down until you see the “Security, Identity & Compliance” section. Select the IAM service.
-
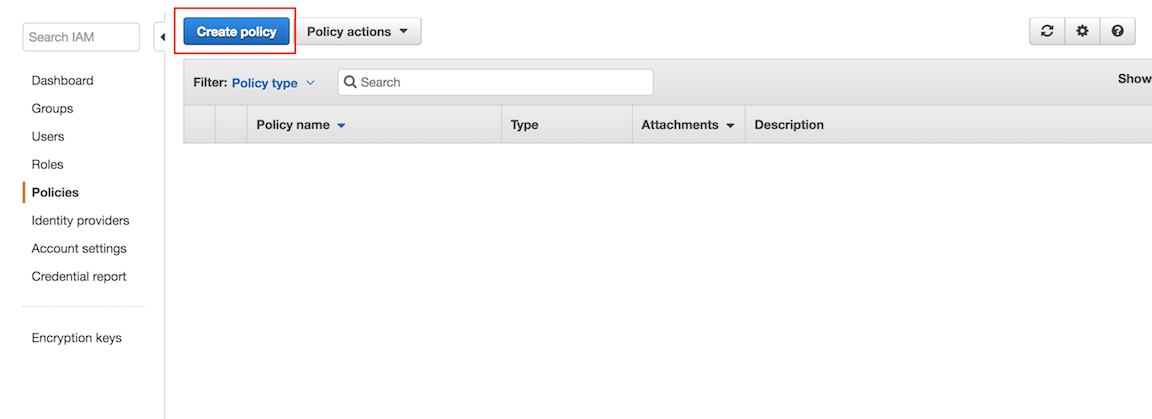
Select the “Policies” menu item and click the “Create Policy” button.
-
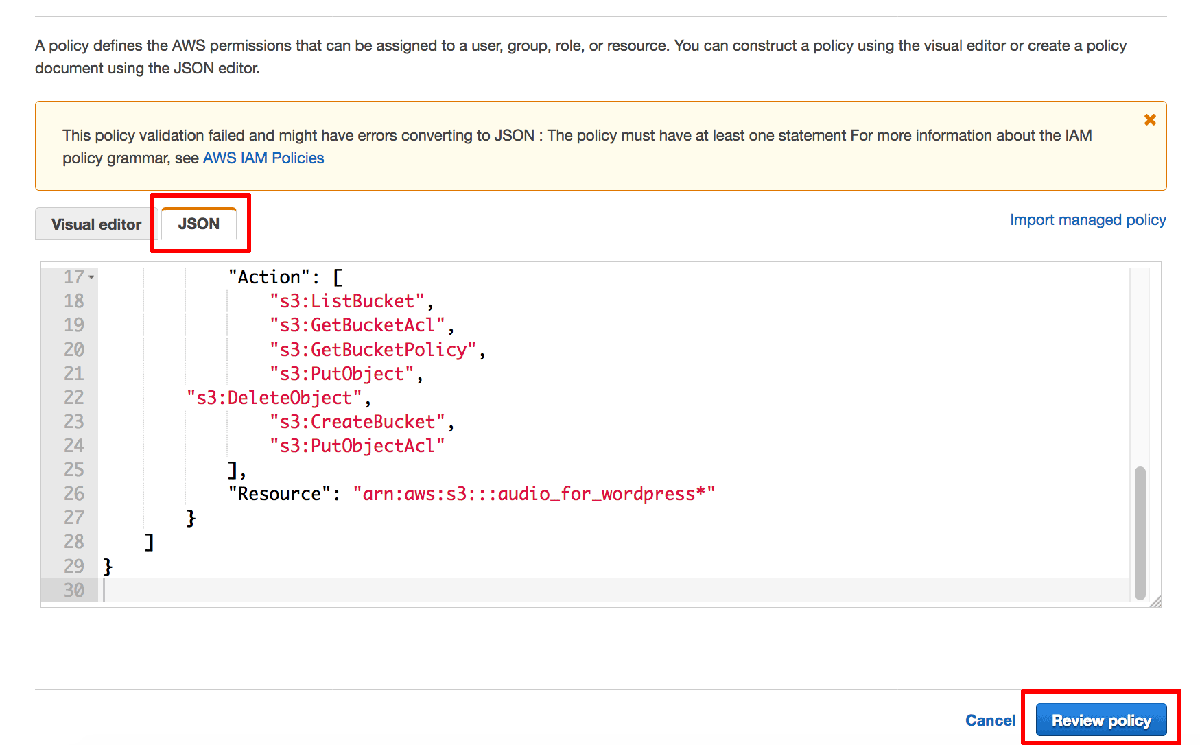
On the next page, select the JSON tab and enter the following content:
  {
      "Version": "2012-10-17",
      "Statement": [
          {
              "Sid": "Permissions1",
              "Effect": "Allow",
              "Action": [
                  "polly:SynthesizeSpeech",
                  "s3:HeadBucket",
                  "polly:DescribeVoices"
              ],
              "Resource": "*"
          },
          {
              "Sid": "Permissions2",
              "Effect": "Allow",
              "Action": [
                  "s3:ListBucket",
                  "s3:GetBucketAcl",
                  "s3:GetBucketPolicy",
                  "s3:PutObject",
      "s3:DeleteObject",
                  "s3:CreateBucket",
                  "s3:PutObjectAcl"
              ],
              "Resource": "arn:aws:s3:::audio_for_wordpress*"
          }
      ]
  }
Click “Review Policy” to proceed.
-
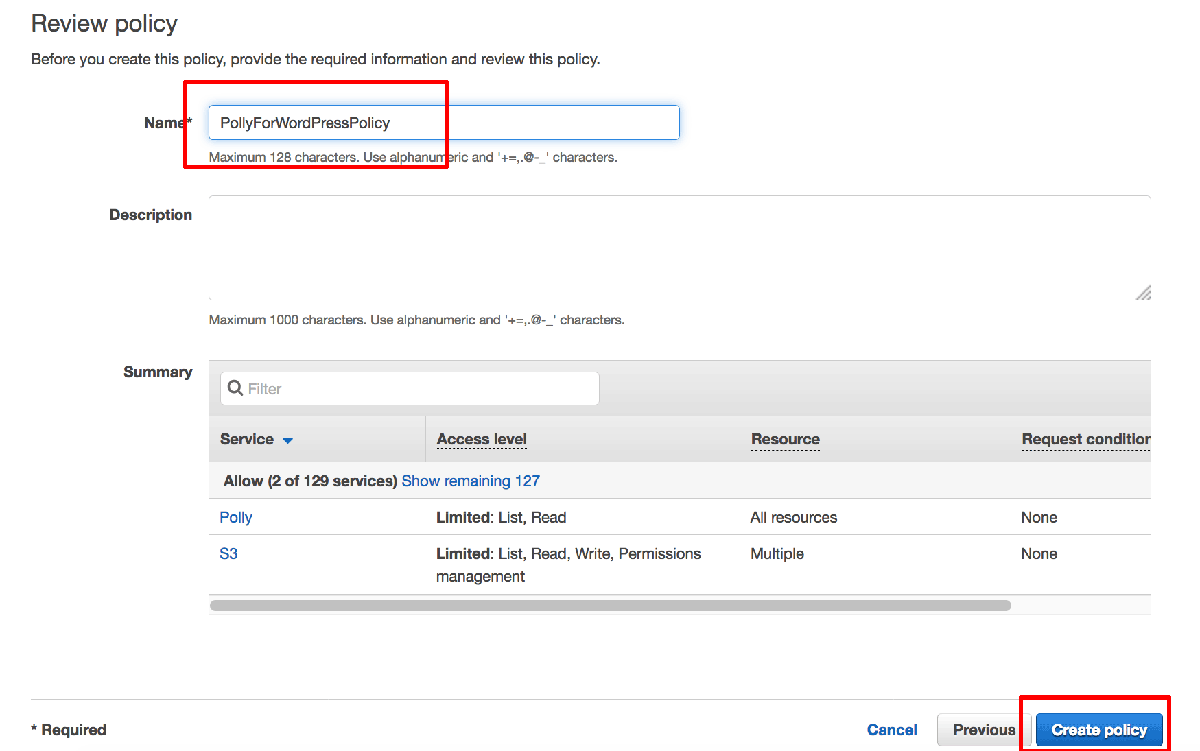
Set the policy name to “PollyForWordPressPolicy” and click “Create Policy” to save the new policy.
-
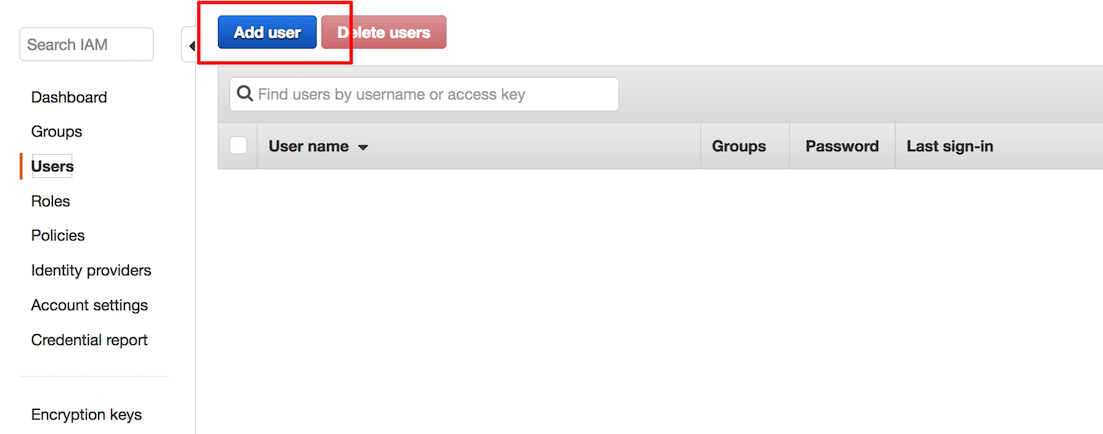
Select the “Users” section in the left navigation bar and click the “Add user” button.
-
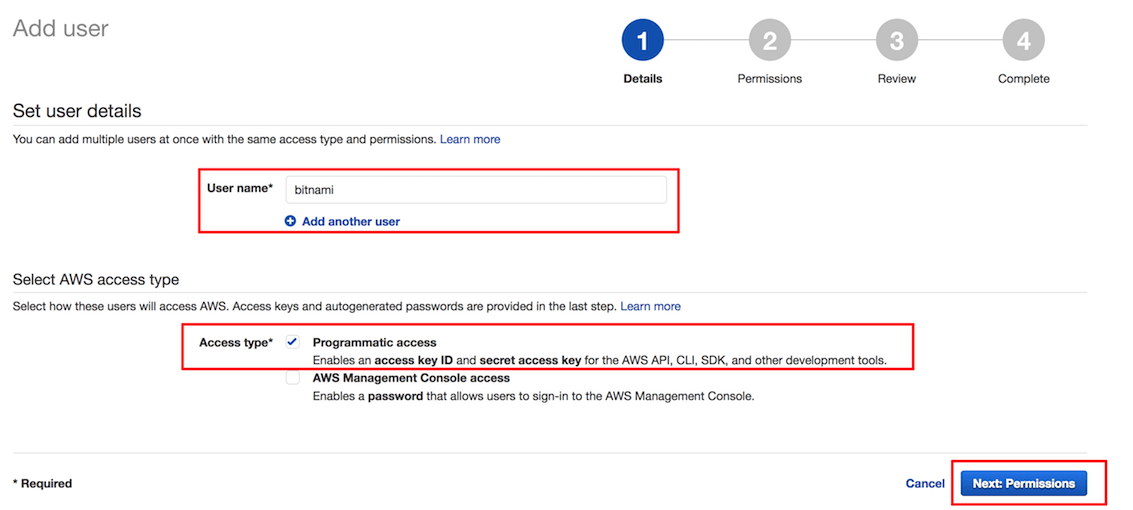
On the “Details” page, enter a user name for use with the plugin. Ensure that the “Programmatic access” checkbox in the “Select AWS access type” section is selected. Click the “Next: Permissions” button to proceed.
-
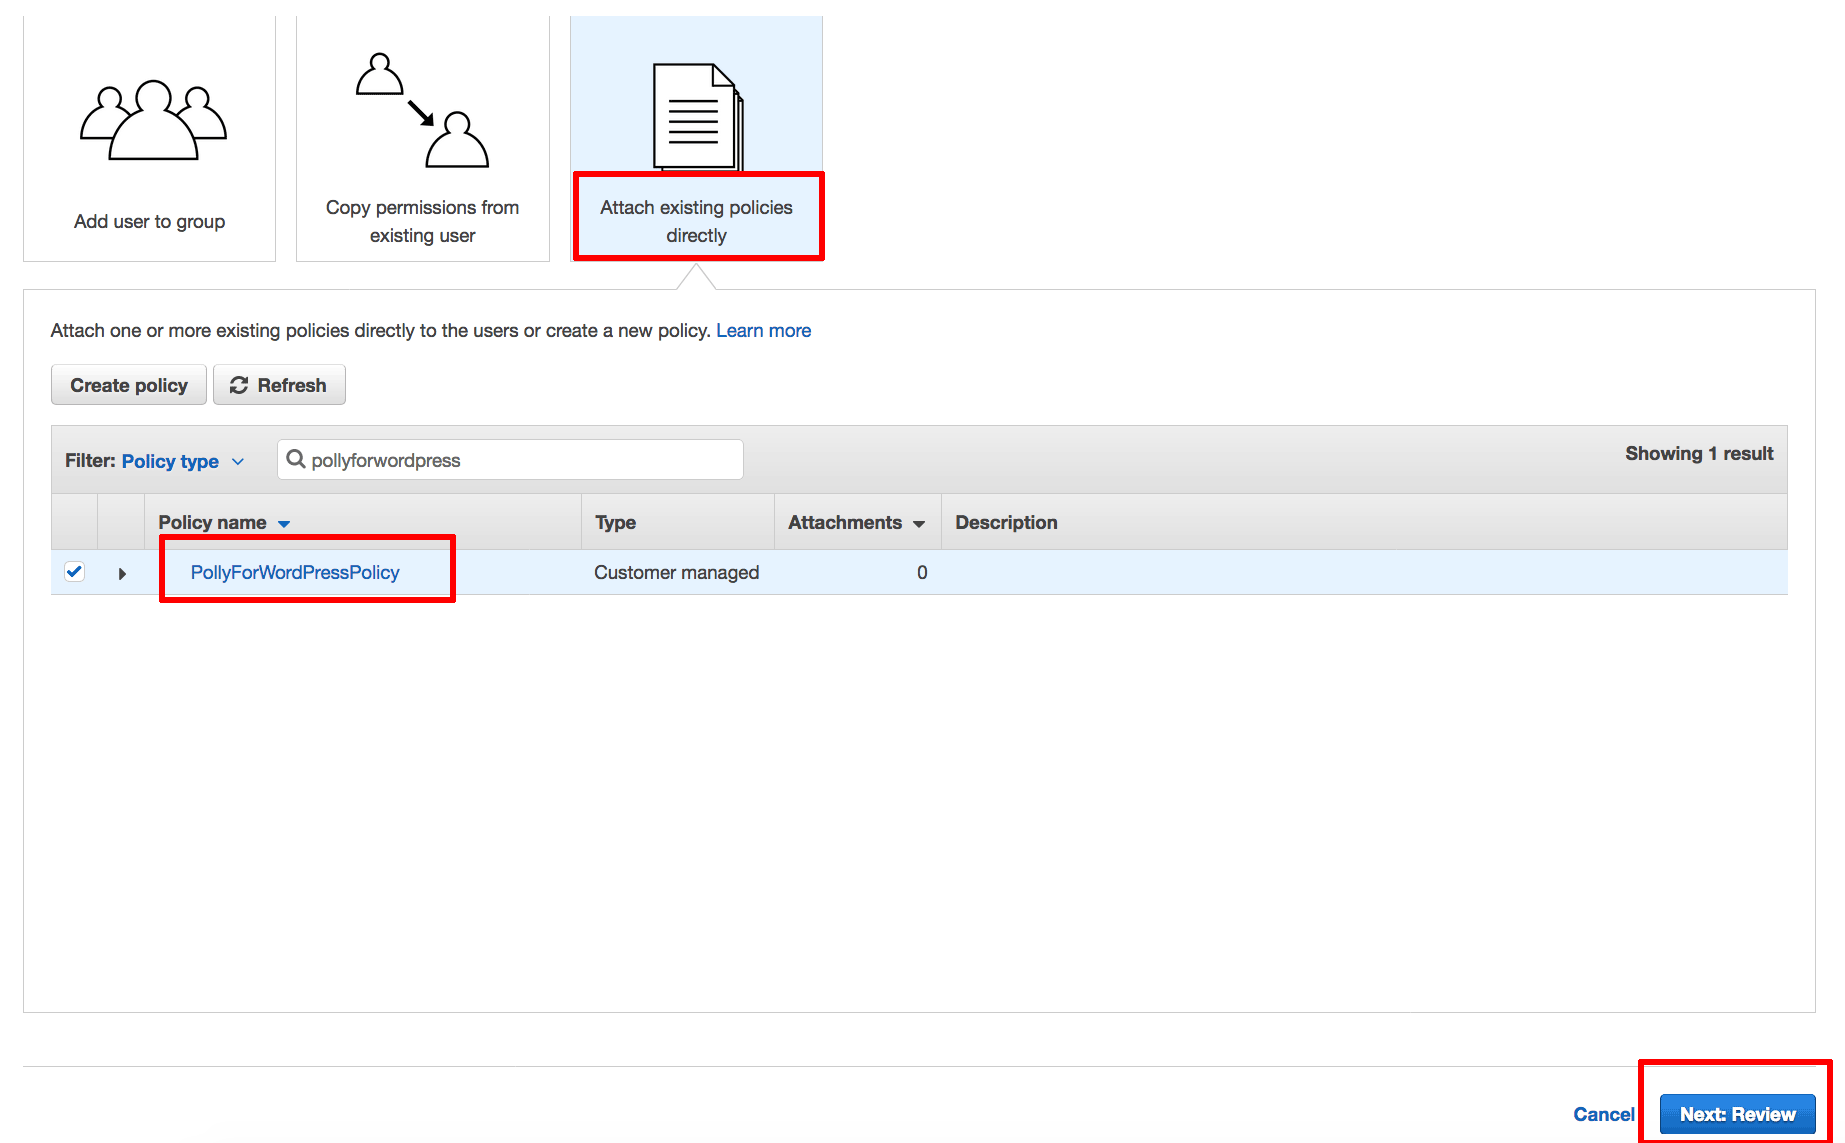
On the “Permissions” page, select the option to “Attach existing policies directly”. From the list of policies, find the new “PollyForWordPressPolicy” policy. Select it and click the “Next: Review” button.
-
On the “Review” page, review the selected options and click the “Create user” button.
-
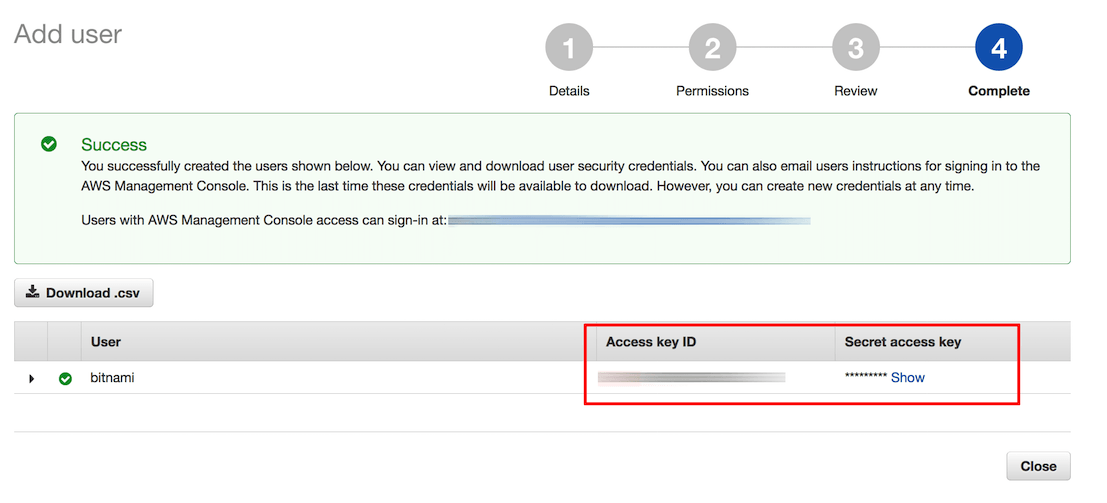
A new user and corresponding key pair, consisting of an “Access Key ID” and “Secret Access Key”, will be generated and displayed. The “Secret Access Key” value will not be displayed again, so it is important to accurately note down the “Access Key ID” and “Secret Access Key” values displayed on the screen at this point.
-
Log out of the AWS Console.
-
Log in to your WordPress dashboard.
-
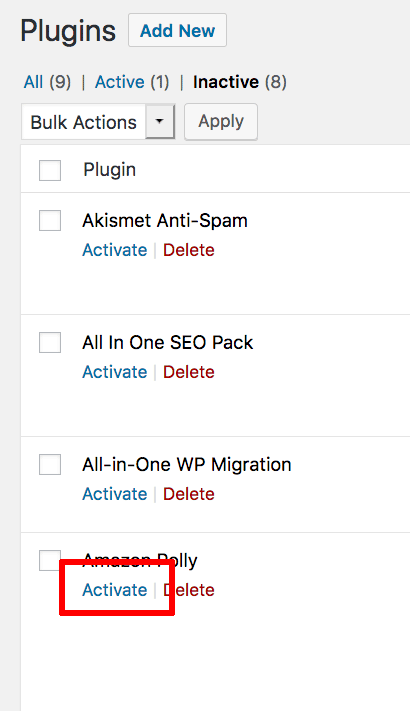
Select the “Plugins -> Installed Plugins” menu item.
-
Find the “Amazon Polly” plugin and click the “Activate” link to activate it.
-
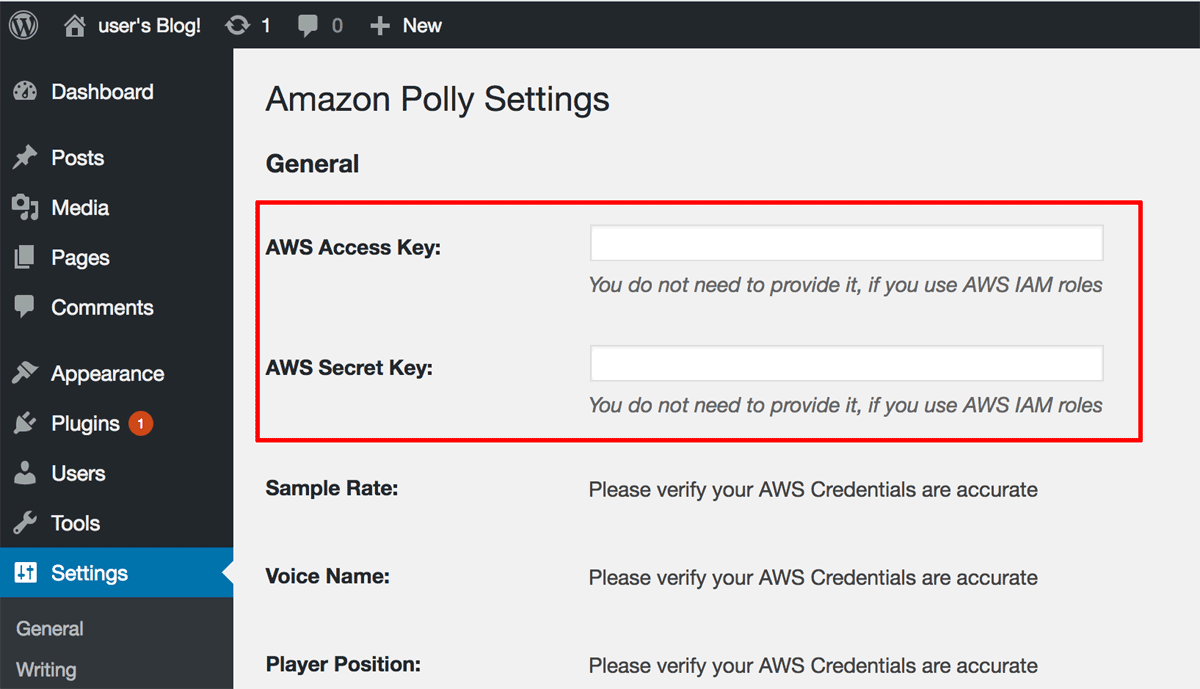
Select the “Settings -> Amazon Polly” menu item.
-
Enter the AWS Access Key and Secret Key obtained earlier and click “Save Changes”.
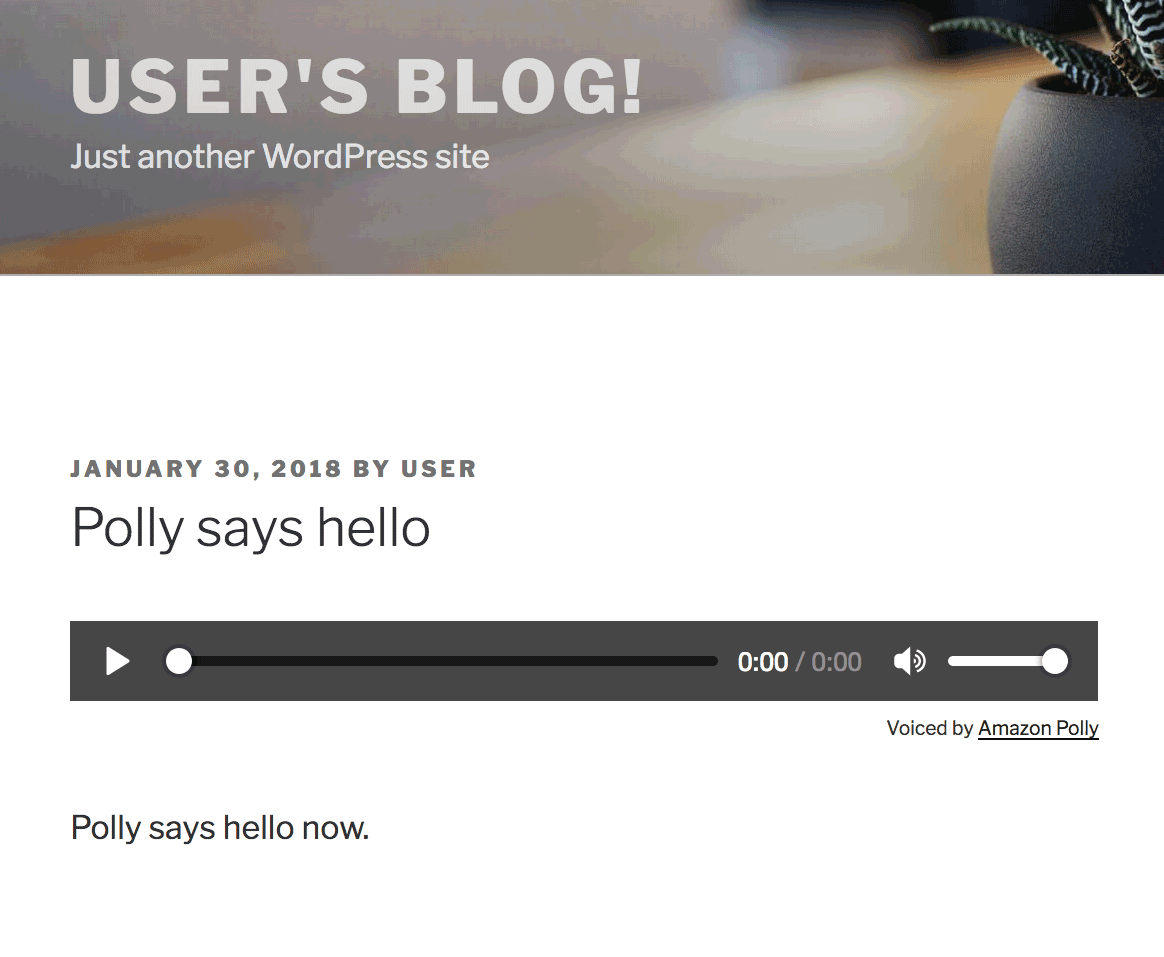
You can verify that the plugin is working by creating and publishing a new post. The published version of the post should automatically display an Amazon Polly audio bar with playback controls. Clicking the “Play” button should result in Amazon Polly reading out the content of the post.