Get Started with Bitnami Applications using VMware vCloud Director
Introduction
VMware vCloud Director is a powerful tool for quick and efficient delivery of cloud resources to organizations and end-users. With vCloud Director, organizations can create virtual datacenters (VDCs) across regions, monitor and manage resources in both private and multi-tenant clouds, and flexibly manage virtual machine resources and operations.
Bitnami provides pre-packaged templates for common applications, such as WordPress, Redmine, GitLab, MariaDB and many others. These templates can be directly used from within vCloud Director to quickly deploy and launch new applications in vCloud Director-managed datacenters. An added benefit is that Bitnami-packaged applications are always secure, up-to-date and packages according to industry best practices.
With this combination, organizations and end-users have a simple and secure way to deploy new applications in the cloud whilst continuing to benefit from the existing provisioning, automation and operations management tools in vCloud Director.
In this tutorial, I’ll walk you, step by step, through the process of deploying Bitnami WordPress as a vApp using vCloud Director.
Overview
If you’re interested in creating a personal or small business blog, chances are that you’re going to use WordPress. WordPress is one of the most popular blogging platforms in the world, used on over 60 million websites (according to Wikipedia). And it is not hard to see why: WordPress is very easy to use, comes with thousands of extensions and themes, is completely free, and is open source.
In this tutorial, I’ll deploy a vApp with the Bitnami WordPress template, which gives you a pre-configured WordPress blog that you can start using right away. But WordPress is just an example: there are many other Bitnami applications to choose from, and they’re all equally easy to deploy.
Here are the steps you’ll follow in this tutorial:
- Subscribe to the Bitnami WordPress application
- Deploy Bitnami WordPress as a vApp
- Obtain WordPress credentials
- Log in and start using WordPress
The next sections will walk you through these steps in detail.
Assumptions and prerequisites
This tutorial assumes that:
- A system administrator has created a virtual datacenter (VDC) for your organization in vCloud Director. Learn more about virtual data centers.
- You have an account in your vCloud Director organization. If not, you must request your system administrator for one. Learn more about user management in VMware vCloud Director.
- You have an account in the VMware Marketplace.
NOTE: Bitnami applications typically require a network IPv4 address to be configured for their server(s). By default, the OVAs are configured to use DHCP to obtain an IP address. If an IPv4 address is not defined statically or can not be retrieved via DHCP, the initialization of the server will take more time than expected and the application might not be properly configured.
Step 1: Subscribe to the Bitnami WordPress application
At the end of this step, you will have added a Bitnami WordPress subscription to your vCloud Director organization.
To begin, you must log in to the VMware Marketplace and subscribe to the Bitnami application you wish to deploy. Follow these steps:
-
Log in to the VMware Marketplace.
-
From the “Catalog” page, find the Bitnami application you wish to deploy (here, Bitnami WordPress) and select it to subscribe.
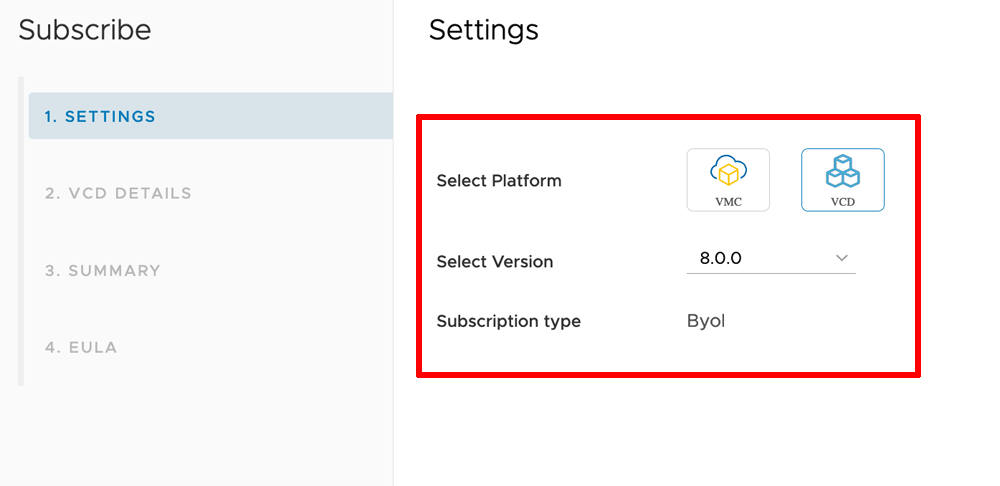
-
On the “Settings” page, choose “VCD” as the platform and select the correct version of vCloud Director in use. Set the subscription type to “BYOL”. Click “Next” to proceed.
-
On the “VCD Details” page, enter the URL to vCloud Director together with your access credentials, your unique vCloud Director organization identifier and the corresponding organization name. Click “Next” to proceed.

-
On the “Summary” page, review the details entered and click “Next” to proceed if they are correct.
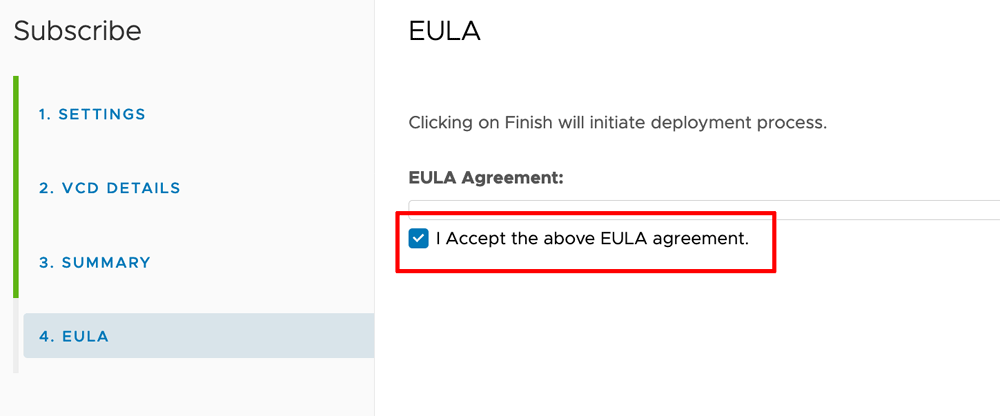
-
On the “EULA” page, read and accept the licence terms and click “Finish” to complete the process.
The subscription will now be added to your vCloud Director organization. To confirm this, follow the steps below:
-
Log in to vCloud Director.
-
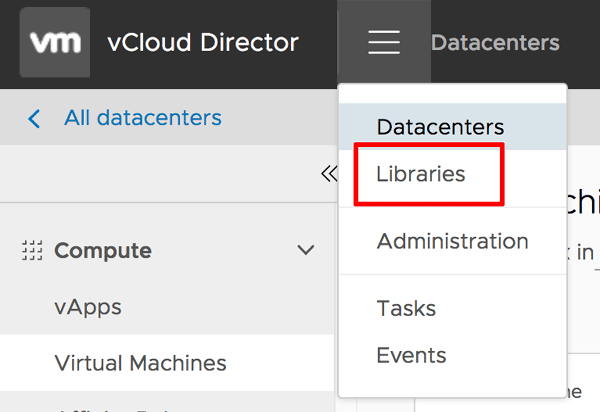
Click the menu icon in the top navigation bar and select the “Libraries” menu item.
-
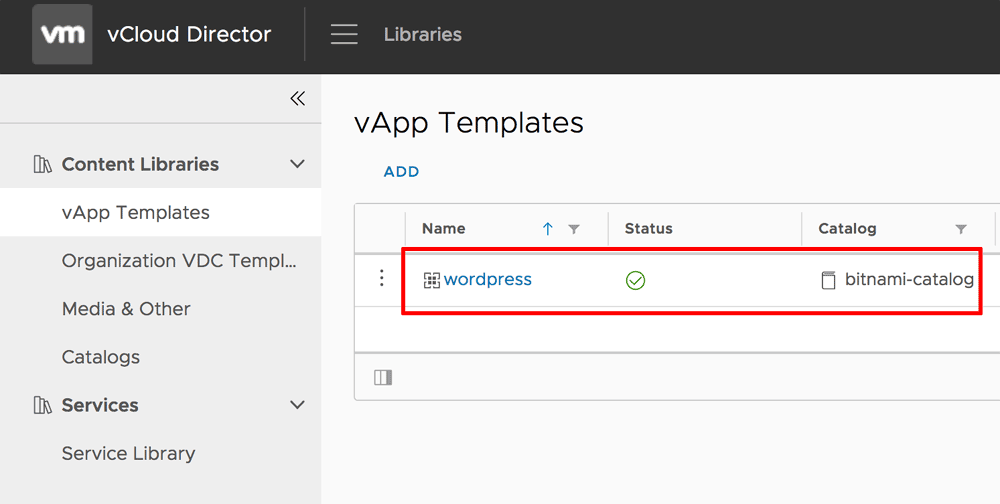
Navigate to the “Content Libraries -> vApp Templates” page.
-
Confirm that you see the Bitnami WordPress application template in the list of templates, as below:
Step 2: Deploy Bitnami WordPress as a vApp
At the end of this step, you will have deployed a Bitnami WordPress vApp through vCloud Director.
The next step is to deploy the Bitnami WordPress template. Follow the steps below:
-
Log in to vCloud Director (if you are not already logged in).
-
Click the menu icon in the top navigation bar and select the “Libraries” menu item.
-
Navigate to the “Content Libraries -> vApp Templates” page.
-
Find the WordPress template and click the corresponding menu button to display a list of available actions. Select the “Create vApp” action.
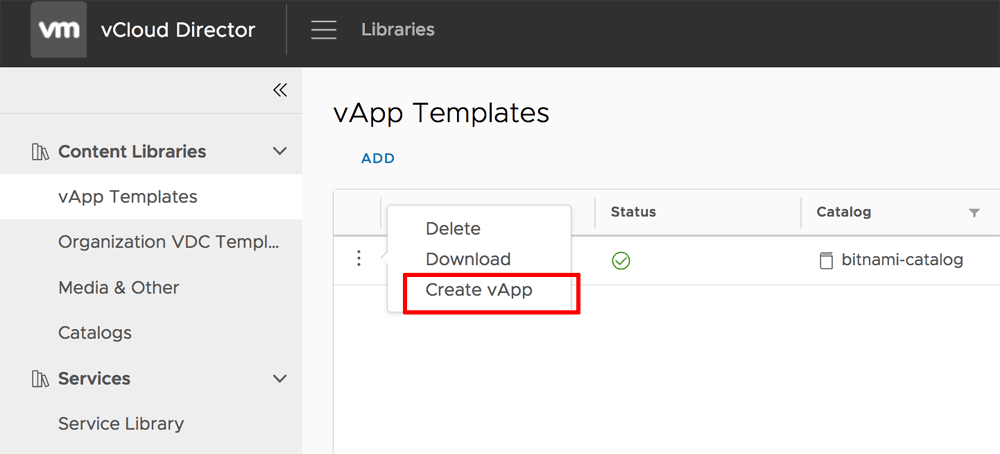
This will display a dialog box which you can use to create a vApp.
-
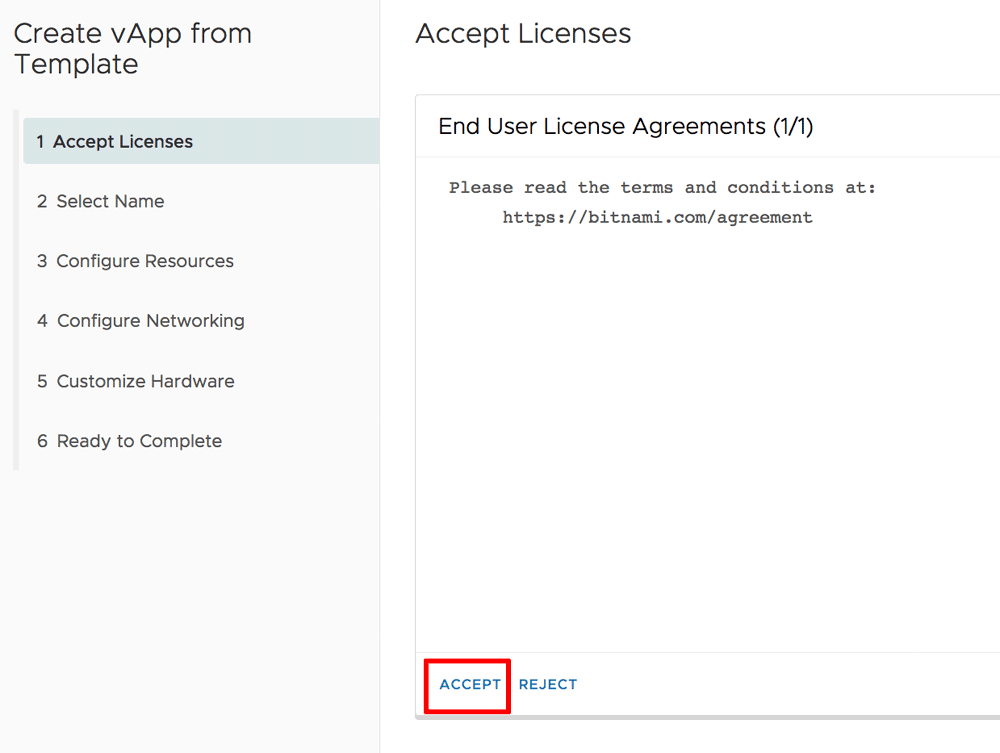
On the “Accept Licenses” page, review the license agreement and click “Accept” if the terms are acceptable. Click “Next” to proceed.
-
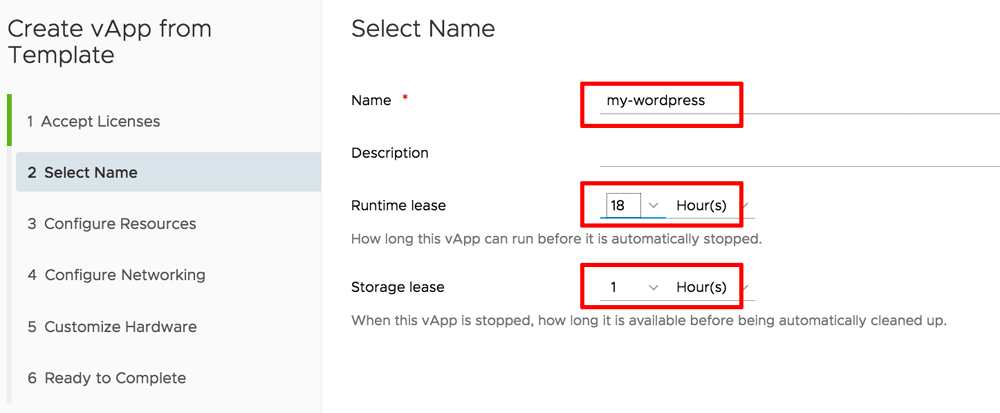
On the “Select Name” page, enter a new for the new vApp and specify the runtime lease and storage lease depending on your requirements. Click “Next” to proceed.
-
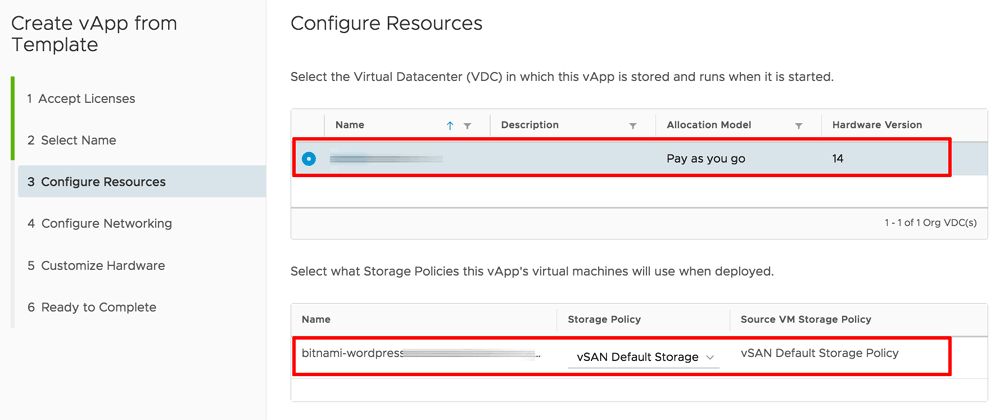
On the “Configure Resources” page, select the virtual datacenter (VDC) and storage policies for the vApp. Click “Next” to proceed.
-
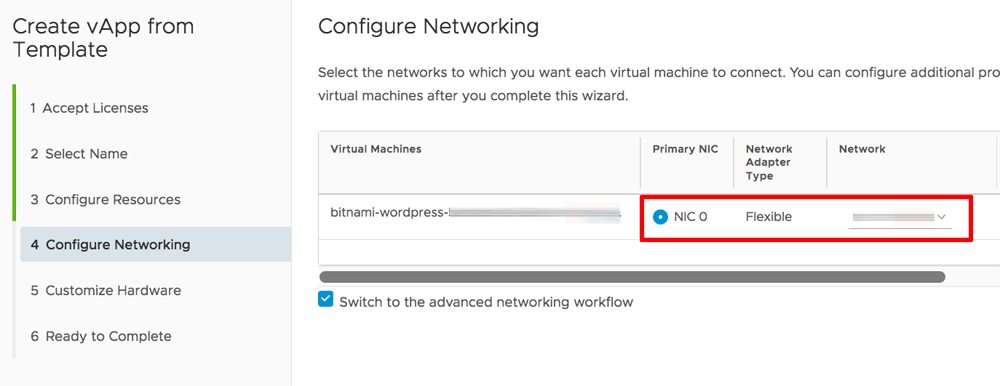
On the “Configure Networking” page, select the network for each virtual machine in the vApp. Click “Next” to proceed.
-
On the “Customize Hardware” page, select the hardware for each virtual machine in the vApp, in particular, the number of vCPUs, memory and storage size. Click “Next” to proceed.

-
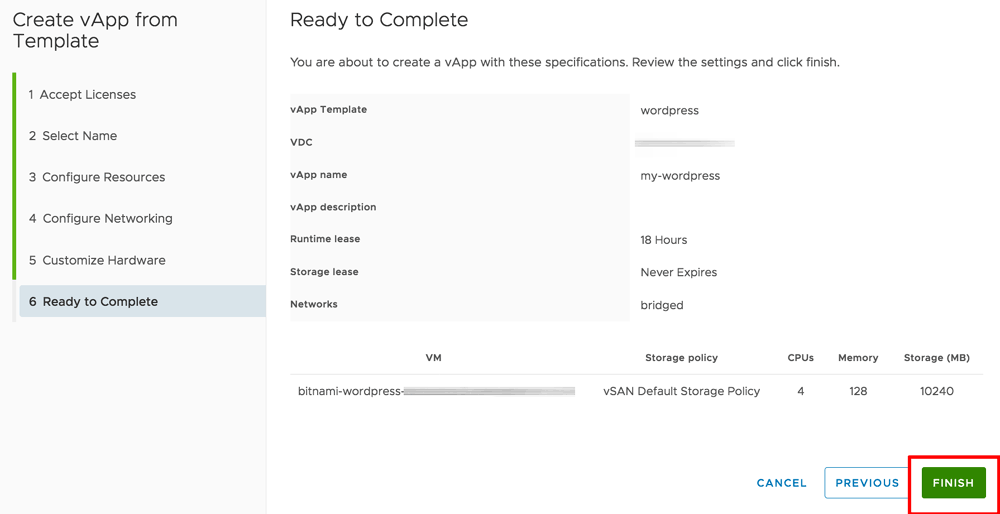
On the “Ready to Complete” page, review the vApp settings and click “Finish” to proceed.
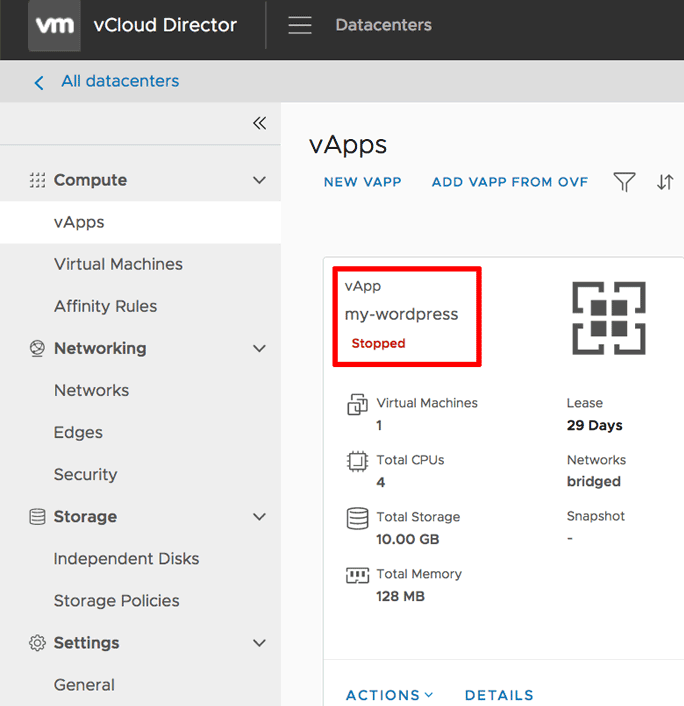
The new vApp will now be provisioned. Once provisioned, it will appear in the list of available vApps for your VDC, under the “Compute -> vApps” menu item.
Once the vApp has been provisioned, the next step is to power it on, by selecting the “Power On” option in the vApp’s “Actions” menu.
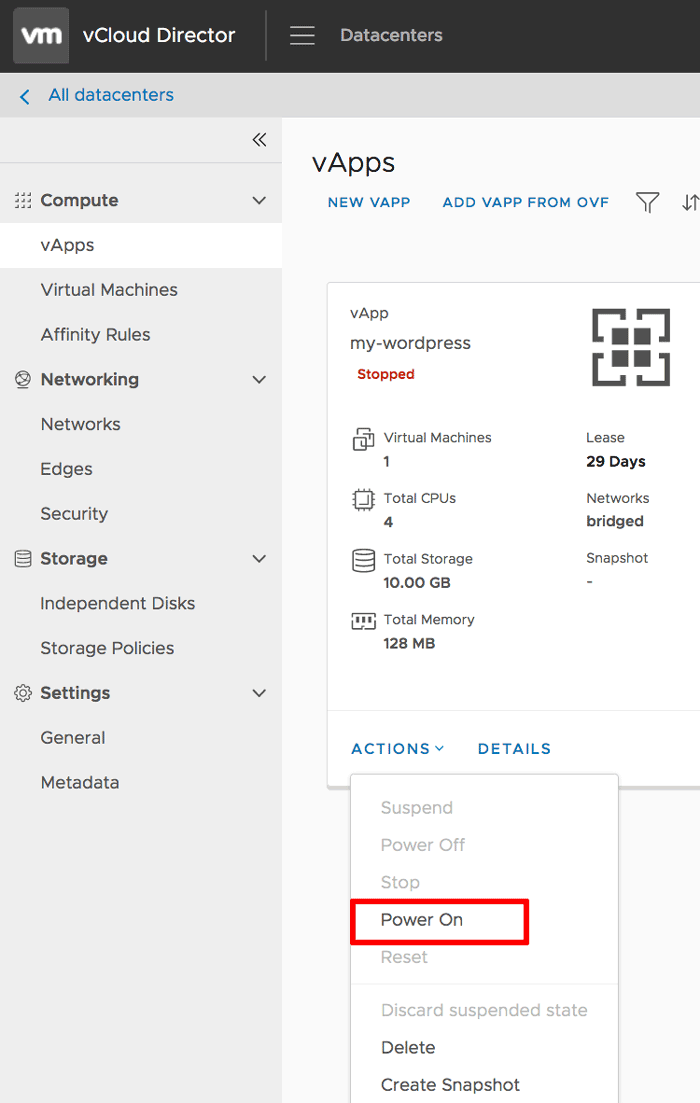
The virtual machine in the new vApp will now power on and the vApp status will change to “Running”.
Step 3: Obtain WordPress credentials
At the end of this step, you will have the credentials needed to access your WordPress blog.
You’re almost done but, before you can log in to WordPress, you need the administrator credentials and the application’s IP address. Follow the steps below:
-
Navigate to the “Compute -> Virtual Machines” page.
-
Find the virtual machine used by the new vApp. Select the “Launch Web Console” option in the vApp’s “Actions” menu.
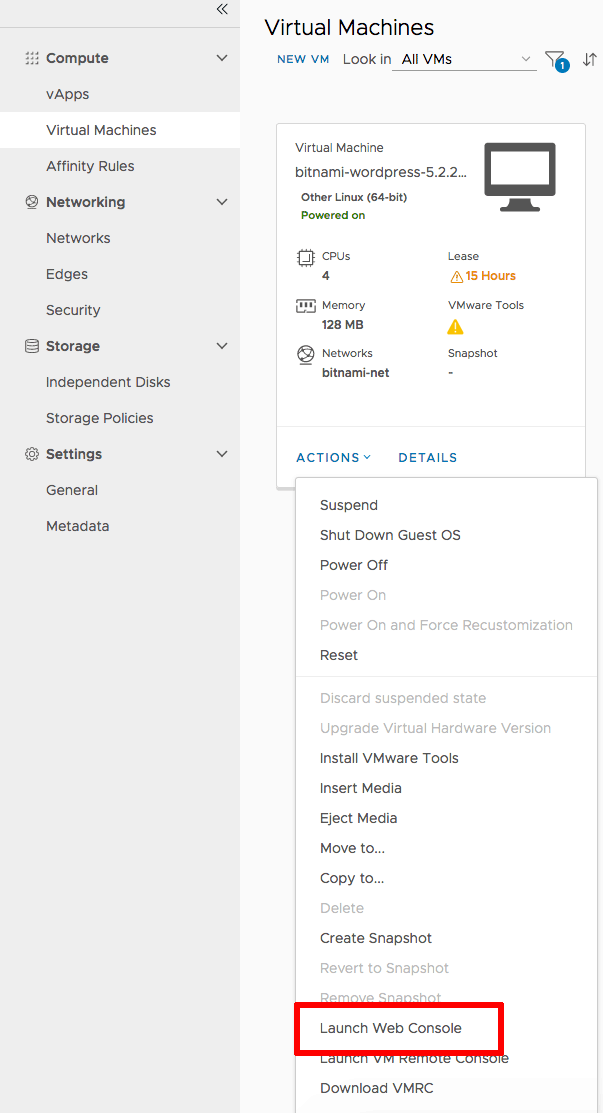
This will launch a Web console for the virtual machine.
NOTE: If you are using vCloud Director with a self-signed certificate and you do not see the virtual machine console, follow the instructions in this VMware Knowledge Base article.
-
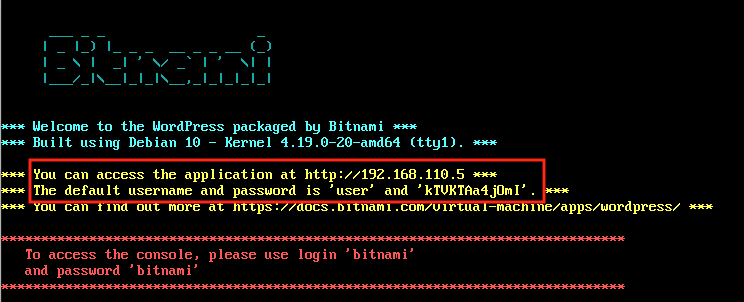
Note the IP address and administrator credentials shown at the virtual machine console.
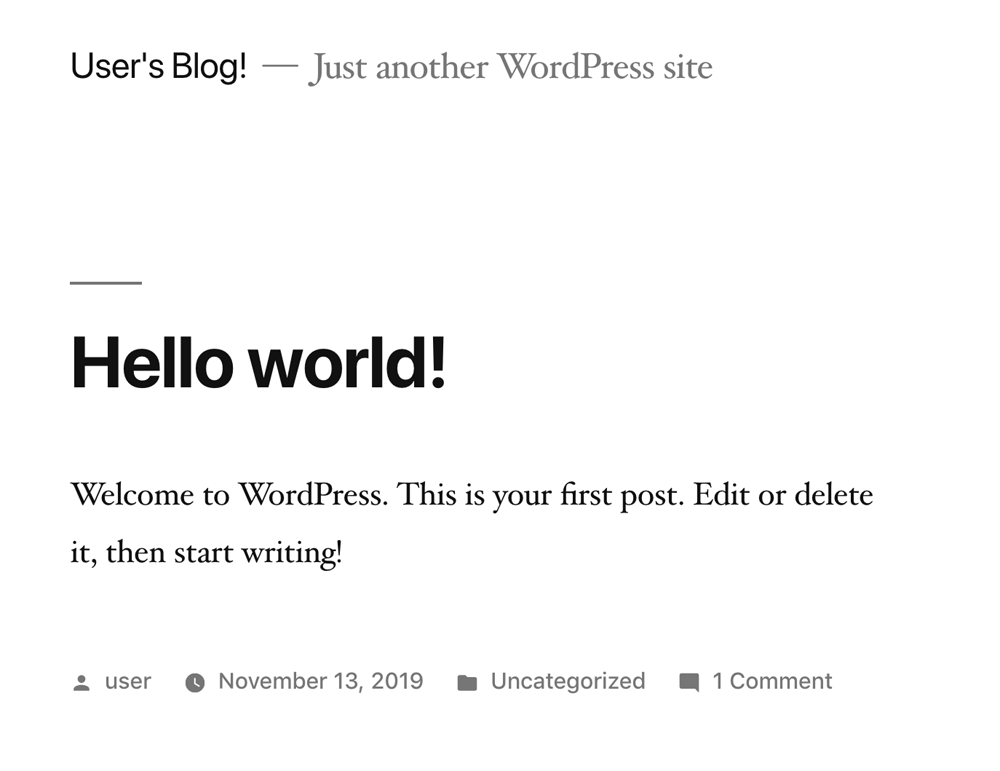
You can now access WordPress by launching your Web browser and browsing to the service URL. You should see the front page of your blog with a sample post, as below:
Step 4: Log in and start using WordPress
At the end of this step, you will have logged in to WordPress and created a new blog post.
To log in to the WordPress dashboard, follow these steps:
-
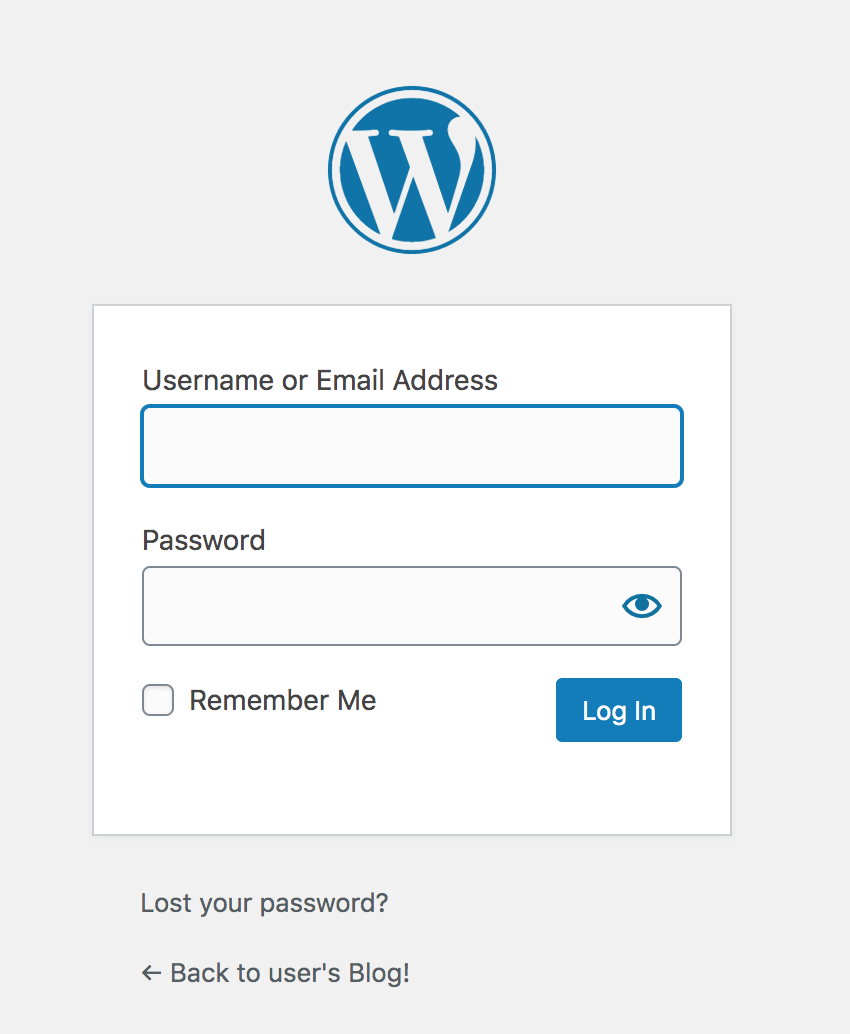
Browse to the WordPress dashboard, usually at the URL http://SERVER-IP/wp-admin.
-
Log in with the administrator credentials from the previous step.
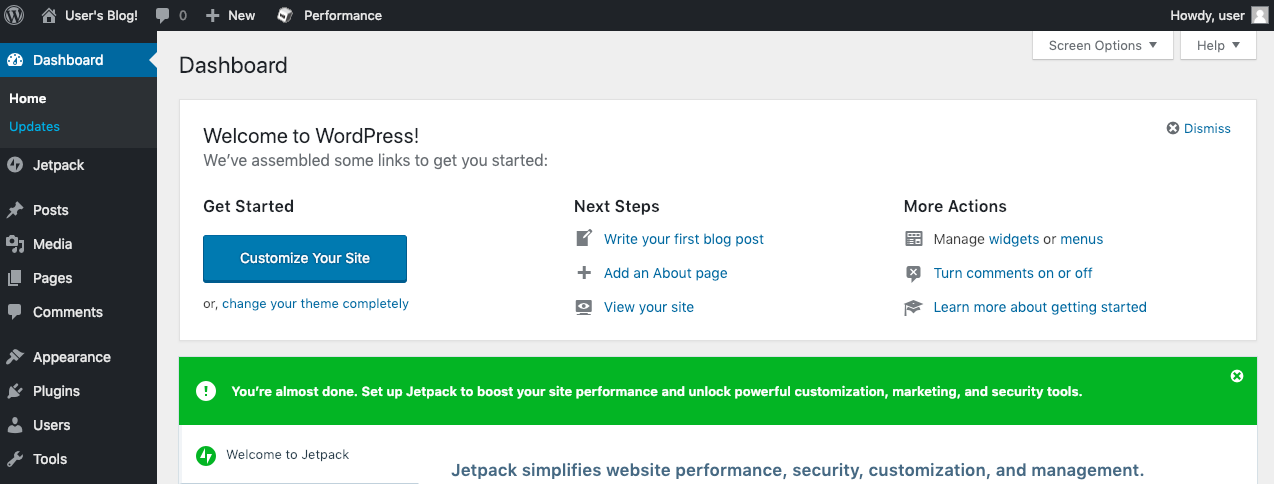
You should now arrive at the WordPress dashboard, which allows you to manage posts, pages and comments; customize your blog with themes and plugins; import and export content; manage navigation menus; add or delete new user accounts; and much more.
Create your first post
You can now add a new post using the following steps:
-
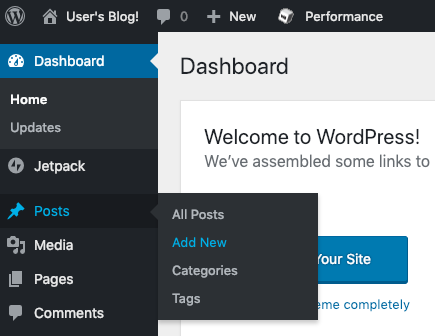
Select the “Posts -> Add New” menu option to create a new post.
-
Enter a title and content for the post. You can use the formatting tools at the top of the content area to format your post and add hyperlinks or images.
-
Optionally, choose the format and category for your post.
-
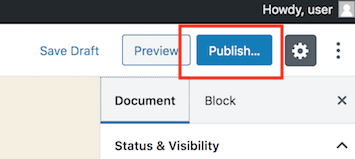
Publish it immediately using the “Publish” button.
And now, when you visit your blog’s front page, you should see your new post.
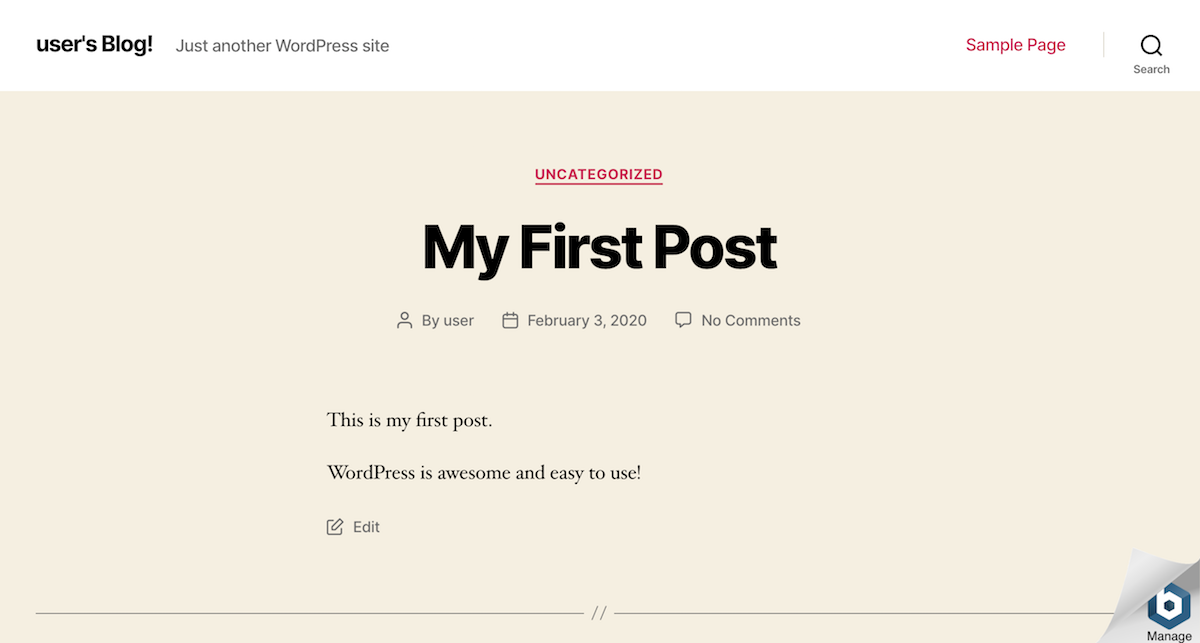
Congratulations! You now have a working, fully-functional WordPress blog in the cloud.
Keep your WordPress installation up-to-date
You can keep your WordPress installation up-to-date with the WordPress update feature. To access this:
-
Log in to WordPress using the administrator account.
-
Select the “Dashboard -> Updates” menu item.
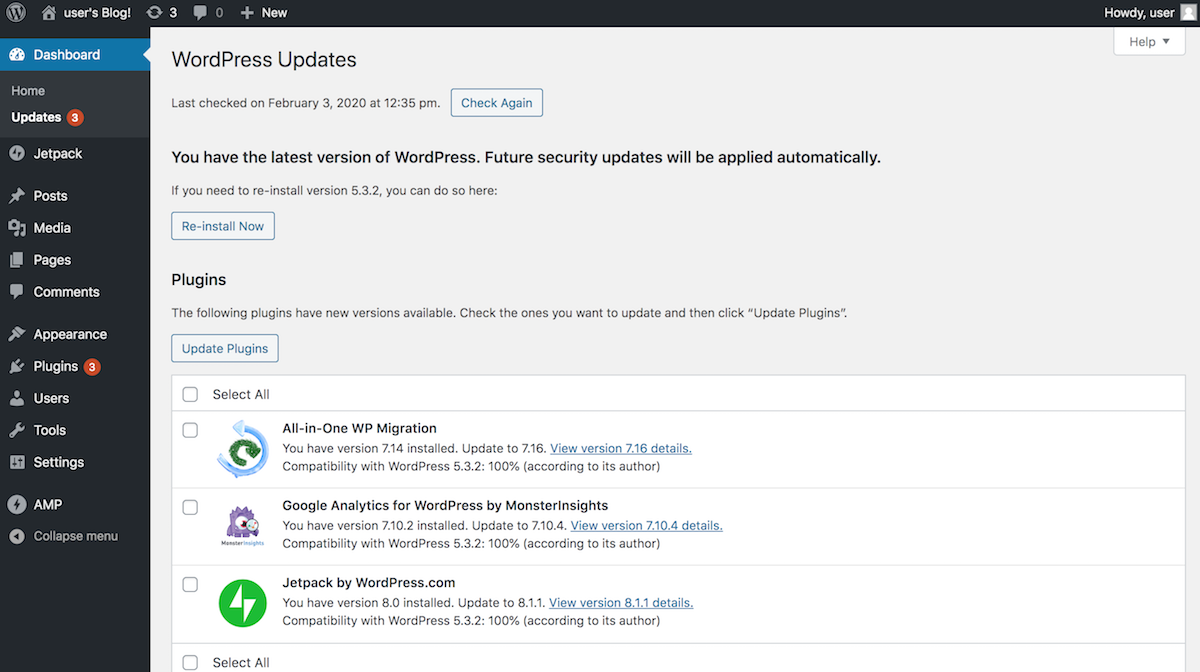
-
Review the resulting page to see if WordPress needs an update. If an update is available, you can install it by clicking the “Update Now” button. You can also re-install WordPress if needed with the “Re-install Now” button.
Useful links
To learn more about the topics discussed in this tutorial, use the links below: