Get Started with Bitnami Applications in the Microsoft Azure Marketplace
Introduction
Microsoft Azure is a secure, flexible and high-performance cloud platform integrating multiple tools and managed services. It provides a complete set of tools to build, deploy and manage enterprise, mobile and Web applications in the cloud.
If you’re new to the cloud, the easiest way to get started with Microsoft Azure is with Bitnami. Bitnami provides pre-packaged application images for Microsoft Azure cloud servers, so that you can get productive with your new server immediately.
In this tutorial, I’ll walk you, step by step, through the process of using the Microsoft Azure Marketplace to create and provision a new Microsoft Azure cloud server. And since Microsoft Azure offers a free trial with $200 credit for 30 days, you’ll have plenty of time to experiment with your server and Bitnami stacks without worrying about being billed for usage.
Overview
If you’re interested in creating a personal or small business blog, chances are that you’re going to use WordPress. WordPress is one of the most popular blogging platforms in the world, used on over 60 million websites (according to Wikipedia). And it is not hard to see why: WordPress is very easy to use, comes with thousands of extensions and themes, is completely free, and is open source.
In this tutorial, I’ll launch a cloud server with the Bitnami WordPress Stack, which gives you a pre-configured WordPress blog that you can start using right way. But WordPress is just an example: there are hundreds of other Bitnami applications to choose from, and they’re all equally easy to set up.
Here are the steps you’ll follow in this tutorial:
- Register with Microsoft Azure
- Deploy the Bitnami WordPress Stack on a Microsoft Azure cloud server
- Obtain WordPress credentials
- Log in and start using WordPress
The next sections will walk you through these steps in detail.
IMPORTANT: When deploying on an Azure Stack instance, it is necessary to download marketplace items first. Check the Microsoft Azure official documentation to learn how to connect both scenarios. Once you finish this process, you can proceed to launch a virtual machine from the Microsoft Azure Portal as it is described below.
Step 1: Register With Microsoft Azure
At the end of this step, you will have signed up for the Microsoft Azure free trial. If you already have a Microsoft Azure account, you may skip this step.
Begin by creating a Microsoft Azure account, by browsing to the Microsoft Azure website and choosing the “Free Trial” option for a one month free trial. You will need an existing Microsoft account to log in and sign up for the free trial; if you don’t have one, you can create one here. Remember to keep track of your account username and password, because you’ll need them in the next step.

Once you’ve signed in, sign up for the Microsoft Azure free trial by providing some basic personal information and your mobile phone number. Microsoft Azure will send a verification code to your mobile number, which you’ll need to enter into the registration form. Once that’s done, proceed to the next stage by entering your credit card information.
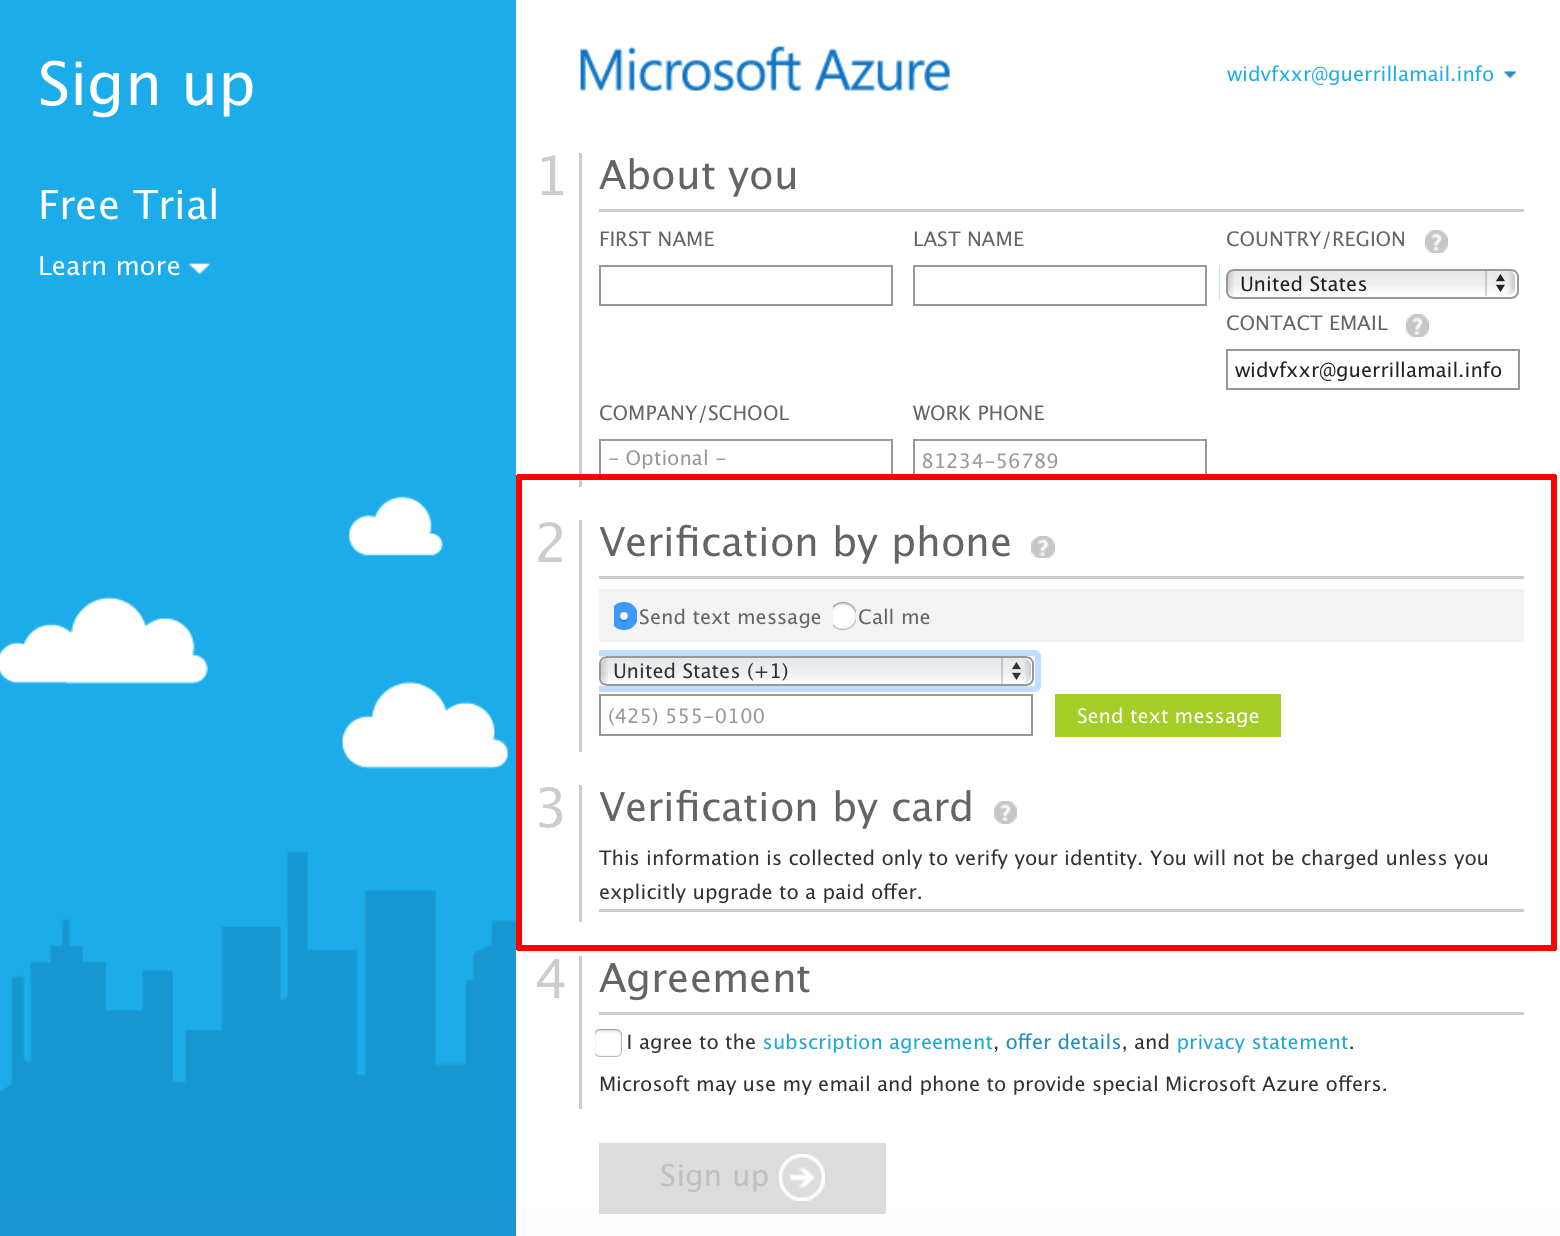
If you’re wondering why you need to provide credit card information for a free trial, or if you’re worried about being billed for services, relax. By default, Microsoft Azure trial accounts are configured with a spending limit of $0, which means that your card will never be billed unless you remove or modify the spending limit. Microsoft Azure needs your credit card information for security purposes, to avoid service misuse and to confirm your identity.
IMPORTANT: When your spending limit is set to $0, Microsoft Azure will automatically deactivate your cloud servers so that you don’t incur any charges if your usage exceeds your free quota. Read about the Microsoft Azure spending limit.
Once your payment information is entered, review Microsoft Azure’s terms of service, free trial details and privacy statement, and indicate your agreement by ticking the box. Then, hit the big green “Sign up” button.
The Microsoft Azure account registration machine will churn away for a minute or so, and you will then be redirected to your Microsoft Azure account management page, which allows you to manage your subscriptions, edit your profile and get support. You should see that your free trial is now active in the subscription list.
Step 2: Deploy WordPress on a Microsoft Azure cloud server
At the end of this step, your WordPress blog will be running on a Microsoft Azure cloud server.
The next step is to launch a cloud server and get WordPress running on it. Follow these steps to complete the deployment of Bitnami WordPress:
-
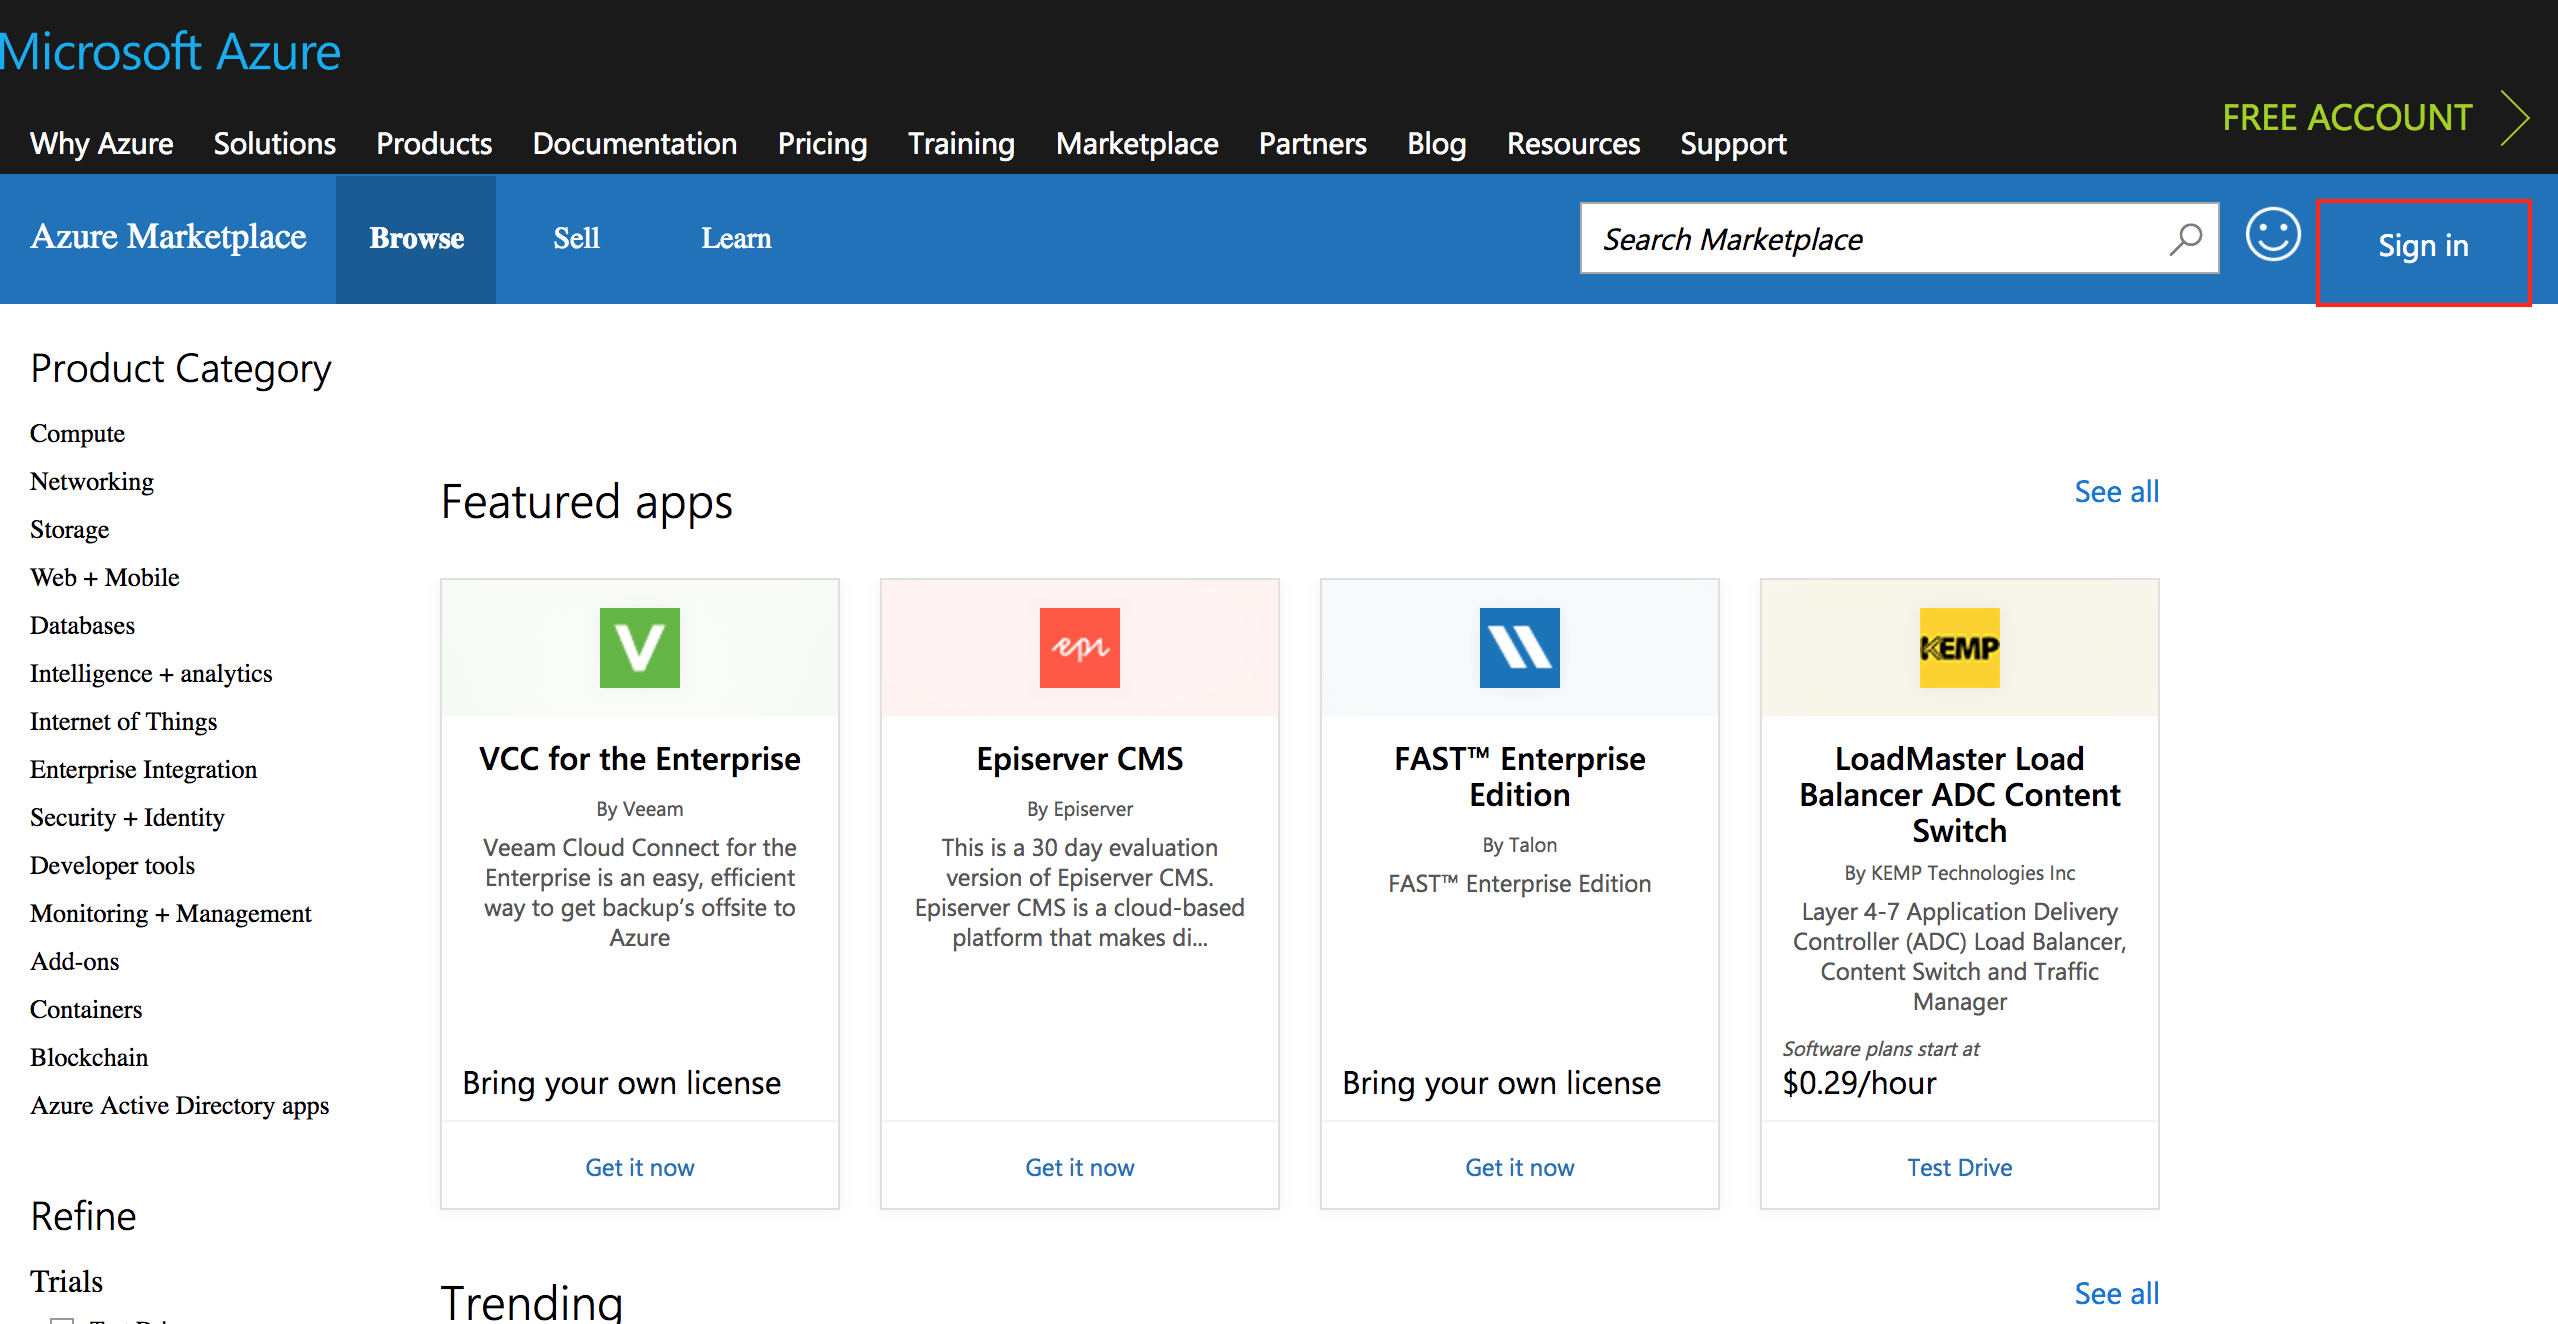
Log in to the Microsoft Azure Marketplace.
-
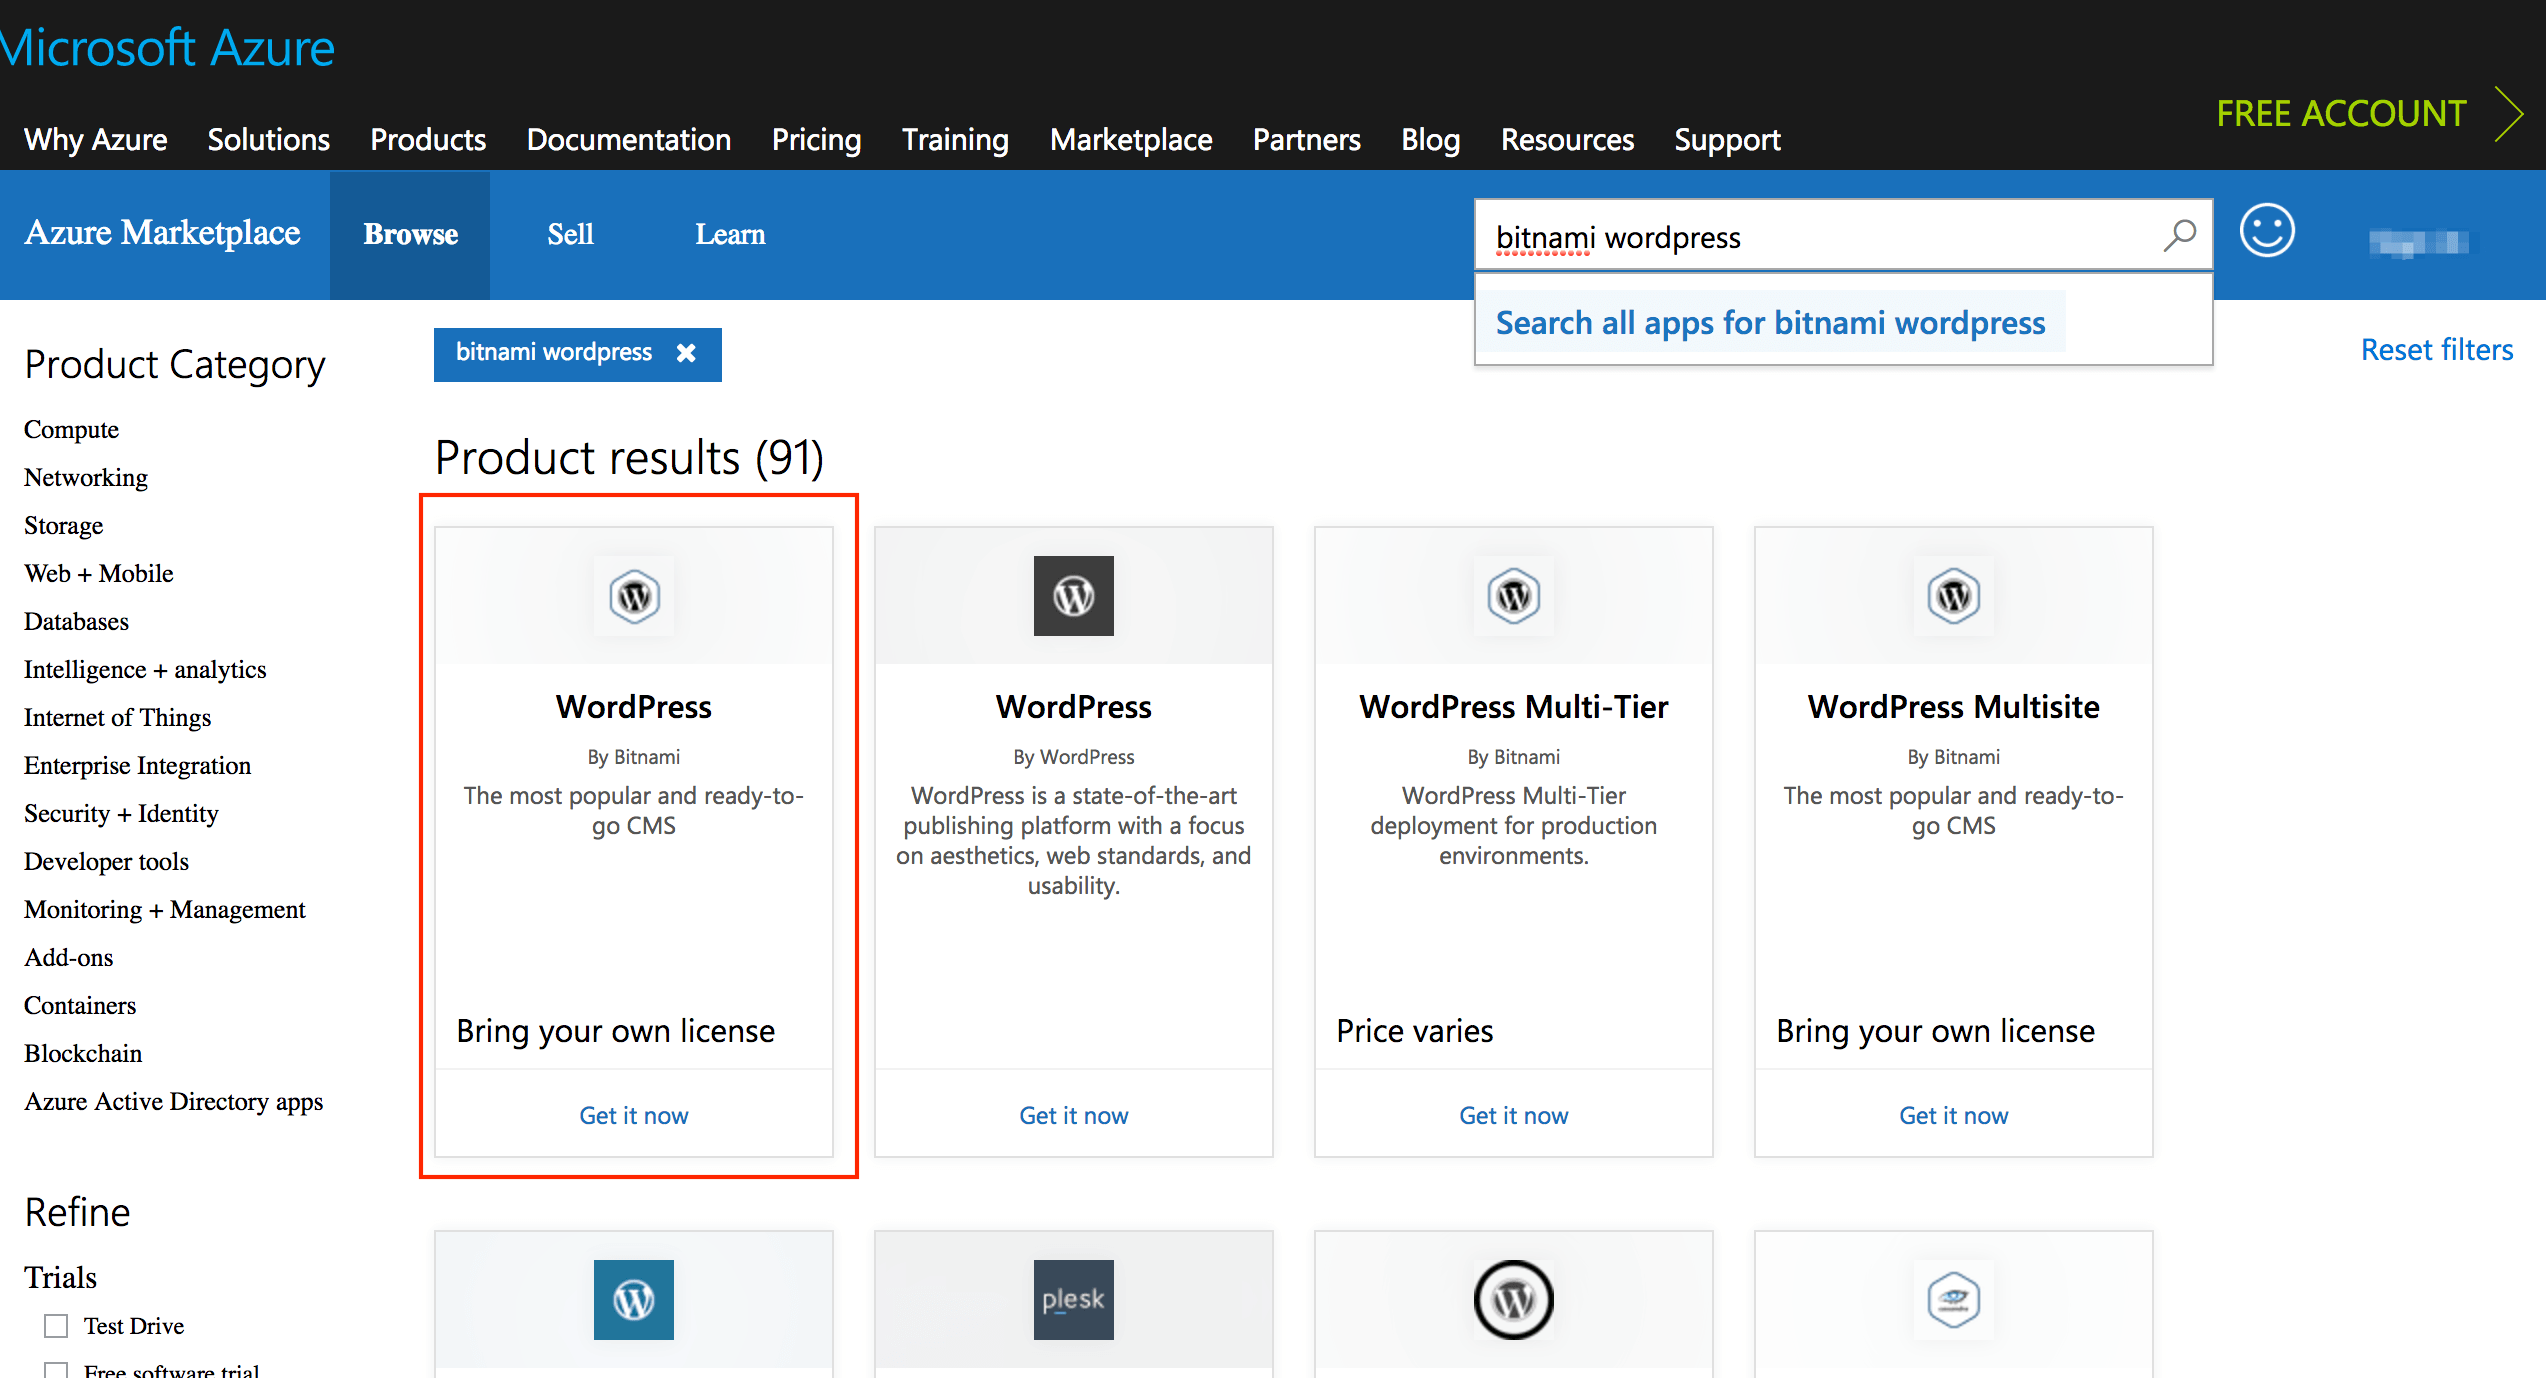
Search for the Bitnami WordPress Stack by entering the search term “bitnami wordpress” in the search bar at the right-top.
-
Select the stack in the list of search results.
-
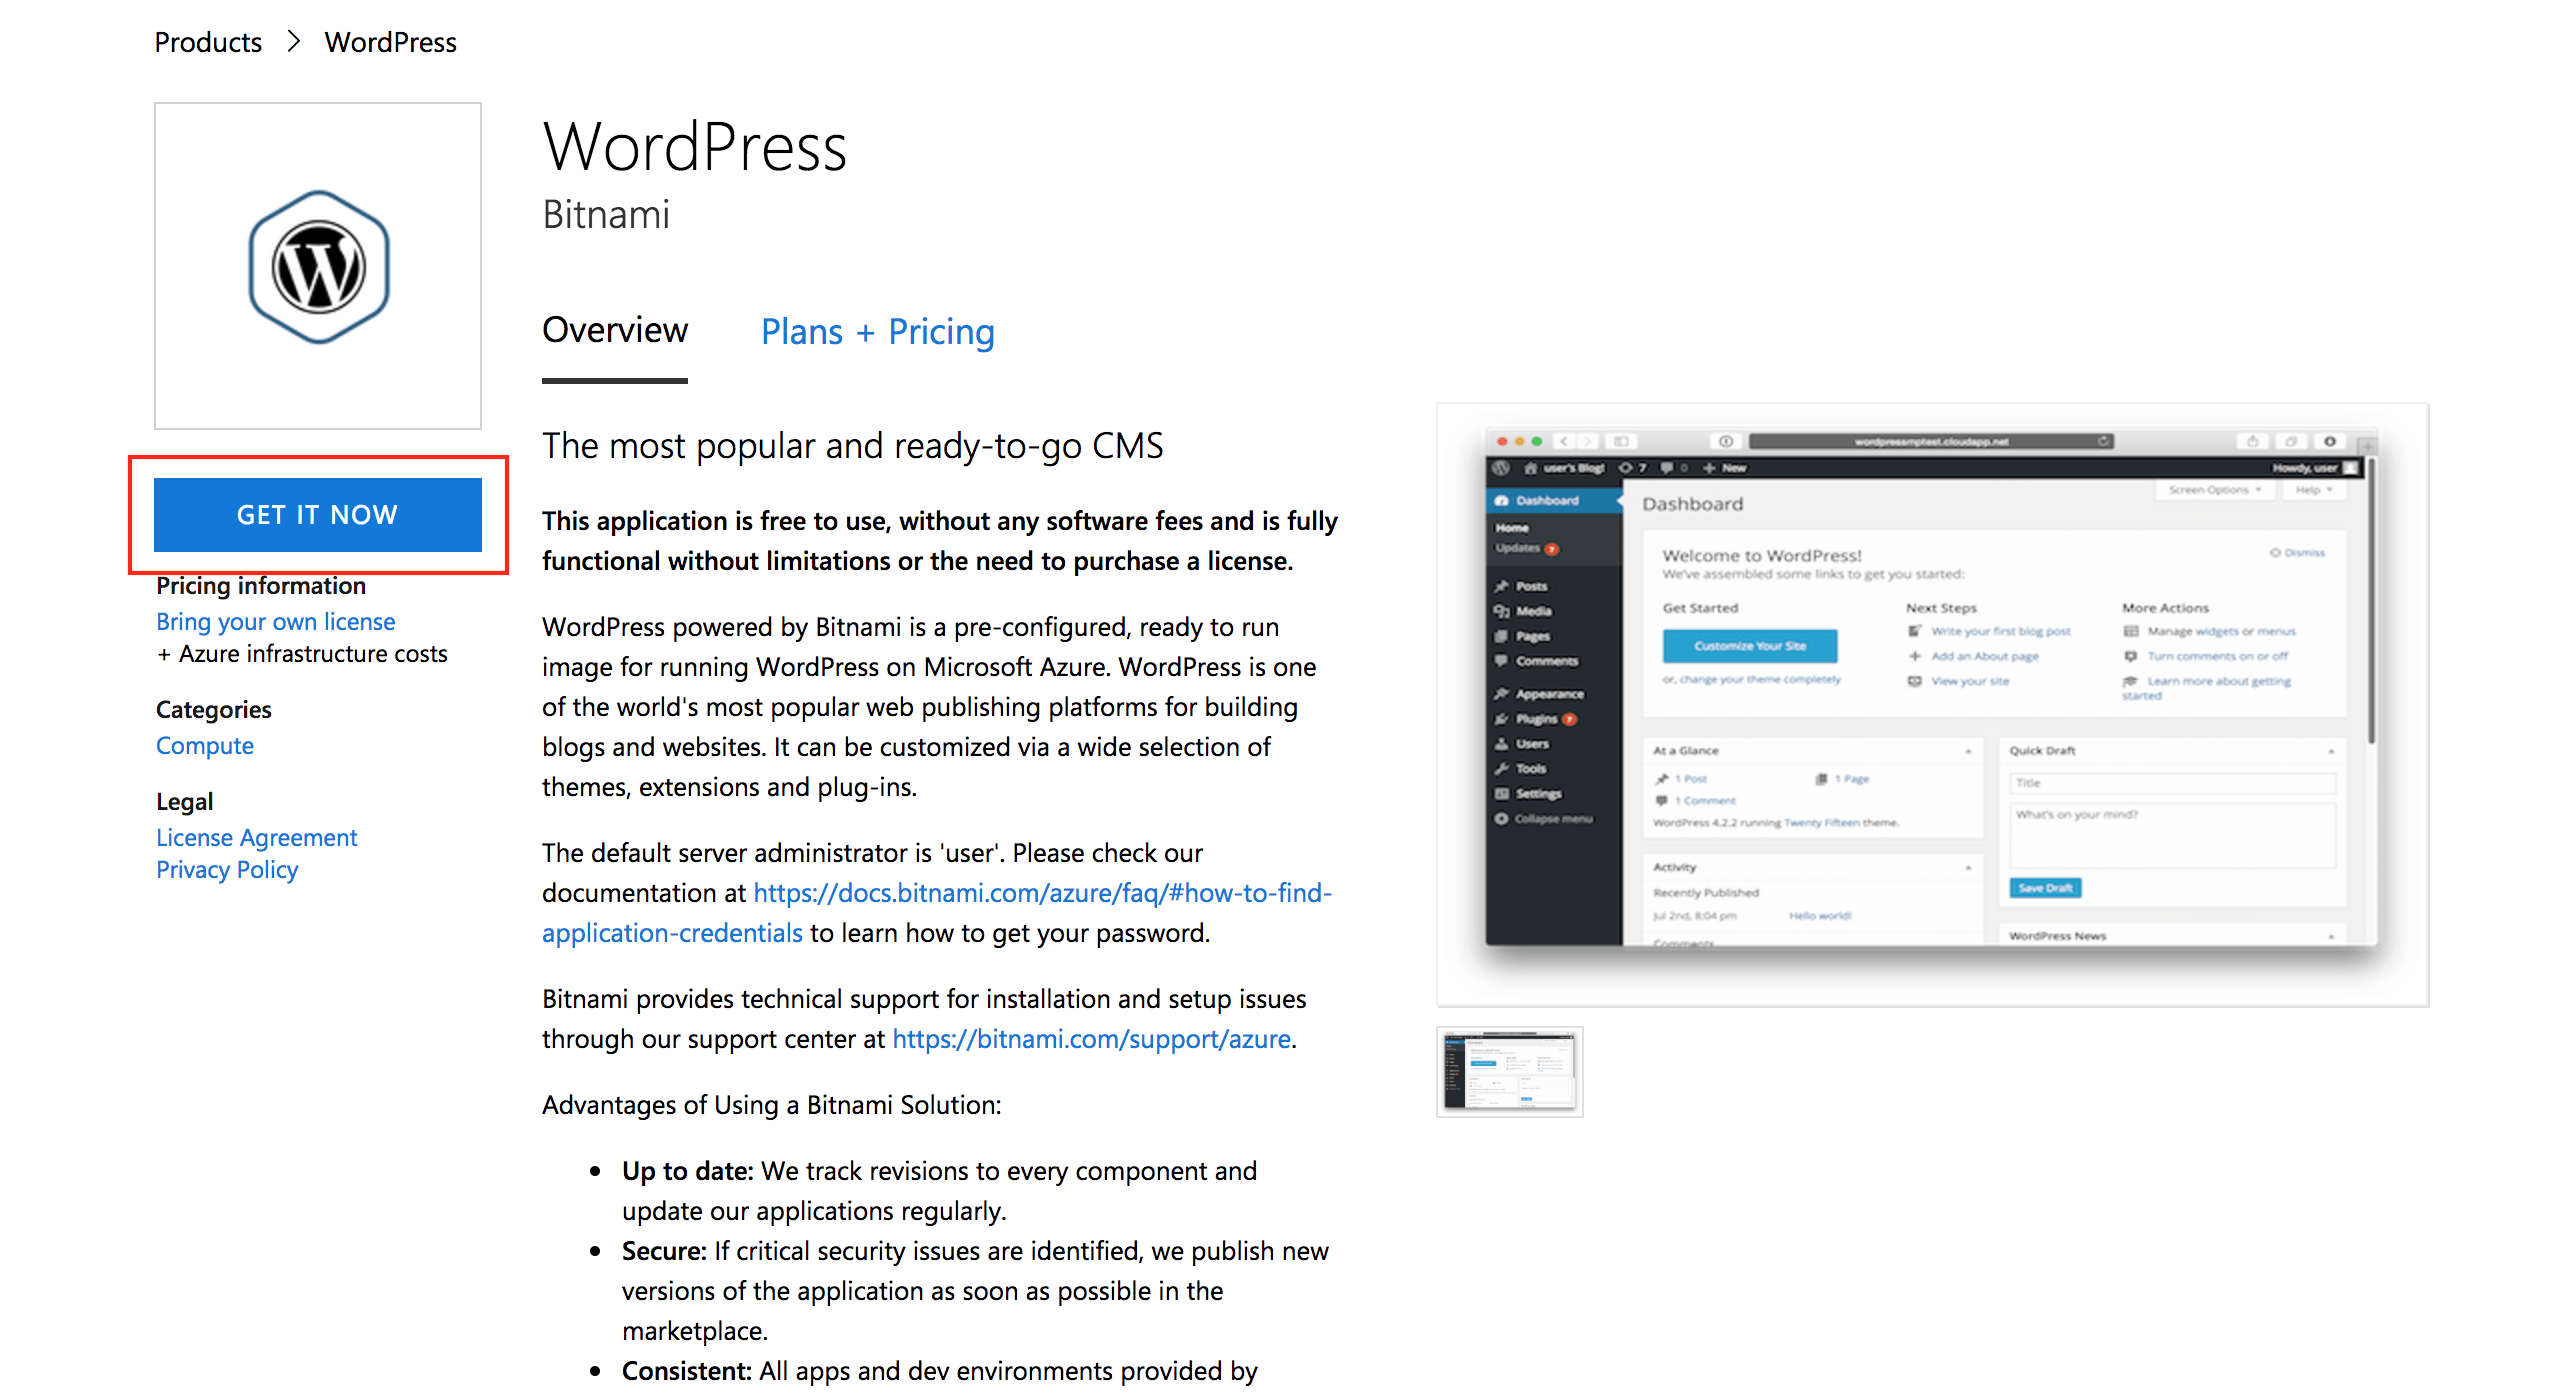
On the resulting detail page, review the description and click “Get it now” to proceed.
-
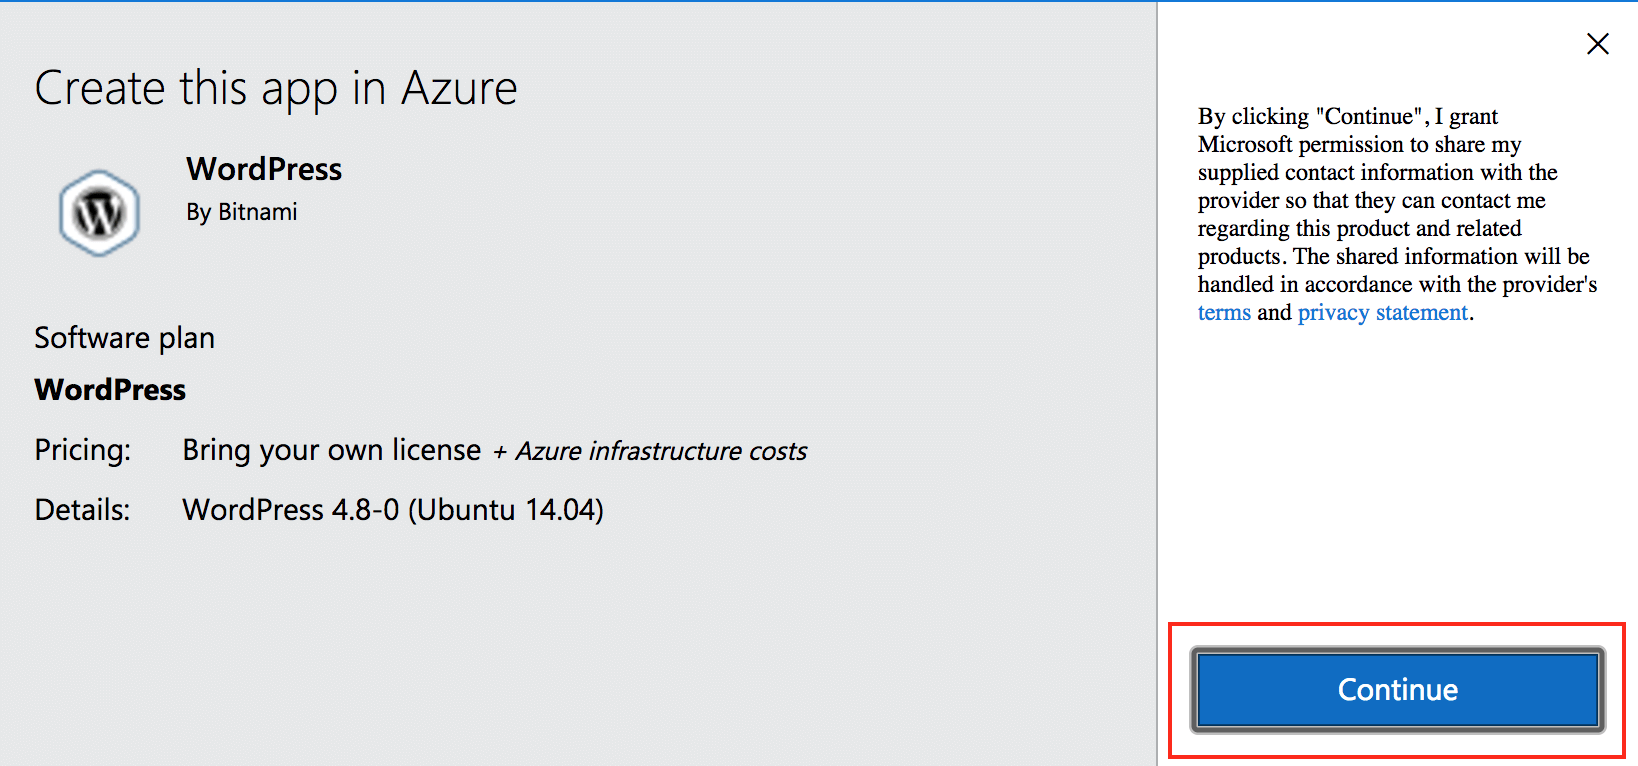
On the resulting dialog, check the terms and conditions of the software plan and accept them by clicking “Continue”. You will be redirected to the Microsoft Azure Portal.
-
Click on the account you want to use for the deployment.
-
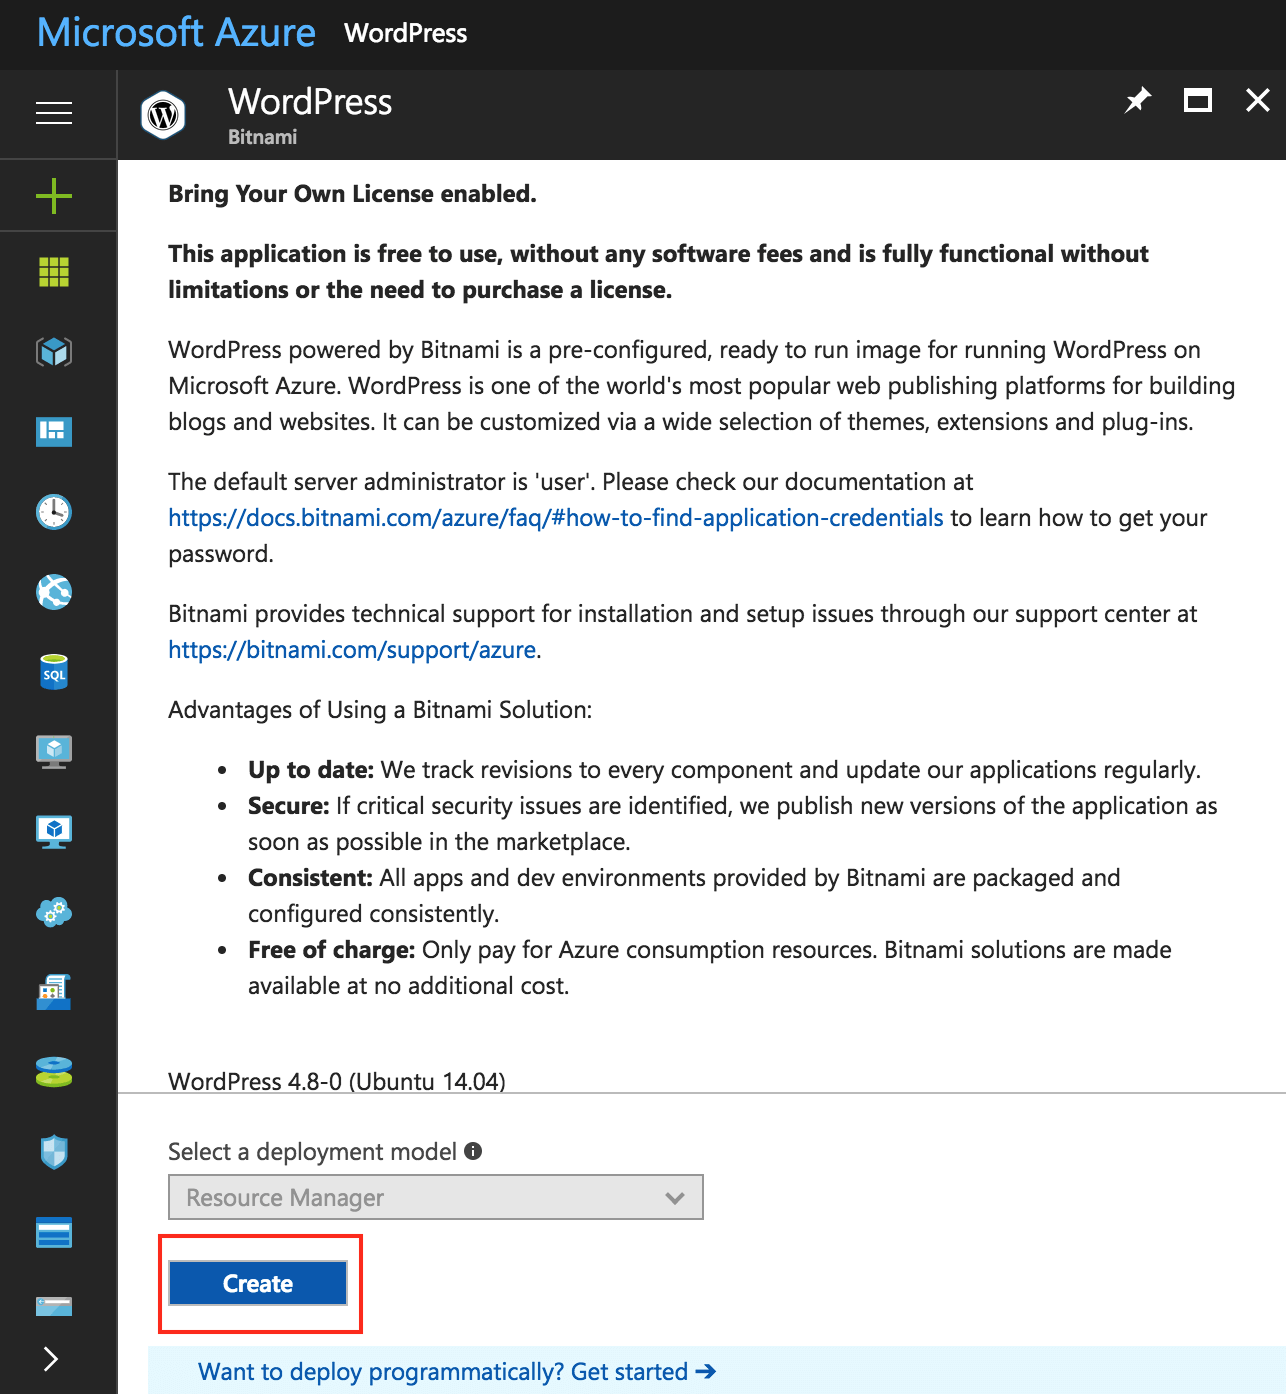
On the resulting page, review the information. It specifies the application version and provides useful links to the Bitnami Documentation page. Click “Create” to start the configuration of the server.
-
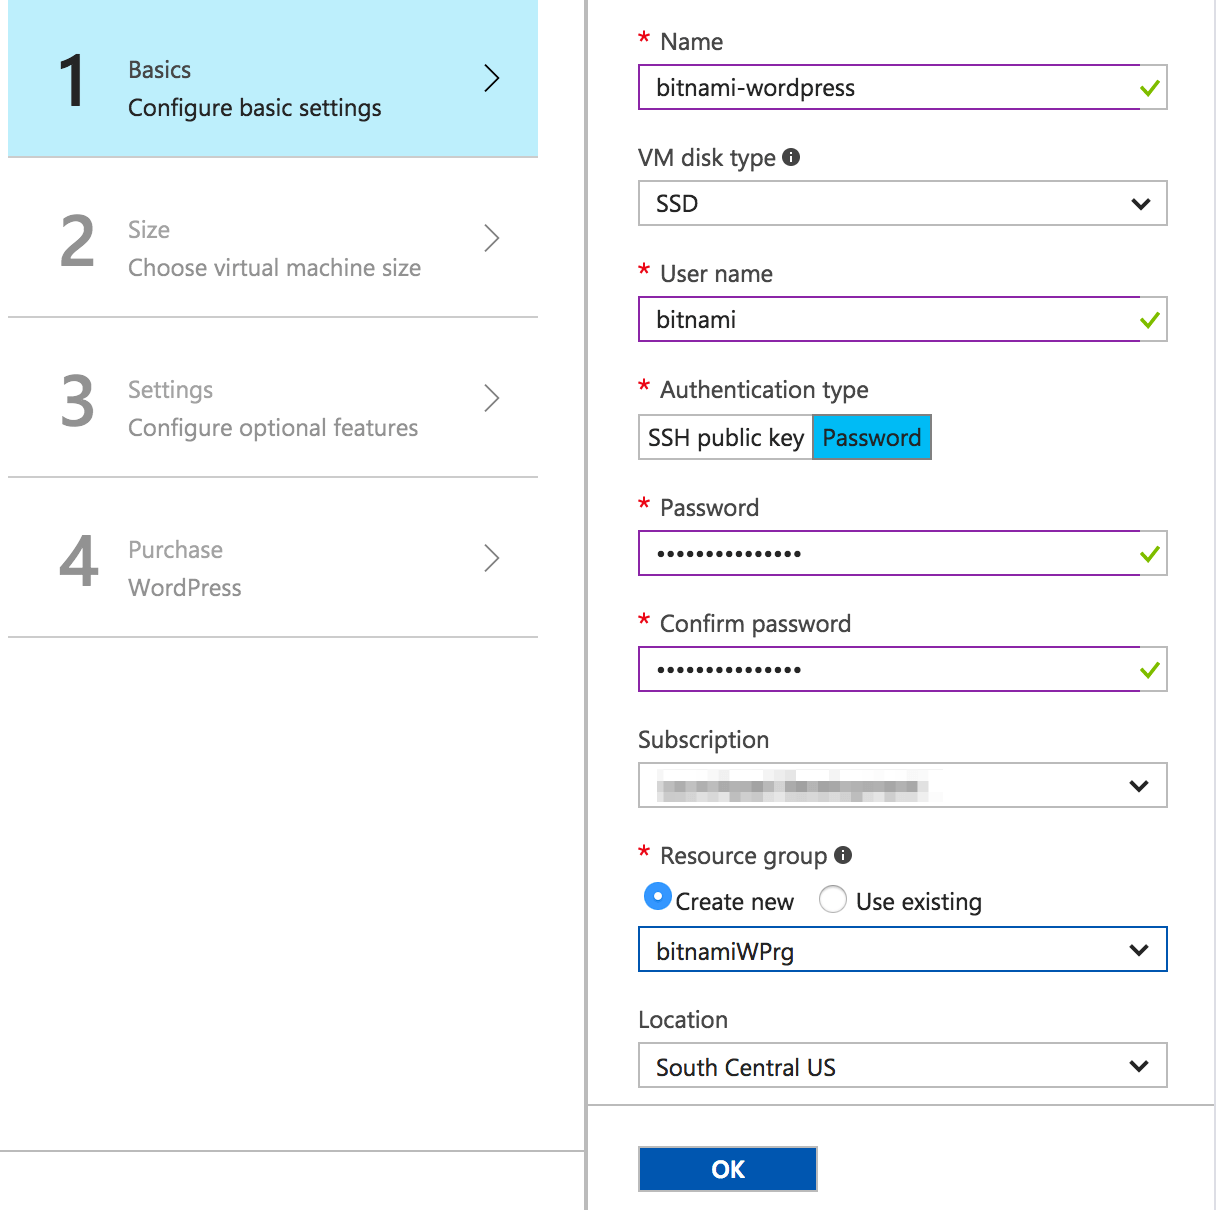
In “Create virtual machine -> Basics” complete the required fields. Create a new resource group and click “OK” to continue.
-
Select the size for your cloud server. For more information, refer to the Microsoft Azure pricing sheet.
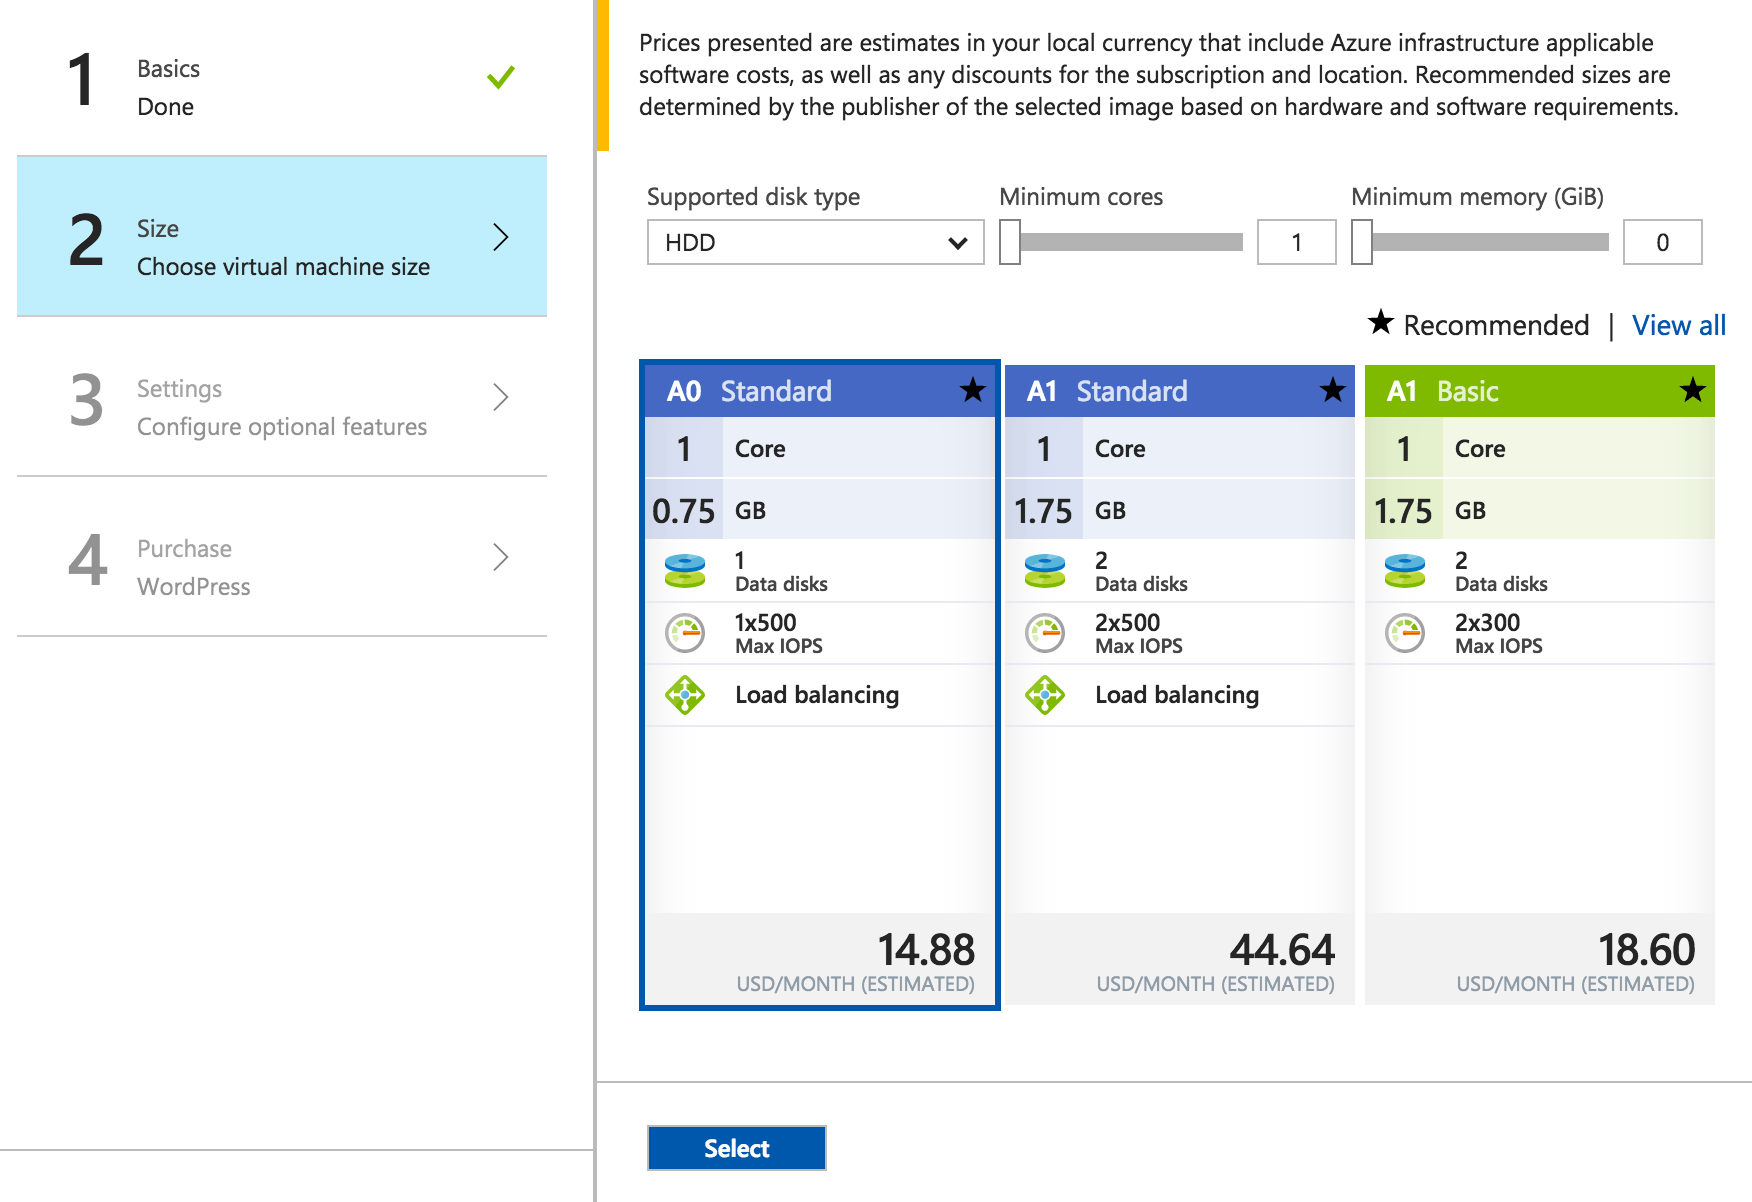
TIP: An “A0” server will work just fine for a low-traffic WordPress blog or for WordPress development.
-
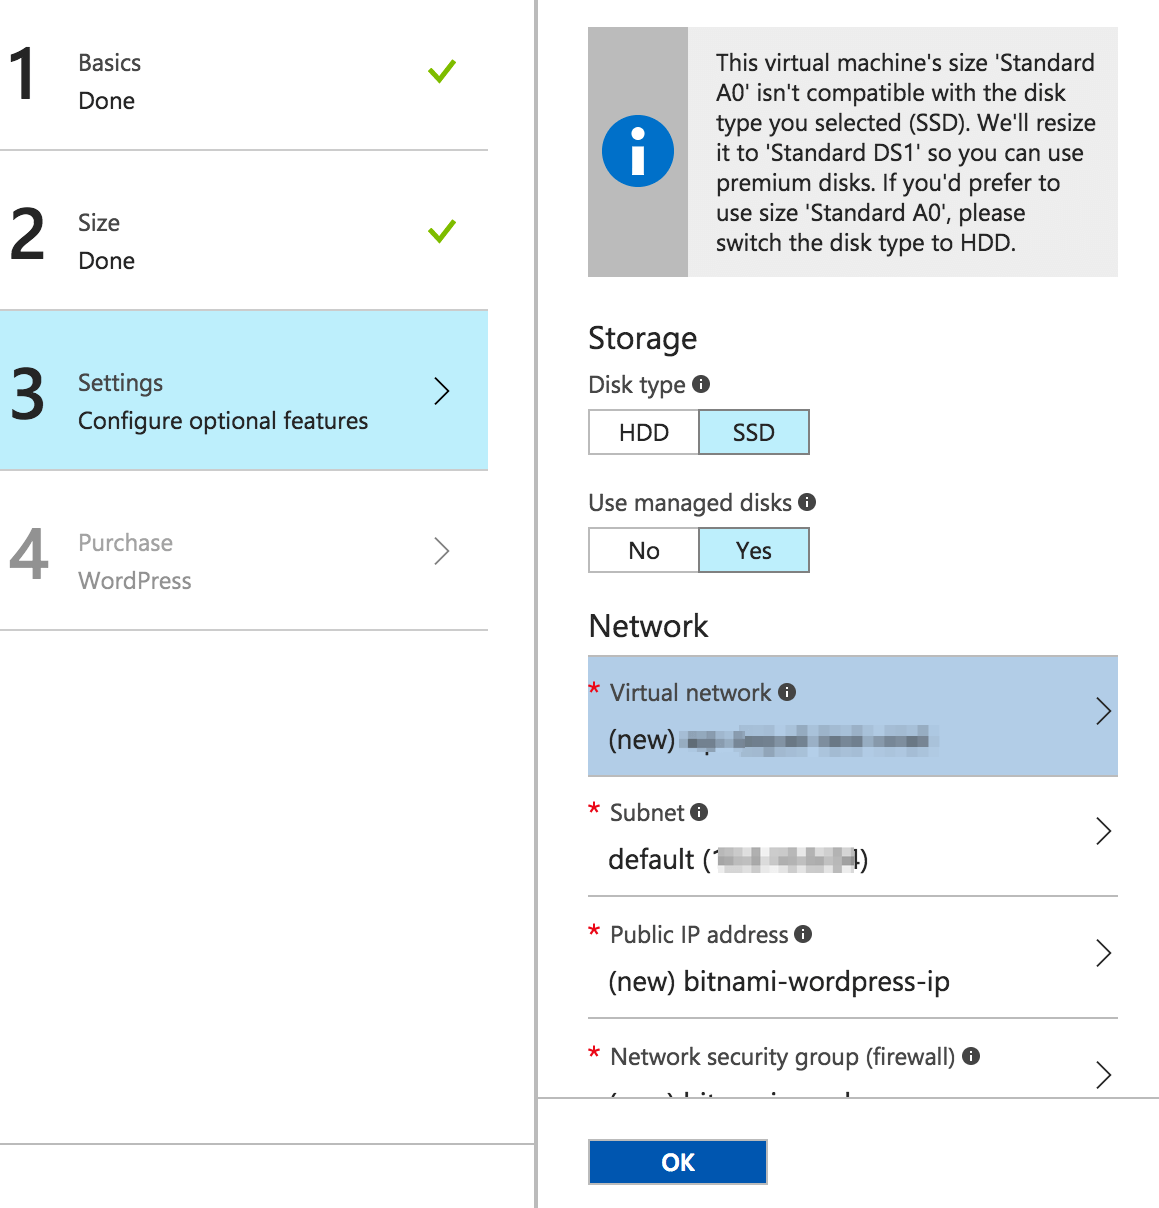
The next step is to configure optional features such as the virtual network of the cloud server. You can leave the values defined by default. Click “OK” to continue.
-
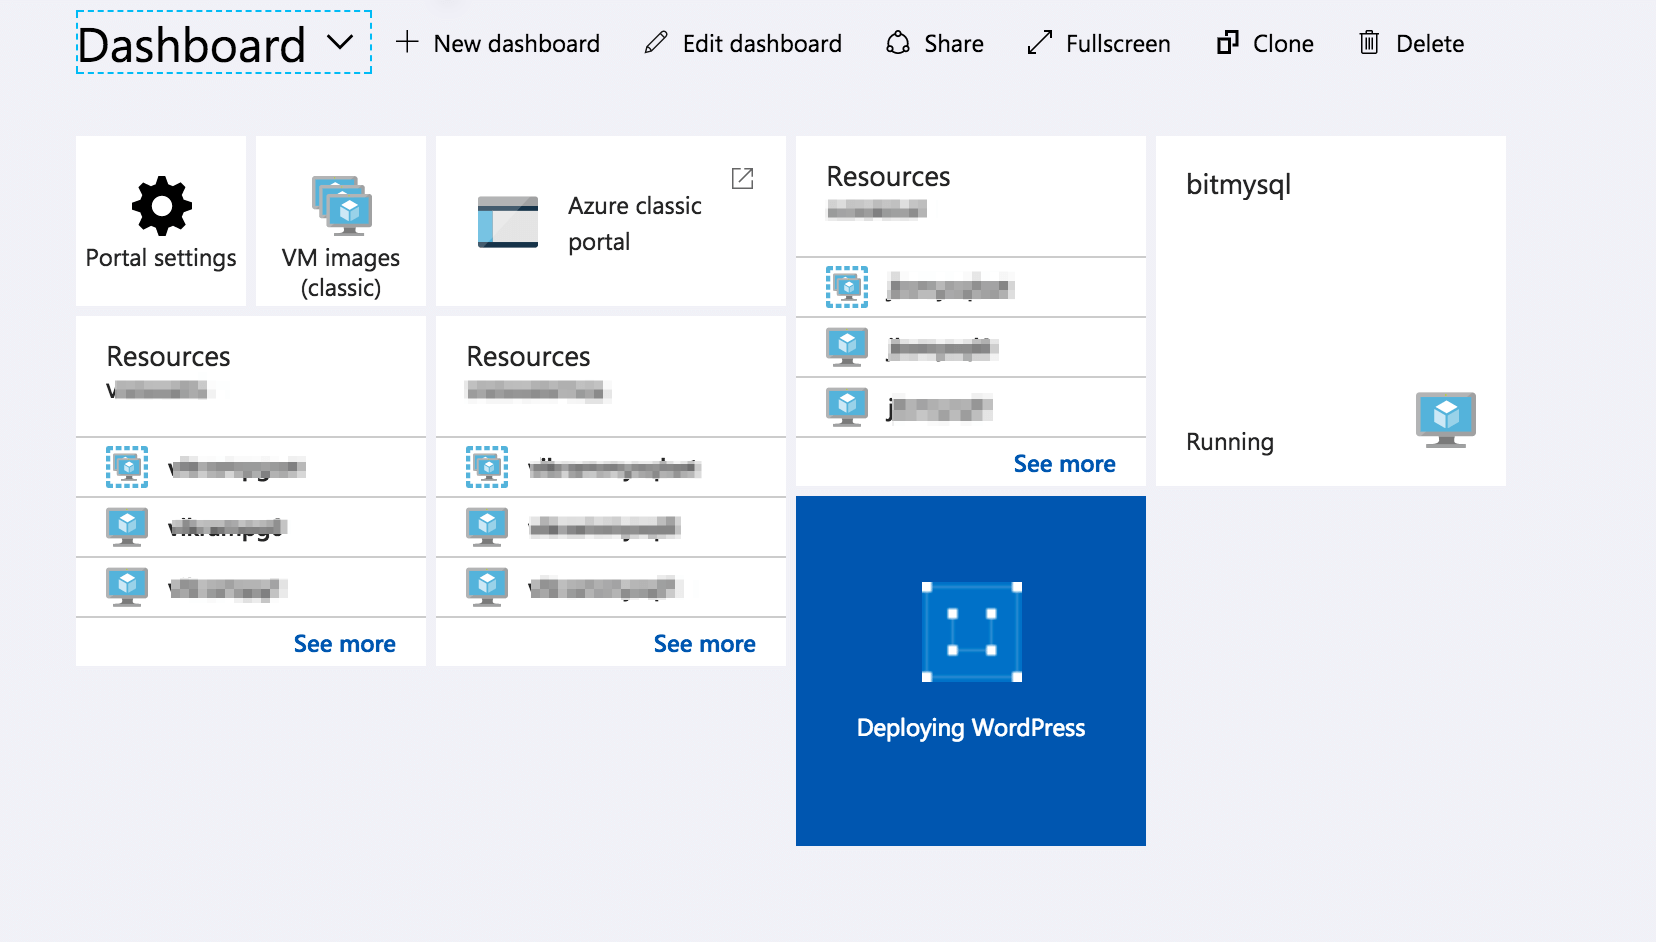
At this point, Azure will run a final validation. On the resulting page, you can see a summary of the related information to your server. Click “Purchase” to accept the current configuration for the virtual machine and the terms of use. This action starts the deployment of your WordPress blog in the recently created server. You can check the status of the deployment from your account dashboard.
-
Once the deployment is finished, you will be redirected to the server. In the “Overview” section, you will find important information such as the public IP address for accessing your application.
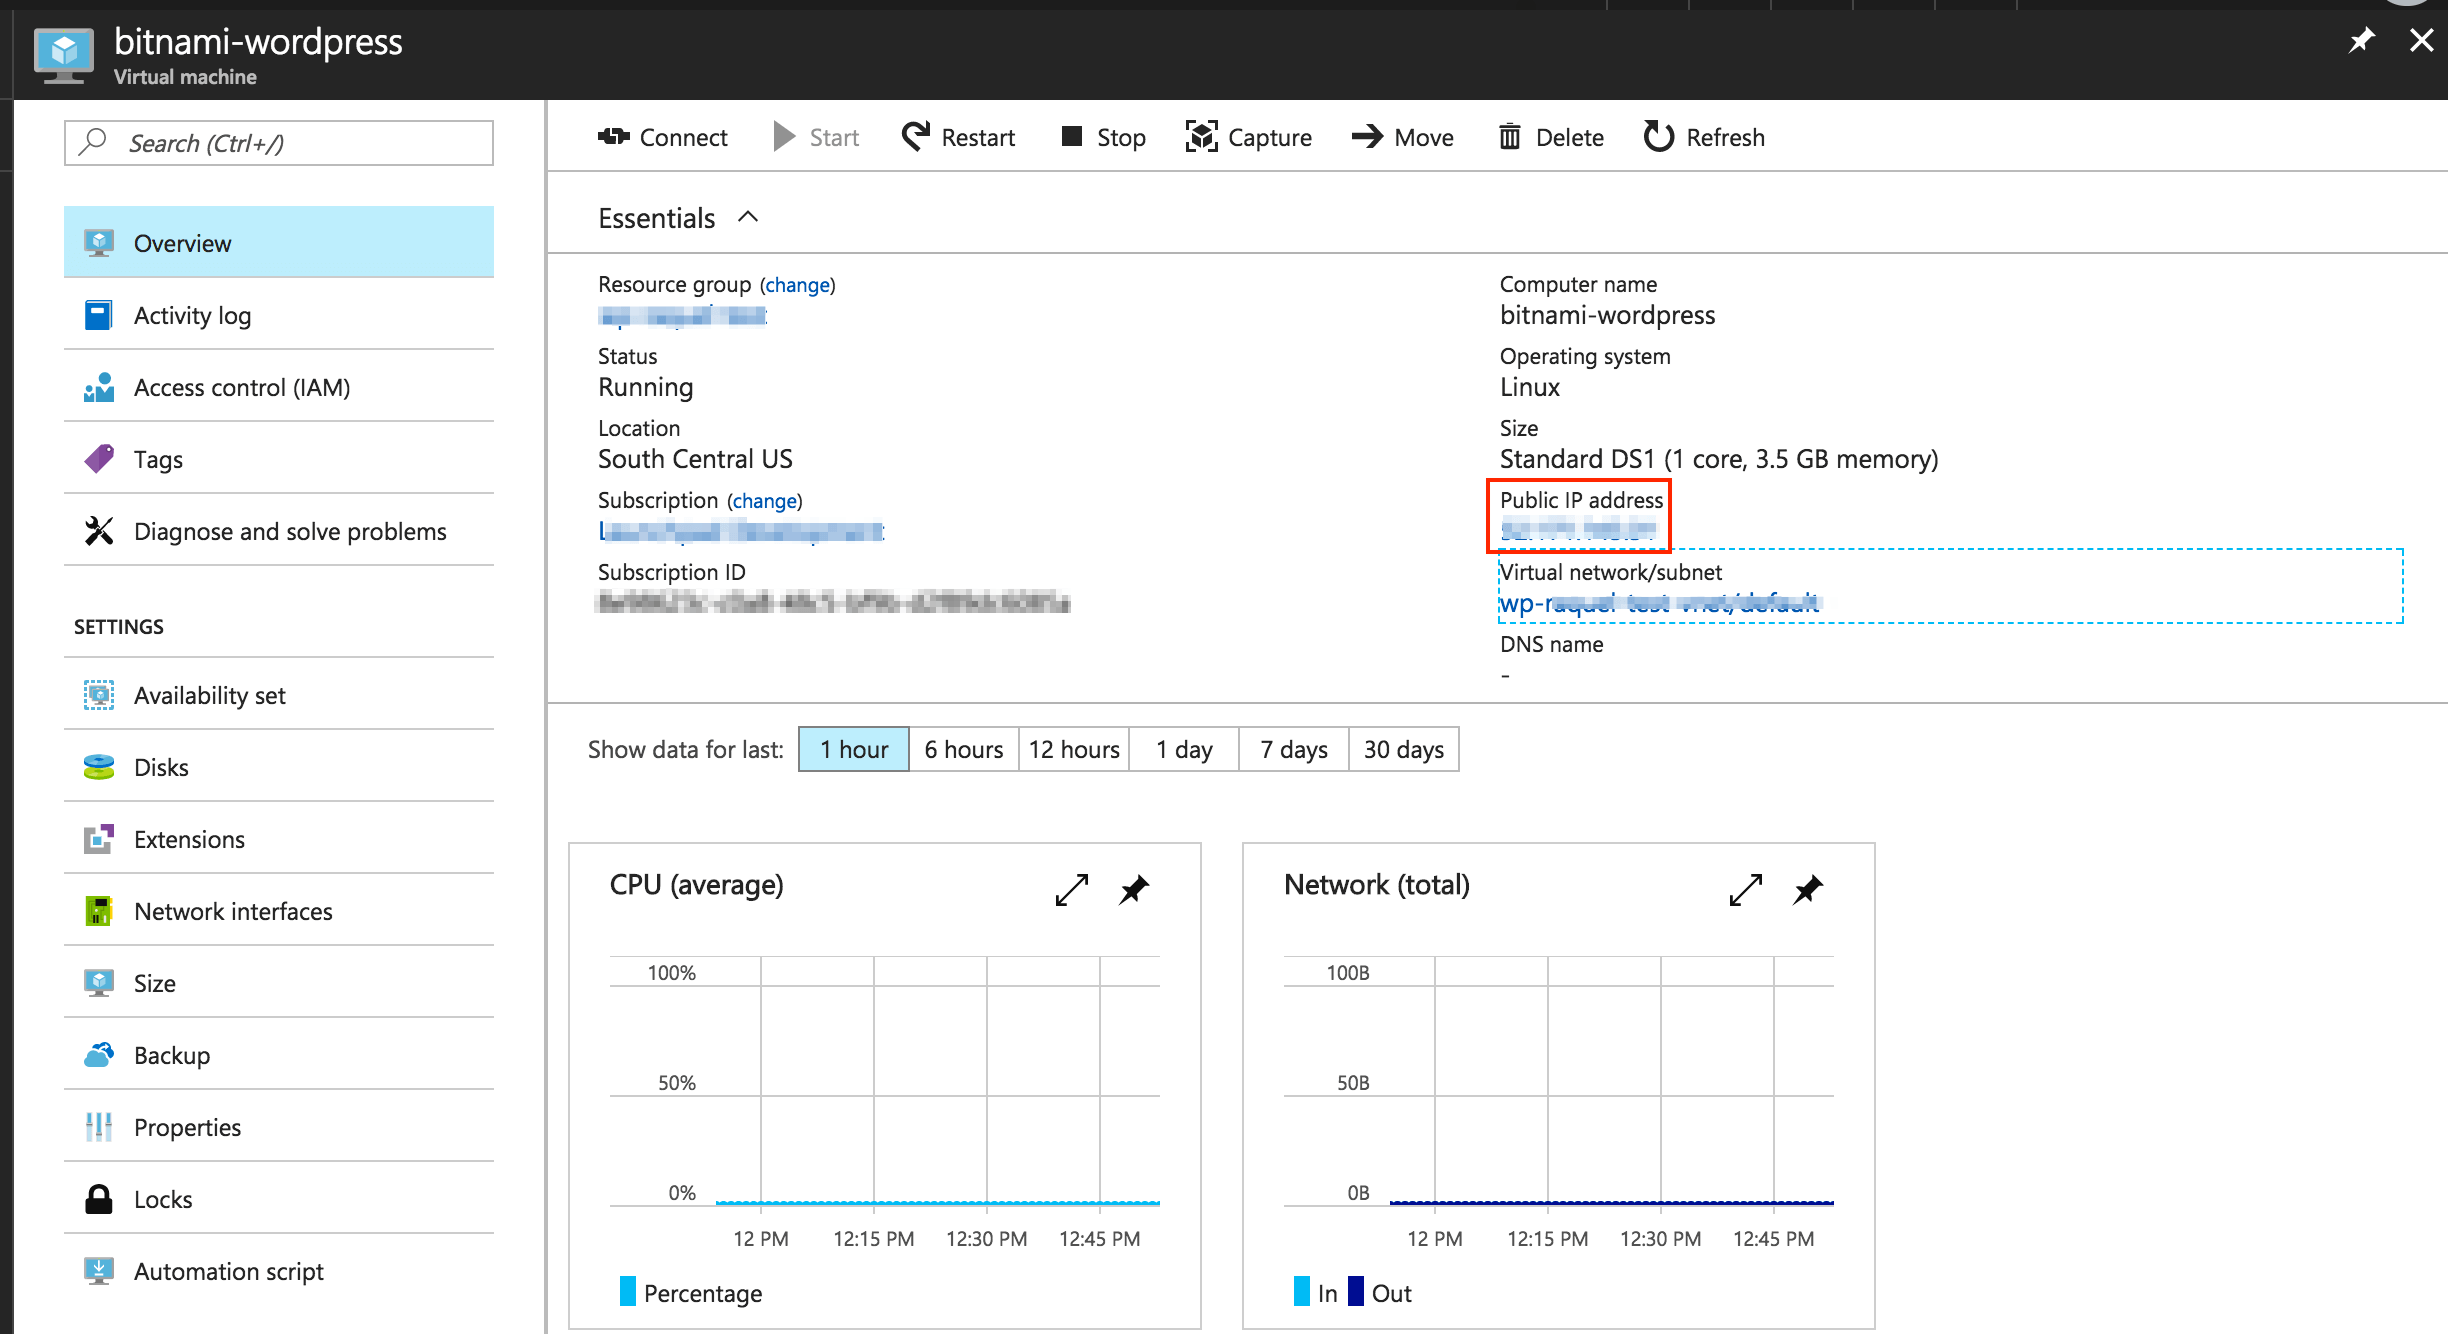
This page includes also controls to shut down, restart or delete the server.
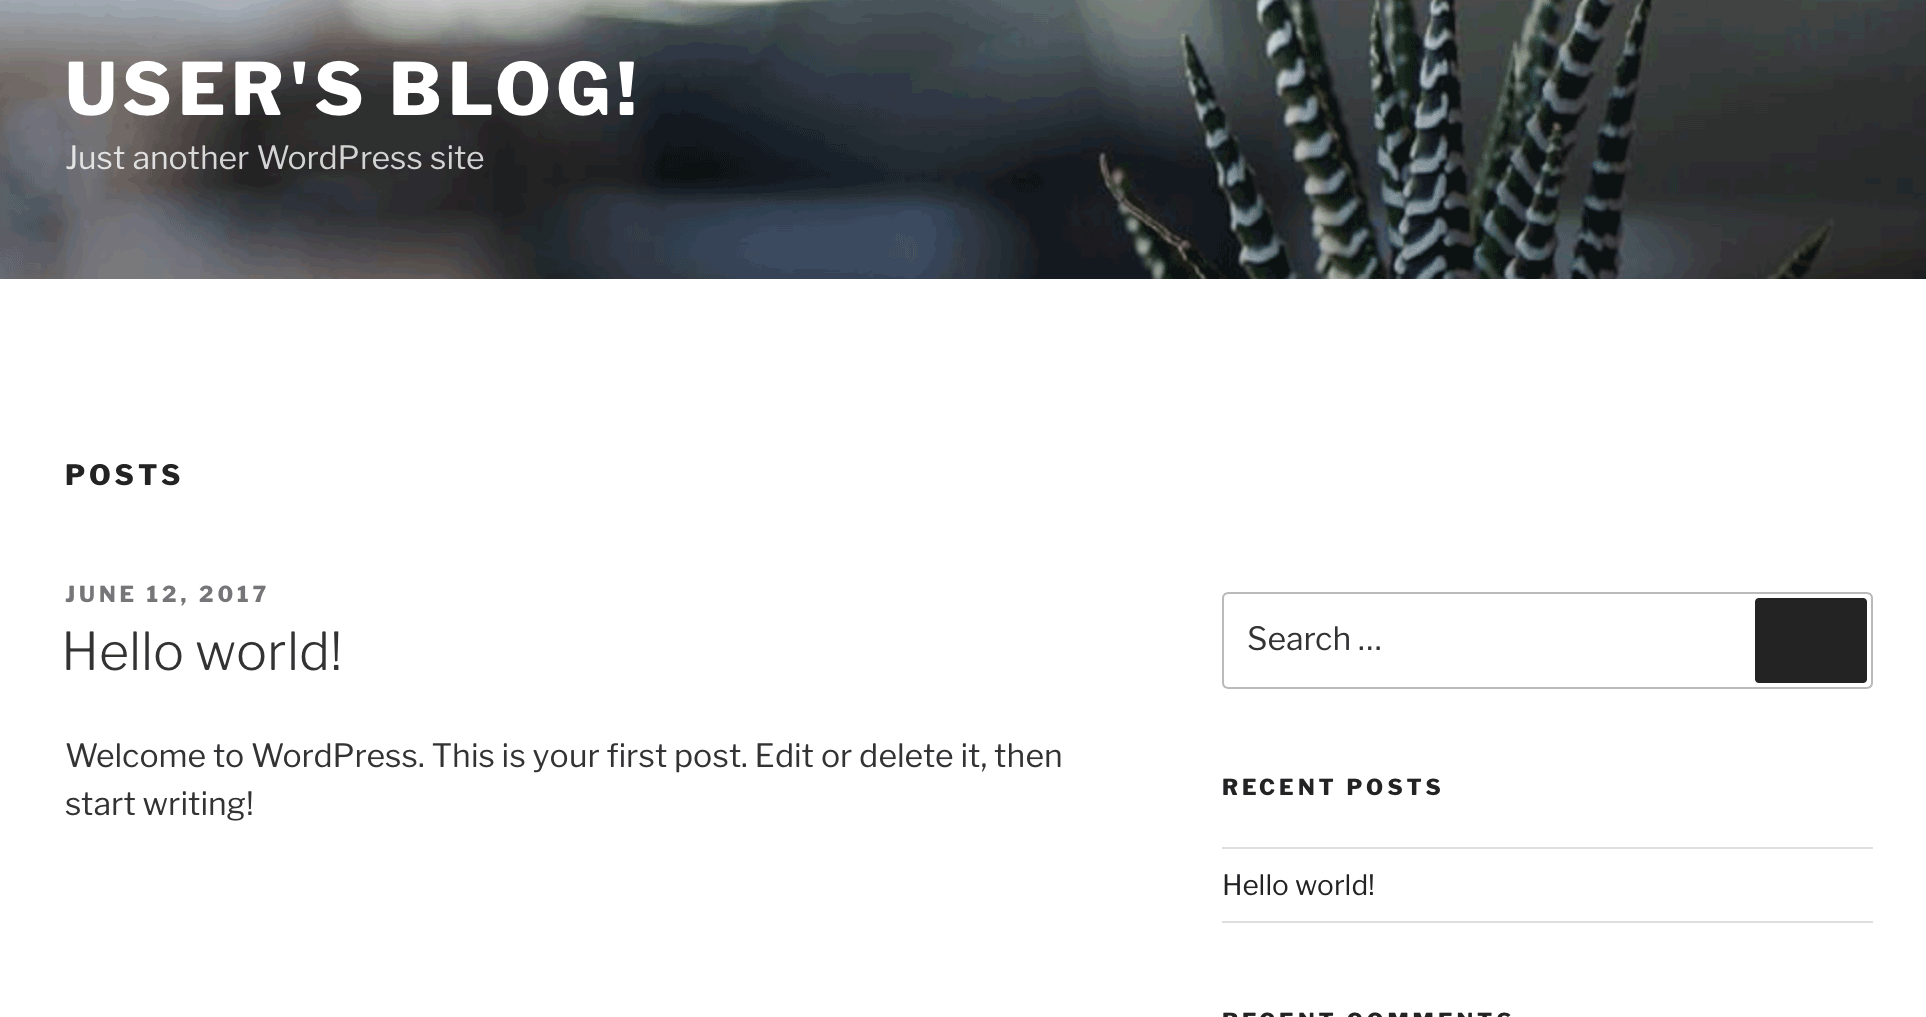
Now, you should be able to browse to the cloud server, by entering the cloud server IP address directly into your browser’s address bar. You should now see your WordPress blog’s home page with a sample post, as shown below.
Step 3: Obtain WordPress credentials
At the end of this step, you will have the credentials needed to access your WordPress blog.
You’re almost done but, before you can log in to WordPress, you need the administrator credentials. Follow these steps:
-
To get the administrator username, browse to the cloud server’s public IP address in your web browser to access your application, and click the Bitnami badge on the bottom right corner of the page. The resulting page shows the application username.
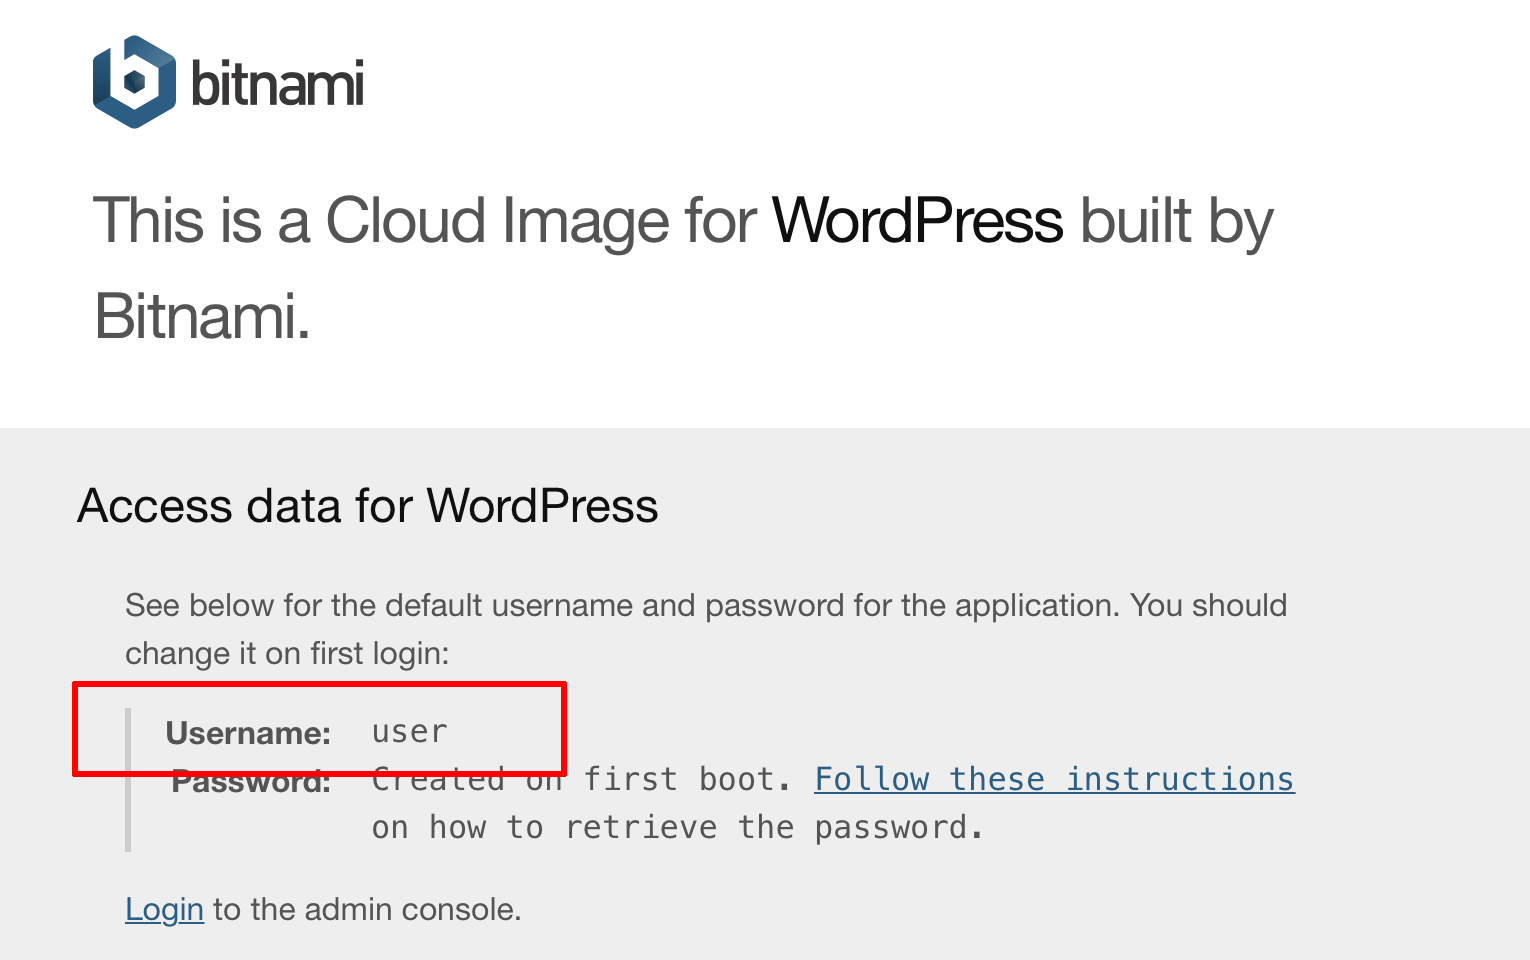
-
The application password is randomly generated during the first boot. This password can be viewed as follows:
-
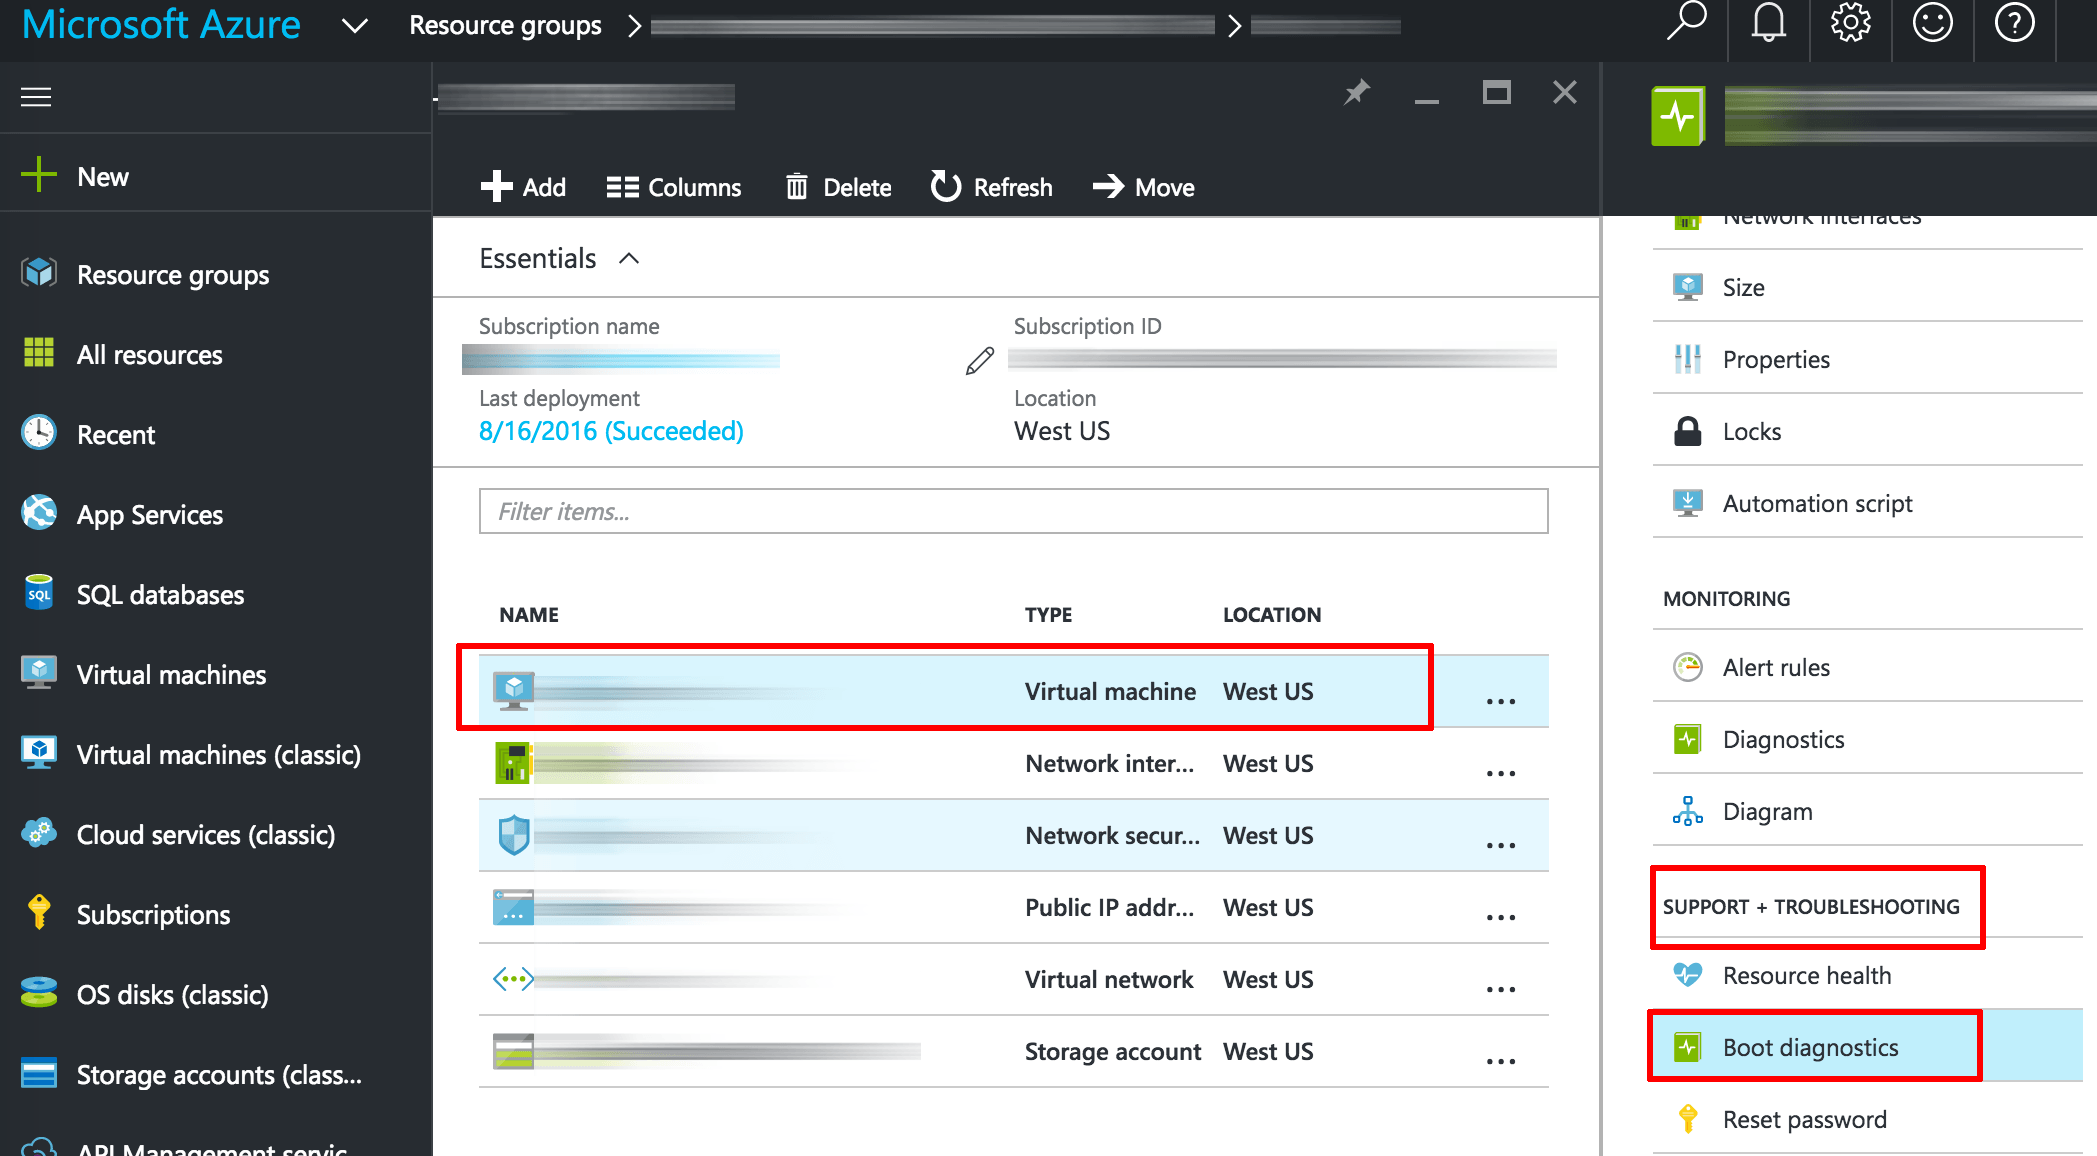
Log in to the Microsoft Azure management console.
-
Click the “Virtual machines” icon in the toolbar and select your server from the resulting list.
-
In the “Support + Troubleshooting” menu, select the “Boot diagnostics” option.
-
Review the system log until you find the application password.
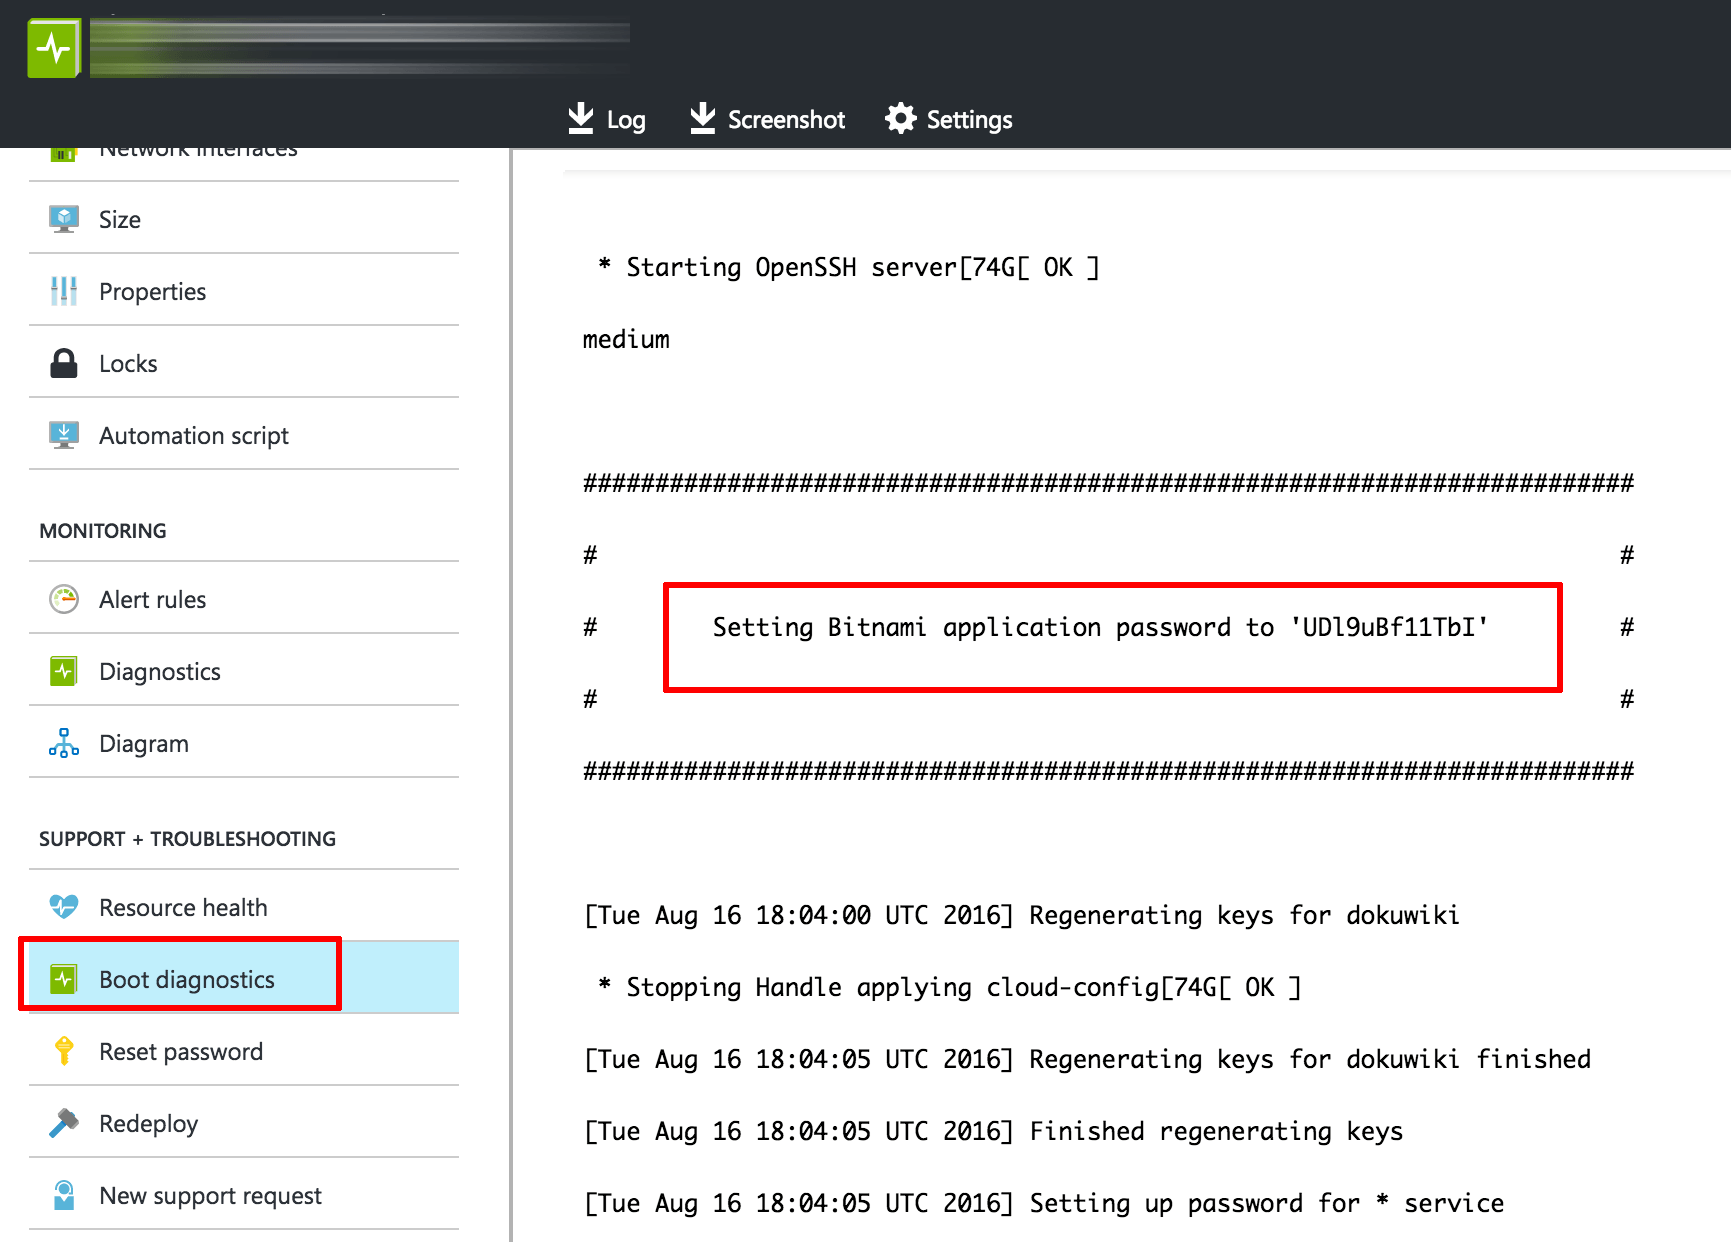
IMPORTANT: This password is only shown the first time you start the image. Please save your password in a safe place. We also recommend changing it in your application to a different value.
-
TIP: You can also obtain the username and password at any time by checking the bitnami_credentials file as it is described in the FAQ.
Step 4: Log in and start using WordPress
At the end of this step, you will have logged in to WordPress and created a new blog post.
To log in to the WordPress dashboard, follow these steps:
-
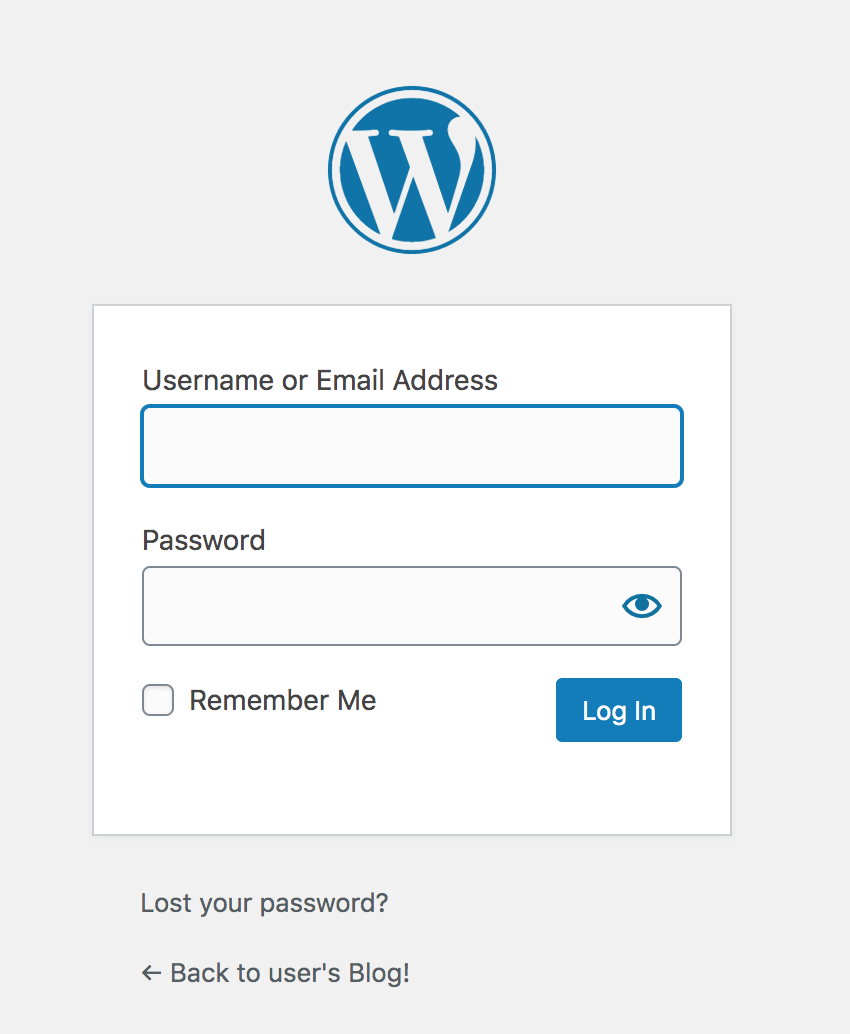
Browse to the WordPress dashboard, usually at the URL http://SERVER-IP/wp-admin.
-
Log in with the administrator credentials from the previous step.
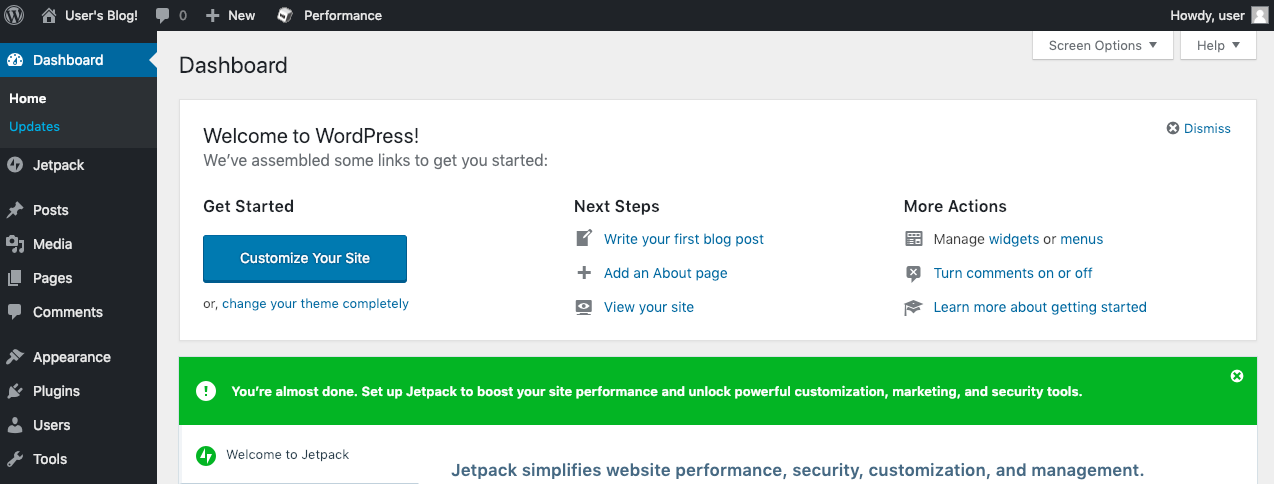
You should now arrive at the WordPress dashboard, which allows you to manage posts, pages and comments; customize your blog with themes and plugins; import and export content; manage navigation menus; add or delete new user accounts; and much more.
Create your first post
You can now add a new post using the following steps:
-
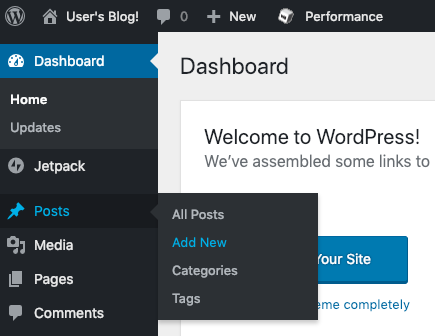
Select the “Posts -> Add New” menu option to create a new post.
-
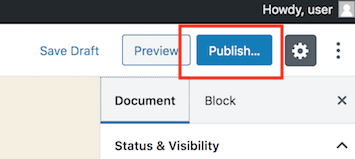
Enter a title and content for the post. You can use the formatting tools at the top of the content area to format your post and add hyperlinks or images.
-
Optionally, choose the format and category for your post.
-
Publish it immediately using the “Publish” button.
And now, when you visit your blog’s front page, you should see your new post.
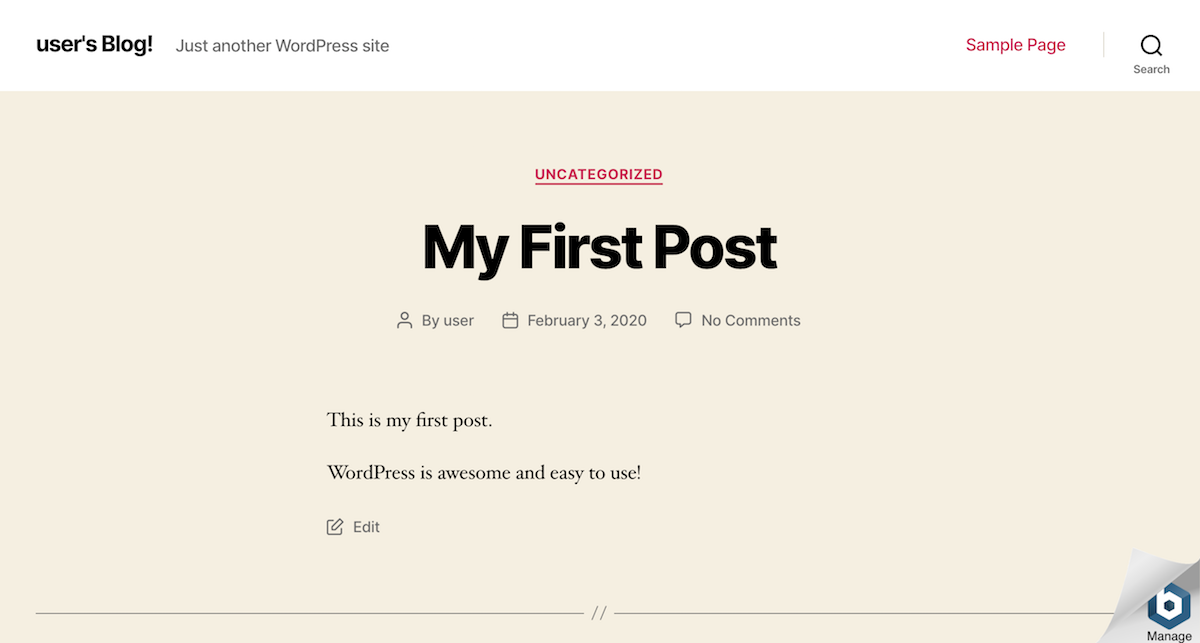
Congratulations! You now have a working, fully-functional WordPress blog in the cloud.
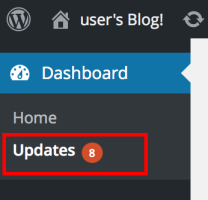
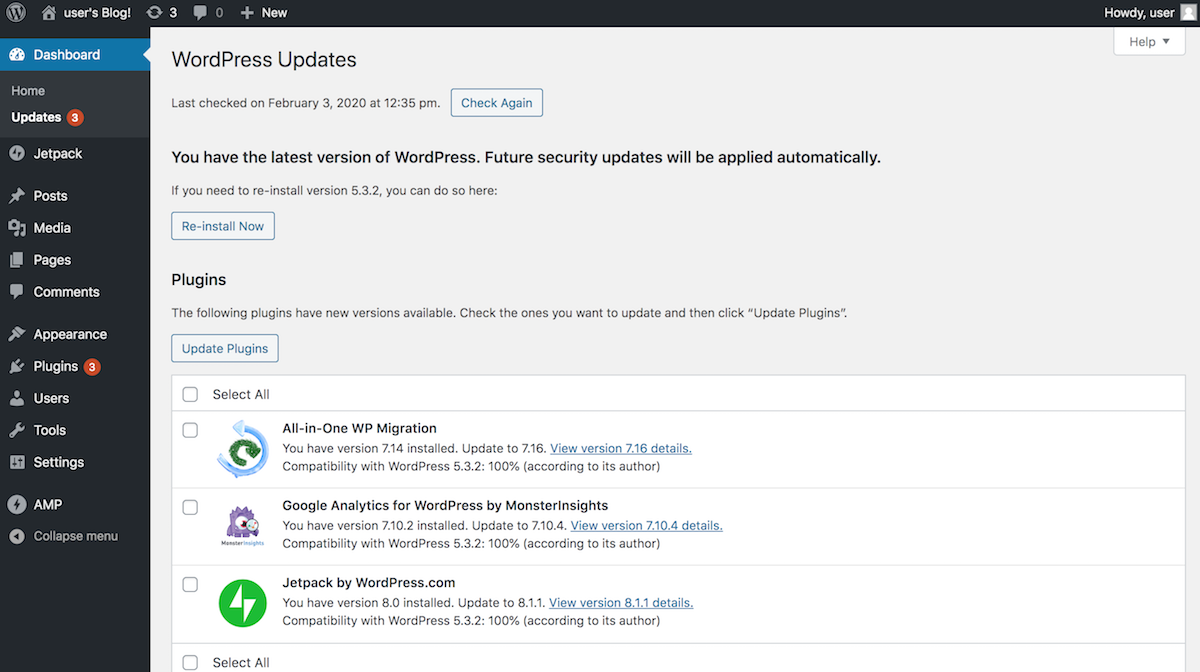
Keep your WordPress installation up-to-date
You can keep your WordPress installation up-to-date with the WordPress update feature. To access this:
-
Log in to WordPress using the administrator account.
-
Select the “Dashboard -> Updates” menu item.
-
Review the resulting page to see if WordPress needs an update. If an update is available, you can install it by clicking the “Update Now” button. You can also re-install WordPress if needed with the “Re-install Now” button.
Useful links
To learn more about the topics discussed in this tutorial, use the links below: