Activate or deactivate maintenance mode
Install the maintenance mode plugin
You can activate maintenance mode on your WordPress website using the WP Maintenance Mode plugin. This plugin allows you to add a customizable maintenance page that lets visitors know your website/blog is down for maintenance. Only registered users with sufficient privileges will be able to interact with the WordPress application while maintenance mode is activate.
TIP: It’s recommended to activate maintenance mode when performing administrative operations such as upgrades or backup/restore tasks.
To install and activate the maintenance mode plugin, follow the steps below:
-
Install the “WP Maintenance Mode” plugin. Refer to the plugin installation page for detailed instructions.
-
Log in to the WordPress administration panel.
-
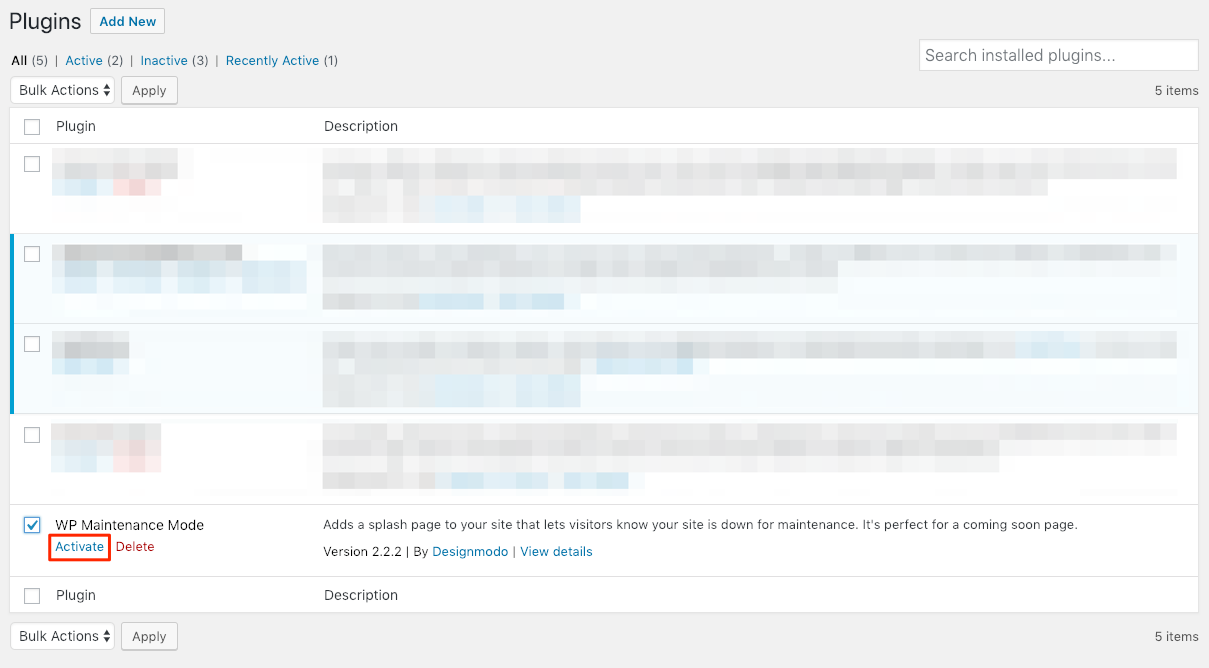
Browse to the “Plugins” menu page and select the “WP Maintenance Mode” plugin.
-
Activate the plugin by clicking the “Activate” link.
Activate maintenance mode
-
Log in to the WordPress administration panel.
-
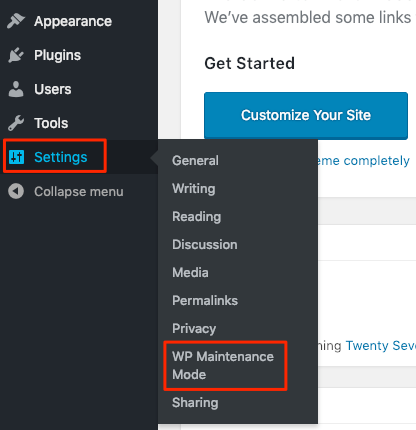
Browse to the “Settings -> WP Maintenance Mode” page.
-
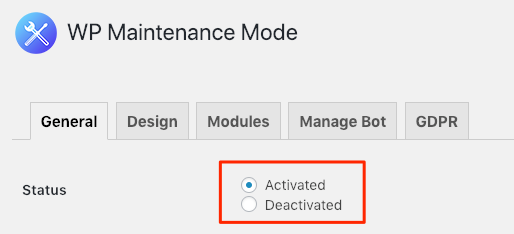
In the “General Settings” section, switch the “Status” to “Activated”.
-
Click the “Save Settings” button.
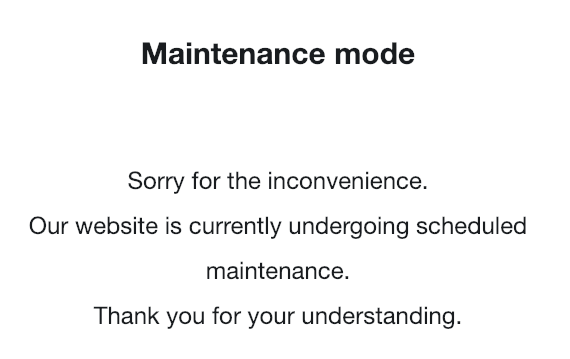
Maintenance mode will now be active on your WordPress site. Verify this by browsing to your WordPress website, where you should see a page similar to the following image:
Deactivate maintenance mode
Once you complete your maintenance operations, disable maintenance mode as follows:
- Log in to the WordPress administration panel.
- Browse to the “Settings -> WP Maintenance Mode” page.
- In the “General Settings” section, switch the “Status” to “Deactivated”.
- Click the “Save Settings” button.
Maintenance mode will now be deactivated on your WordPress site.