Modify the interface language
Follow the steps below:
- Log in to the PrestaShop administration panel using your browser.
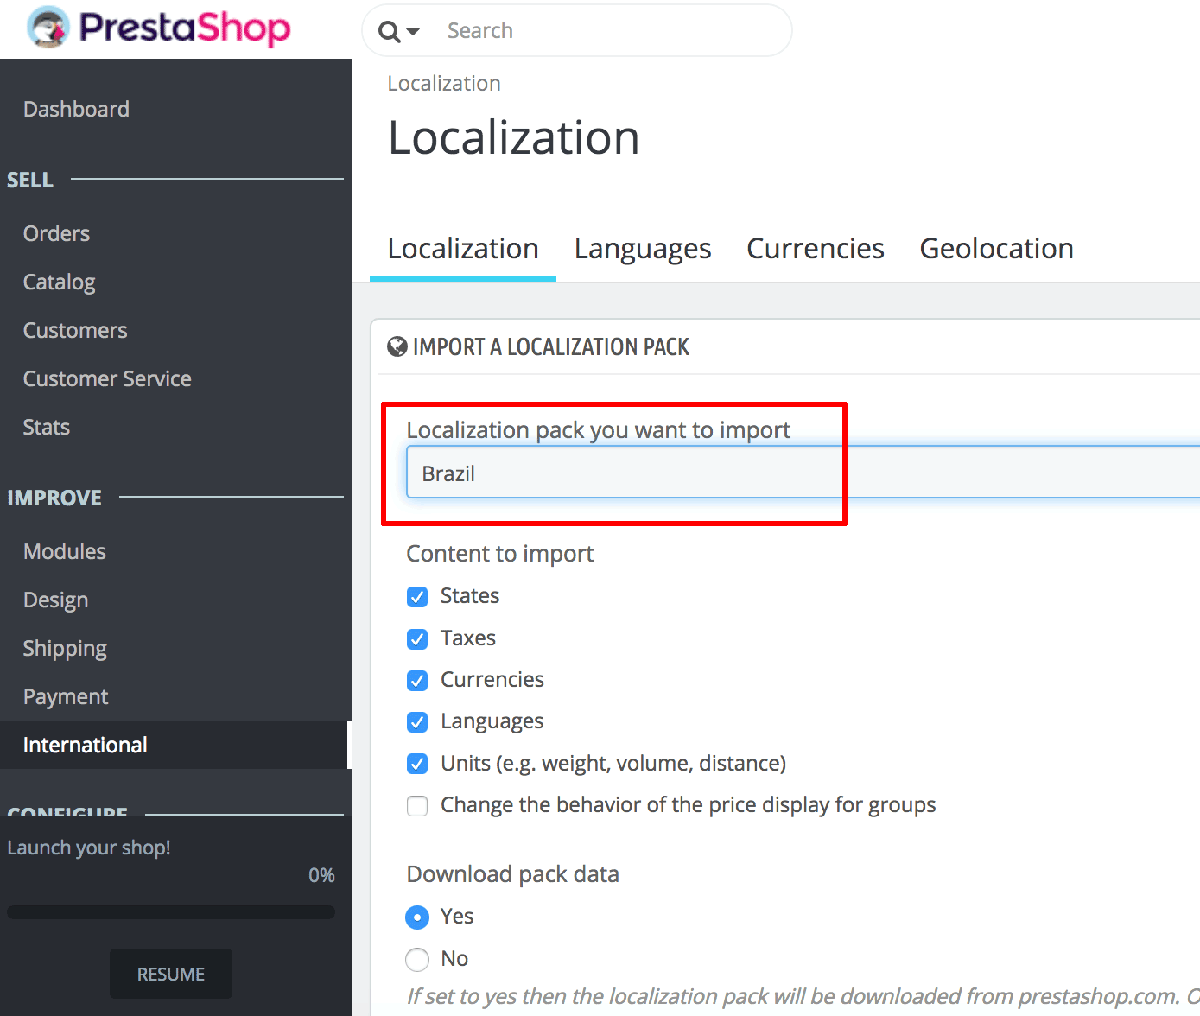
- Navigate to the “International -> Localization” page and select a localization pack to import for your language.
-
Click “Import” to import the localization pack.
-
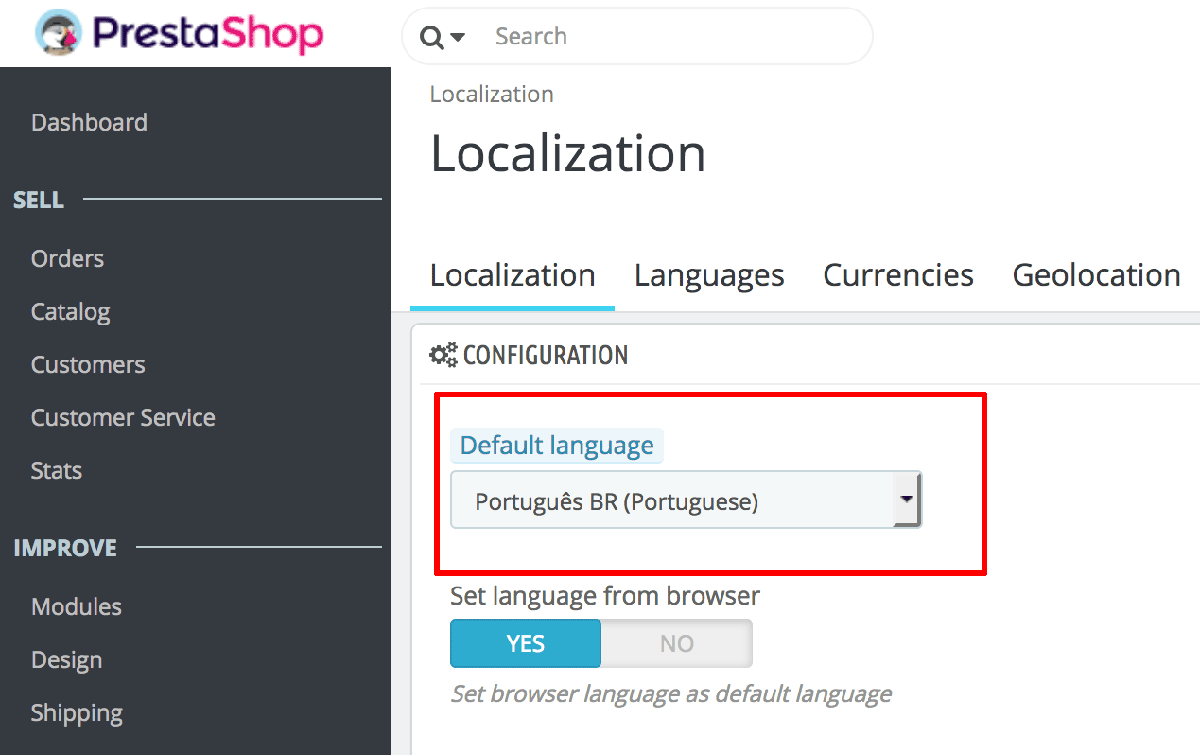
Once imported, navigate to the “International -> Localization” page and select the new language as the default language for your shop.
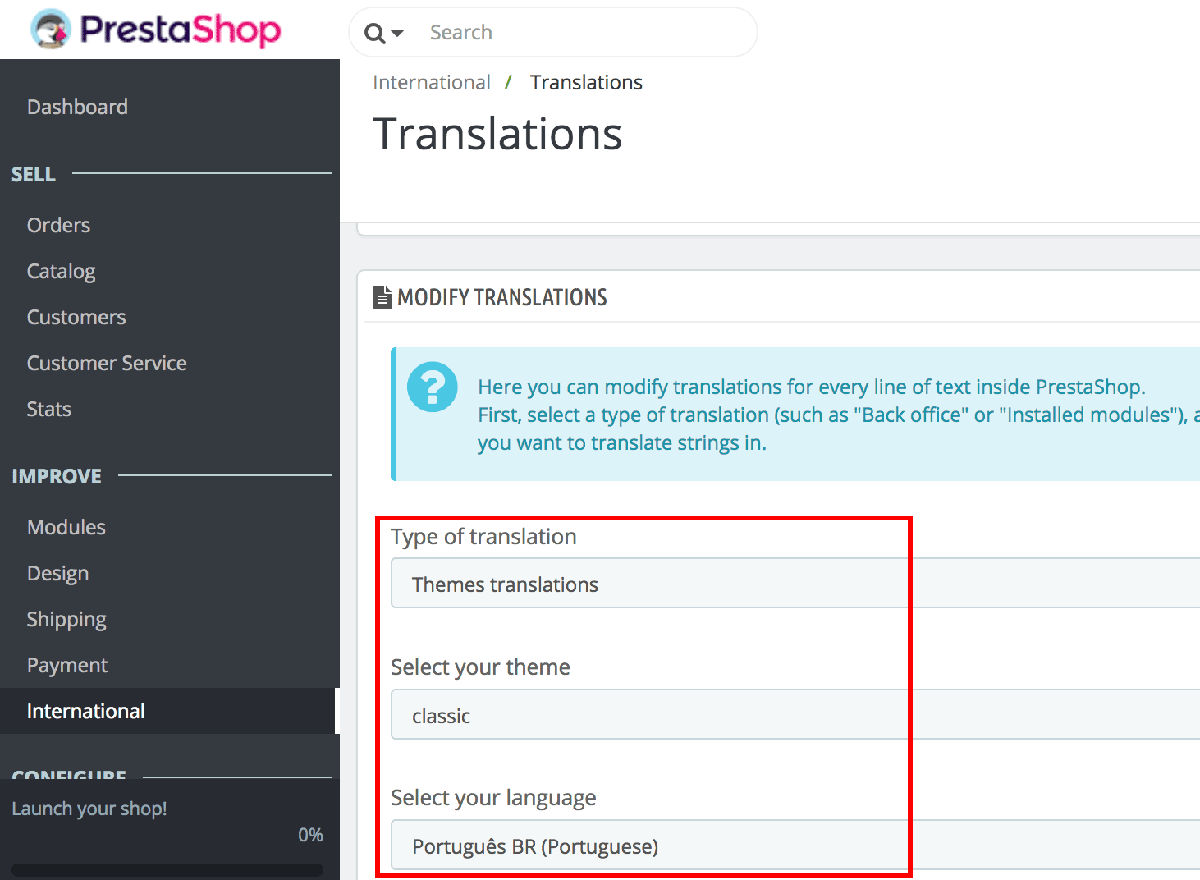
Alternatively, to add custom translations, navigate to the “International -> Translations” page, select the translation type as “Themes translations”, select the newly-installed language and click “Modify” to begin adding new translation strings or modifying existing ones.