Configure a static IP address
Google Cloud Platform instances are launched with a dynamic IP address by default, which means that the IP address changes every time the server is stopped and restarted. In many cases, this is not desired and so, users also have the option to assign the server a static IP address.
To configure a static IP address:
-
Log in to the Google Cloud Console using the Google Account associated with your project.
-
Select your project from the list of available projects.
-
Click the “Hamburger” button on the left side of the top navigation bar:
-
Select the “Compute -> Compute Engine -> VM Instances” menu item.
-
The resulting page displays a list of VM instances. Select the instance which you wish to configure and click the “Edit” button in the top menu bar.
-
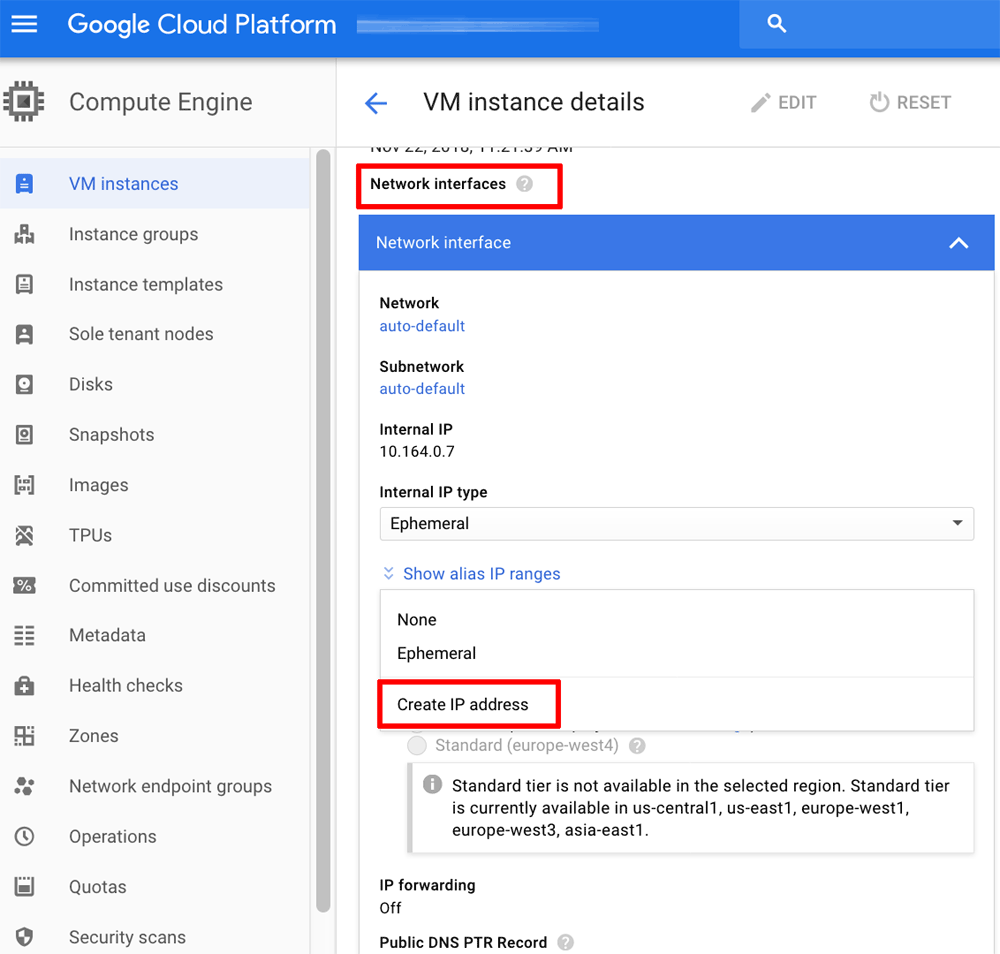
In the “Network interfaces” section, find the “External IP” field and set the value to “Create IP address”.
-
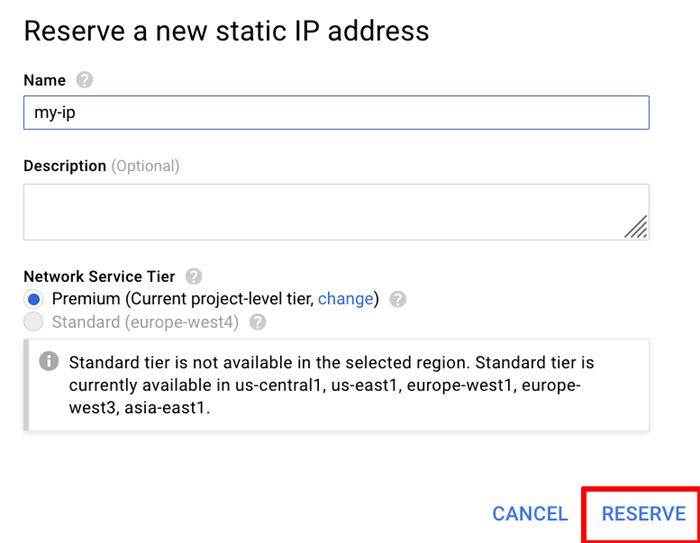
In the “Reserve a new static IP address” dialog, enter a human-readable name for the static IP address and click the “Reserve” button to create the static IP address.
-
Click “Done” in the “Network interfaces” section and then “Save” on the instance edit page to save your changes.


