Open or close server ports
Open server ports for remote access
IMPORTANT: Making this application’s network ports public is a significant security risk. You are strongly advised to only allow access to those ports from trusted networks. If, for development purposes, you need to access from outside of a trusted network, please do not allow access to those ports via a public IP address. Instead, use a secure channel such as a VPN or an SSH tunnel. Follow these instructions to remotely connect safely and reliably.
By default, Google cloud servers have some or all of their ports closed to secure them against external attacks. In some cases, ports needed for specific applications to operate properly are also left open by default.
If you need to access your server remotely, you must first open the necessary port(s) using the Google Console.
Follow the steps below:
-
Log in to the Google Cloud Console using the Google Account associated with your project.
-
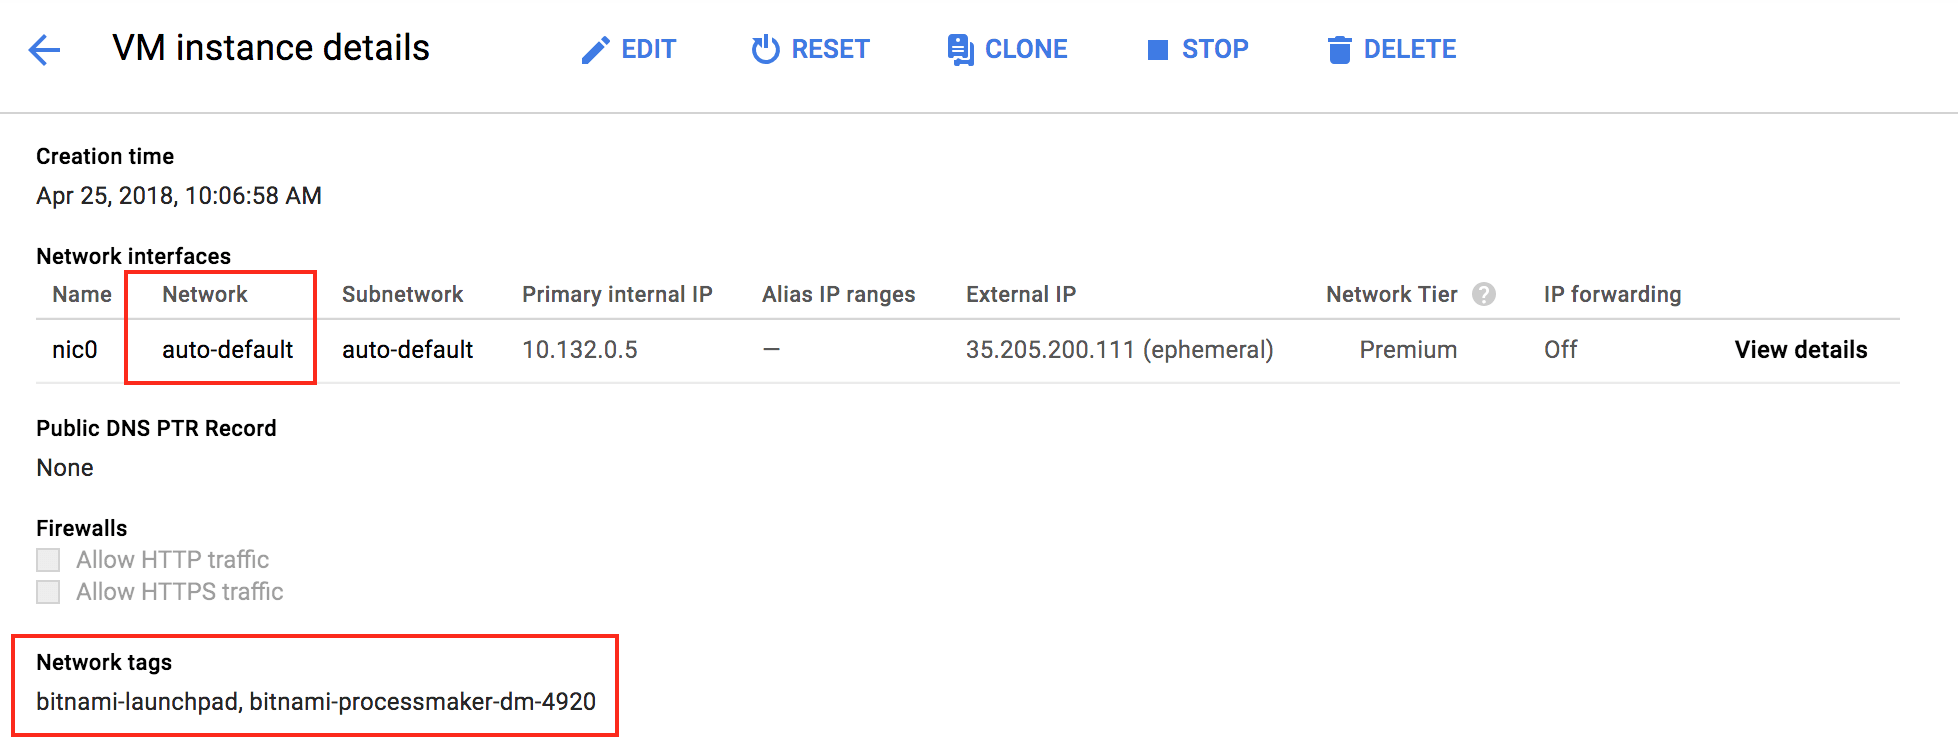
Navigate to “Compute Engine -> VM instances” to select the instance you want to allow remote connections. Click on it to access the “VM instance details” screen.
-
In the “Network interfaces” section, click the “View Details” button. It opens the “Network interface details” screen.
-
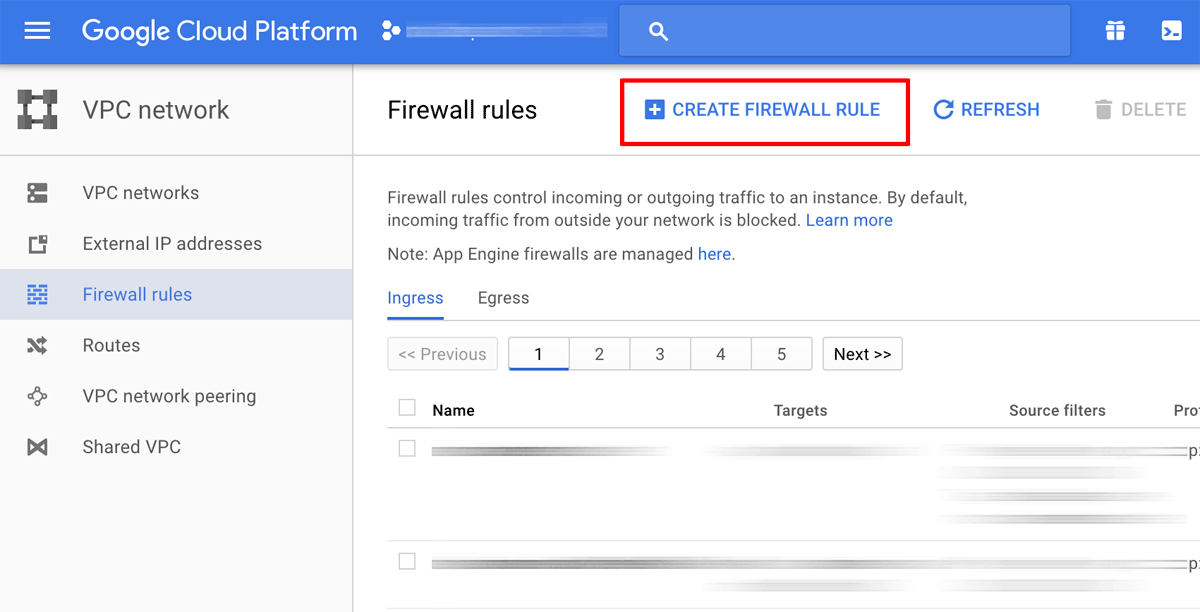
In the left-side menu, click “VPC network -> Firewall rules”.
-
On the resulting page, create a new firewall rule for your network by clicking the “Create firewall rule” button.
-
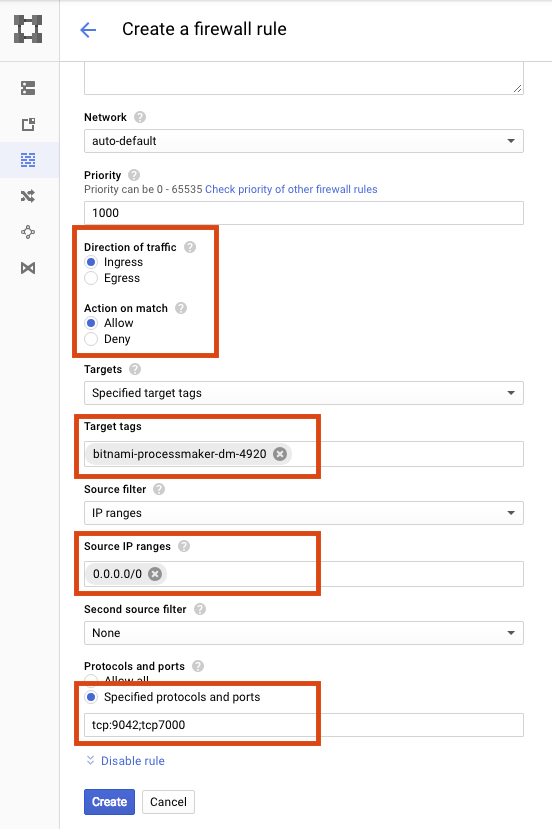
Enter details for the new firewall rule using the guidelines below:
-
Name: Use a human-readable name that makes it easy to identify the rule.
-
Description: Enter a description for the firewall rule (optional).
-
Network: Select the network used by your server. It can be obtained either from the “VM instance details” or from the “Network interface details” screen.
-
Direction of traffic: Select the “Ingress” option.
-
Action on match: Select the “Allow” option.
-
Targets: Select the “Specified target tags” option.
-
Target tags: Specify the target of this firewall rule. In this case, it matches with the instance name tag.
-
Source filter: Select the “IP ranges” option.
-
Source IP ranges: Use 0.0.0.0/0 to allow access from anywhere, or specify an IP address range.
-
Specified protocols or ports: Enter the port numbers prefixed by either tcp: or udp:. Use commas to separate multiple port numbers and semi-colons between protocol blocks. For example: tcp:80, 443; udp:8001.
The image below sets up a firewall rule for Apache Cassandra on TCP ports 9042 and 7000 as an example.
-
-
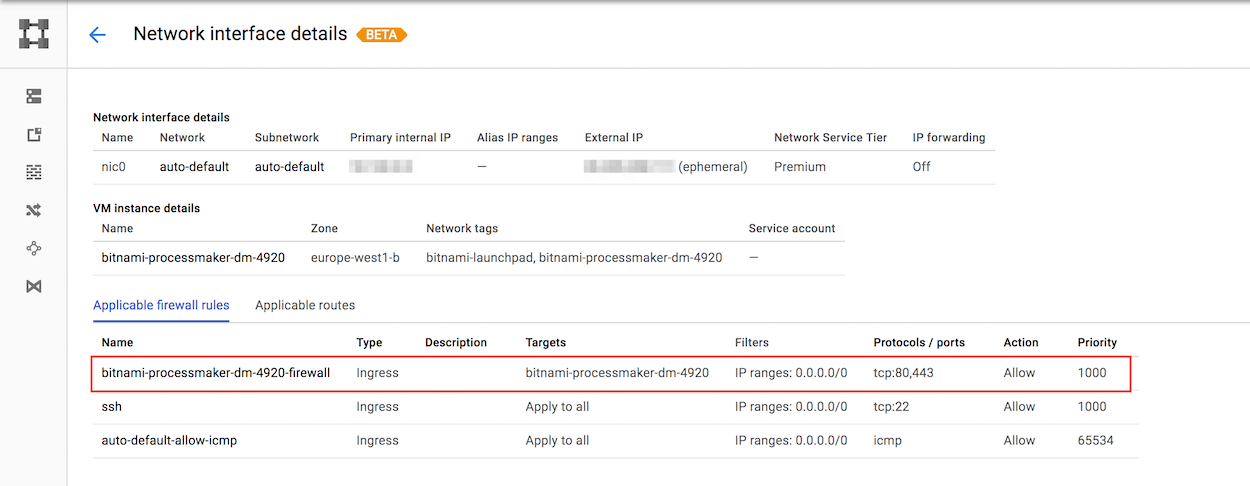
Click “Create” to save the firewall rule. The new firewall rule will come into effect immediately. This new firewall rule should appear in the “Applicable firewall rules” section of the instance “Network interface details” screen as shown below:
In case that the firewall rule doesn’t appear in the list, you can manually add the firewall rule to your instance. To do so:
Close server ports and deny remote access
To close a server port and deny remote access on that port, follow these steps:
-
Log in to the Google Cloud Console using the Google Account associated with your project.
-
Select the “Networking -> VPC network -> Firewall rules” menu.
-
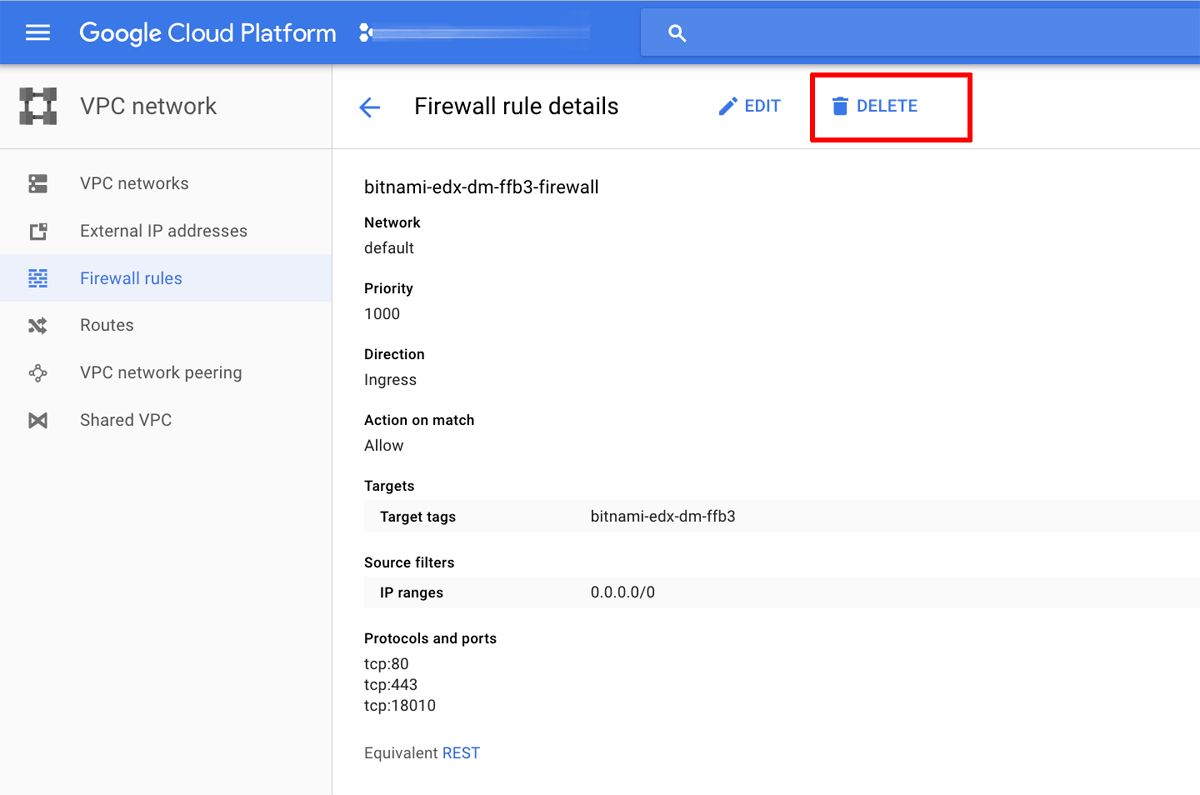
Find the firewall rule(s) for the port(s) you wish to close. Select each rule and click the “Delete” button at the top of the page. The change will come into effect immediately.

