Add nodes to the cluster
IMPORTANT: These steps assume that you have already installed the Google Cloud SDK and you are signed in to the Google Cloud Platform through the gcloud command-line client. If this is not the case, please refer to the Google Cloud SDK documentation for instructions on how to install and use the command-line client.
To add nodes to the database cluster, follow these steps:
-
Log in to the Google Cloud Console.
-
Browse to the Deployment Manager and select the deployment to which you wish to add nodes.
-
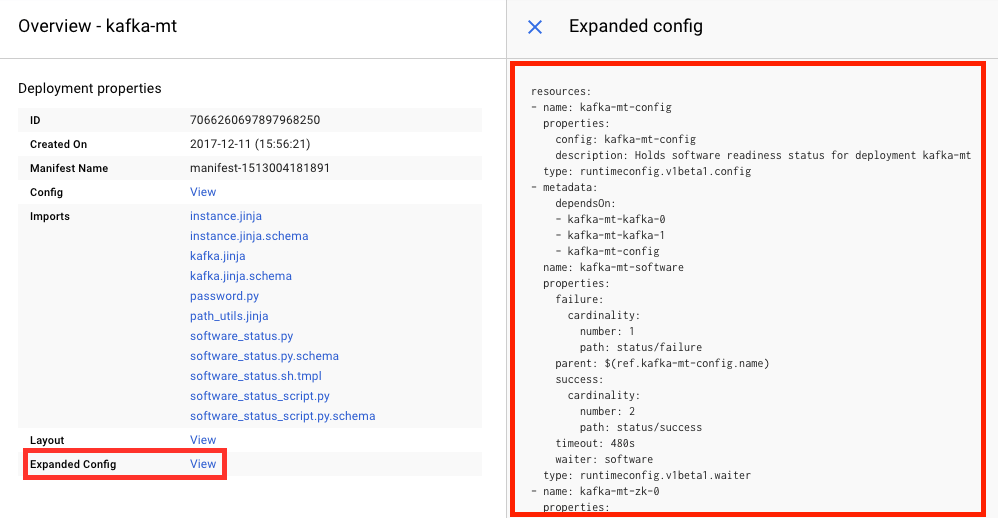
In the deployment overview, review the deployment properties and click to view the “Expanded Config” deployment configuration file.
-
Copy or download the contents of the “Expanded Config” file to the server with the Google Cloud SDK as expanded-config.yaml.
-
Edit the file and add configuration for one or more additional nodes, by copying the configuration and metadata for an existing node and its corresponding data disk. Then updating the copied configuration to use a unique name for the new node(s) and data disk(s).
To add a new Kafka node to a Kafka cluster, here is an abridged example of the configuration and metadata that you would update to add a new node and data disk. To create a unique name for the new node, you would typically replace the XX placeholder in the node name with a number.
NOTE: The code block below is an illustrative example and may differ in your specific deployment. You should always copy the code block from your deployment’s current configuration file.
[...] - metadata: dependsOn: - kafka-mt-kafka-0 - kafka-mt-kafka-1 - kafka-mt-kafka-XX - kafka-mt-config name: kafka-multivm-software [...] - name: kafka-mt-kafka-XX properties: bootDiskType: pd-standard canIpForward: false disks: - autoDelete: true boot: true deviceName: kafka-mt-kafka-XX-boot initializeParams: diskType: https://www.googleapis.com/compute/v1/projects/bitnamigcetest2/zones/us-central1-f/diskTypes/pd-standard sourceImage: projects/bitnamigcetest2/global/images/kafka-mt type: PERSISTENT - autoDelete: true boot: false deviceName: kafka-mt-kafka-XX-data source: $(ref.kafka-mt-kafka-XX-data.selfLink) type: PERSISTENT [...] - key: PROVISIONER_DATA_DISK value: kafka-mt-kafka-XX-data [...] tags: items: - kafka-mt-kafka-XX zone: us-central1-f type: compute.v1.instance metadata: dependsOn: - kafka-mt-kafka-XX-data - name: kafka-mt-kafka-XX-data properties: sizeGb: 30 type: https://www.googleapis.com/compute/v1/projects/bitnamigcetest2/zones/us-central1-f/diskTypes/pd-ssd zone: us-central1-f type: compute.v1.disk -
Preview the updated deployment with the command below. Replace the DEPLOYMENT-ID placeholder in the command below with the correct name of your deployment.
$ gcloud deployment-manager deployments update DEPLOYMENT-ID --config expanded-config.yaml --preview -
Once you have verified that the deployment preview is correct, confirm the deployment and initialize the new node(s):
$ gcloud deployment-manager deployments update DEPLOYMENT-ID