Configure Load Balancing with SSL for Bitnami Multi-Tier Solutions on Google Cloud Platform
Introduction
Load balancing is a technique commonly used by high-traffic Web sites and Web applications to share traffic across multiple hosts, thereby ensuring quick response times and rapid adaptation to traffic peaks and troughs. Google Cloud Platform includes a load balancing service with Secure Sockets Layer (SSL) support that makes it easy to add secure load balancing for Bitnami Multi-Tier Solutions.
This guide walks you through the process of configuring and testing a load balancer with an SSL certificate for a Bitnami Multi-Tier Solution running on Google Cloud Platform.
Assumptions and prerequisites
This guide assumes that:
- You have a Bitnami Multi-Tier Solution running on Google Cloud Platform, deployed using the Google Cloud Platform Marketplace. The example application used in this guide is the Bitnami WordPress Multi-Tier Solution.
- You own a domain name and have the ability to modify the domain name record.
Step 1: Identify your Bitnami virtual machines in the Google Cloud Platform console
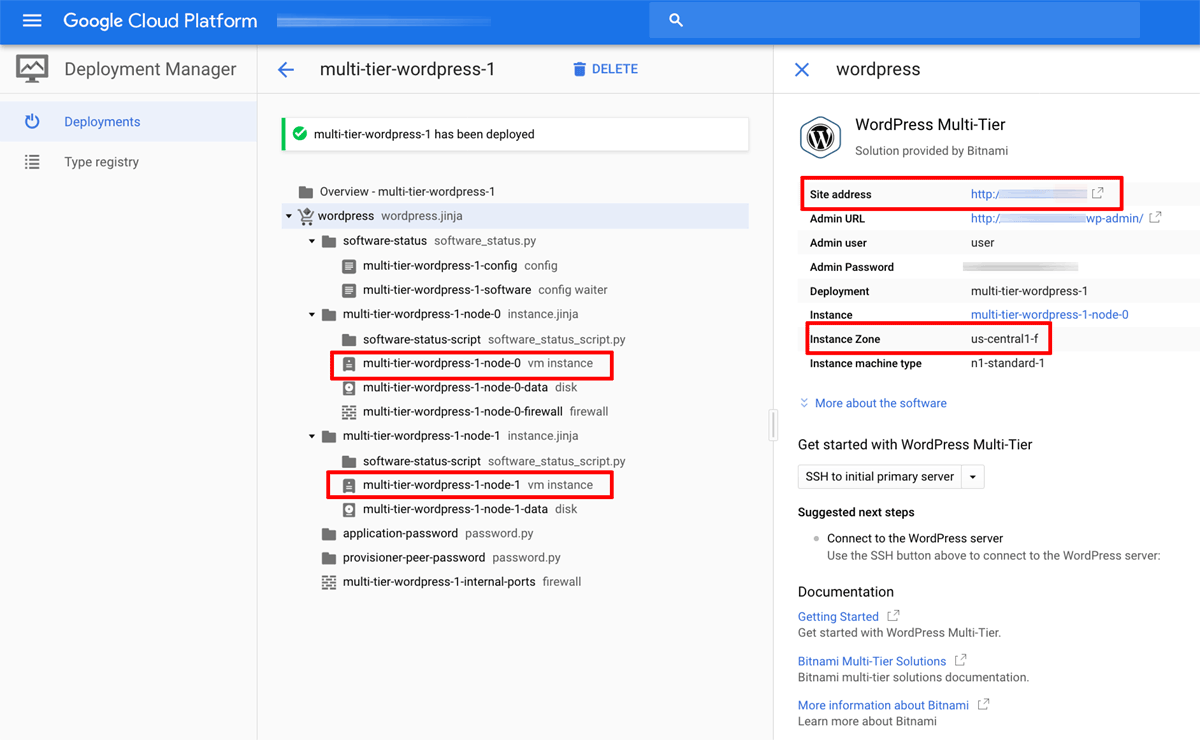
The first step is to identify your Bitnami virtual machines and collect various important bits of information that you will need in subsequent steps. To do this:
-
Log in to the Google Cloud Console.
-
From the “Tools -> Deployment Manager” page, search for and select the deployment containing your Bitnami application.
-
Note the name of the primary virtual machine (typically named with suffix 0) as well as its public IP address, network and availability zone.
-
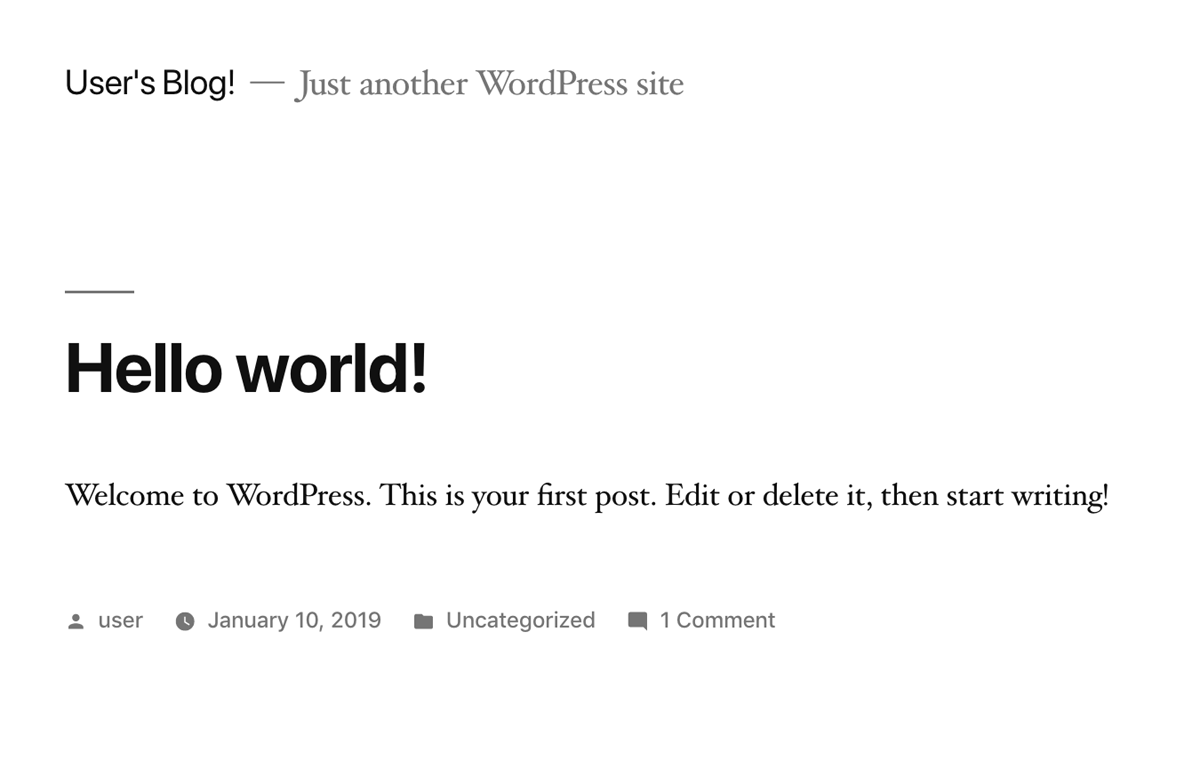
Browse to the virtual machine’s public IP address and confirm that you get a positive response, such as the welcome page of the Bitnami application. This response will be necessary to pass health checks performed by the load balancer.
Step 2: Create an instance group
The Google Cloud Platform load balancer operates on instance groups rather than individual instances. Create an instance group for your Bitnami Multi-Tier Solution as follows:
- Log in to the Google Cloud Console (if you’re not already logged in).
- Navigate to the “Compute -> Compute Engine -> Instance groups” page.
- Click the “Create instance group” link.
- On the resulting page, create a new instance group by providing the details below:
-
Provide a name for the new instance group.
-
Set the “Location” field to “Single zone”.
-
Select the region and zone of your Bitnami Multi-Tier Solution virtual machines.
-
Set the “Group type” field to “Unmanaged”.
-
Select the network that your Bitnami Multi-Tier Solution virtual machines are attached to.
-
In the “VM instances” field, select the primary virtual machine (typically named with suffix 0) of your Bitnami Multi-Tier Solution.
-
Click “Create to save the new instance group.

-
The new instance group should now appear in the list of instance groups.
Step 3: Create a load balancer
Next, create a load balancer, as follows:
-
Log in to the Google Cloud Console (if you’re not already logged in).
-
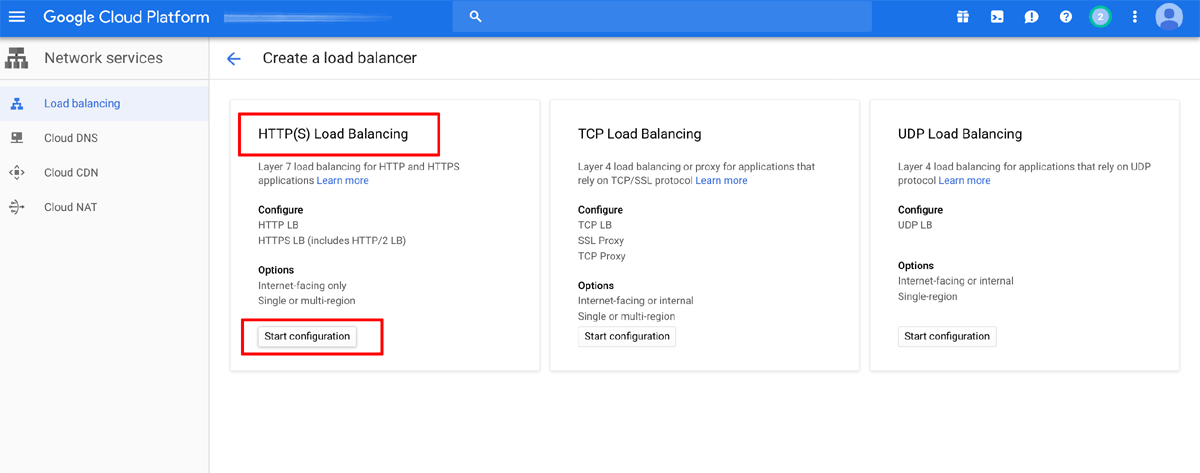
Navigate to the “Networking -> Network services -> Load balancing” page.
-
Click the “Create load balancer” link.
-
Select the “HTTP(S) Load Balancing” option and click the “Start configuration” button.
-
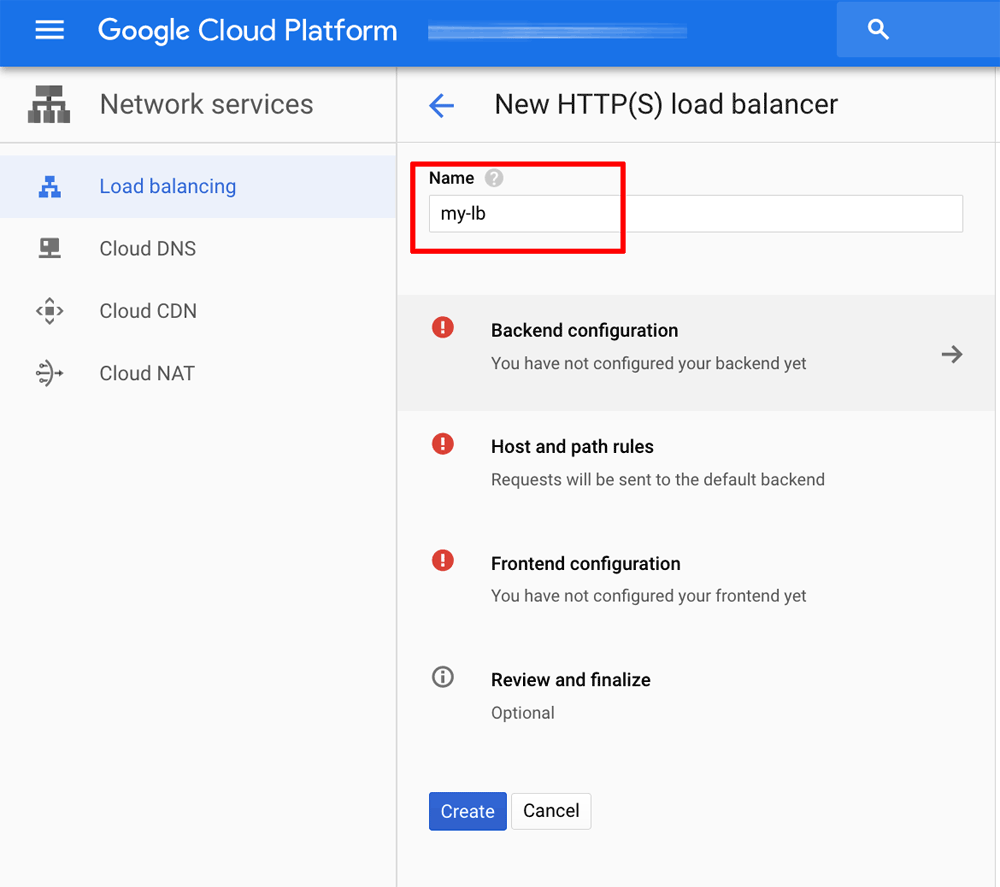
On the resulting page, enter a name for the new load balancer.
Step 4: Create a backend service for the load balancer
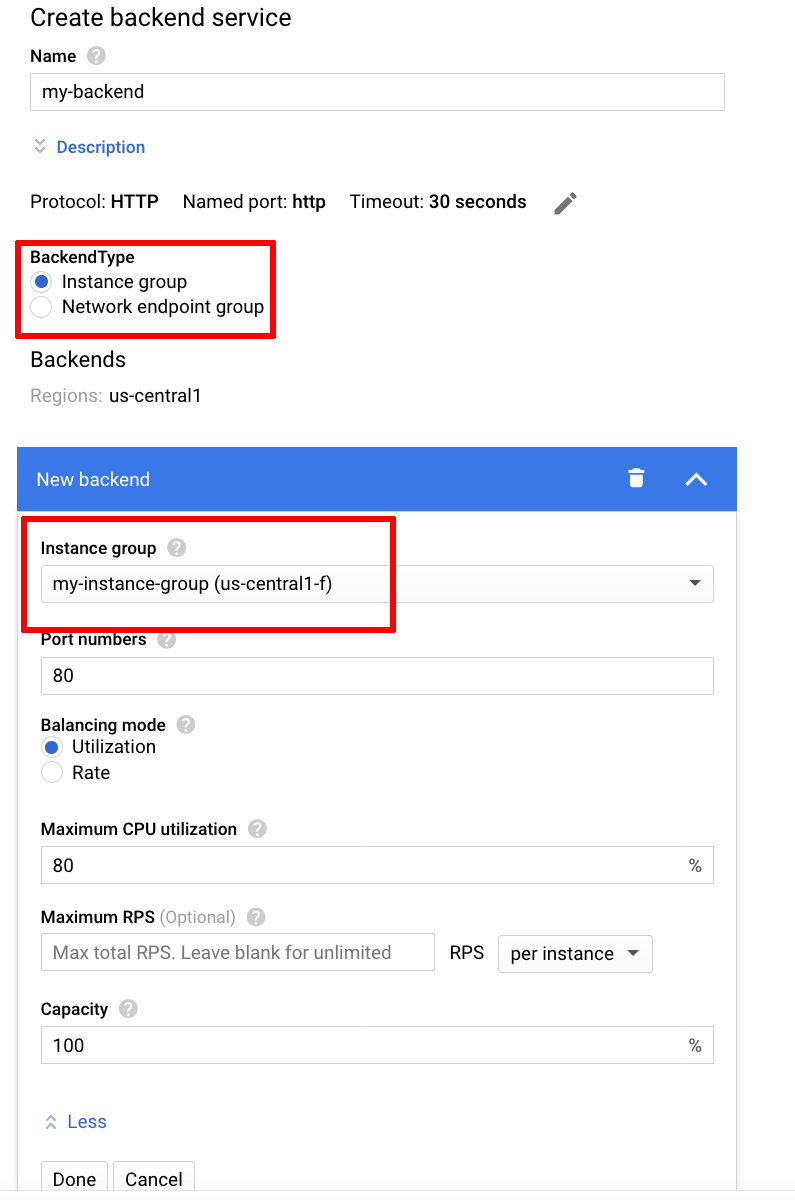
The first step in configuring the load balancer is to create a backend service. Click the “Backend configuration” link on the load balancer page and proceed as follows:
-
Select the option to “Create a backend service”.
-
On the resulting page, enter a name for the new backend service.
-
Ensure the protocol is set to “HTTP” with named port “http”.
-
Set the value of the “Backend type” field to “Instance group”.
-
In the “Instance group” field, select the instance group created in Step 2.
-
Click “Done” to save the new backend service.
-
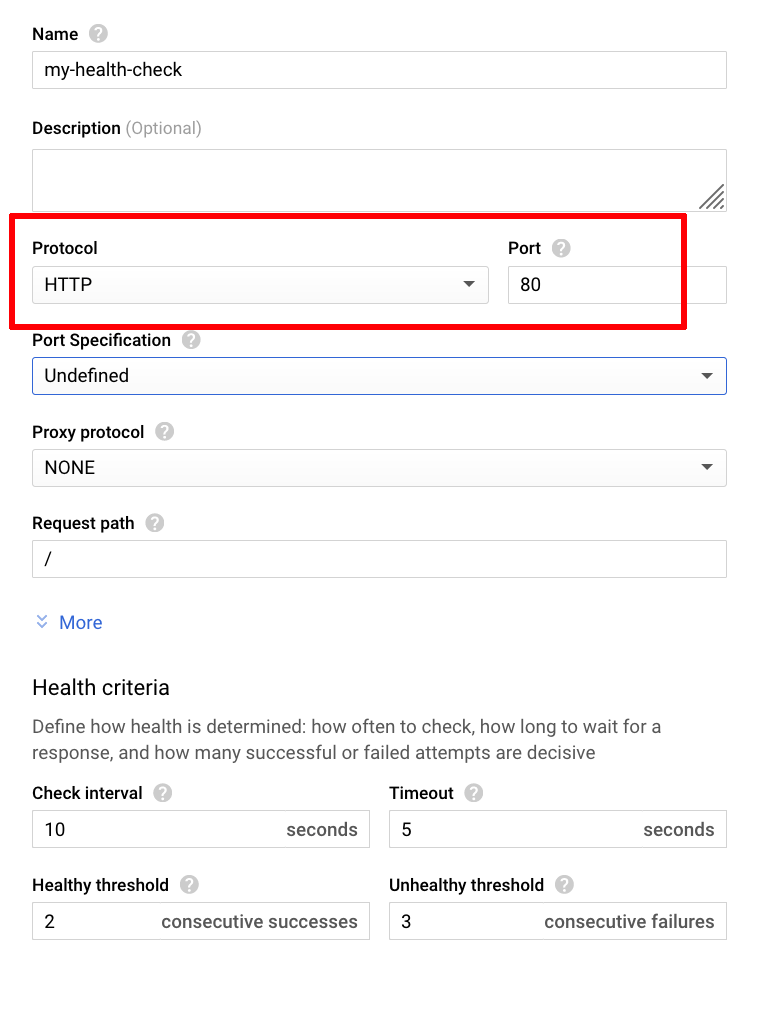
In the “Health check” field, select the option to “Create another health check”.
-
On the resulting page, enter a name for the new health check.
-
Set the value of the “Protocol” field to “HTTP”.
-
Leave all other values at their defaults and click “Save and continue” to save the health check.
-
Click “Create” to create the new backend service.
Step 5: Create an HTTP frontend for the load balancer
The next step is to define the protocols and ports that the load balancer will support for incoming client requests. To begin, configure the load balancer to support HTTP requests, by clicking the “Frontend configuration” link on the load balancer page and proceeding as follows:
-
In the “New Frontend IP and port” dialog, select “HTTP” as the protocol.
-
Choose between the “Standard” and “Premium” network tier (if available), depending on your requirements.
-
Set the value of the “IP address” field to “Create IP address”.
-
In the resulting dialog, enter a name for the new static IP address and click “Reserve”.
-
Set the value of the “IP address” field to the newly-created static IP address.
-
Set the value of the “Port” field to “80”.
-
Click “Done” to save the configuration.

-
On the load balancer page, click the “Create” button to create the load balancer and save the settings configured thus far.
The new load balancer should now appear in the list of load balancers.

Step 6: Point your domain name to the load balancer’s IP address
Update your domain’s DNS settings by adding an A record that points to the static IP address created in Step 5. To do this, you will usually need to log in to your domain name provider’s management console and make the necessary changes.
NOTE: Once you make the necessary changes, it can take up to 48 hours for the change to propagate across other DNS servers.
Verifying that the changes to your domain name record have propagated by using the Global DNS Propagation Checker and entering your domain name into the search field. After confirming that the domain name now points to the public IP address of the load balancer, you can test it by browsing to http://DOMAIN (replace the DOMAIN placeholder with the correct domain name) and confirming that you see the welcome page of the Bitnami application.
Step 7: Create an HTTPS frontend for the load balancer
The next step is to configure the load balancer to support HTTPs requests as follows:
-
Navigate to the load balancer detail page and click the “Edit” link.
-
Click the “Frontend configuration” link on the load balancer detail page.
-
Click the “Add Frontend IP and Port” button.
-
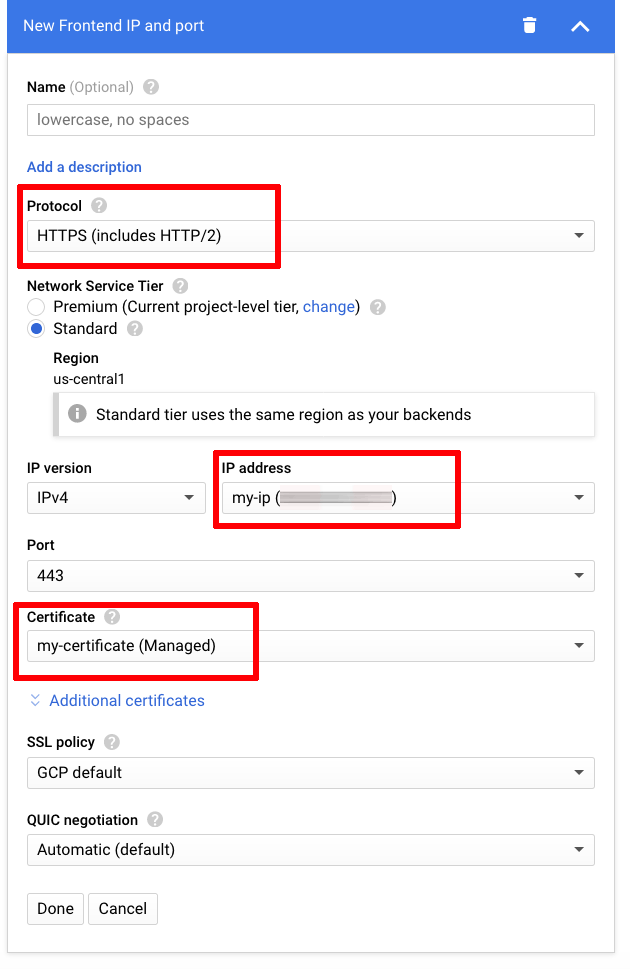
In the “New Frontend IP and port” dialog, select “HTTPS” as the protocol.
-
Choose between the “Standard” and “Premium” network tier (if available), depending on your requirements.
-
Set the value of the “IP address” field to the newly-created static IP address.
-
Set the value of the “Port” field to “443”.
-
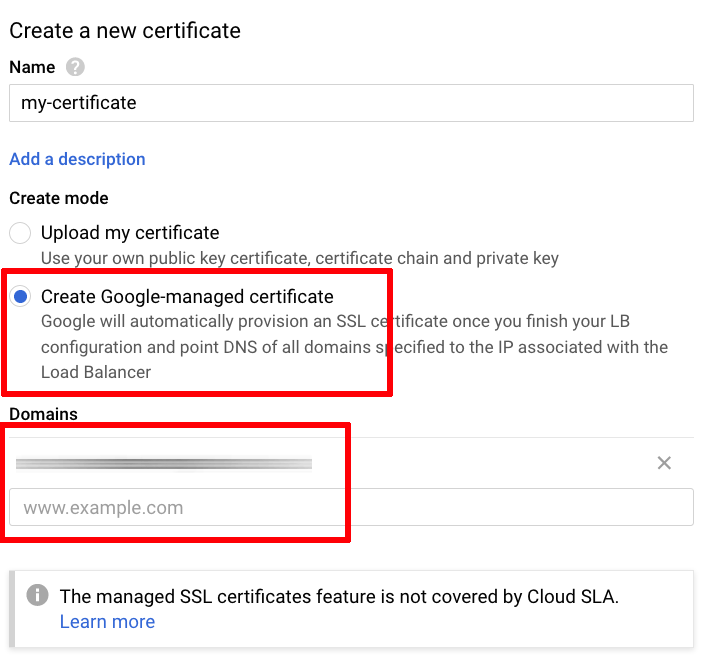
In the “Certificate” field, click the “Create a new certificate” option.
-
In the resulting dialog, enter a name for the SSL certificate.
-
Select the “Create Google-managed certificate” option and enter your domain name(s).
-
Click “Create” to create the new certificate.
-
Click “Done” to save the frontend configuration.
-
Leave all other values at their defaults.
-
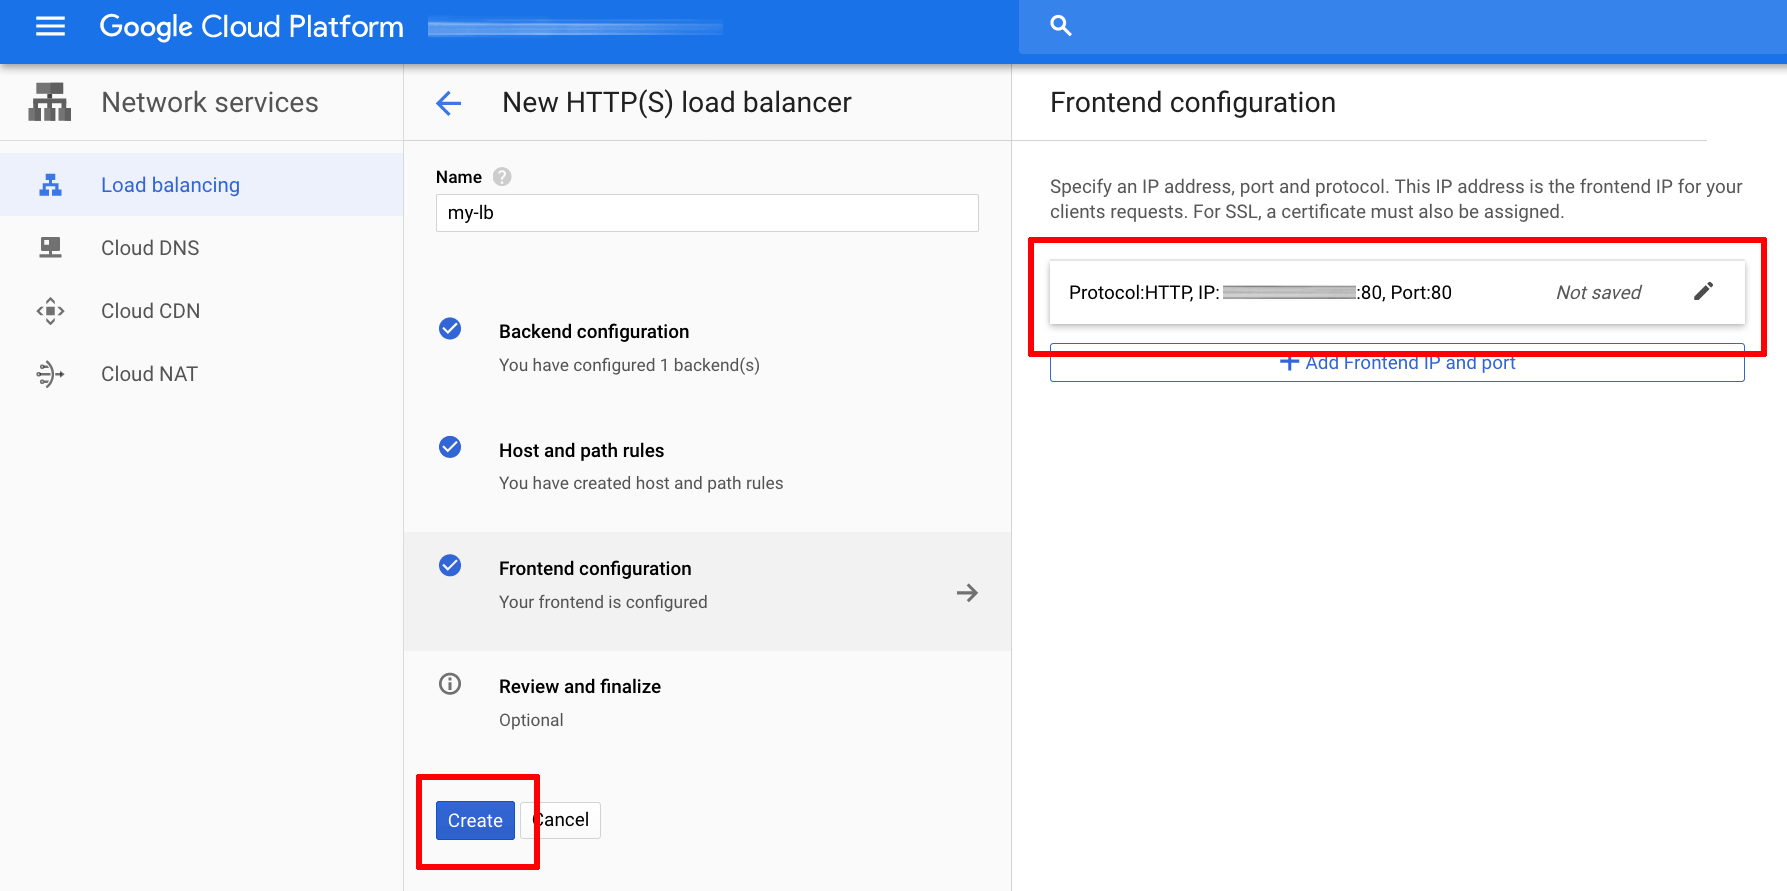
On the load balancer page, click the “Update” button to update the load balancer with the new settings.
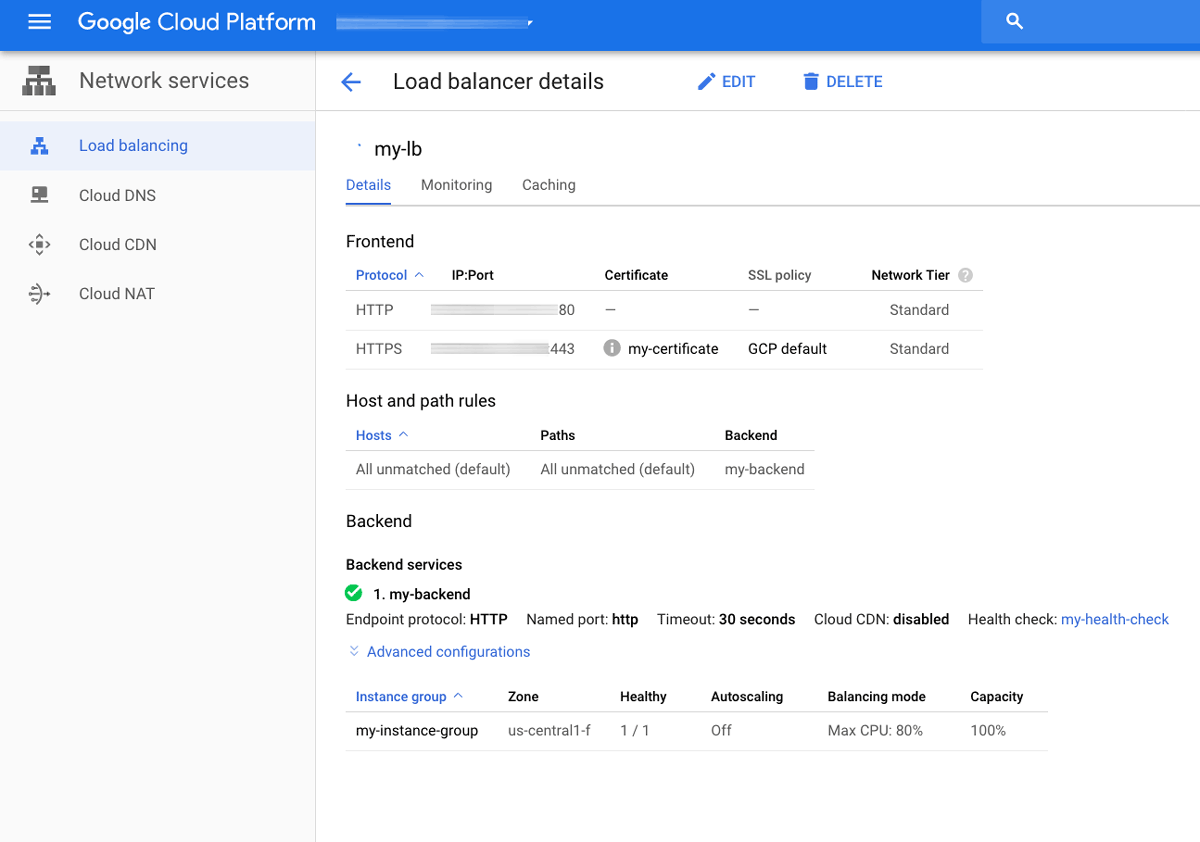
Confirm that your final load balancer configuration looks like the example below:
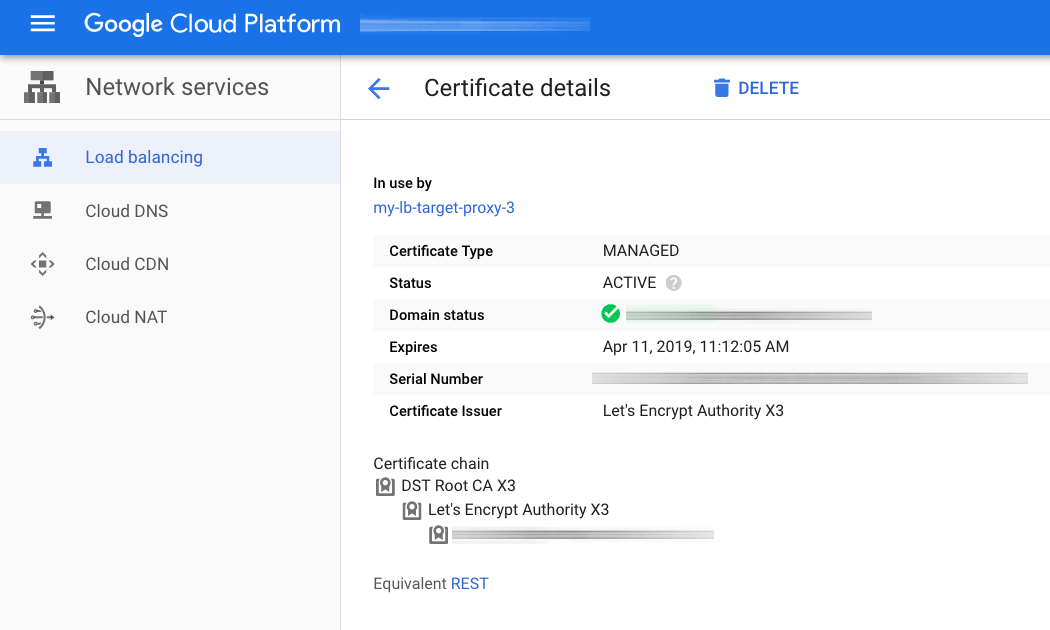
Once you have saved the settings, your new SSL certificate will be provisioned by Google. This can take up to 60 minutes, and you can check the status on the “Certificates” page. Once the new SSL certificate has been activated, you should be able to see the details on the certificate details page, as shown below:
NOTE: If Google is unable to provision your SSL certificate, it will display an error. Refer to the documentation on status codes and solutions for more information.
Step 8: Configure HTTP redirection
NOTE: This is an optional but recommended step.
Typically, you will want to redirect any HTTP requests to your application, to the more secure HTTPS URL. To do this, you must update the Bitnami application’s configuration with additional redirection rules. Follow these steps:
-
Log in to the primary virtual machine using SSH.
-
Edit the /opt/bitnami/apache/conf/vhosts/wordpress-vhost.conf file and add the following lines below the RewriteEngine On line:
RewriteCond %{HTTP:X-Forwarded-Proto} =http RewriteRule .* https://%{HTTP:Host}%{REQUEST_URI} [L,R=permanent] -
Save the changes and restart services:
$ sudo service bitnami restart
This change will ensure that HTTP requests are redirected to the HTTPS frontend.
Step 9: Test the load balancer
Test the load balancer as follows (replace the DOMAIN placeholder with the correct domain name):
-
Browsing to http://DOMAIN should result in the load balancer displaying the insecure welcome page of the Bitnami application.
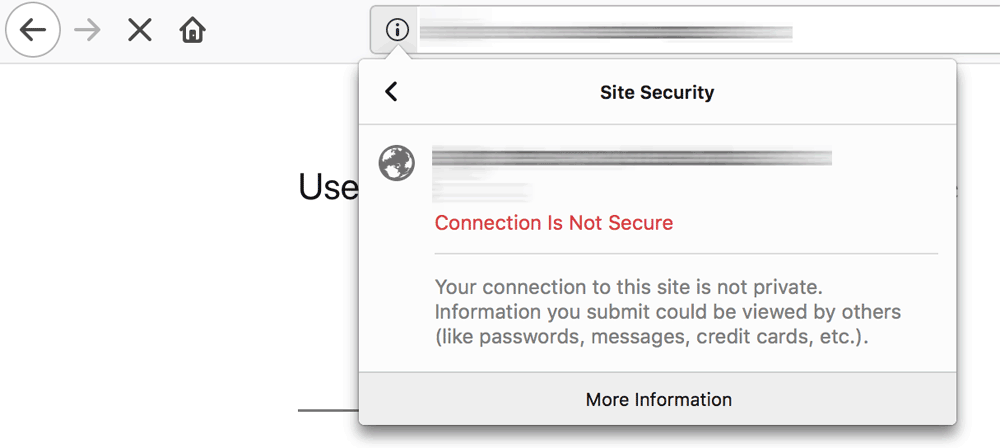
Alternatively, if you have configured the optional HTTPS redirection in Step 8, browsing to http://DOMAIN should redirect you to https://DOMAIN and the result described next.
-
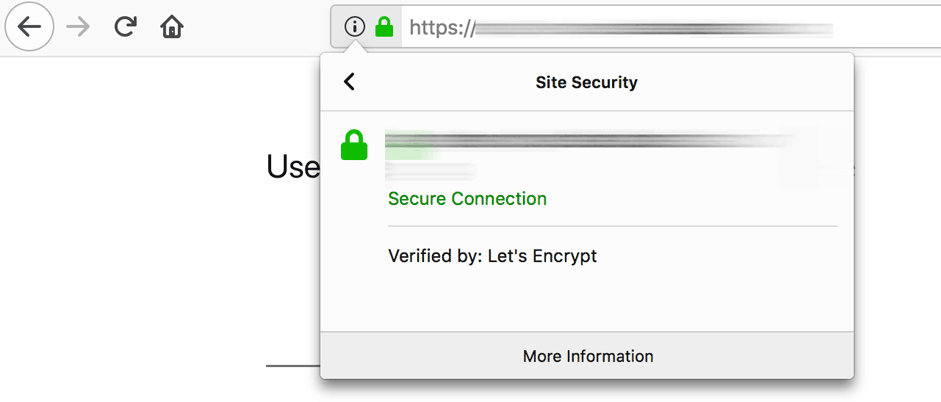
Browsing to https://DOMAIN should result in the load balancer displaying the secure welcome page of the Bitnami application. Clicking the padlock icon in the browser address bar should display the details of the domain and SSL certificate.
Your load balancer has now been configured with an SSL certificate for your Bitnami Multi-Tier Solution running on Google Cloud Platform.
Useful links
To learn more about the topics discussed in this guide, consider visiting the following links: