Upgrade SuiteCRM
It is strongly recommended to create a backup before starting the update process. If you have important data, create and try to restore a backup to ensure that everything works properly.
Follow these steps:
-
Download the appropriate SuiteCRM Upgrade zip file from the SuiteCRM website to your local machine. For example, download the SuiteCRMPro-Upgrade-6.4.x-to-6.5.0.zipfile to upgrade SuiteCRM Professional from version 6.4.x to 6.5.0. Download the appropriate conversion file to convert to SuiteCRM Professional or SuiteCRM Enterprise.
-
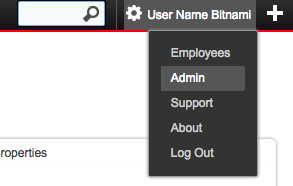
Log into your existing SuiteCRM application as the administrator and click “Admin” on the right-hand corner of the page.
-
Click “Upgrade Wizard” in the “Systems” panel of the “Administration” home page. This displays the Upgrade Wizard page.

-
Click “Next”. This displays the “System Checks” page and SuiteCRM begins the system check process. The “Systems Check” page indicates that there were no issues if the system check process completes successfully. Issues with file permissions, database, and server settings are listed on the page if the system check process encountered any problems.

-
Click “Next” if the system check is successful. This displays the “Upload an Upgrade” page.
-
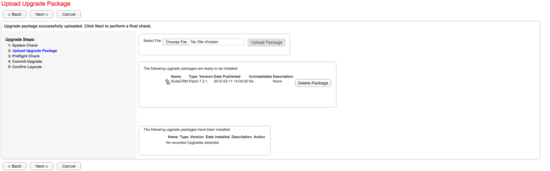
Click “Browse”, and navigate to the location of the upgrade zip file and select it. The path to the file displays in the “Upload an upgrade” field.
-
Click “Upload Upgrade” to upload the package to the SuiteCRM application. The system uploads the package and displays it on the page. Use the “Delete Package” button to remove the package if necessary.
-
Click “Next. This displays the “Preflight Check” page. Click “Show Schema Change Script” to view differences in the SuiteCRM databases schema between your current and new SuiteCRM versions. By default, the “Upgrade Wizard Runs SQL” option is selected as the database update method. Select “Manual SQL Queries” from the “Database Update Method” drop-down list and select the “Check when SQL has been manually run” box, if you ran the SQL queries manually.

-
Click “Recheck” to rerun “Preflight Check”. Click “Next” to skip this step. This displays the “Commit Upgrade” page. You can also click “Show” to see a list of files that were copied and the rebuilt results. You can also view skipped queries.

-
Click “Next”. During the upgrade process, SuiteCRM performs a three-way merge between the customized instance on old version, default instance on old version, and default instance on new version. This three-way merge adds any fields that have been added to the default module layouts in the new version to the corresponding module layouts in the existing version, if the module layouts in the old version were not customized through Studio (or in the appropriate upgrade-safe way) prior to the upgrade. The three-way merge also changes the placement of fields in non-Studio-customized module layouts to match the placement in the default module layouts.
-
SuiteCRM displays the “Confirm Layouts” page as Step 5 of the upgrade process if the existing module layouts have been customized, and there are changes to the default fields and field placement in the new module layouts. The “Confirm Layouts” page lists the module layouts that have changed in the new version. The administrator has the option of applying the changes to the existing module layouts. By default, all of the listed module layouts are selected to be merged during the upgrade. For example, in 6.1.0, SuiteCRM added the “Assigned To” fields to the default “Detail View” and “Edit View” layouts for Notes and for Email Templates.
-
Uncheck the module if you do not want to add the new fields to a module.
-
Click “Next”. This displays a message confirming that the layouts were successfully merged (if you chose to update your modules).
-
Click “Next”. The “Debrief” page confirms the upgrade installation. Complete the steps for manual merging of files or running SQL queries now.
-
Click “Done”. This displays the Home page indicating that the upgrade is complete.
-
Click “Repair” and select the “Rebuild Relationships” and “Rebuild Extensions” options in the “Systems” panel of the “Administration” home page.
-
Manually merge the files by extracting the skipped file from the patch zip file if you unchecked any files to prevent the “Upgrade Wizard” from overwriting them. Merge the file installed in the SuiteCRM application directory. Note that you can check the upgradeWizard.log file in the SuiteCRM folder for information on unsuccessful SuiteCRM upgrades.
For more information, visit https://suitecrm.com/wiki/index.php/Upgrade.