Migrate Your Application Database to Google Cloud SQL
Introduction
If you would like to migrate your Bitnami application’s database to Google Cloud SQL, this guide will walk you through the necessary steps. The example application used in this guide is WordPress, although the steps will work generically for any Bitnami application stack.
NOTE: Before following the steps in this guide, ensure that you have a Google Cloud Platform account, and that the server running your Bitnami application stack has a public IP address.
Step 1: Create a new database on Google Cloud SQL
Begin by creating a new database on Google Cloud SQL, as described below:
-
Log in to the Google Cloud Console.
-
Select the project you wish to use.
-
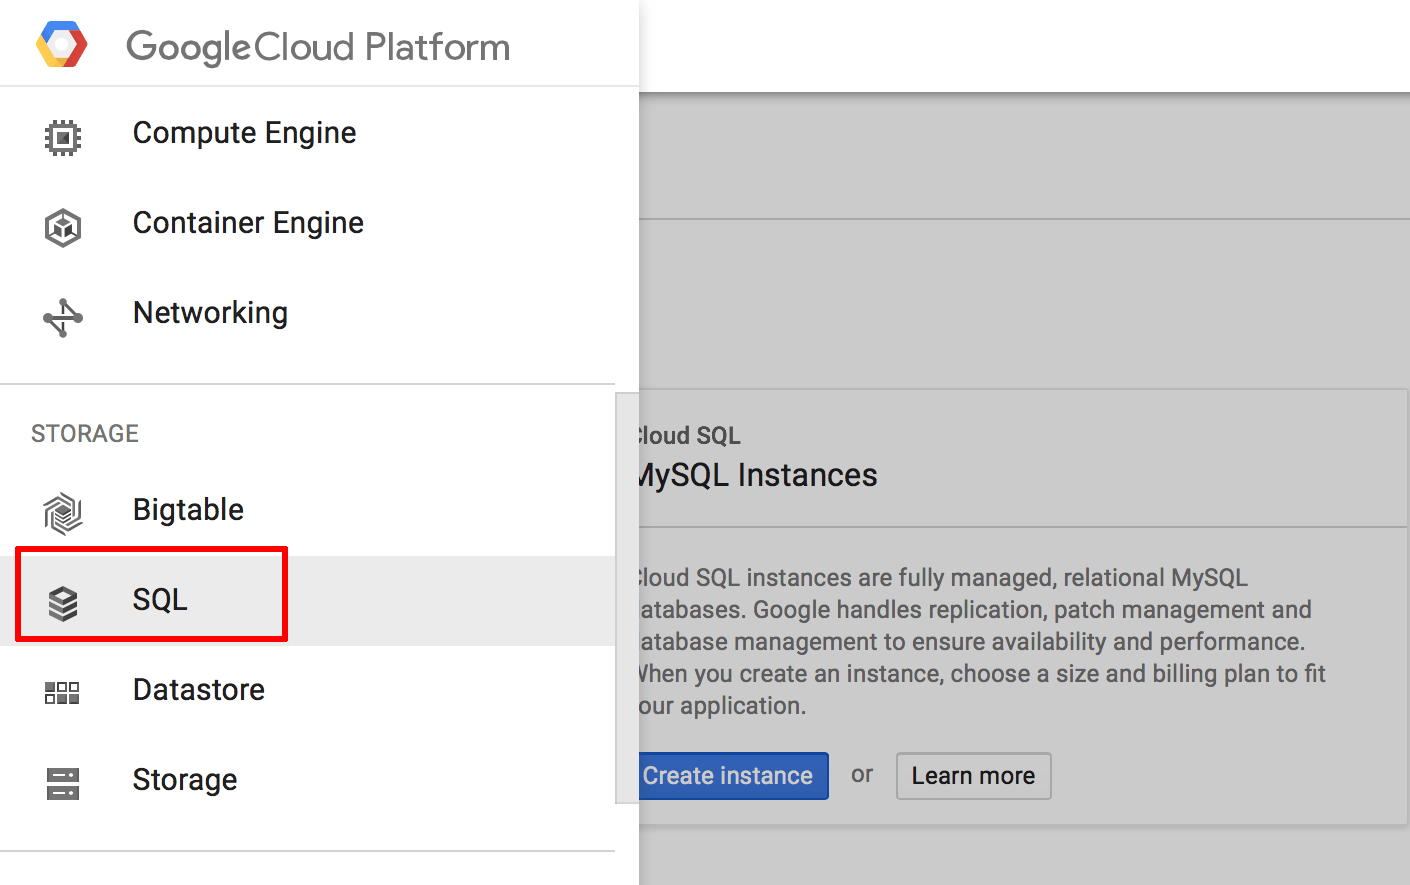
From the navigation menu, select the “Storage -> SQL” menu item.
-
On the resulting page, click the “Create instance” button.

-
Choose between a “First Generation” or “Second Generation” instance. This guide assumes a “Second Generation” instance.
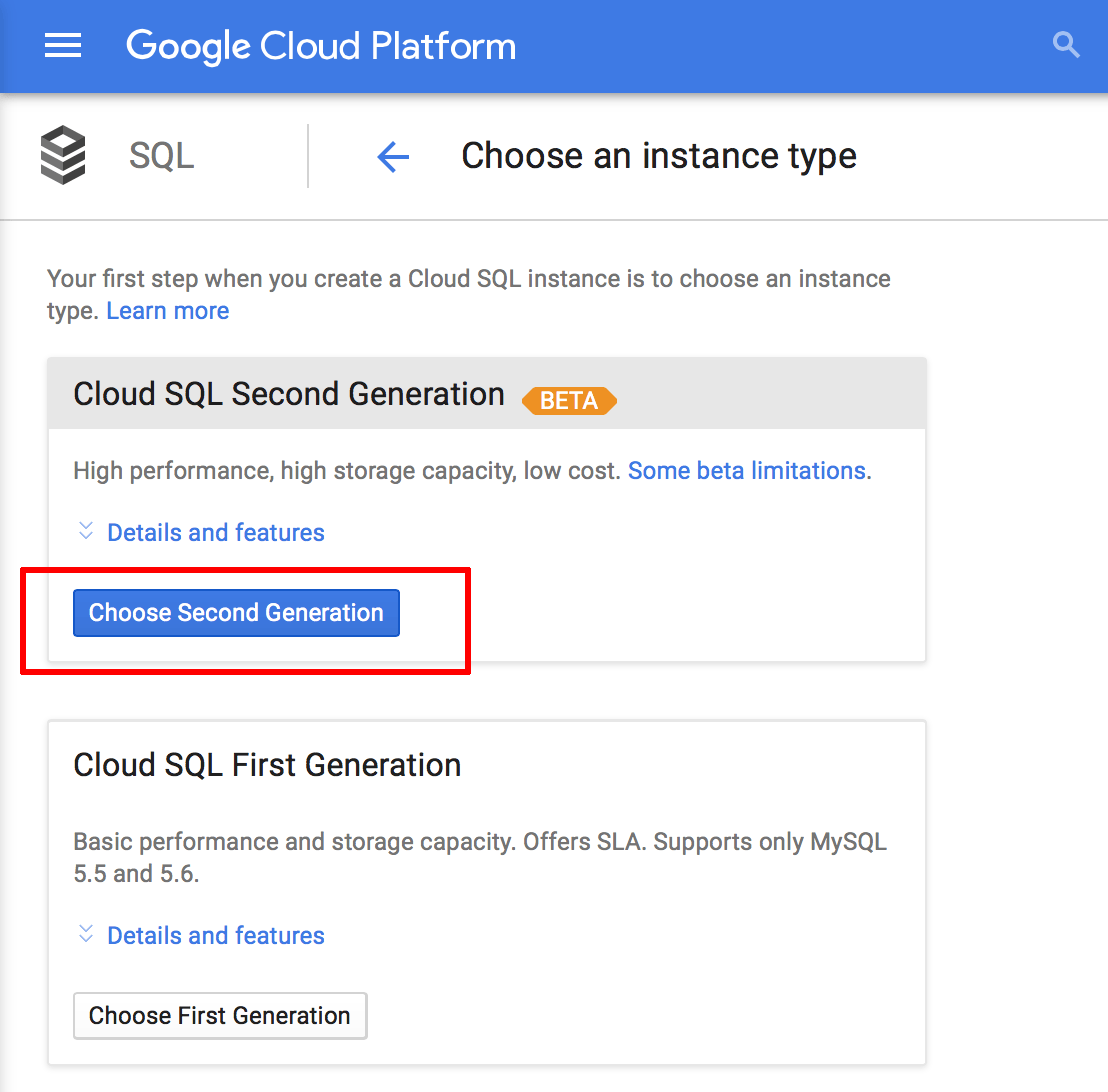
NOTE: “Second Generation” instances offer higher performance at a lower cost, but do not support versions of MySQL older than MySQL 5.6. At the time of writing, “Second Generation” instances are in beta and do not offer a Service Level Agreement (SLA).
-
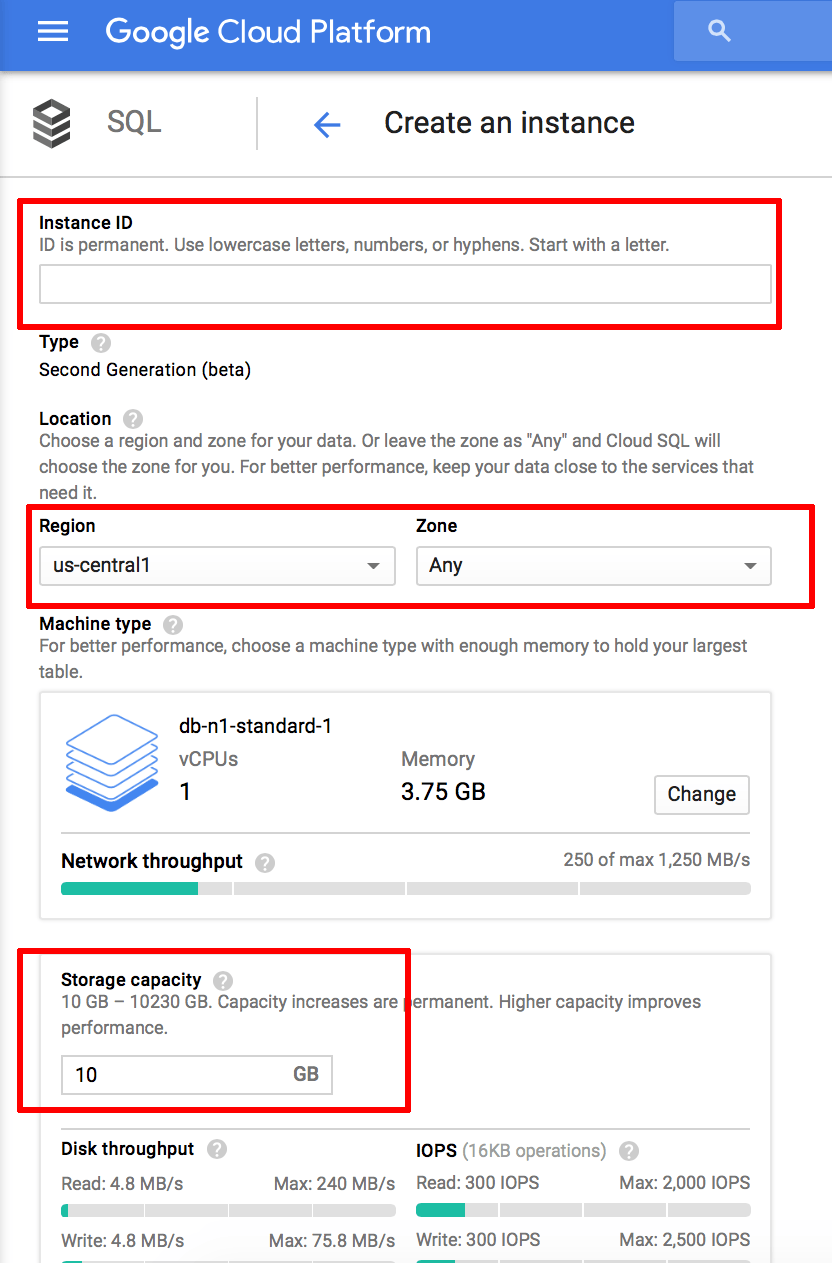
On the “Create an instance” page, enter the details for the database you wish to create, most notably the instance ID, the region and the allocated storage capacity.
-
Click the “Create” button to create the database instance.
Your new database instance will now be launched. You will be redirected to an “Instances” page which shows the current status of the instance, as shown below:
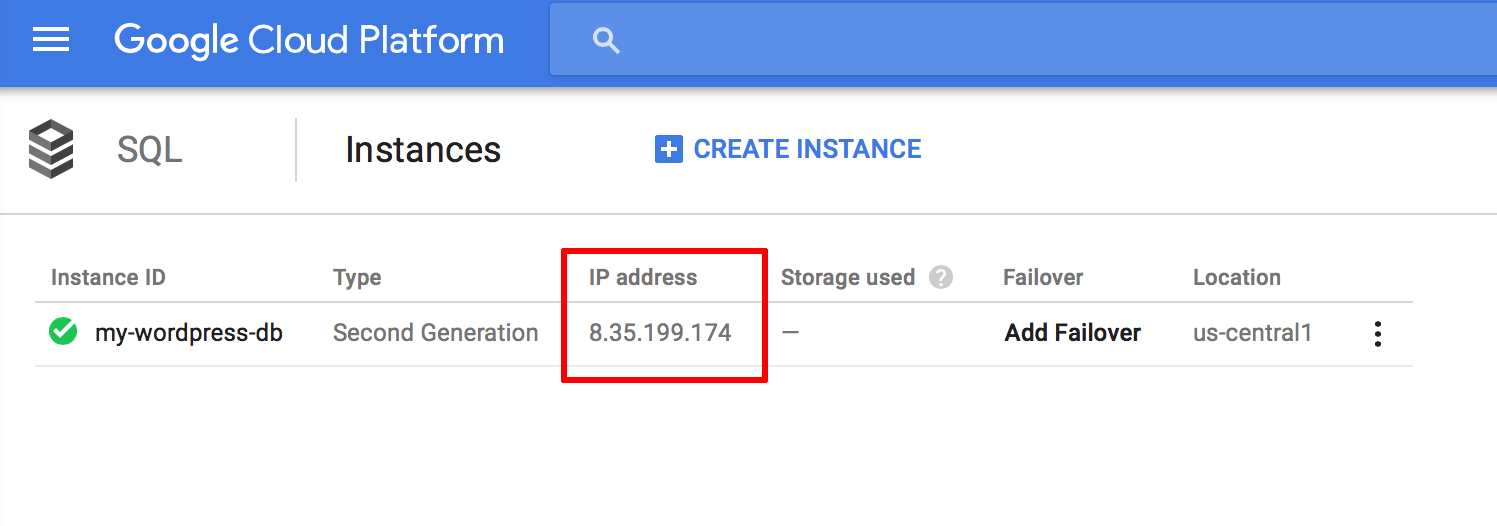
Make a note of the instance’s IP address, as you will need it in subsequent steps.
Step 2: Enable access
Once your database instance is running, the next step is to allow remote access to the MySQL database server. To do this:
-
From the “Instances” page, click the instance ID of the database you just created.
-
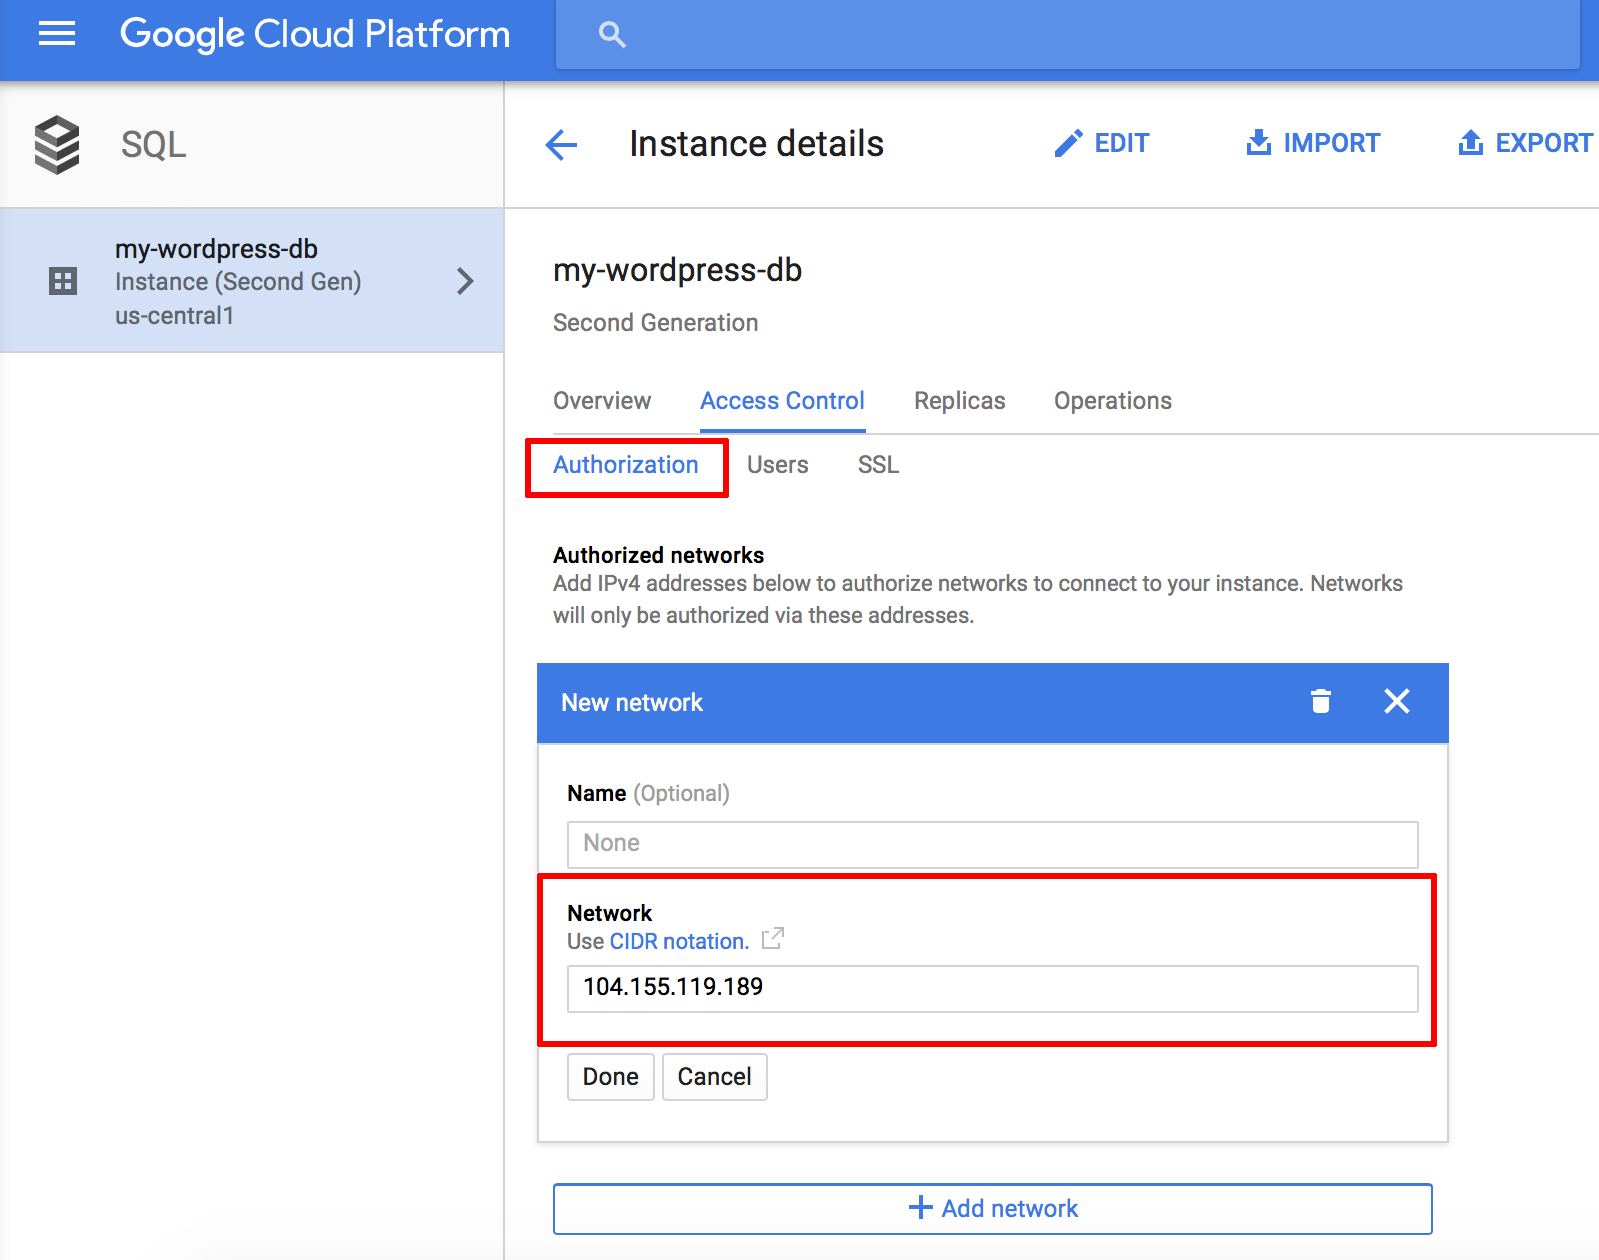
On the resulting instance details page, click the “Access control” tab and the “Authorization” sub-tab. Click the “Add network” button and enter the public IP address of the server running your Bitnami application stack. Click “Save” to save the changes.
-
On the same page, select the “Users” sub-tab. Click the “Change root password” button and enter a new password for the MySQL root user. Click “OK” to save the changes.
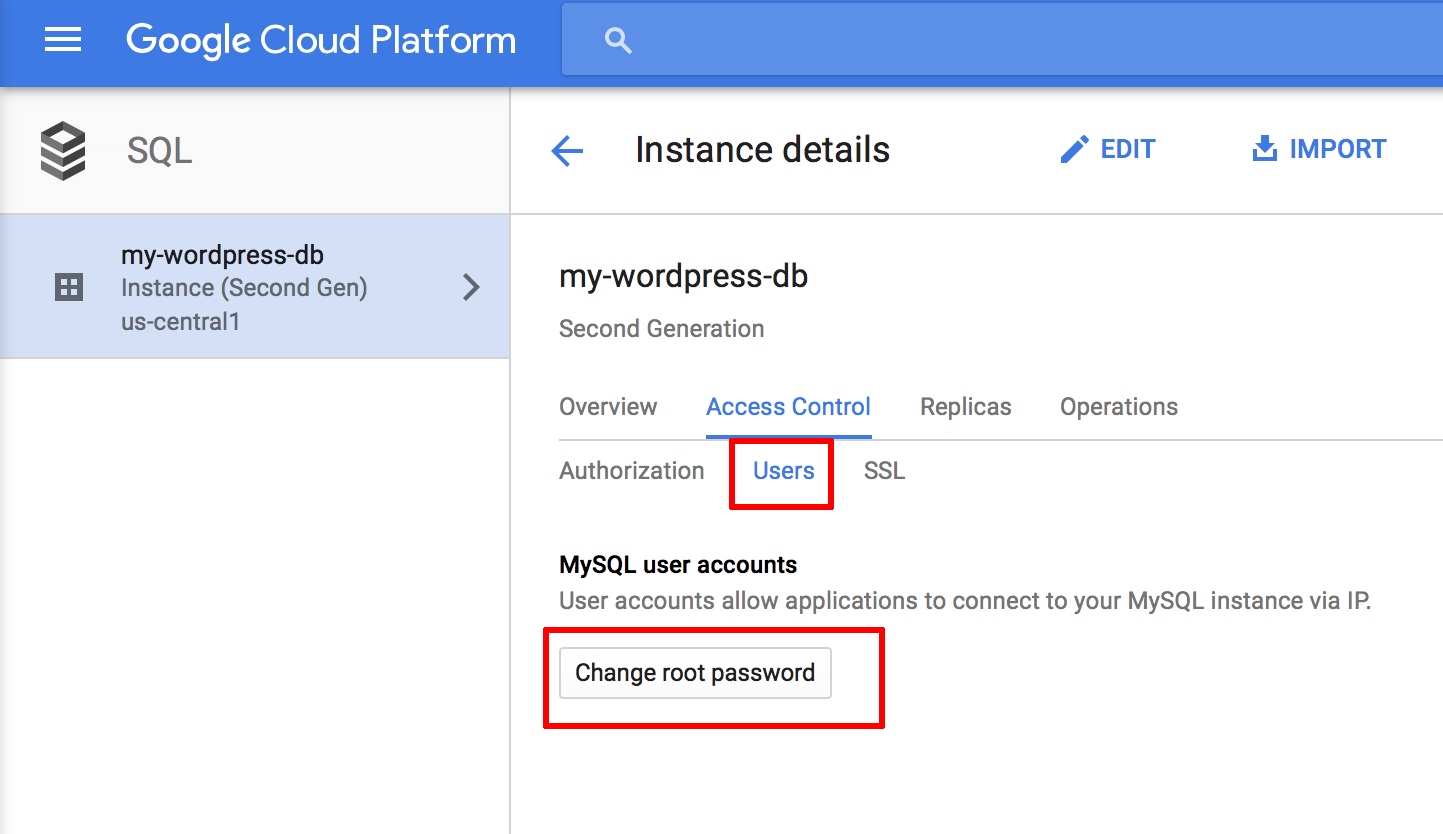
IMPORTANT: Make a note of this password, since you will need it in a later step.
Step 3: Disable write access to the application
You can now migrate your application database to Google Cloud SQL. However, before you do this, you must disable write access to the application so that the original and new databases stay in sync.
The method to do this varies from application to application. In some cases, the application itself offers a “maintenance mode” which can be activated for the duration of the data migration. In others, you might need to download a maintenance mode plugin for this purpose. If neither of these options is available, you must manually disable login access by redirecting users to a static maintenance page.
In this WordPress-based example, the easiest way to disable write access is to install and activate the WP Maintenance Mode plugin. This plugin will display a splash screen notification to inform users that the WordPress blog/website is down for maintenance and cannot be accessed.
Step 4: Export the application database from your Bitnami stack
The next step is to export the application database. You can either do this using the command-line mysqldump tool or the browser-based phpMyAdmin application.
Using the command line
Use the mysqldump tool to create a backup of the current database as follows:
-
Obtain the password for your Bitnami application database.
-
Log in to the server console via SSH.
-
Execute the following command to create a backup of the current database. In this example, the database is named bitnami_wordpress. Replace this with the name of the database you wish to export.
$ mysqldump -u root -p bitnami_wordpress > backup.sql -
Enter the database password when prompted.
This will produce a backup.sql file in the current directory with the content of the selected database. Store this file carefully, as you will need it in the next step.
Using phpMyAdmin
You can also accomplish this with the browser-based phpMyAdmin application included by default with Bitnami stacks.
-
Log in to the included phpMyAdmin application using these instructions.
-
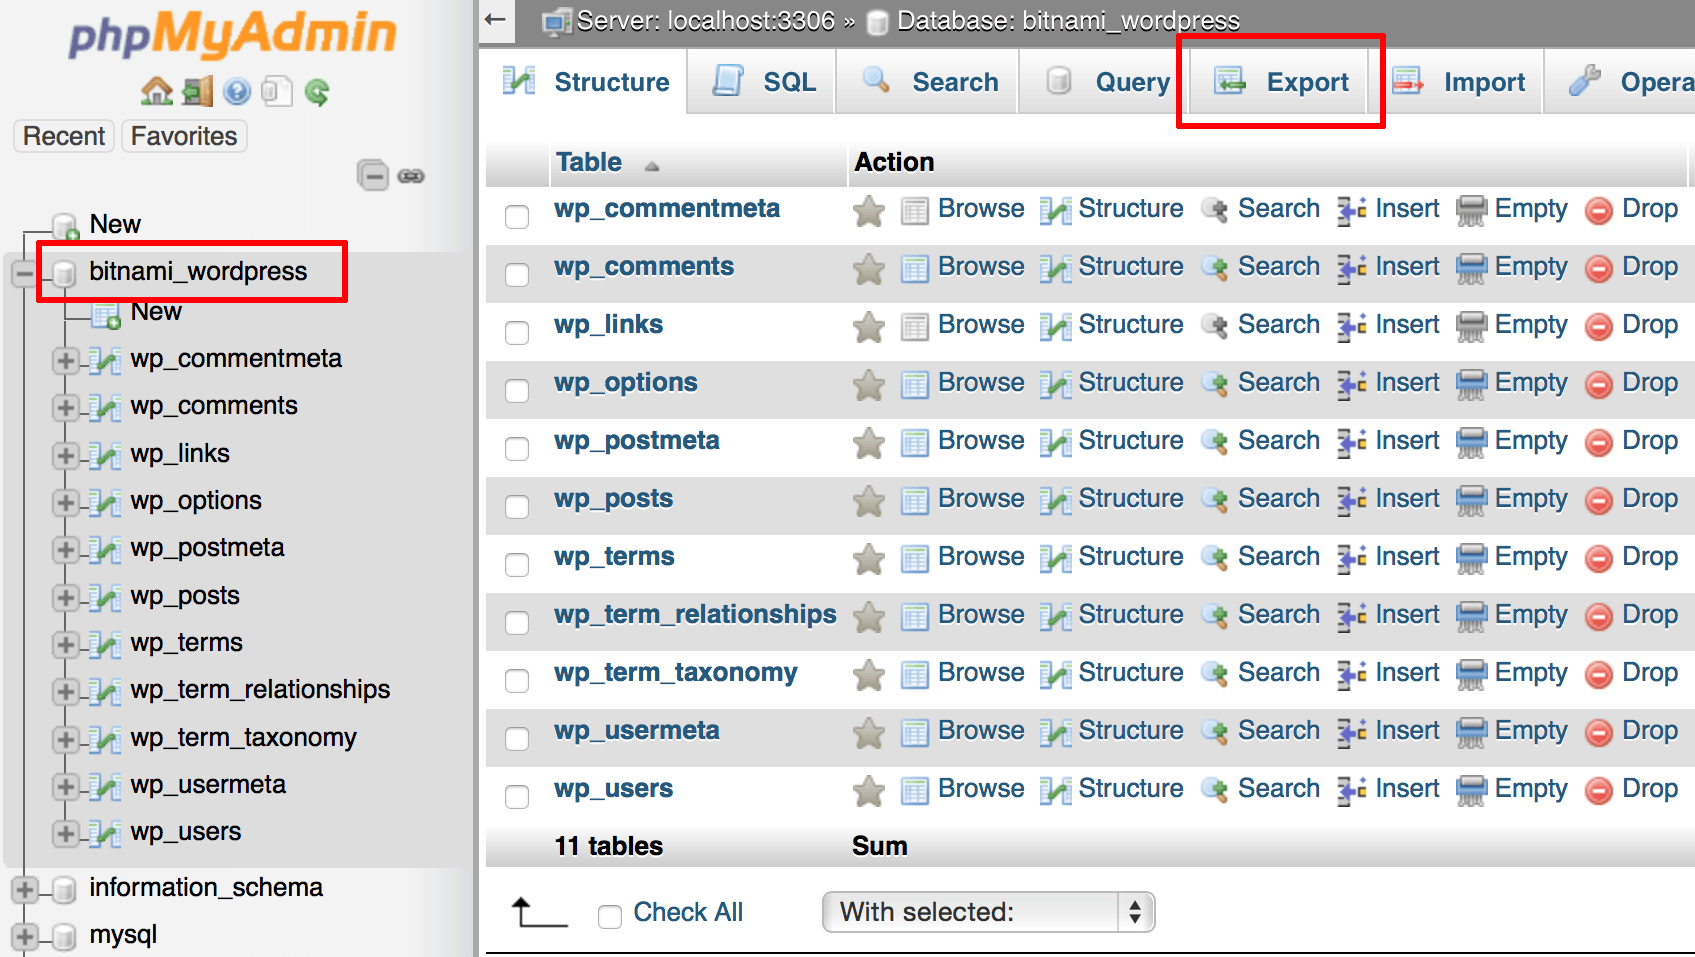
Select the application database in the left navigation menu. In this example, the database is named bitnami_wordpress.
-
Select the “Export” menu item.
-
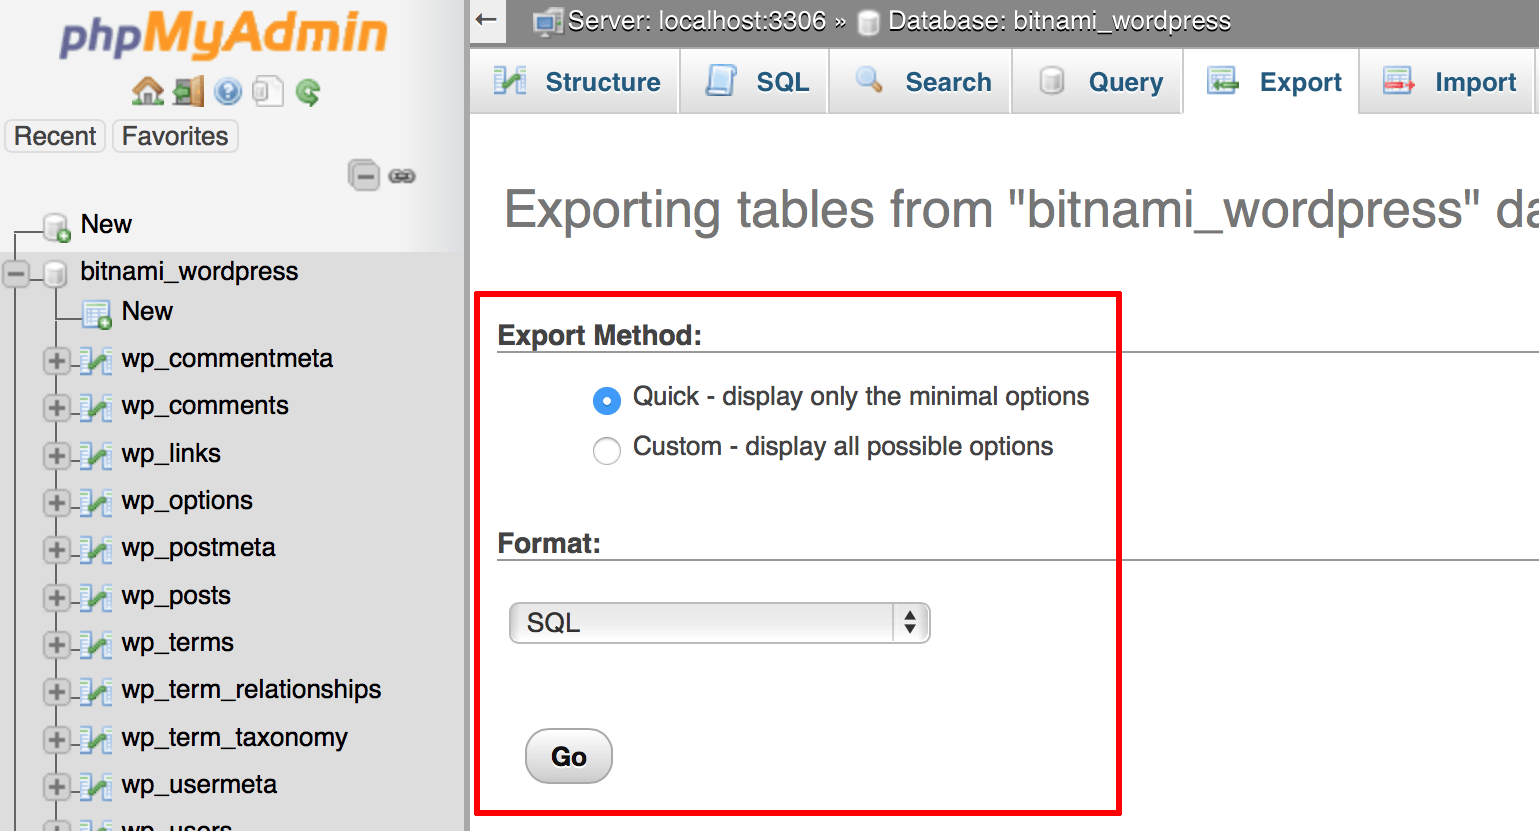
On the resulting page, select the “Quick” export method and the “SQL” output format.
-
Click “Go”.
An SQL export file will be created and downloaded to your desktop. Store this file carefully, as you will need it in the next step.
Step 5: Import the application database to Google Cloud SQL
The next step is to import the application database to your Google Cloud SQL database instance. Again, you can accomplish this either using the command-line tool or the browser-based phpMyAdmin application.
Using the command line
Use the mysql command-line client to connect to the Google Cloud SQL database instance and create a new database and user as follows:
-
Log in to the server console via SSH.
-
Execute the following command to connect to the remote MySQL database. Replace the IP-ADDRESS placeholder with the IP address of the database instance, obtained at the end of Step 1.
$ mysql -u root -p -h IP-ADDRESS -
Enter the database password for the root user (defined in Step 2) when prompted.
-
If all goes well, you should be connected to the remote database and be presented with an interactive MySQL command prompt. First, create a new database to hold the migrated data, as shown below. In this example, the database is named wordpress but feel free to use any other name.
mysql> CREATE DATABASE wordpress; -
Next, create a MySQL user account with privileges to read and write only to this database. This is recommended for security. Replace the PASSWORD placeholder with a custom password. If you wish, you may also replace the example username admin used in the command with a different username.
mysql> GRANT ALL PRIVILEGES ON wordpress.* TO 'admin'@'%' IDENTIFIED BY 'PASSWORD'; -
Disconnect from the remote MySQL database by typing:
mysql> exit -
Execute the following command to import the backup file. In this example, the target database is named wordpress and the account is named admin, as described previously. If you used different values in the previous steps, replace these values accordingly.
$ mysql -u admin -p -h IP-ADDRESS -D wordpress < backup.sqlRemember to replace the IP-ADDRESS placeholder with the IP address of your Google Cloud SQL database instance. Enter the database password for the root user (defined in Step 2) when prompted.
The original application database content will now be imported into the new Google Cloud SQL database.
Using phpMyAdmin
You can also accomplish this with the browser-based phpMyAdmin application included with the Bitnami stack. However, it is first necessary to configure phpMyAdmin to connect to your Google Cloud SQL database instance, as described below:
-
Log in to your server console via SSH.
-
Edit the phpMyAdmin configuration file at /opt/bitnami/apps/phpmyadmin/htdocs/config.inc.php and add the lines below to the end of the file:
  $i++;
  $cfg['Servers'][$i]['verbose'] = 'Google Cloud SQL';
  $cfg['Servers'][$i]['host'] = 'IP-ADDRESS';
  $cfg['Servers'][$i]['port'] = '3306';
  $cfg['Servers'][$i]['socket'] = '';
  $cfg['Servers'][$i]['connect_type'] = 'tcp';
  $cfg['Servers'][$i]['extension'] = 'mysqli';
  $cfg['Servers'][$i]['auth_type'] = 'cookie';
  $cfg['Servers'][$i]['AllowNoPassword'] = false;
Remember to replace the IP-ADDRESS placeholder in the above code with the actual endpoint of your Google Cloud SQL database instance. These lines will make it possible to access your Google Cloud SQL database instance through phpMyAdmin.
-
Save the file.
Next:
-
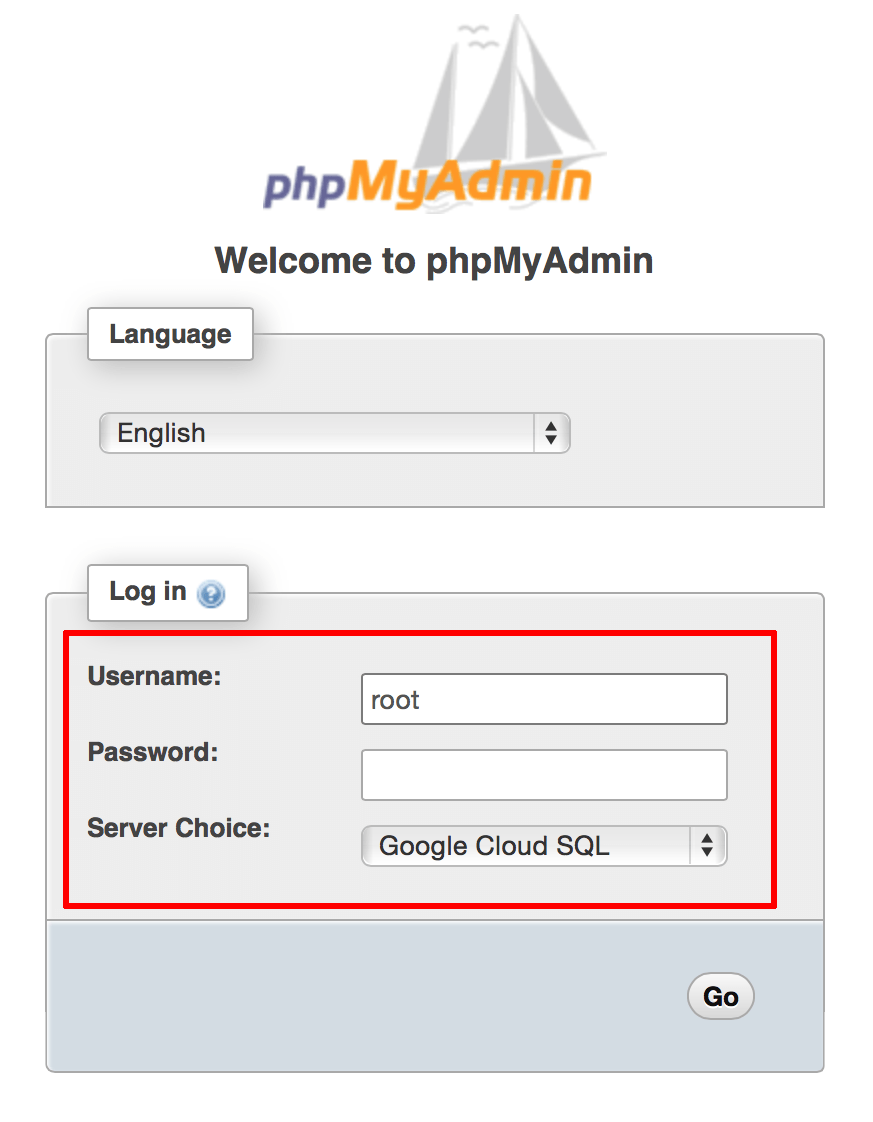
Browse to the phpMyAdmin application using these instructions and select the “Google Cloud SQL” server.
-
Log in with the database username root and password defined in Step 2.
-
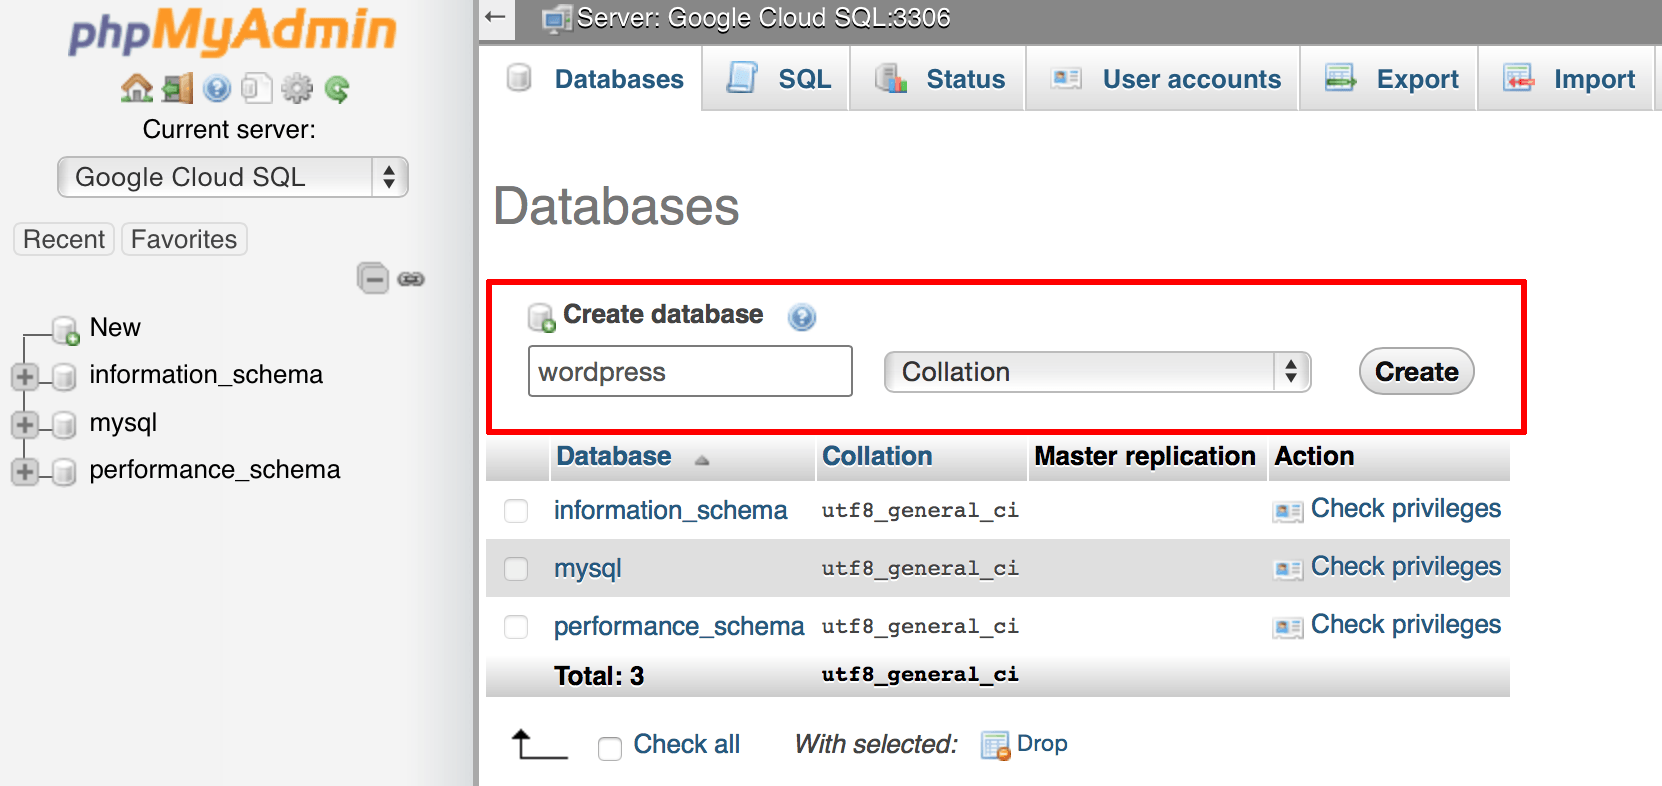
Select the “Databases” menu item in the top navigation bar.
-
Create a new database to hold the migrated data, by entering a database name into the “Create database” field and clicking “Create”. In this example, the database is named wordpress but feel free to use any other name.
-
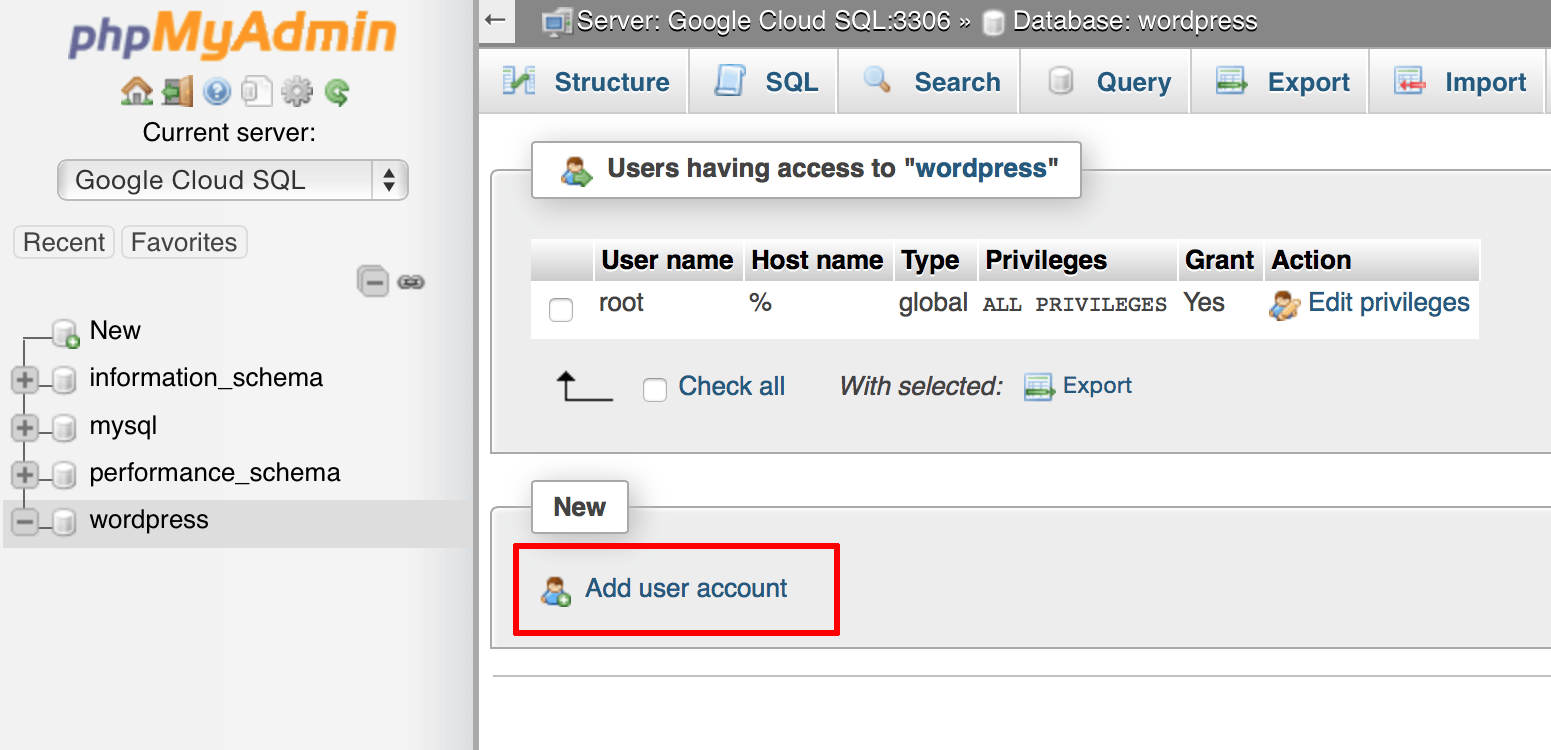
Select the new database in the left navigation menu. On the database detail page, click the “Privileges” menu in the top navigation bar and on the resulting page, click the “Add user account” link.
-
On the resulting page, enter a username and password for the new user account. This guide uses the example username admin, but you may change this if you wish. Ensure that the “Grant all privileges on database” checkbox is ticked.
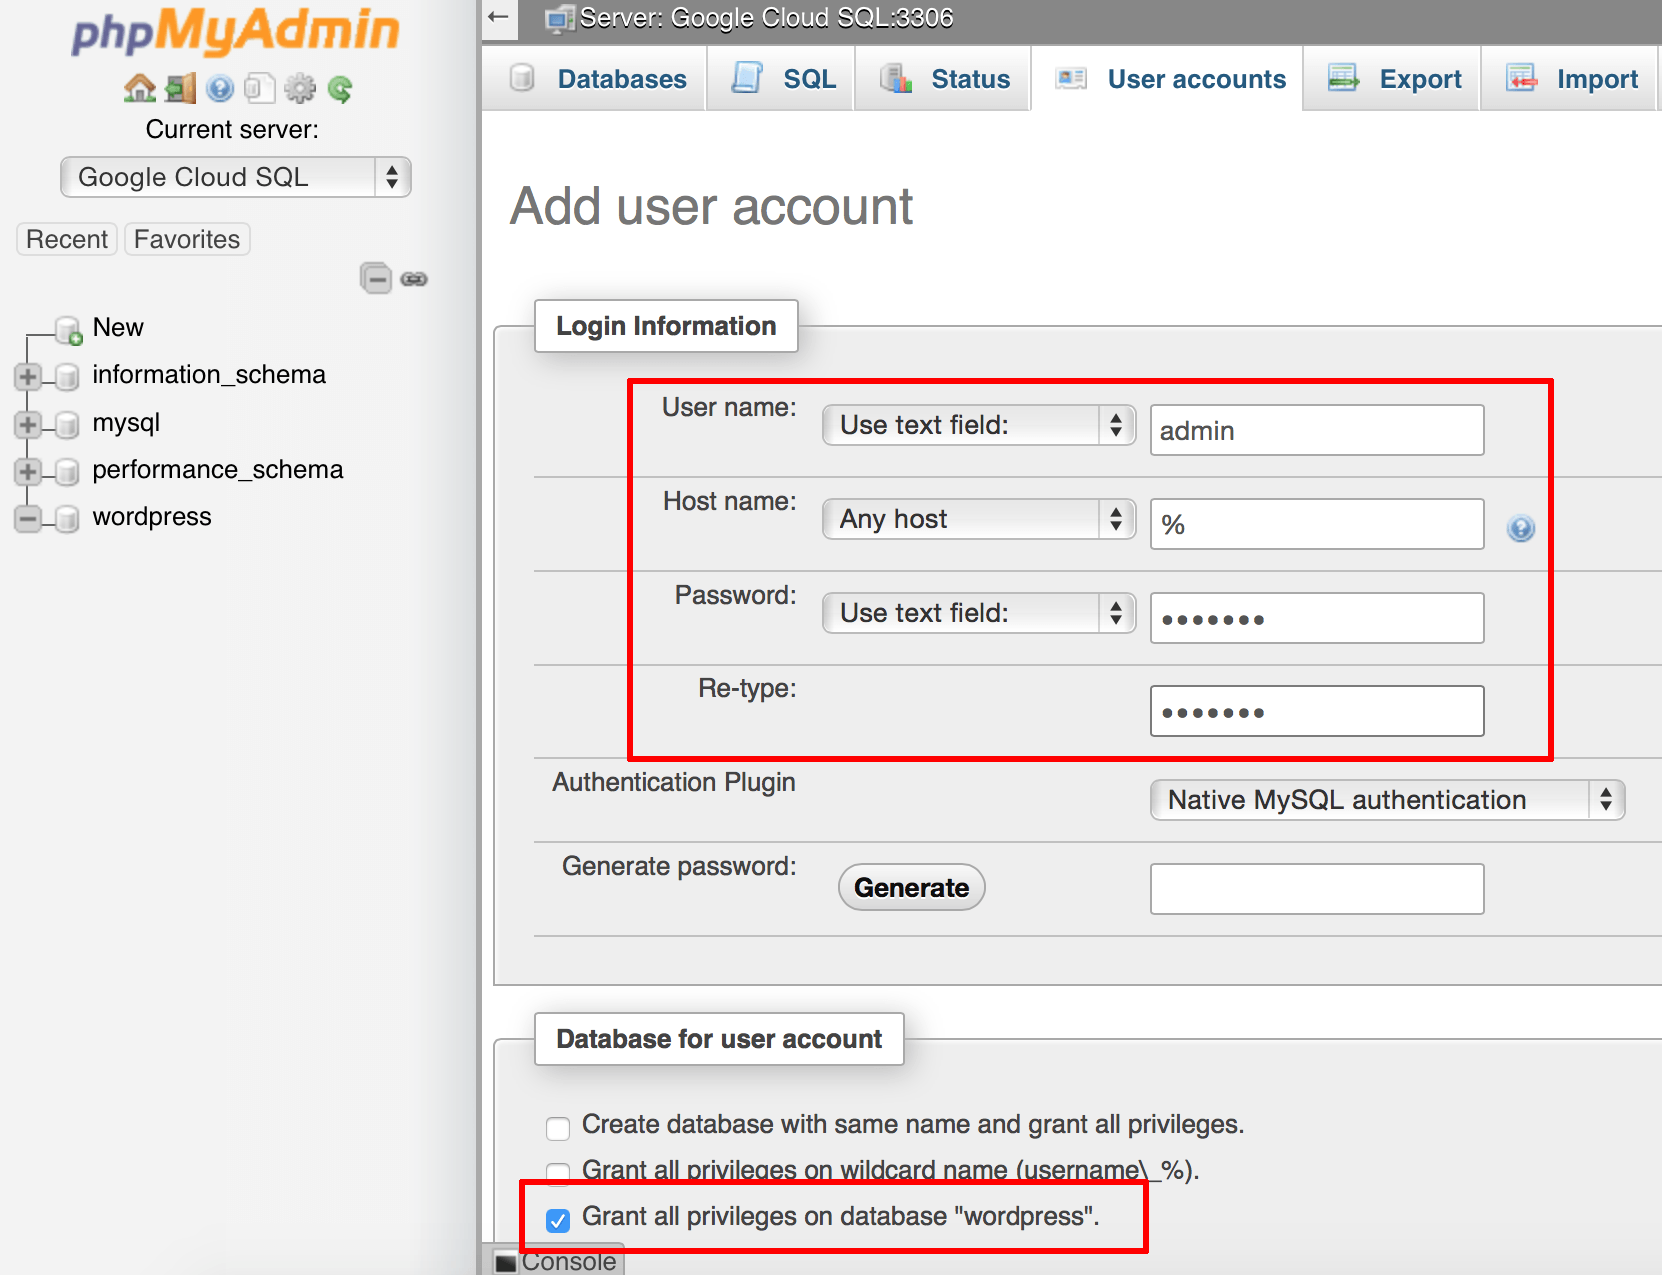
-
Click “Go” to save the changes and create the account.
-
Select the new wordpress database in the left navigation menu.
-
Select the “Import” menu item.
-
On the resulting page, select the SQL export file created in Step 4.
-
Click “Go”.
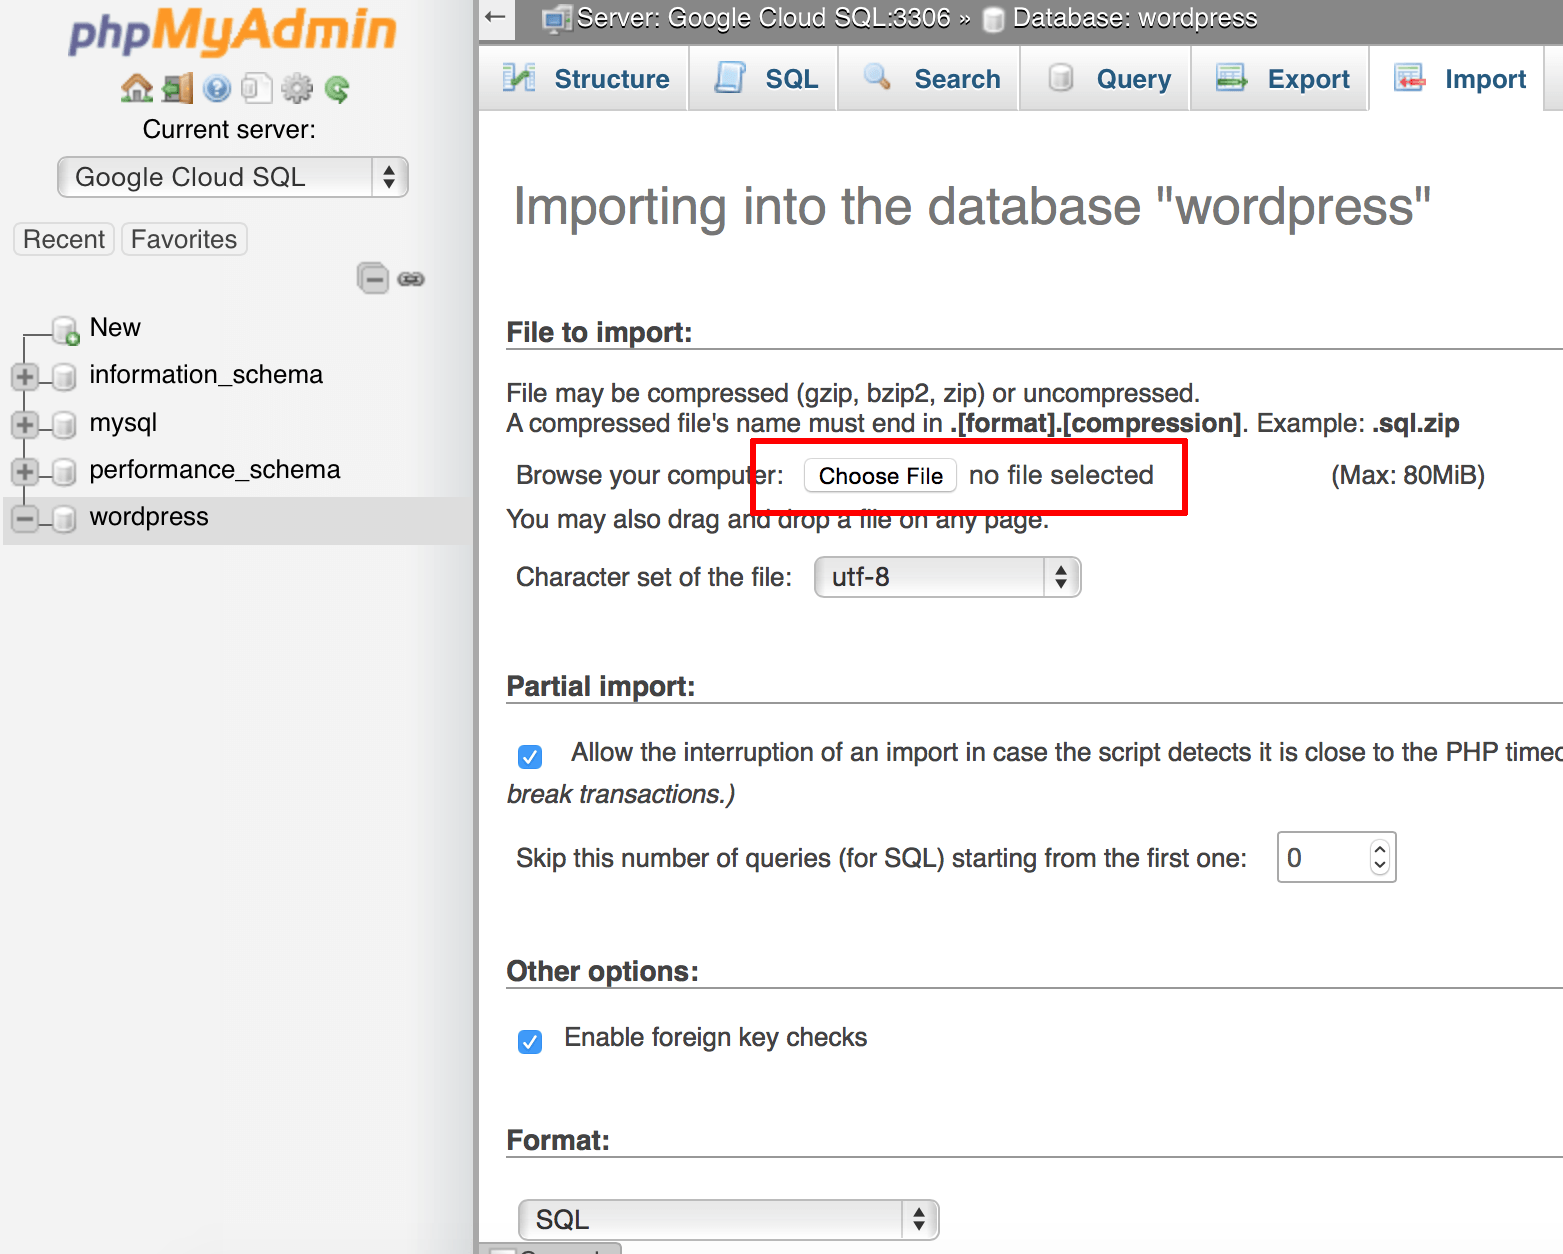
The original application database content will now be imported into the new Google Cloud SQL database. A confirmation message will be displayed.
Step 6: Reconfigure the application to use the new database
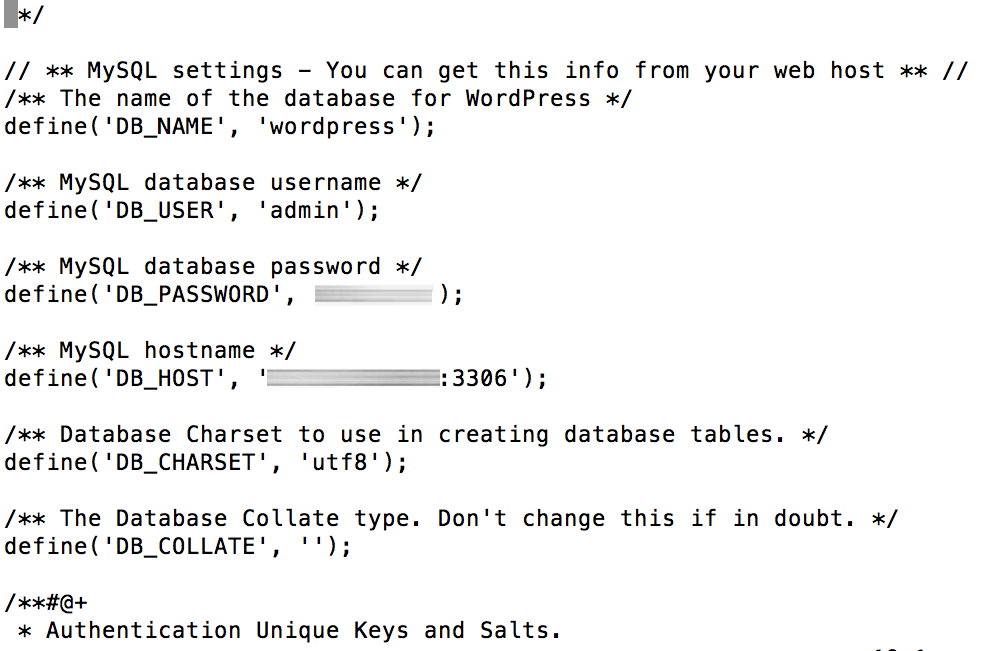
Once your database has been transferred to Google Cloud SQL, the next step is to update your application configuration and point it to the new database. The procedure to do this varies from application to application, but typically involves modifying a configuration file and specifying the new database host, database username and password, and new database name.
For example, to update the WordPress configuration, edit the file at /opt/bitnami/apps/wordpress/htdocs/wp-config.php and modify the various configuration variables as shown in the image below:
Step 7: Re-enable write access to the application
You can now turn off maintenance mode and re-enable full access to the application, by reversing the steps performed in Step 3.