Configure agents as Docker containers
By configuring your Bitnami package for Jenkins instance with containers as ephemeral agents, you can run tests for specific languages on demand within a pre-configured and fully isolated environment. This method uses Docker with Bitnami containers.
You will need an instance of the Bitnami package for Jenkins and administrator access to it.
Step 1: Prepare the environment
-
Confirm that you have Docker installed:
$ sudo docker versionIf Docker is not installed, install it using the instructions in the Docker documentation.
-
Allow the user running Jenkins to connect to the Docker daemon by adding it to the docker group:
  $ sudo usermod -aG docker jenkins
  sudo /opt/bitnami/ctlscript.sh restart
NOTE: By adding the user jenkins to the group docker, you are granting it superuser rights. This is a security risk and no mitigation is provided in this guide. You must separately address this risk in production systems. Please be aware of the risks before proceeding
-
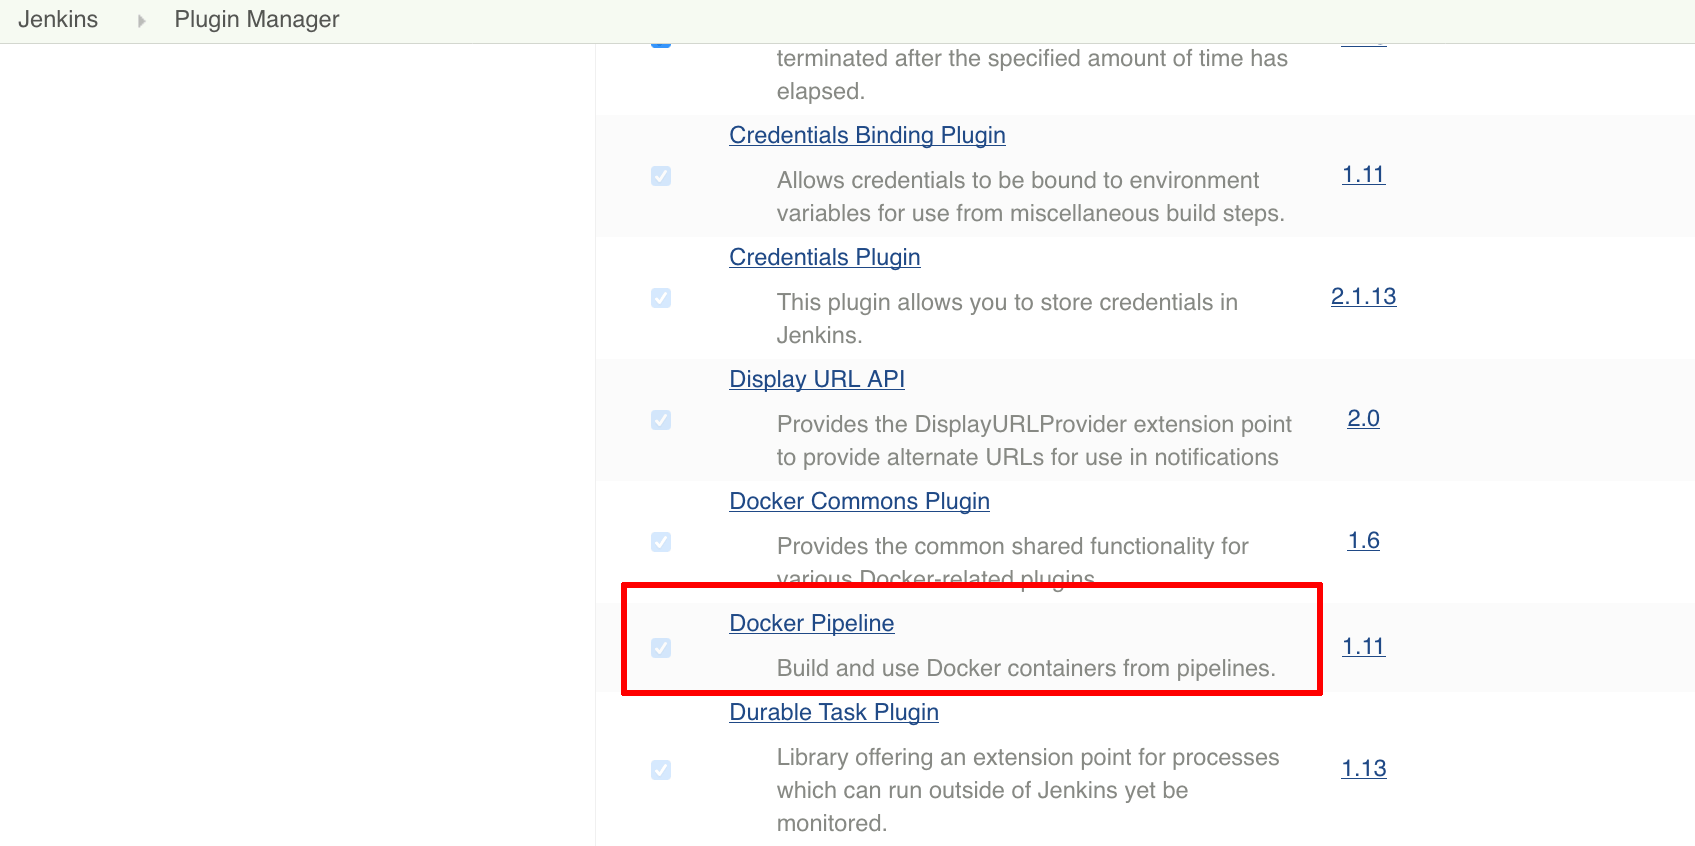
Check that you have the Docker Pipeline plugin installed. From the Jenkins administration panel, navigate to the “Manage Jenkins” section and click the “Manage Plugins” link. On the resulting page, select the “Installed” tab and look for “Docker Pipeline” or use the filter bar.
The plugin should be installed by default in Jenkins v2.x and may need to be manually installed in Jenkins v1.x.
Step 2: Configure a job
Create a job that uses the Docker Pipeline plugin to build the application inside the container and ensure the container itself is created and destroyed when the job starts and finishes.
Follow these steps:
-
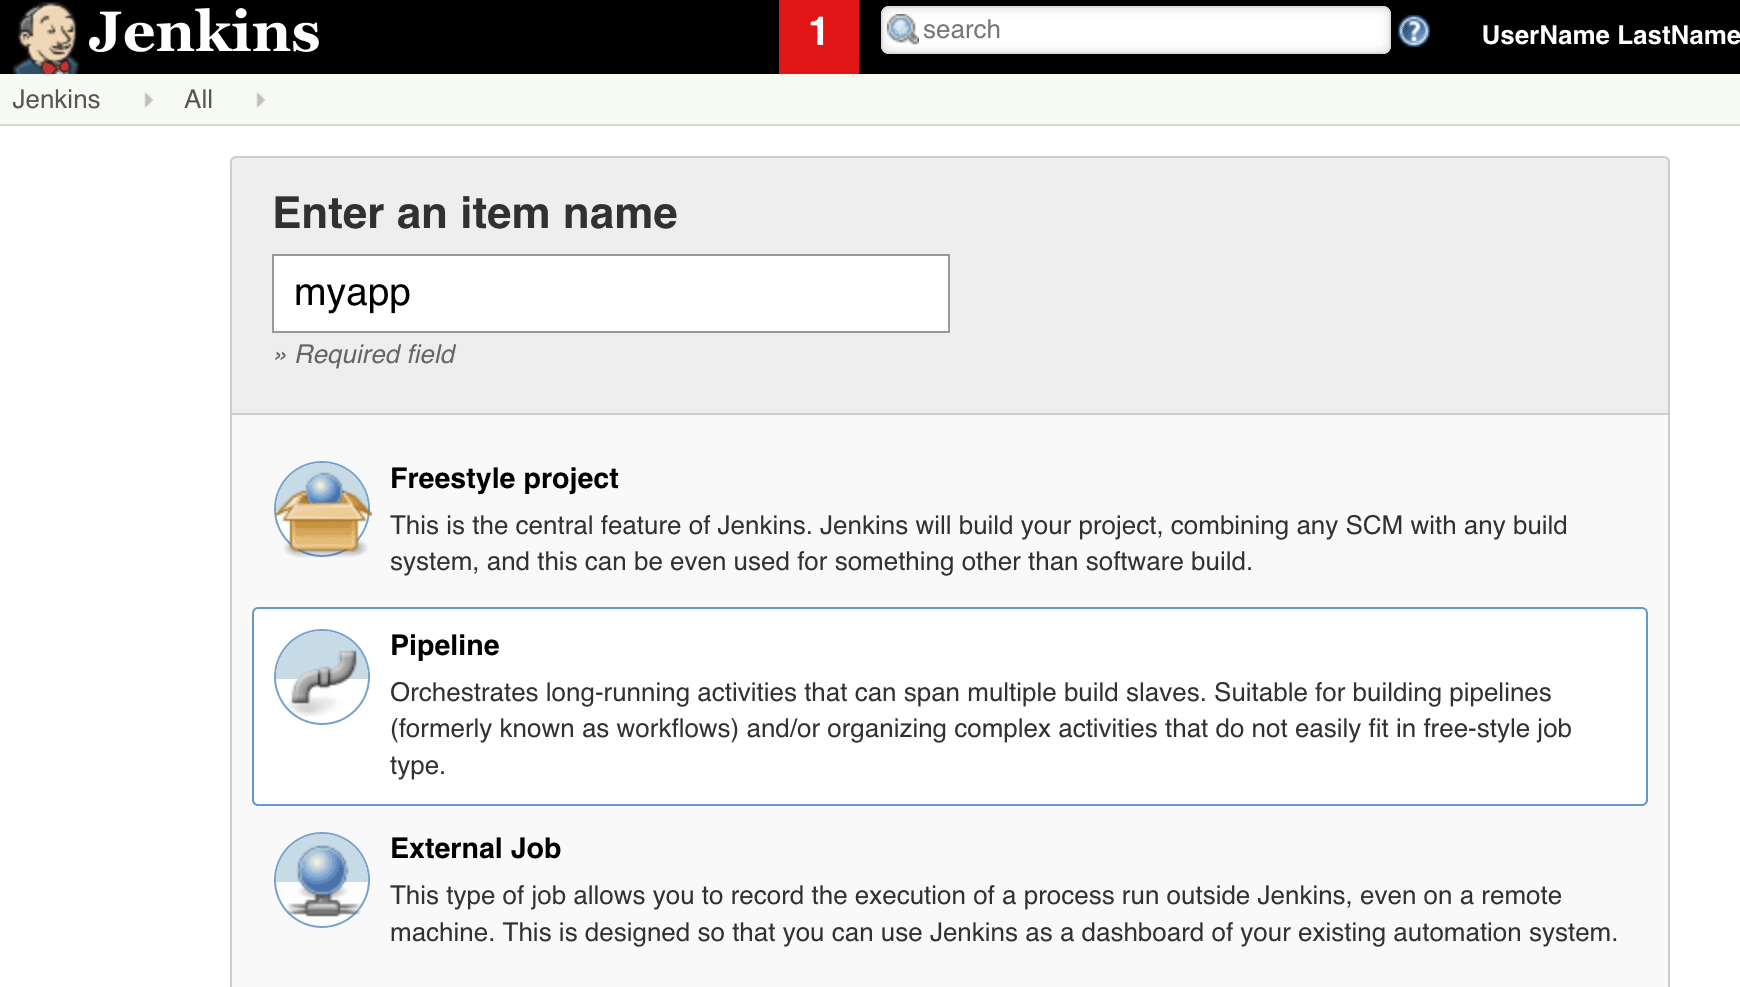
From the main panel, click “New Job”.
-
Give the job a name and select “Pipeline” as the project type.
-
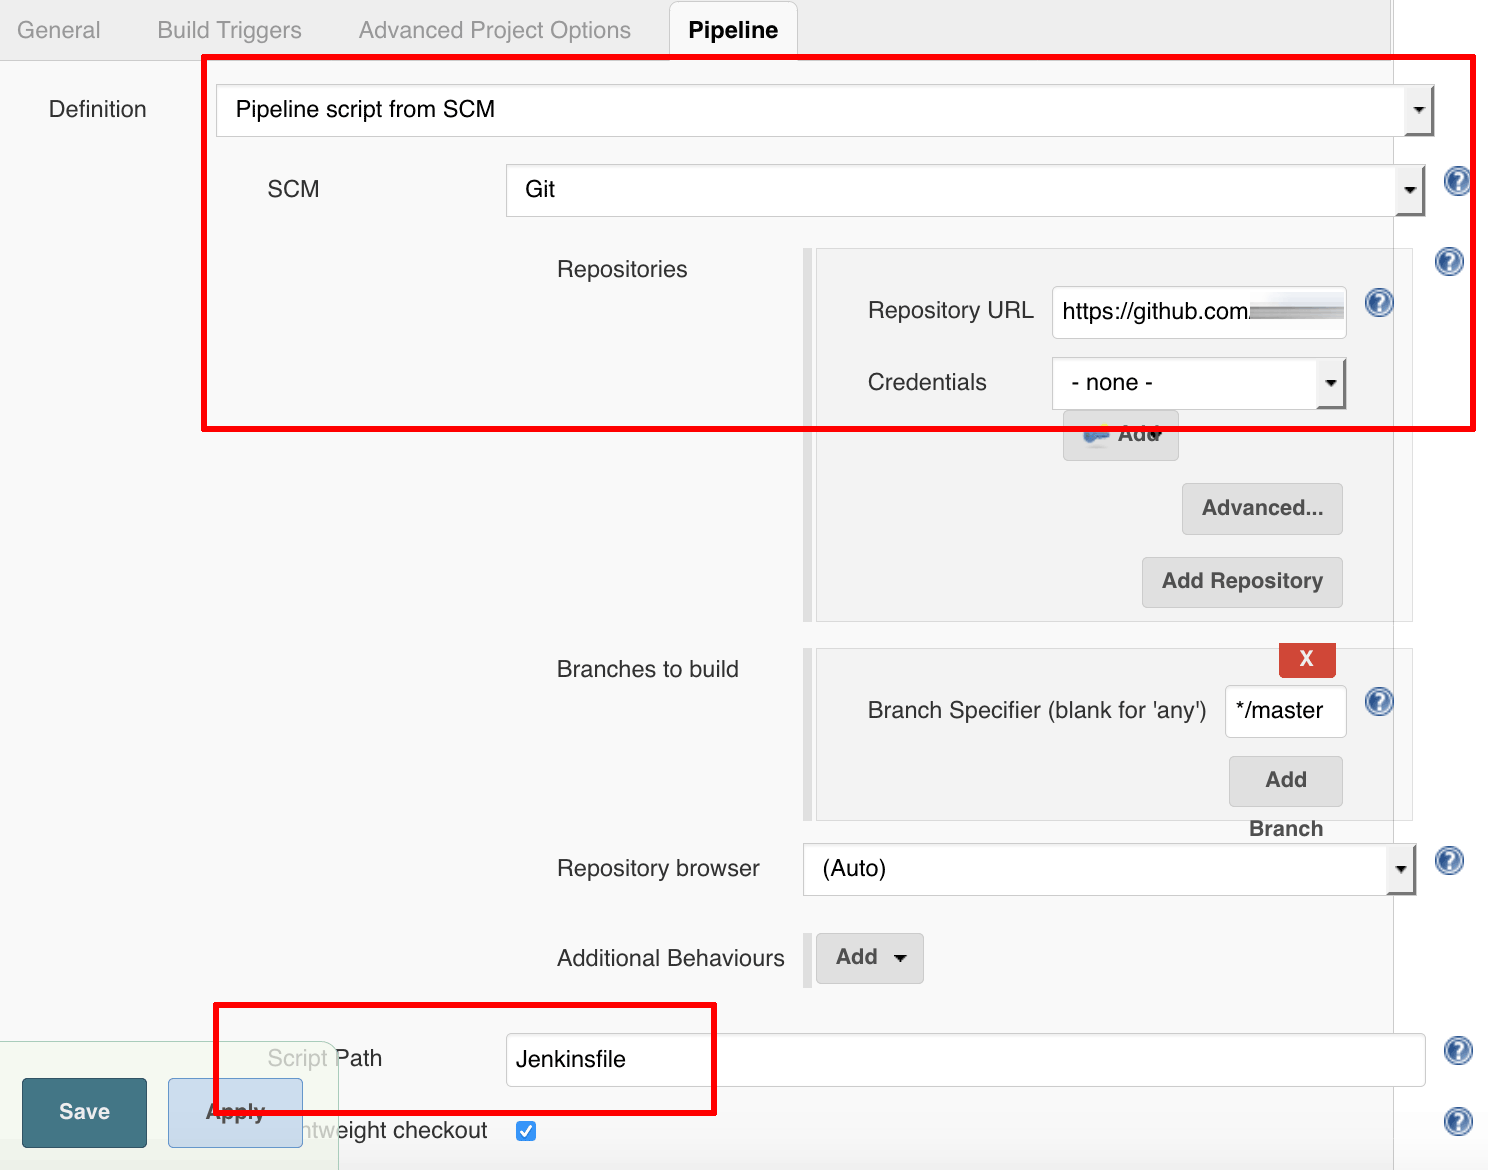
In the “Pipeline” tab, configure the pipeline using the fields below as reference. Replace GITHUB-REPO-URL and GITHUB-REPO-BRANCH with the GitHub repository URL and repository branch to be built.
- Definition: Pipeline script from SCM
- SCM: Git
- Repository URL: GITHUB-REPO-URL
- Branch specifier: GITHUB-REPO-BRANCH
- Script path: Jenkinsfile
-
Save the job.
Step 3: Create the pipeline script
The Docker Pipeline plugin looks for a pipeline script containing build instructions. The script consists of a series of steps, is typically named Jenkinsfile and is stored as part of the source code repository.
As an example, this guide assumes that the Jenkins job uses a GitHub source code repository containing a PHP application with a composer.json file and a set of phpUnit tests. Here is a sample Jenkinsfile for this example PHP application:
node {
  stage("Main") {

    checkout scm

    docker.image('bitnami/php-fpm:latest').inside("-e COMPOSER_HOME=/tmp/jenkins-workspace") {

      stage("Prepare folders") {
        sh "mkdir /tmp/jenkins-workspace"
      }

      stage("Get Composer") {
        sh "php -r \"copy('https://getcomposer.org/installer', 'composer-setup.php');\""
        sh "php composer-setup.php"
      }

      stage("Install dependencies") {
        sh "php composer.phar install"
      }

      stage("Run tests") {
        sh "vendor/bin/phpunit"
      }

   }

  }

  // Clean up workspace
  step([$class: 'WsCleanup'])

}
This Jenkinsfile checks out the source code for the PHP application using the GitHub repository URL and branch specified in the job configuration. It then launches a Docker container with Bitnami’s PHP-FPM image and creates a temporary workspace to perform all operations. Finally, it runs the listed commands to download and install Composer, download dependencies and run phpUnit tests in the container. The build is considered successful if all tests pass.
NOTE: Every project will be built and tested differently. The steps shown in the Jenkinsfile above are shown for illustration purposes assuming a sample PHP project. You will need to create a custom Jenkinsfile depending on your project’s build/test requirements.
Step 4: Run the job
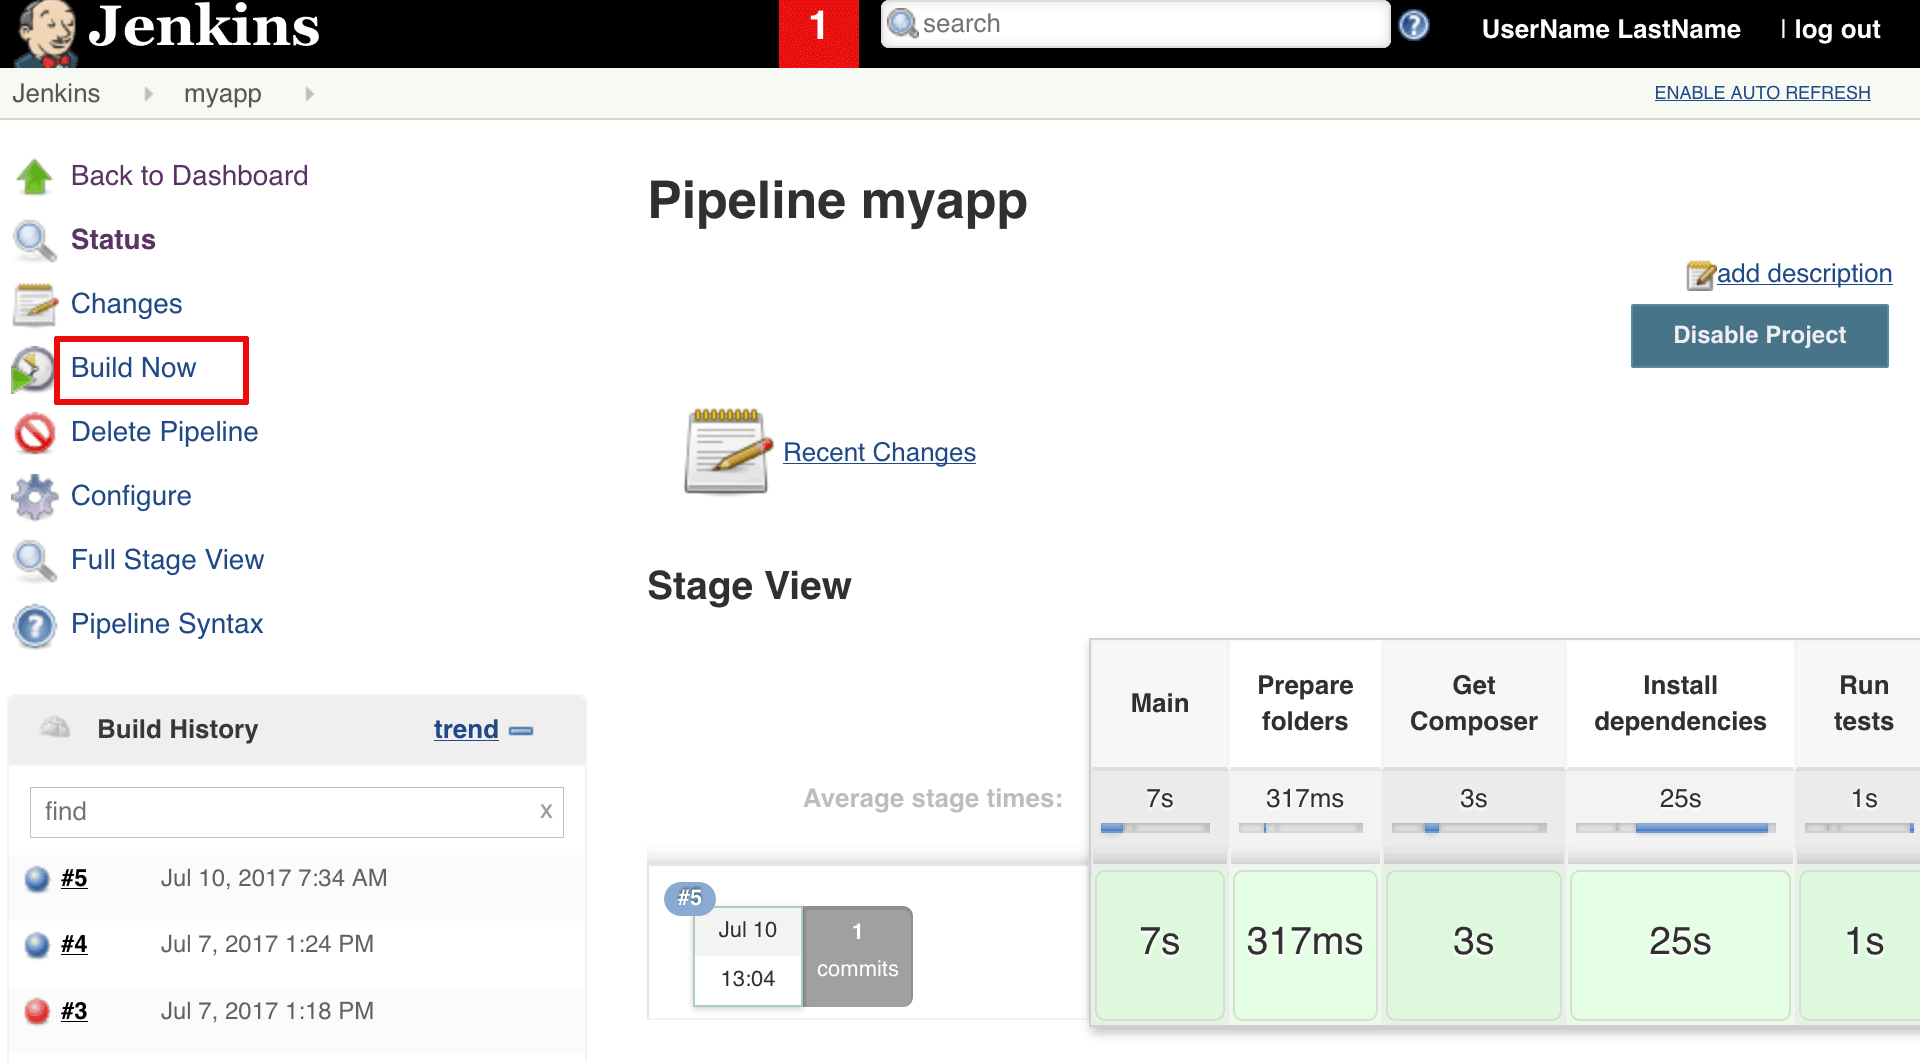
From the Jenkins dashboard, select the sample job and click the “Build Now” link. Jenkins should go to work building and testing the code using the specified container. Check the build results and the console output to see the job progress.


