Configure MySQL Workbench
NOTE: We are in the process of modifying the configuration for many Bitnami stacks. On account of these changes, the file paths and commands stated in this guide may change depending on whether your Bitnami stack uses MySQL or MariaDB. To identify which database server is used in your stack, run the command below:
$ test -d /opt/bitnami/mariadb && echo "MariaDB" || echo "MySQL"The output of the command indicates which database server (MySQL or MariaDB) is used by the installation, and will allow you to identify which guides to follow in our documentation for common database-related operations.
NOTE: This section assumes that you have downloaded and installed MySQL Workbench.
To connect to your remote MySQL database server using MySQL Workbench, you have to allow remote connections to the server.
Once your MySQL server is configured to accept remote connections, you can connect to it using MySQL Workbench. Follow these steps:
-
Launch MySQL Workbench.
-
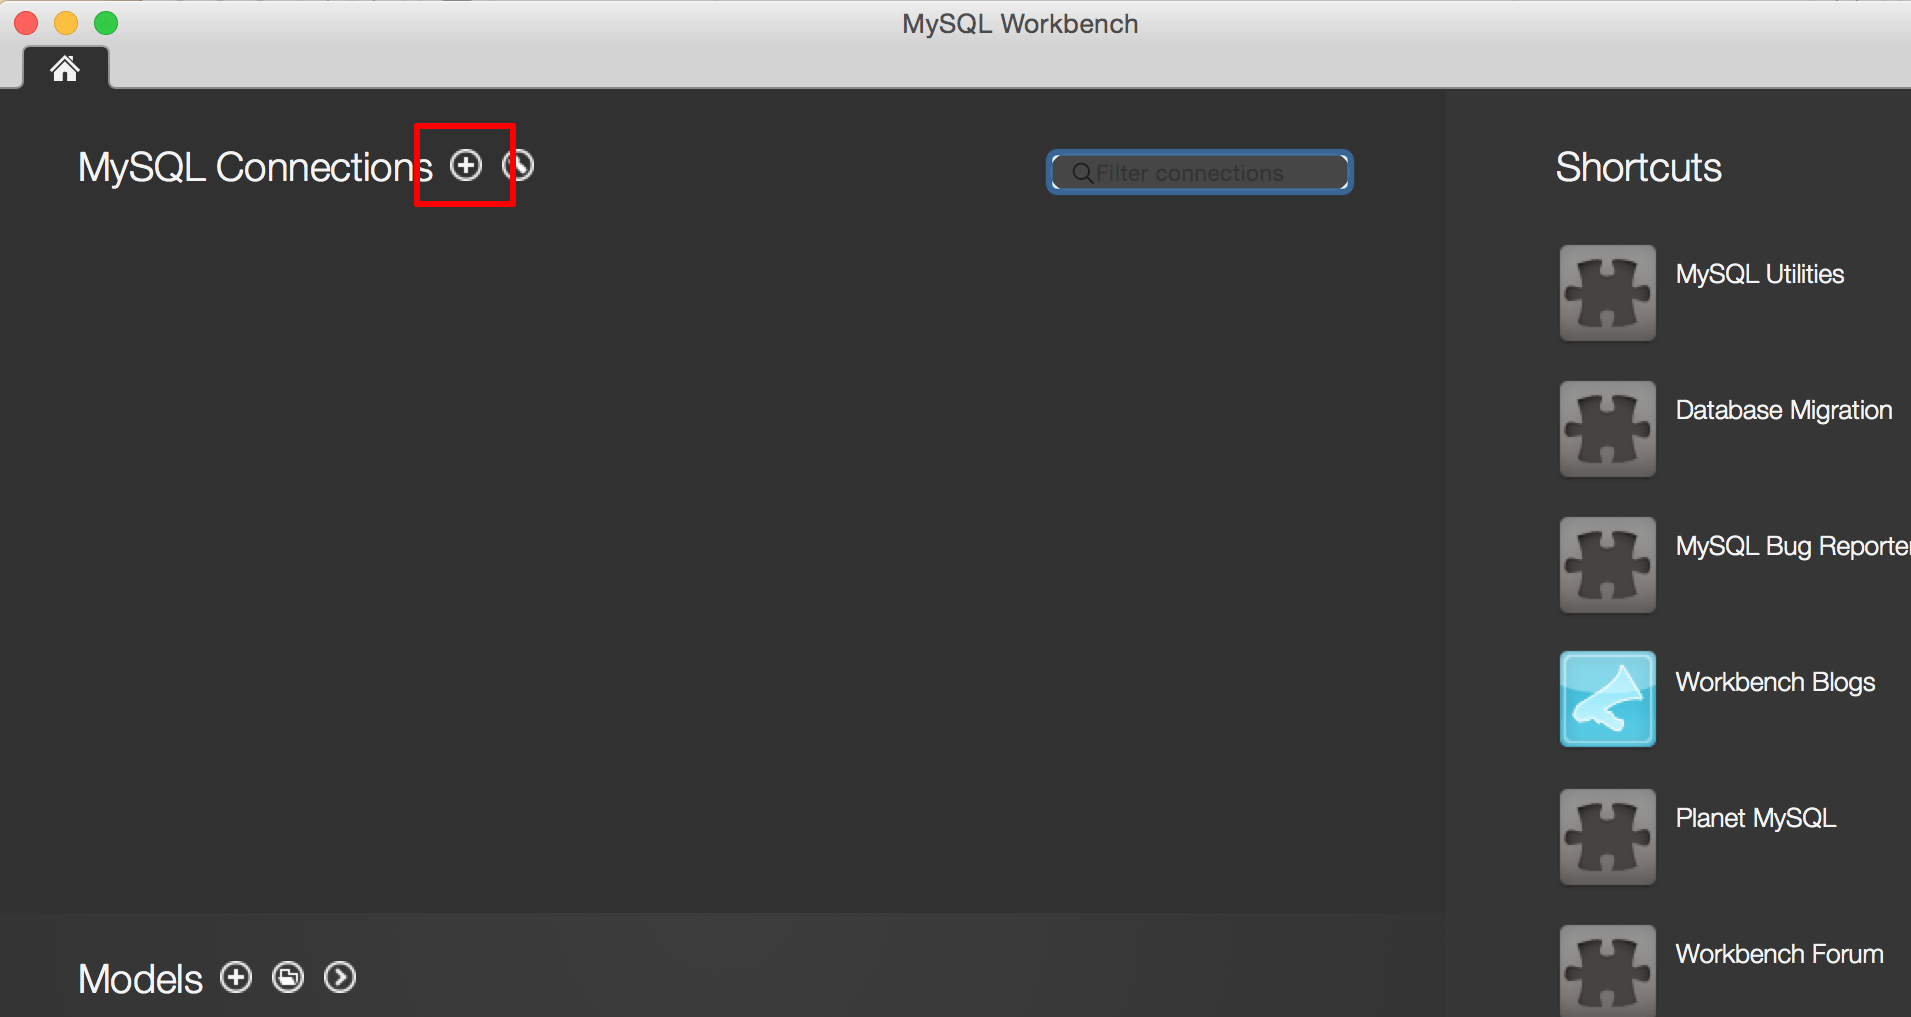
Click the “+” symbol in the “MySQL Connections” tab to add a new connection.
-
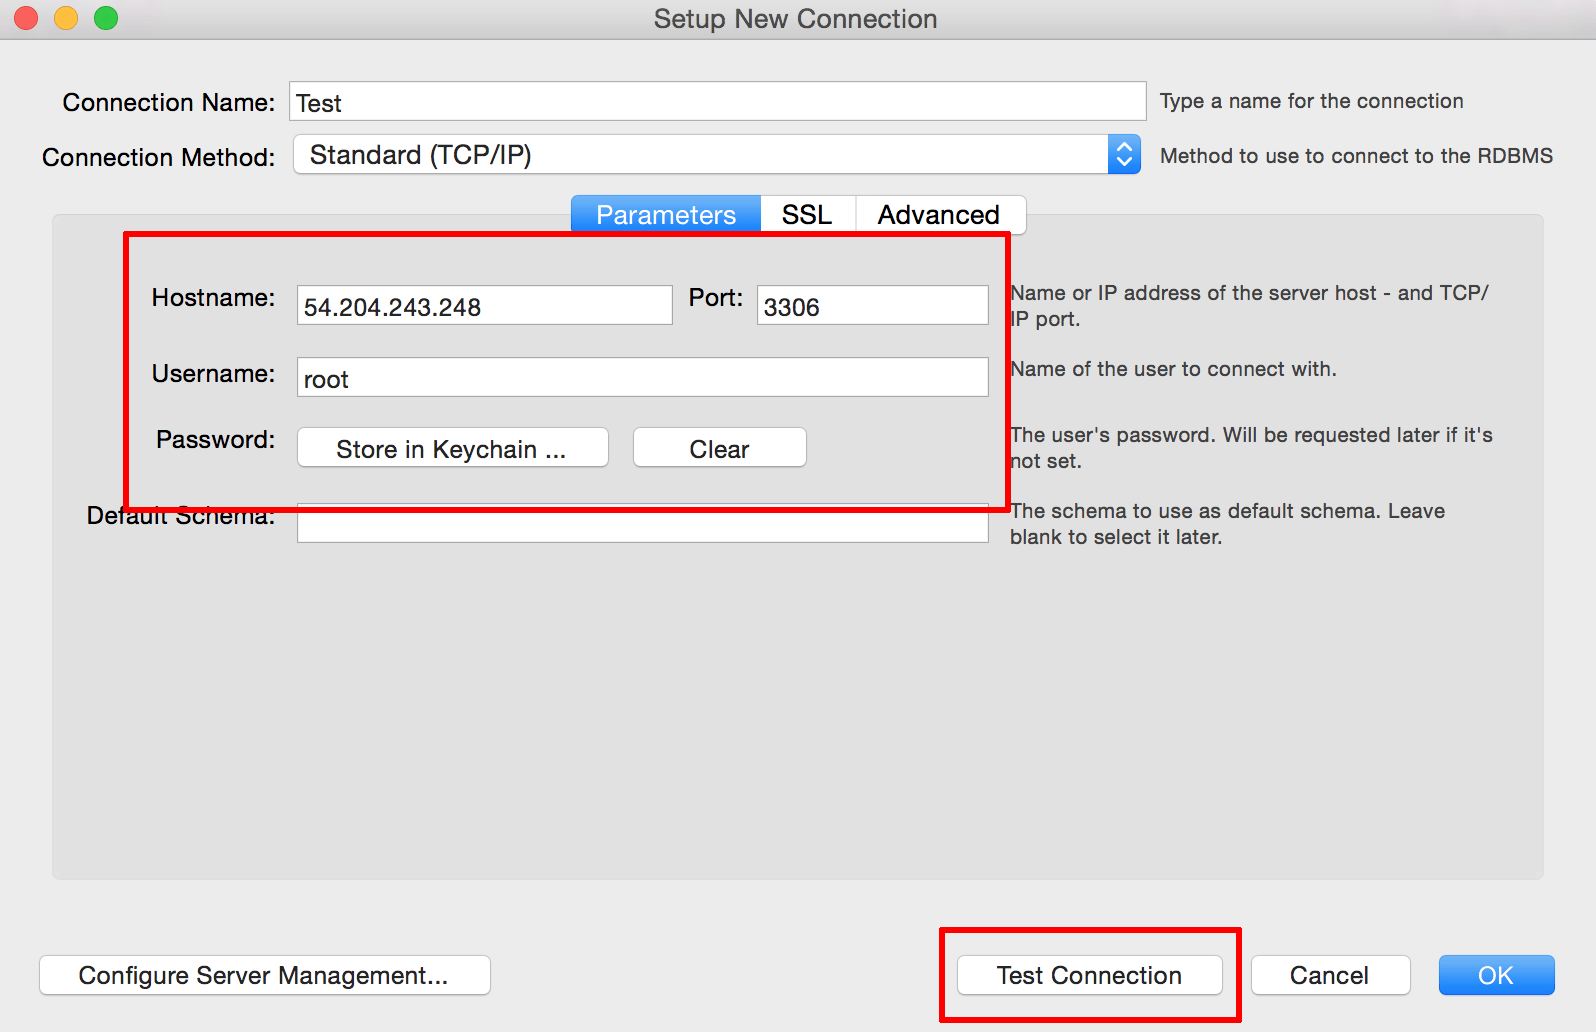
Configure the connection as follows:
-
Click “Test Connection” to test the connection.
-
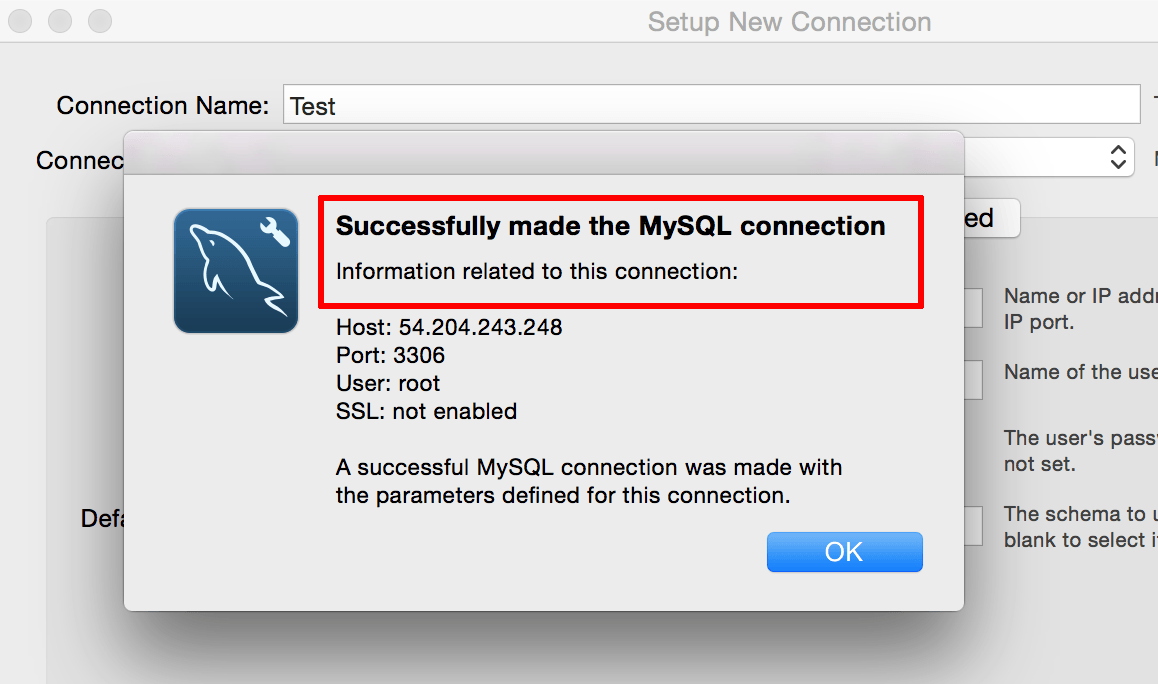
If the connection is successful, click “OK” to save the connection.
-
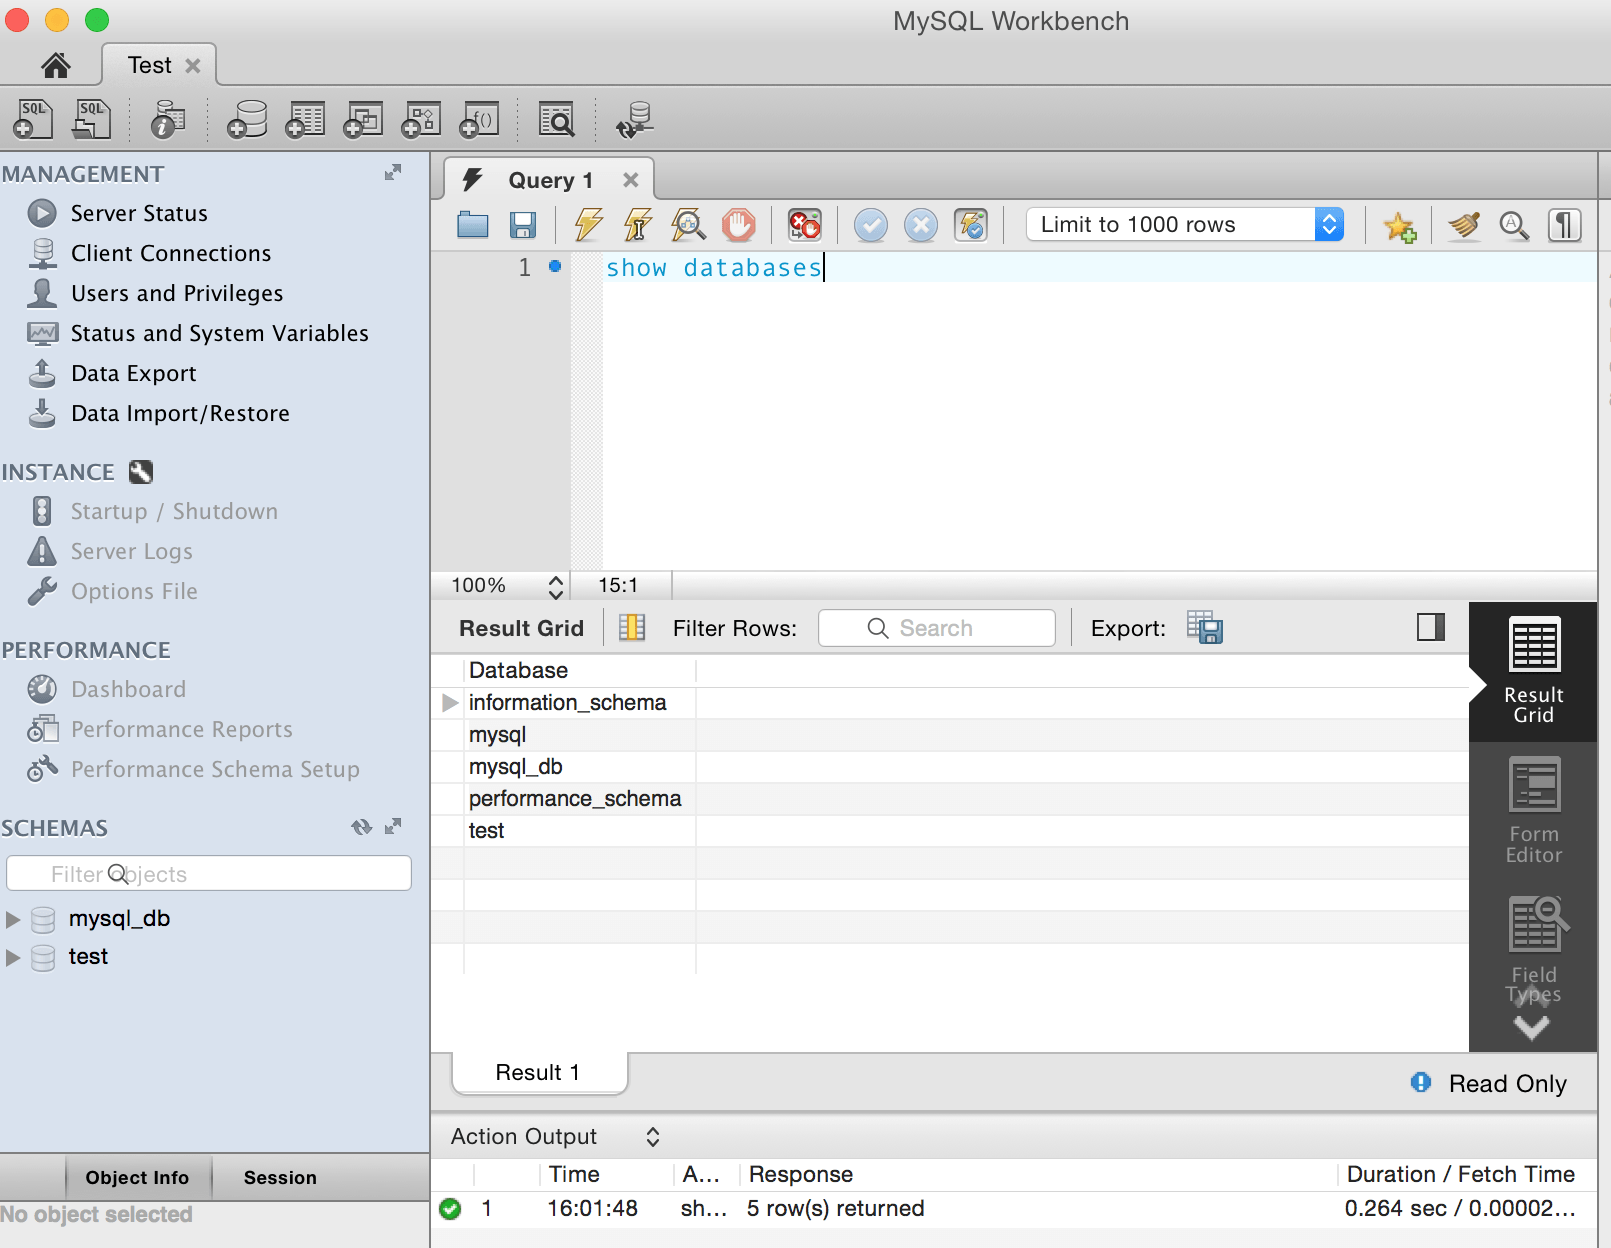
Double-click the new connection to launch the MySQL Workbench SQL Editor. You may be prompted for a password. Use the same password you used when previously configuring the server to accept remote connections. Once connected, the SQL editor window will open and you can interact with the server using SQL commands, as shown below:


