Configure SMTP for outbound emails
To configure outbound email, follow these steps:
- Log in to the application as an administrator.
- Select the “Setup -> E-mails” menu item.
- Click the “Modify” button.
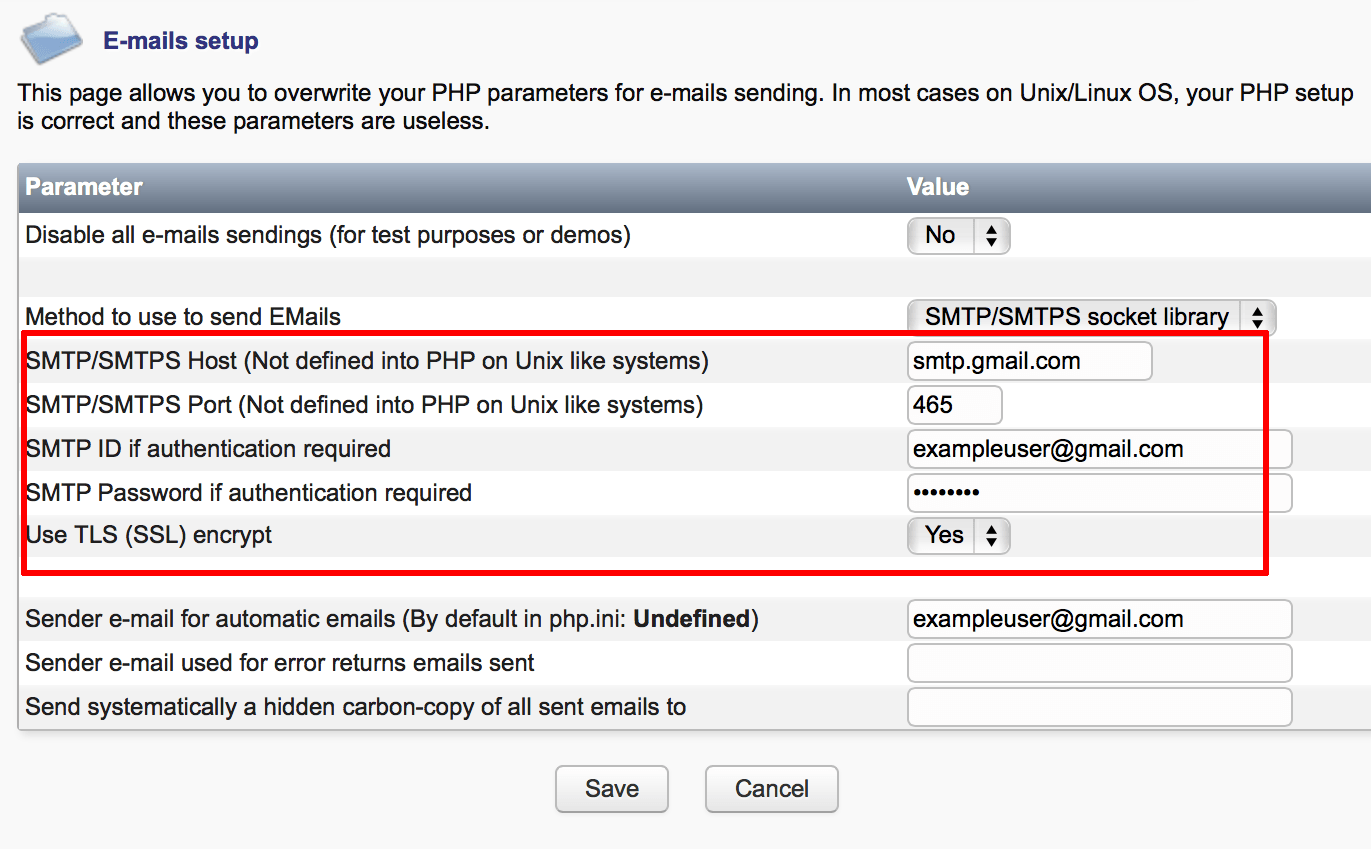
- Select the “SMTP/SMTPS socket library” as the method to send email.
- Enter details for the SMTP server to be used for outbound email. For example, to configure a Gmail account, you could use the settings below. Replace USERNAME and PASSWORD with your Gmail account username and password respectively.
- SMTP/SMTPS Host - smtp.gmail.com
- SMTP/SMTPS Port - 465
- SMTP ID - USERNAME@gmail.com
- SMTP Password - PASSWORD
- Use TLS (SSL) encrypt - Yes
- Sender email - USERNAME@gmail.com
- Click “Save” to save your changes.
Once you have made the above changes, you can use the “Test sending” option on the “Setup -> E-mails” page to send a test email to one or more recipients and verify your outbound email settings.
To configure the application to use other third-party SMTP services for outgoing email, such as SendGrid, refer to the FAQ.
NOTE: If you are using Gmail as the outbound email server, your application’s attempts to send outgoing emails may be blocked by Gmail if it considers the authentication attempts to be suspicious. When this happens, you will receive a Gmail security alert at the corresponding Gmail address. To proceed, you will need to manually confirm the validity of the authentication attempt before Gmail will permit the application to send outbound emails. For more information on this and other Gmail issues related to outbound email from your application, refer to our Gmail SMTP troubleshooting page.

